Get started with the local inference SDK for Azure AI Personalizer
Important
Starting on the 20th of September, 2023 you won’t be able to create new Personalizer resources. The Personalizer service is being retired on the 1st of October, 2026.
The Personalizer local inference SDK (Preview) downloads the Personalizer model locally, and thus significantly reduces the latency of Rank calls by eliminating network calls. Every minute the client will download the most recent model in the background and use it for inference.
In this guide, you'll learn how to use the Personalizer local inference SDK.
You will need to install the Personalizer client library for .NET to:
- Authenticate the quickstart example client with a Personalizer resource in Azure.
- Send context and action features to the Reward API, which will return the best action from the Personalizer model
- Send a reward score to the Rank API and train the Personalizer model.
Reference documentation | Library source code | Package (NuGet)
Prerequisites
- Azure subscription - Create one for free
- The current version of .NET Core.
- Once you have your Azure subscription, create a Personalizer resource in the Azure portal to get your key and endpoint. After it deploys, select Go to resource.
- You will need the key and endpoint from the resource you create to connect your application to the Personalizer API. You'll paste your key and endpoint into the code below later in the quickstart.
- You can use the free pricing tier (
F0) to try the service, and upgrade later to a paid tier for production.
Setting up
Change the model update frequency
In the Azure portal, go to your Personalizer resource's Configuration page, and change the Model update frequency to 30 seconds. This short duration will train the model rapidly, allowing you to see how the recommended action changes for each iteration.

Change the reward wait time
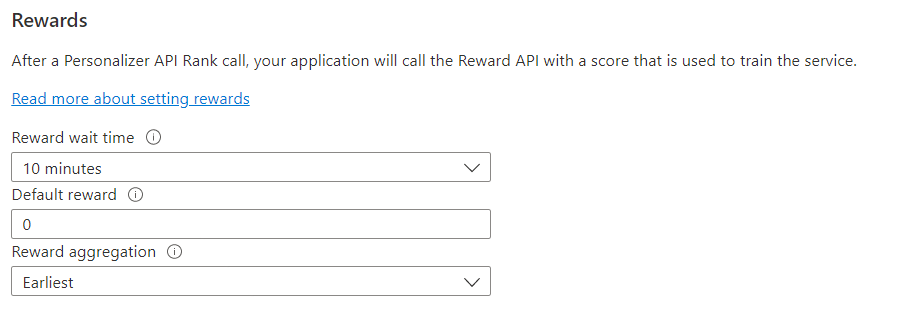
In the Azure portal, go to your Personalizer resource's Configuration page, and change the Reward wait time to 10 minutes. This determines how long the model will wait after sending a recommendation, to receive the reward feedback from that recommendation. Training won't occur until the reward wait time has passed.

Create a new C# application
Create a new .NET Core application in your preferred editor or IDE.
In a console window (such as cmd, PowerShell, or Bash), use the dotnet new command to create a new console app with the name personalizer-quickstart. This command creates a simple "Hello World" C# project with a single source file: Program.cs.
dotnet new console -n personalizer-quickstart
Change your directory to the newly created app folder. You can build the application with:
dotnet build
The build output should contain no warnings or errors.
...
Build succeeded.
 0 Warning(s)
 0 Error(s)
...
Install the client library
Within the application directory, install the Personalizer client library for .NET with the following command:
dotnet add package Azure.AI.Personalizer --version 2.0.0-beta.2
Tip
If you're using the Visual Studio IDE, the client library is available as a downloadable NuGet package.
From the project directory, open the Program.cs file in your preferred editor or IDE. Add the following using directives:
using Azure;
using Azure.AI.Personalizer;
using System;
using System.Collections.Generic;
using System.Linq;
Object model
The Personalizer client is a PersonalizerClient object that authenticates to Azure using Azure.AzureKeyCredential, which contains your key.
To ask for the single best item to show the user, create a PersonalizerRankOptions, then pass it to PersonalizerClient.Rank method. The Rank method returns a PersonalizerRankResult.
To send a reward score to Personalizer, pass the event ID and the reward score to the PersonalizerClient.Reward method.
Determining the reward score, in this quickstart is trivial. In a production system, the determination of what impacts the reward score and by how much can be a complex process, that you may decide to change over time. This design decision should be one of the primary decisions in your Personalizer architecture.
Code examples
These code snippets show you how to do the following tasks with the Personalizer client library for .NET:
- Create a Personalizer client
- Multi-Slot Rank API
- Multi-Slot Reward API
Authenticate the client
In this section you'll do two things:
- Specify your key and endpoint
- Create a Personalizer client
Start by adding the following lines to your Program class. Make sure to add your key and endpoint from your Personalizer resource.
Important
Go to the Azure portal. If the Personalizer resource you created in the Prerequisites section deployed successfully, click the Go to Resource button under Next Steps. You can find your key and endpoint in the resource's key and endpoint page, under resource management.
Remember to remove the key from your code when you're done, and never post it publicly. For production, consider using a secure way of storing and accessing your credentials. For example, Azure key vault.
private const string ServiceEndpoint  = "https://REPLACE-WITH-YOUR-PERSONALIZER-RESOURCE-NAME.cognitiveservices.azure.com";
private const string ResourceKey = "<REPLACE-WITH-YOUR-PERSONALIZER-KEY>";
Next, construct the Rank and Reward URLs. Note that setting useLocalInference: true as a parameter for PersonalizerClientOptions is required to enable local inference.
static PersonalizerClient InitializePersonalizerClient(Uri url)
{
    // Set the local inference flag to true when initializing the client.
    return new PersonalizerClient(url, new AzureKeyCredential(ResourceKey), new PersonalizerClientOptions(useLocalInference: true));
}
Get content choices represented as actions
Actions represent the content choices from which you want Personalizer to select the best content item. Add the following methods to the Program class to represent the set of actions and their features.
static IList<PersonalizerRankableAction> GetActions()
{
    IList<PersonalizerRankableAction> actions = new List<PersonalizerRankableAction>
    {
        new PersonalizerRankableAction(
            id: "pasta",
            features: new List<object>() { new { taste = "salty", spiceLevel = "medium" }, new { nutritionLevel = 5, cuisine = "italian" } }
        ),

        new PersonalizerRankableAction(
            id: "ice cream",
            features: new List<object>() { new { taste = "sweet", spiceLevel = "none" }, new { nutritionalLevel = 2 } }
        ),

        new PersonalizerRankableAction(
            id: "juice",
            features: new List<object>() { new { taste = "sweet", spiceLevel = "none" }, new { nutritionLevel = 5 }, new { drink = true } }
        ),

        new PersonalizerRankableAction(
            id: "salad",
            features: new List<object>() { new { taste = "salty", spiceLevel = "low" }, new { nutritionLevel = 8 } }
        )
    };

    return actions;
}
Get user preferences for context
Add the following methods to the Program class to get a user's input from the command line for the time of day and user taste preference. These will be used as context features.
static string GetTimeOfDayForContext()
{
    string[] timeOfDayFeatures = new string[] { "morning", "afternoon", "evening", "night" };

    Console.WriteLine("\nWhat time of day is it (enter number)? 1. morning 2. afternoon 3. evening 4. night");
    if (!int.TryParse(GetKey(), out int timeIndex) || timeIndex < 1 || timeIndex > timeOfDayFeatures.Length)
    {
        Console.WriteLine("\nEntered value is invalid. Setting feature value to " + timeOfDayFeatures[0] + ".");
        timeIndex = 1;
    }

    return timeOfDayFeatures[timeIndex - 1];
}
static string GetUsersTastePreference()
{
    string[] tasteFeatures = new string[] { "salty", "sweet" };
    var random = new Random();
    var taste = random.Next(1, 2);

    Console.WriteLine("\nWhat type of food would you prefer (enter number)? 1. salty 2. sweet");
    if (!int.TryParse(GetKey(), out int tasteIndex) || tasteIndex < 1 || tasteIndex > tasteFeatures.Length)
    {
        Console.WriteLine("\nEntered value is invalid. Setting feature value to " + tasteFeatures[0] + ".");
        tasteIndex = 1;
    }

    return tasteFeatures[taste - 1];
}
Both methods use the GetKey method to read the user's selection from the command line.
private static string GetKey()
{
    return Console.ReadKey().Key.ToString().Last().ToString().ToUpper();
}
private static IList<object> GetContext(string time, string taste)
{
    return new List<object>()
    {
        new { time = time },
        new { taste = taste }
    };
}
Create the learning loop
The Personalizer learning loop is a cycle of Rank and Reward calls. In this quickstart, each Rank call, to personalize the content, is followed by a Reward call to tell Personalizer how well the service performed.
The following code loops through a cycle of asking the user their preferences through the command line, sending that information to Personalizer to select the best action for each slot, presenting the selection to the customer to choose from among the list, then sending a reward score to Personalizer signaling how well the service did in its selection.
static void Main(string[] args)
{
    Console.WriteLine($"Welcome to this Personalizer Quickstart!\n" +
    $"This code will help you understand how to use the Personalizer APIs (rank and reward).\n" +
    $"Each iteration represents a user interaction and will demonstrate how context, actions, and rewards work.\n" +
    $"Note: Personalizer AI models learn from a large number of user interactions:\n" +
    $"You won't be able to tell the difference in what Personalizer returns by simulating a few events by hand.\n" +
    $"If you want a sample that focuses on seeing how Personalizer learns, see the Python Notebook sample.");

    int iteration = 1;
    bool runLoop = true;

    IList<PersonalizerRankableAction> actions = GetActions();
    PersonalizerClient client = InitializePersonalizerClient(new Uri(ServiceEndpoint));

    do
    {
        Console.WriteLine("\nIteration: " + iteration++);

        string timeOfDayFeature = GetTimeOfDayForContext();
        string deviceFeature = GetUsersTastePreference();

        IList<object> currentContext = GetContext(timeOfDayFeature, deviceFeature);

        string eventId = Guid.NewGuid().ToString();

        var rankOptions = new PersonalizerRankOptions(actions: actions, contextFeatures: currentContext, eventId: eventId);
        PersonalizerRankResult rankResult = client.Rank(rankOptions);

        Console.WriteLine("\nPersonalizer service thinks you would like to have: " + rankResult.RewardActionId + ". Is this correct? (y/n)");

        float reward = 0.0f;
        string answer = GetKey();

        if (answer == "Y")
        {
            reward = 1.0f;
            Console.WriteLine("\nGreat! Enjoy your food.");
        }
        else if (answer == "N")
        {
            reward = 0.0f;
            Console.WriteLine("\nYou didn't like the recommended food choice.");
        }
        else
        {
            Console.WriteLine("\nEntered choice is invalid. Service assumes that you didn't like the recommended food choice.");
        }

        client.Reward(rankResult.EventId, reward);

        Console.WriteLine("\nPress q to break, any other key to continue:");
        runLoop = !(GetKey() == "Q");

    } while (runLoop);
}
Run the program
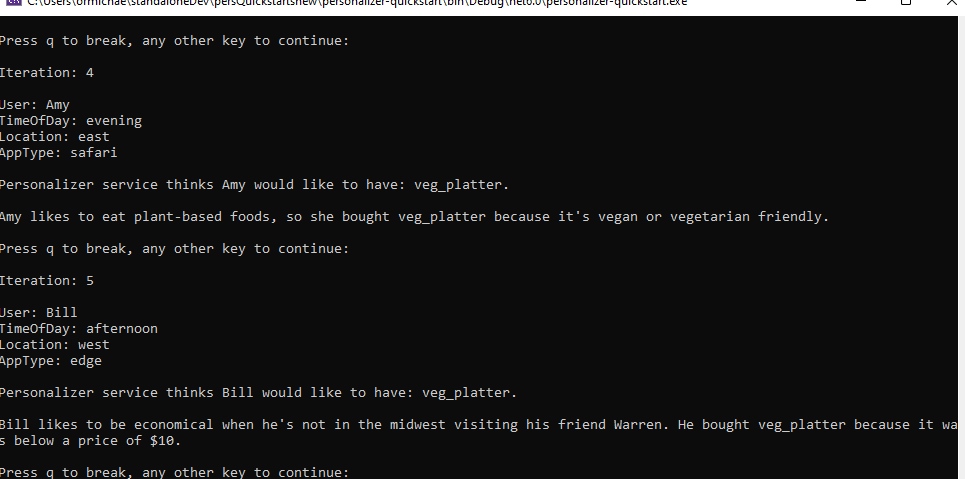
Run the application with the dotnet run command from your application directory.
dotnet run
