Understand shared IP addresses in Azure DevTest Labs
Azure DevTest Labs virtual machines (VMs) can share a public IP address, to minimize the number of public IPs you need to access lab VMs. This article describes how shared IPs work, and how to configure shared IP addresses.
Shared IP settings
You create a DevTest Labs lab in a virtual network, which can have one or more subnets. The default subnet has Enable shared public IP set to Yes. This configuration creates one public IP address for the entire subnet. Any VMs in this subnet default to using the shared IP.
For more information about configuring virtual networks and subnets, see Configure a virtual network in Azure DevTest Labs.

For existing labs, you can check or set this option by selecting Configuration and policies in the lab's left navigation, and then selecting Virtual networks under External resources. Select a virtual network from the list to see the shared IP settings for its subnets.
To change the setting, select a subnet from the list, and then change Enable shared public IP to Yes or No.
When creating a VM, you can access this setting on the Advanced settings page next to IP address.

- Shared: All VMs you create as Shared go into the same resource group. The resource group has one assigned IP address that all VMs in the resource group use.
- Public: Every public VM has its own IP address and resource group.
- Private: Every private VM uses a private IP address. You can't connect to these VMs from the internet by using Remote Desktop protocol (RDP).
When you add a VM with shared IP to a subnet, DevTest Labs automatically adds the VM to a load balancer and assigns the VM a TCP port number on the public IP address. The port number forwards to the secure shell (SSH) port on the VM.
Use a shared IP
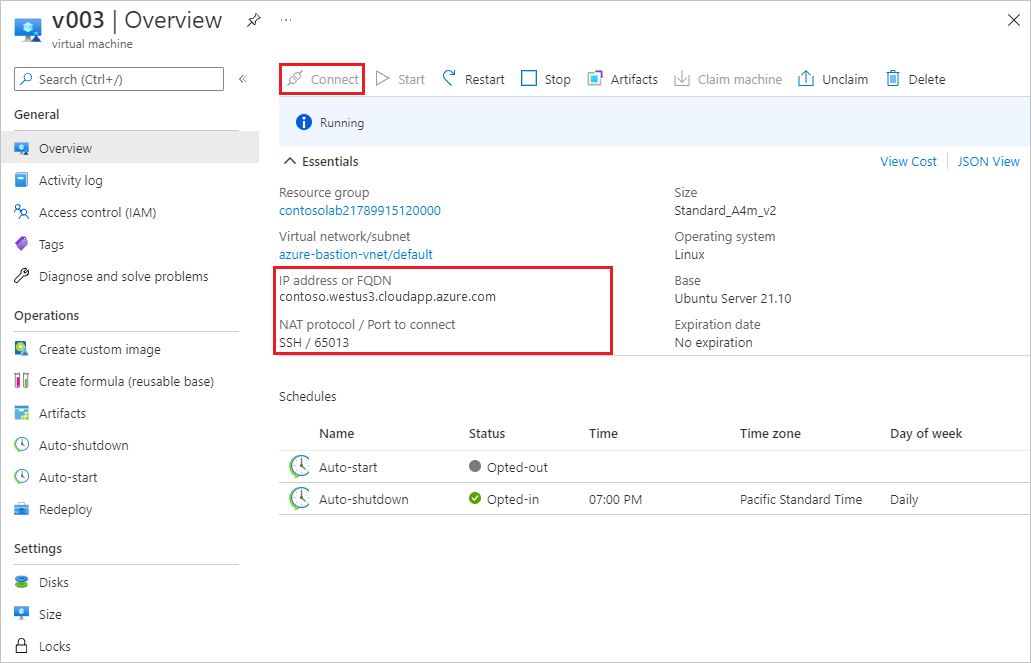
Windows users: Select the Connect button on the VM Overview page to download a pre-configured RDP file and access the VM.
Linux users: Secure shell (SSH) connects to the VM by using the IP address or fully qualified domain name, followed by a colon, followed by the port number. For example, the following screenshot shows an SSH connection address of
contoso.westus3.cloudapp.azure.com:65013.