Nóta
Teastaíonn údarú chun rochtain a fháil ar an leathanach seo. Is féidir leat triail a bhaint as shíniú isteach nó eolairí a athrú.
Teastaíonn údarú chun rochtain a fháil ar an leathanach seo. Is féidir leat triail a bhaint as eolairí a athrú.
This article shows you how to manage your Azure Database for PostgreSQL flexible server instance. Management tasks include compute and storage scaling, admin password reset, and viewing server details.
Sign in
Sign in to the Azure portal. Go to your Azure Database for PostgreSQL flexible server resource in the Azure portal.
Scale compute and storage
After server creation you can scale between the various pricing tiers as your needs change. You can also scale up or down your compute and memory by increasing or decreasing vCores.
Note
Storage cannot be scaled down to lower value.
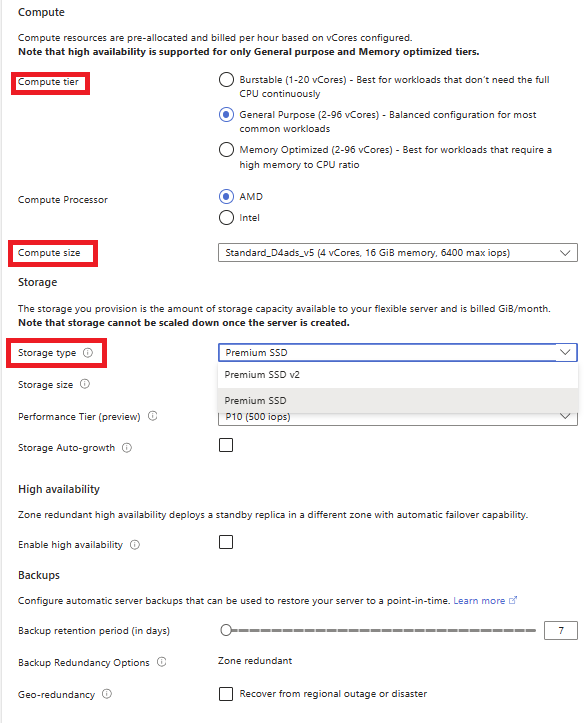
- Select your server in the Azure portal. Select Compute + Storage, located in the Settings section.
- You can change the Compute Tier , vCore, Storage to scale up the server using higher compute tier or scale up within the same tier by increasing storage or vCores to your desired value.

Important
- Storage can't be scaled down.
- Scaling vCores causes a server restart.
- Select OK to save changes.
Reset admin password
You can change the administrator role's password using the Azure portal.
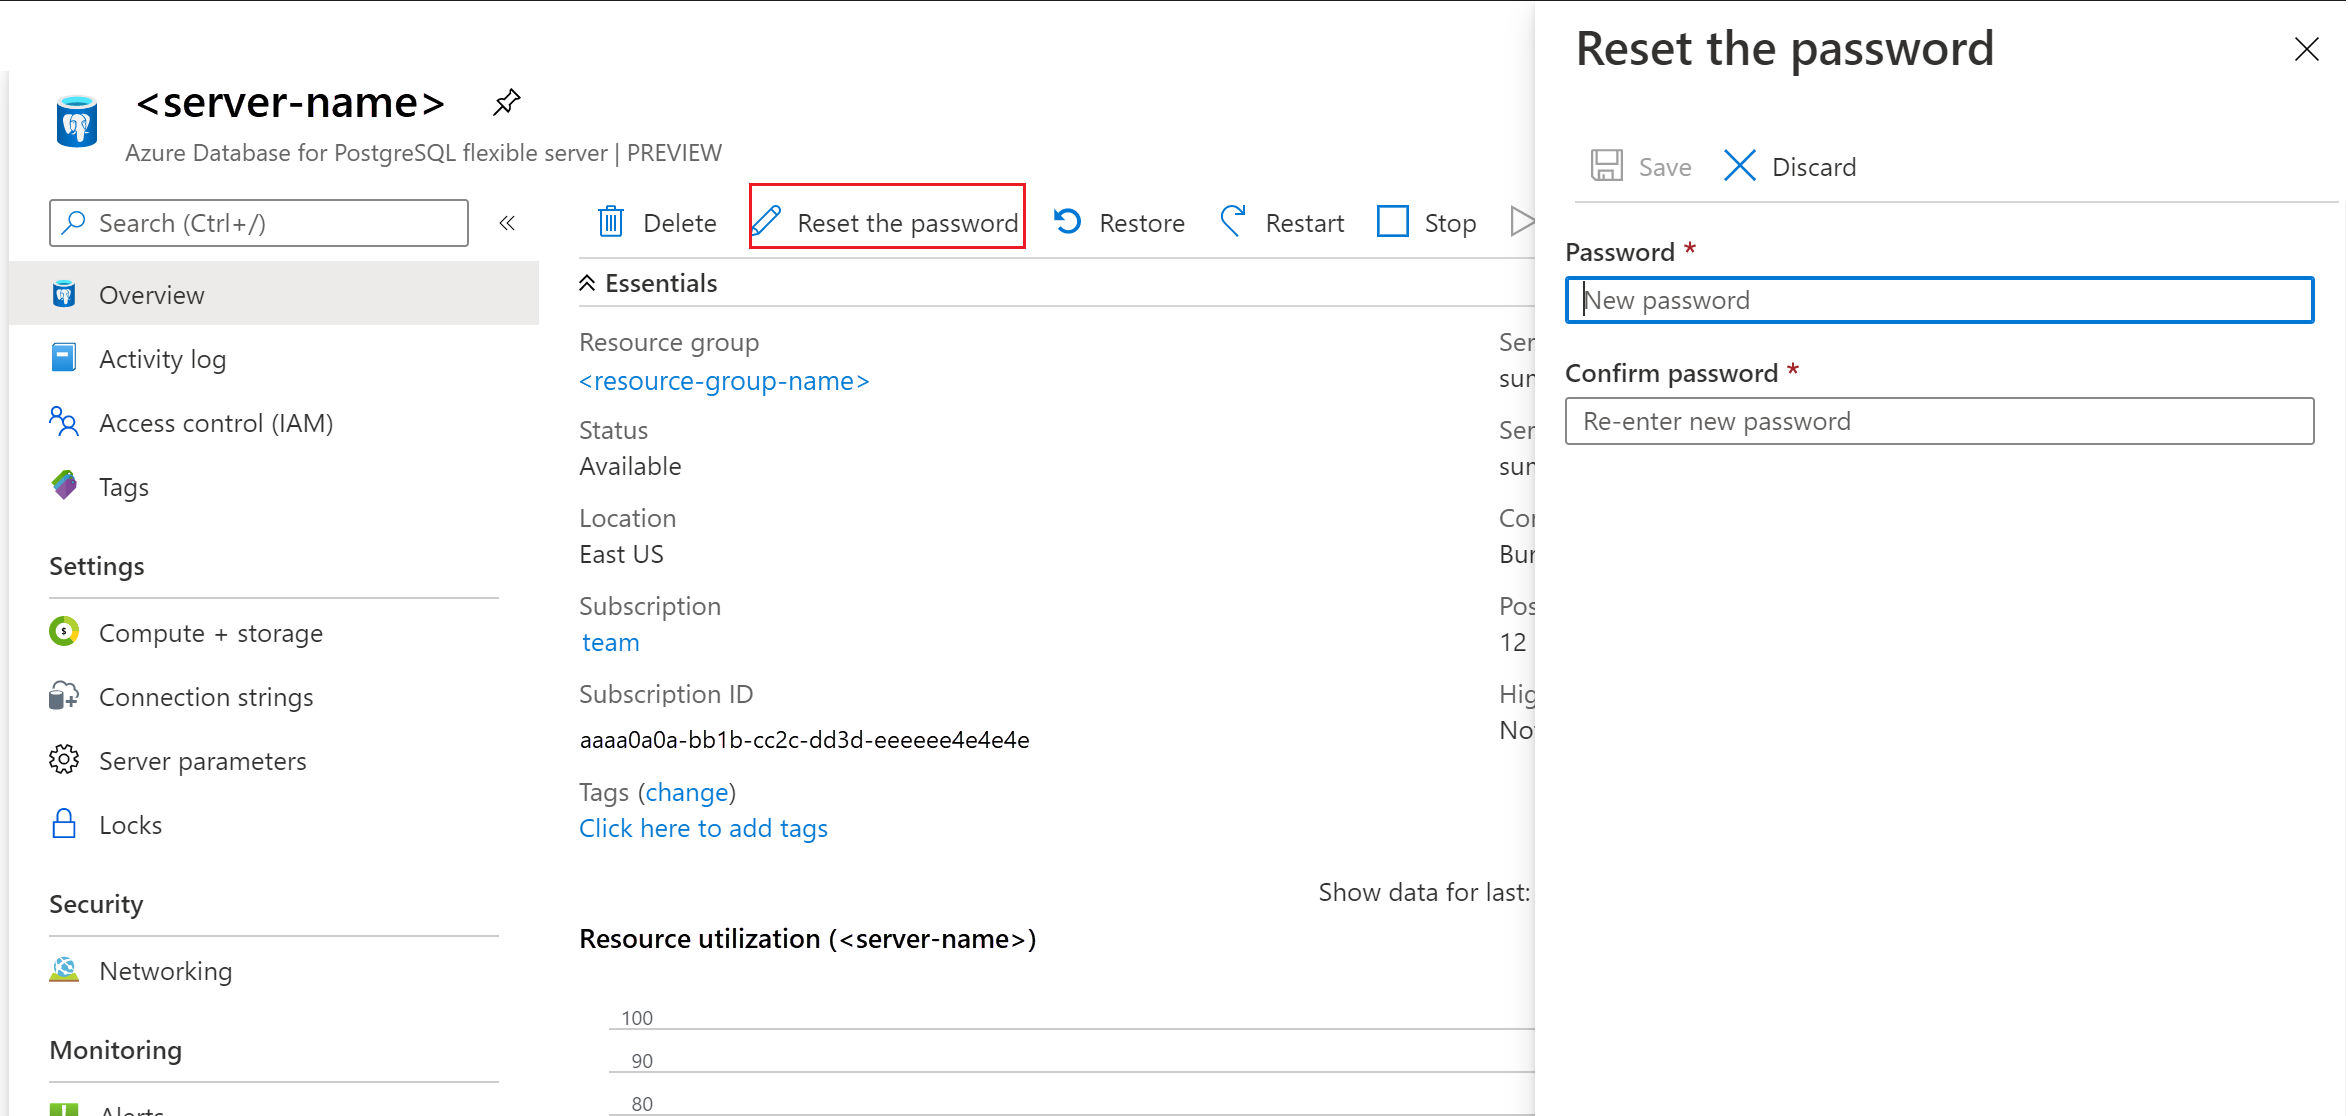
- Select your server in the Azure portal. In the Overview window select Reset password.
- Enter a new password and confirm the password. The textbox will prompt you about password complexity requirements.

- Select Save to save the new password.
Delete a server
You can delete your server if you no longer need it.
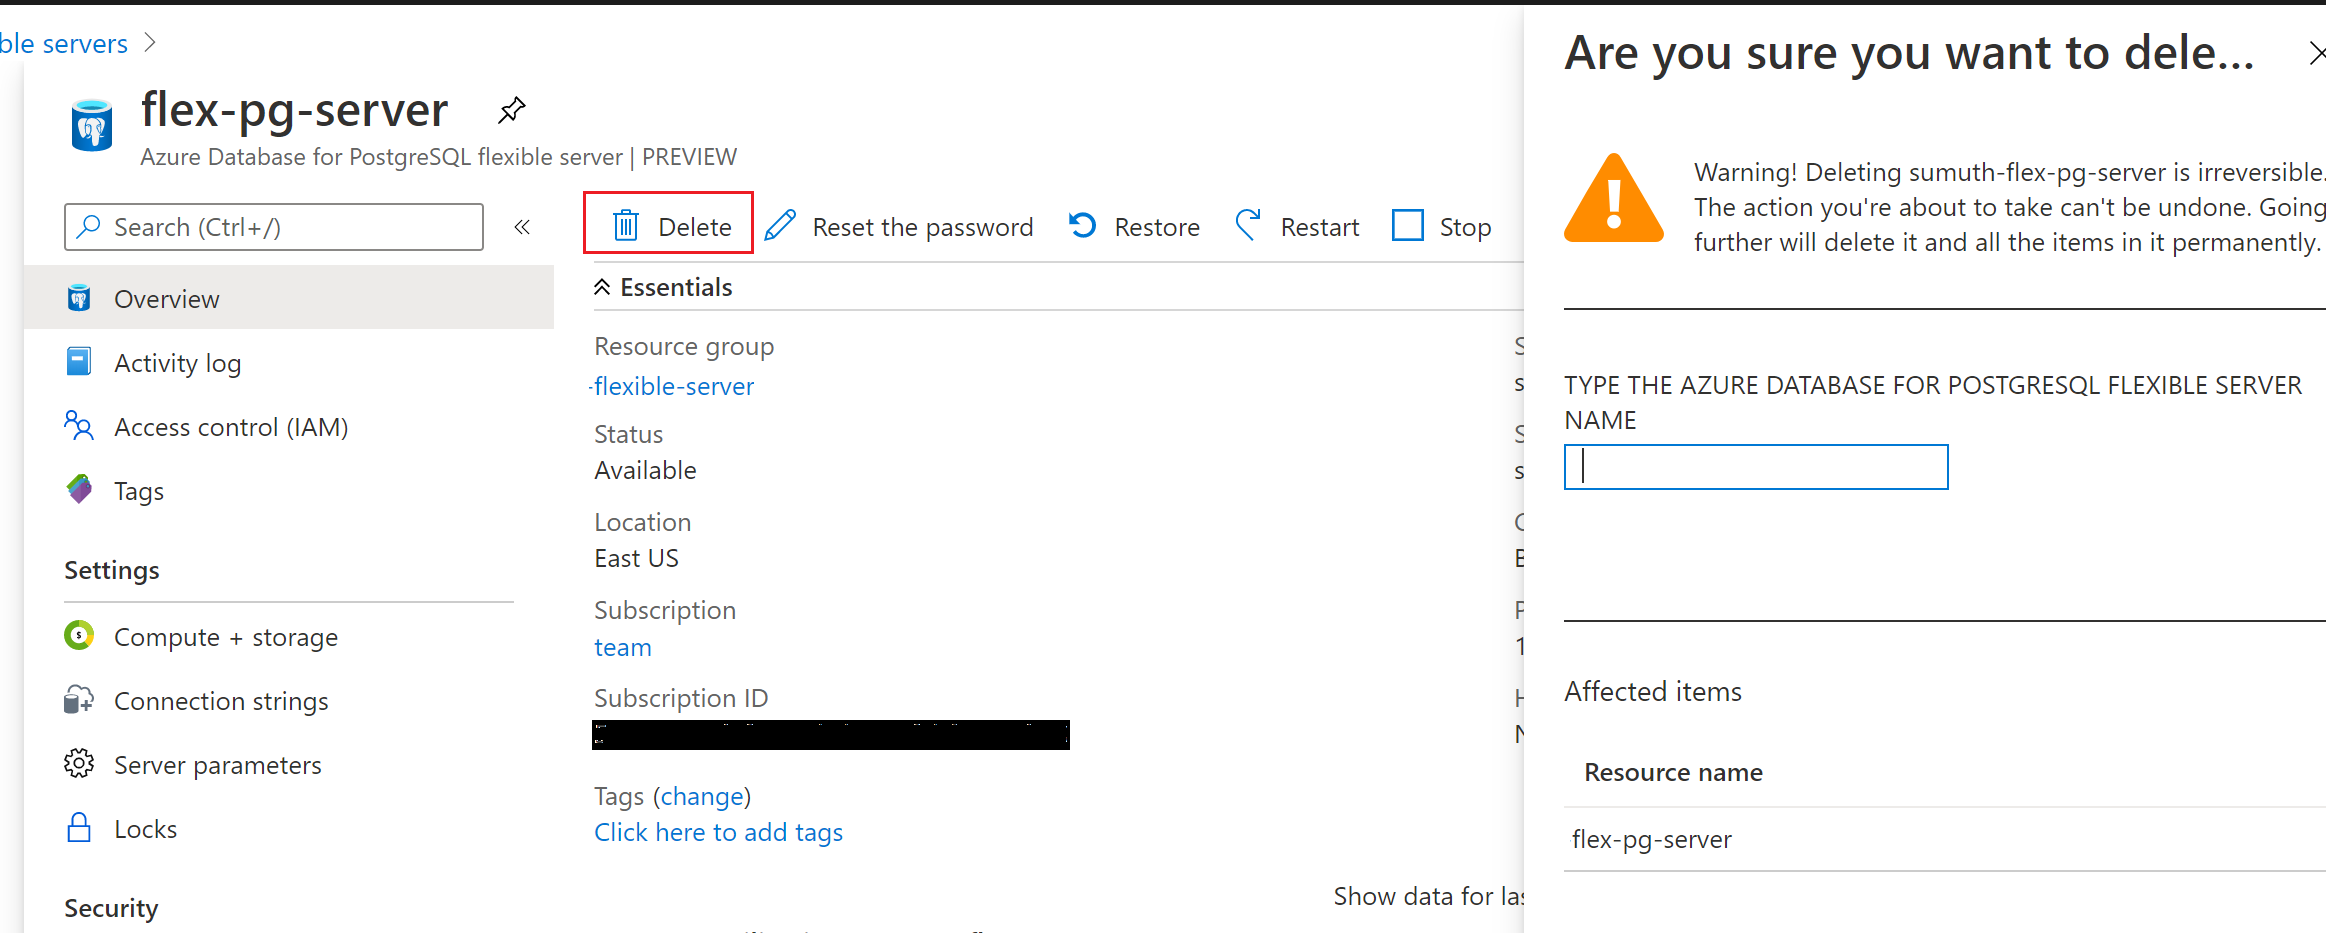
Select your server in the Azure portal. In the Overview window select Delete.
Type the name of the server into the input box to confirm that you want to delete the server.


- Select Delete.