Export DICOM files
The DICOM® service allows you to export DICOM data in a file format. The service simplifies the process of using medical imaging in external workflows, such as AI and machine learning. You can use the export API to export DICOM studies, series, and instances in bulk to an Azure Blob Storage account. DICOM data exported to a storage account is exported as a .dcm file in a folder structure that organizes instances by StudyInstanceID and SeriesInstanceID.
There are three steps to exporting data from the DICOM service:
- Enable a system-assigned managed identity for the DICOM service.
- Configure a new or existing storage account and give permission to the system-assigned managed identity.
- Use the export API to create a new export job to export the data.
Enable managed identity for the DICOM service
The first step to export data from the DICOM service is to enable a system-assigned managed identity. This managed identity is used to authenticate the DICOM service and give permission to the storage account used as the destination for export. For more information about managed identities in Azure, see About managed identities for Azure resources.
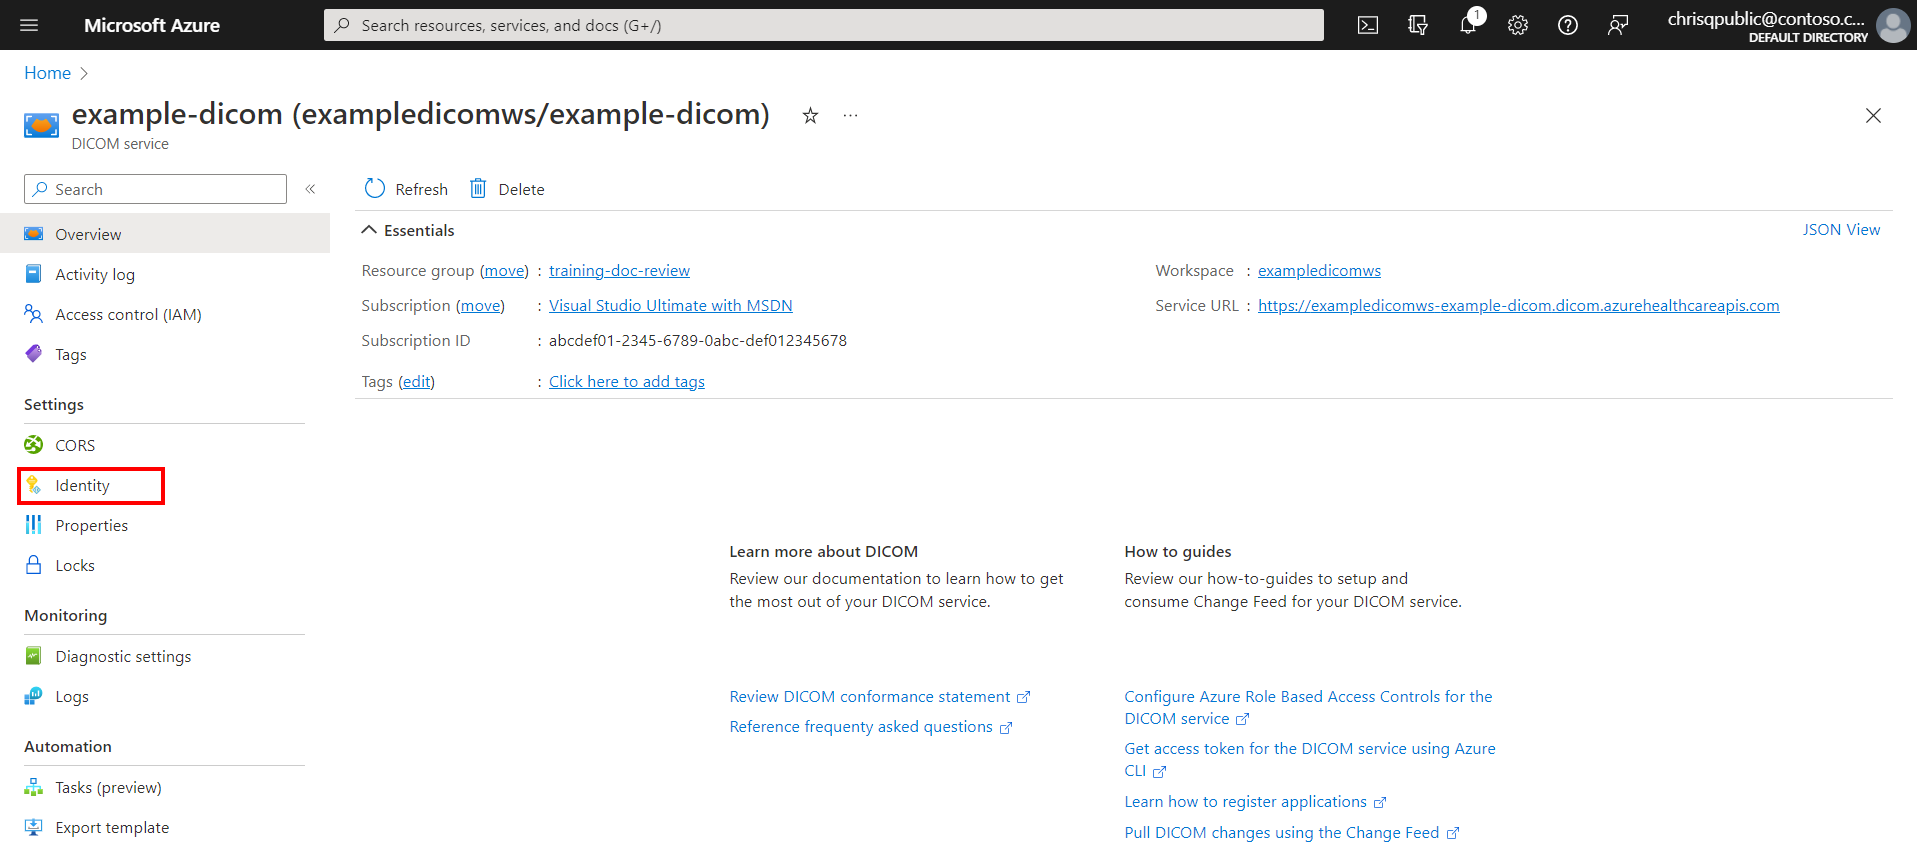
In the Azure portal, browse to the DICOM service that you want to export from, and select Identity.
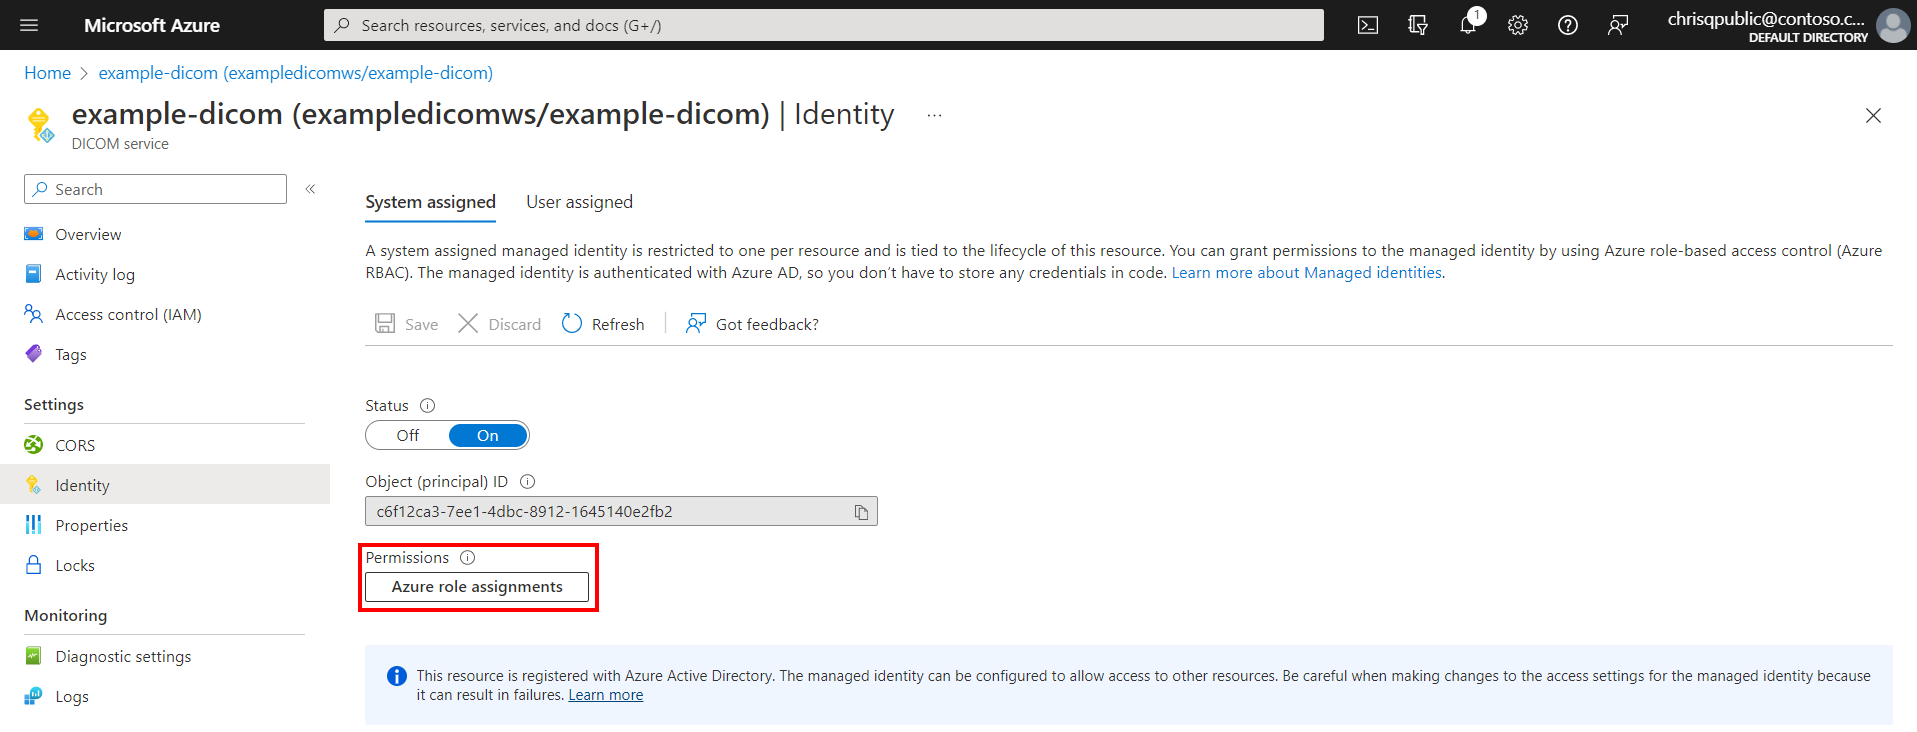
Set the Status option to On, and then select Save.
Select Yes in the confirmation dialog that appears.
It takes a few minutes to create the system-assigned managed identity. After the system identity is enabled, an Object (principal) ID appears.
Assign storage account permissions
The system-assigned managed identity needs Storage Blob Data Contributor permission to write data to the destination storage account.
Under Permissions, select Azure role assignments.
Select Add role assignment. On the Add role assignment pane, make the following selections:
- Under Scope, select Storage.
- Under Resource, select the destination storage account for the export operation.
- Under Role, select Storage Blob Data Contributor.
Select Save to add the permission to the system-assigned managed identity.
Use the export API
The export API exposes one POST endpoint for exporting data.
POST <dicom-service-url>/<version>/export
Given a source, the set of data to be exported, and a destination (the location to which data is exported), the endpoint returns a reference to a new, long-running export operation. The duration of this operation depends on the volume of data to be exported. For more information about monitoring progress of export operations, see the Operation status section.
Any errors encountered while attempting to export are recorded in an error log. For more information, see the Errors section.
Request
The request body consists of the export source and destination.
{
    "source": {
        "type": "identifiers",
        "settings": {
            "values": [
                "..."
            ]
        }
    },
    "destination": {
        "type": "azureblob",
        "settings": {
            "setting": "<value>"
        }
    }
}
Source settings
The only setting is the list of identifiers to export.
| Property | Required | Default | Description |
|---|---|---|---|
Values |
Yes | A list of one or more DICOM studies, series, and/or SOP instance identifiers in the format of "<StudyInstanceUID>[/<SeriesInstanceUID>[/<SOPInstanceUID>]]" |
Destination settings
The connection to the Blob Storage account is specified with BlobContainerUri.
| Property | Required | Default | Description |
|---|---|---|---|
BlobContainerUri |
No | "" |
The complete URI for the blob container |
UseManagedIdentity |
Yes | false |
A required flag that indicates whether managed identity should be used to authenticate to the blob container |
Example
The following example requests the export of the following DICOM resources to the blob container named export in the storage account named dicomexport:
- All instances within the study whose
StudyInstanceUIDis1.2.3 - All instances within the series whose
StudyInstanceUIDis12.3andSeriesInstanceUIDis4.5.678 - The instance whose
StudyInstanceUIDis123.456,SeriesInstanceUIDis7.8, andSOPInstanceUIDis9.1011.12
POST /export HTTP/1.1
Accept: */*
Content-Type: application/json
{
    "source": {
        "type": "identifiers",
        "settings": {
            "values": [
                "1.2.3",
                "12.3/4.5.678",
                "123.456/7.8/9.1011.12"
            ]
        }
    },
    "destination": {
        "type": "azureblob",
        "settings": {
            "blobContainerUri": "https://dicomexport.blob.core.windows.net/export",
            "UseManagedIdentity": true
        }
    }
}
Response
The export API returns a 202 status code when an export operation is started successfully. The body of the response contains a reference to the operation. The value of the Location header is the URL for the export operation's status (the same as href in the body).
Inside the destination container, use the path format <operation id>/results/<study>/<series>/<sop instance>.dcm to find the DCM files.
HTTP/1.1 202 Accepted
Content-Type: application/json
{
    "id": "df1ff476b83a4a3eaf11b1eac2e5ac56",
    "href": "https://example-dicom.dicom.azurehealthcareapis.com/v1/operations/df1ff476b83a4a3eaf11b1eac2e5ac56"
}
Operation status
Poll the preceding href URL for the current status of the export operation until completion. After the job reaches a terminal state, the API returns a 200 status code instead of 202. The value of its status property is updated accordingly.
HTTP/1.1 200 OK
Content-Type: application/json
{
    "operationId": "df1ff476b83a4a3eaf11b1eac2e5ac56",
    "type": "export",
    "createdTime": "2022-09-08T16:40:36.2627618Z",
    "lastUpdatedTime": "2022-09-08T16:41:01.2776644Z",
    "status": "completed",
    "results": {
        "errorHref": "https://dicomexport.blob.core.windows.net/export/4853cda8c05c44e497d2bc071f8e92c4/errors.log",
        "exported": 1000,
        "skipped": 3
    }
}
Errors
If there are any user errors exporting a DICOM file, the file is skipped and its corresponding error is logged. This error log is also exported alongside the DICOM files, and the caller can review it. You can find the error log at <export blob container uri>/<operation ID>/errors.log.
Format
Each line of the error log is a JSON object with the following properties. A given error identifier might appear multiple times in the log, as each update to the log is processed at least once.
| Property | Description |
|---|---|
Timestamp |
The date and time when the error occurred |
Identifier |
The identifier for the DICOM study, series, or SOP instance in the format of "<study instance UID>[/<series instance UID>[/<SOP instance UID>]]" |
Error |
The detailed error message |
Note
DICOM® is the registered trademark of the National Electrical Manufacturers Association for its Standards publications relating to digital communications of medical information.


