Try Microsoft Intune for free
Microsoft Intune helps you protect your workforce's corporate data by managing devices and apps. In this topic, you will create a free subscription to try Intune in a test environment.
Note
Use the information provided in this series of topics to try and evaluate Microsoft Intune. When you're ready, follow the complete process to set up Intune. For more information, see Set up Microsoft Intune.
Intune provides mobile device management (MDM) and mobile app management (MAM) from a secure cloud-based service that is administered using the Microsoft Intune admin center. Using Intune, you ensure your workforce's corporate resources (data, devices, and apps) are correctly configured, accessed, and updated, meeting your company's compliance policies and requirements.
When you complete the signup process, you'll have a new tenant. A tenant is a dedicated instance of Microsoft Entra ID where your subscription to Intune is hosted. You can then configure the tenant, add users and groups, and assign licenses to users. When you're ready, you can help users enroll their devices and add apps that they need to begin the modern endpoint management process. As you continue, you can set configuration and protection policies, as well as other endpoint management capabilities.
Prerequisites
Before setting up Microsoft Intune, review the following requirements:
Sign up for a Microsoft Intune free trial
Trying out Intune is free for 30 days. If you already have a work or school account, sign in with that account and add Intune to your subscription. Otherwise, you can sign up for a new account to use Intune for your organization.
Important
You can't combine an existing work or school account after you sign up for a new account.
Important
On October 15, 2024, Microsoft begins enforcement of the Azure sign-in requirement to use multi-factor authentication (MFA). When enforced, MFA must be used by all users who sign-in to Intune admin center regardless of any roles they have or don’t have. The MFA requirements also apply to services that are accessed through the admin center, like Windows 365 Cloud PC, and to use of the Microsoft Azure portal and Microsoft Entra admin center. MFA requirements don’t apply to end users who access applications, websites, or services hosted on Azure where those users don’t sign-in to the admin center.
The requirement to sign-in using MFA applies to all Intune subscriptions, including Plan 1 subscriptions with or without add-ons, and free trial subscriptions. The prerequisites and process required to configure MFA depend on the MFA method you choose to use for your tenant. Shortly after MFA is enabled for a tenant, subsequent sign-in attemps will require the user to complete setup for using the configured MFA solution.
To learn more about the MFA requirement, see Planning for mandatory multifactor authentication for Azure and admin portals in the Entra documentation.
In the Entra planning article you’ll also find guidance and resources to help you Prepare for multifactor authentication, including methods to configure MFA including but not limited to:
- Conditional Access policies
- The MFA Wizard for Microsoft Entra ID from the Microsoft 365 admin center
- Entra ID security defaults
To sign up for the Microsoft Intune free trial, follow the steps below:
Navigate to the Intune set up account page.
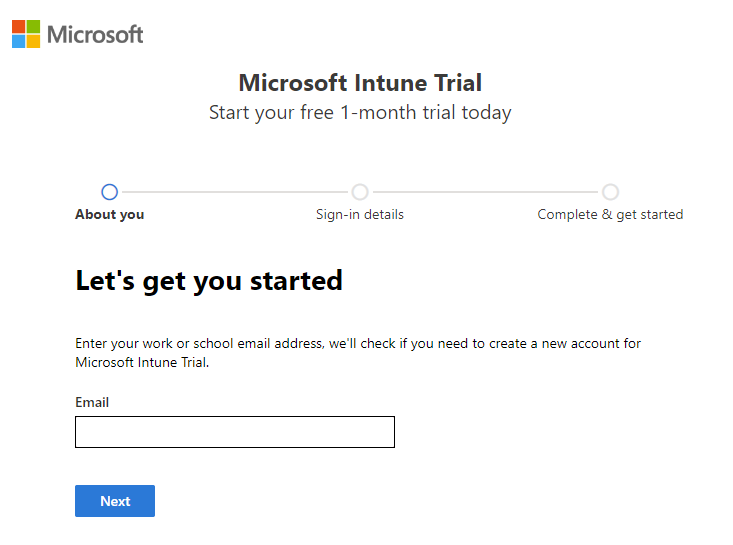
Enter your email address and click Next.
Note
If you already have an account set up with another Microsoft service using your email address, you can choose to sign in to use the account with the Intune trial, or you can create a new account. These steps assume you are creating a new account.

Click Set up account to create a new account.

Add your name, phone number, company name, company size, and region. Review the remaining information and click Next.

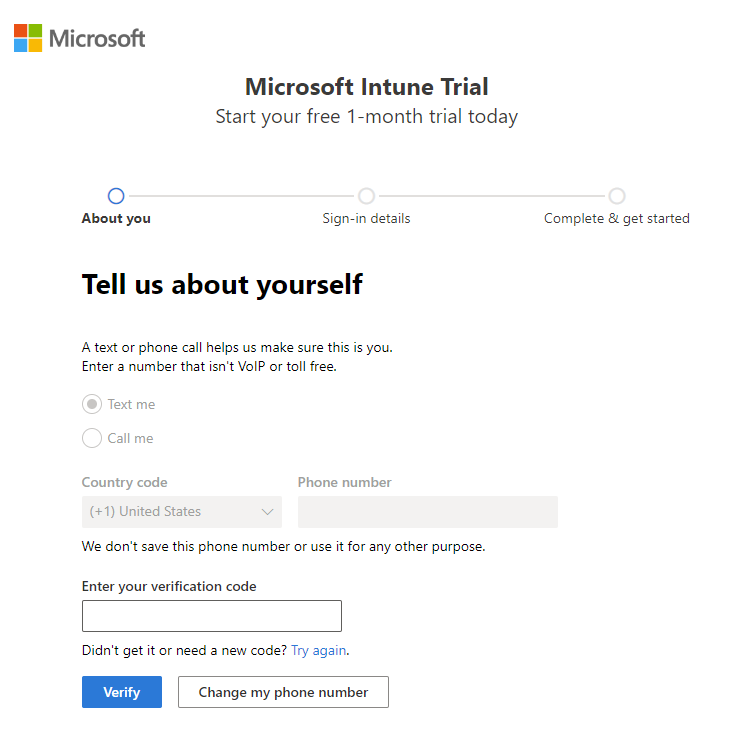
Click Send verification code to verify the phone number you added.

Enter the verification code you receive on your mobile device, then click Verify.

Add your Username and Domain name for your trial that represents your business or organization. Your name will be added before .onmicrosoft.com. Click Save to check availability. Click Next to continue. If you like, you can later change this domain name to your custom domain name.

In order to verify your identity, you must add a payment method. Your card is only used for verification purposes and won't be charged until you buy something.

After your account has been created, you'll see your user name. You'll use this user name to log in to Intune. Additionally, you receive an email message that contains your account information at the email address that you provided during the sign-up process. This email confirms your subscription is active.

Note
If you click Get Started, you'll open the Microsoft 365 admin center home page. If you click Manage your subscription, you'll open Your products and view details about your Microsoft Intune Trial subscription.
Sign in to Intune in the Microsoft Intune admin center
If you're not already signed in to the admin center, complete the following steps:
Open a new browser window and enter https://intune.microsoft.com in the address bar.
Use the user ID that you were given in the steps above to sign in. The user ID will look similar to the following: yourID@yourdomain.onmicrosoft.com.

When you sign up for a trial, you will also receive an email message that contains your account information and the email address that you provided during the sign-up process. This email confirms your trial is active.
Tip
When working with the Microsoft Intune, you may have better results working with a browser in regular mode, rather than private mode.
Confirm the MDM authority in Microsoft Intune
By default, the Mobile Device Management (MDM) authority is set when you create your free trial. You can confirm that the MDM authority is set by using the following steps:
- If you're not already signed in, sign in to the Microsoft Intune admin center.
- Click Tenant administration.
- View the tenant details. The MDM authority should be set to Microsoft Intune.
If after signing in to the Microsoft Intune admin center, you see an orange banner indicating that you haven't yet set the MDM authority, you can activate it at this time. The mobile device management (MDM) authority setting determines how you manage your devices. The MDM authority must be set before users can enroll devices for management.
Set the MDM authority to Intune
If you do not have the MDM authority set, sign in to the Microsoft Intune admin center.
Select the orange banner to open the Mobile Device Management Authority setting. The orange banner is only displayed if you haven't yet set the MDM authority.
Note
If you have set the MDM Authority, you will see the MDM authority value on the Tenant administration pane. The orange banner is only displayed if you haven't yet set the MDM authority.

If your MDM Authority is not set, under Choose MDM Authority, set your MDM authority to Intune MDM Authority.
For more information about the MDM authority, see Set the mobile device management authority.
Configure your custom domain name (Optional)
As mentioned above, if your organization has its own custom domain that you want to use without .onmicrosoft.com, you can change it in the Microsoft 365 admin center. You can add, verify, and configure your custom domain name using the following steps.
Important
You cannot rename or remove the initial onmicrosoft.com part of the domain name. However, you can add, verify or remove custom domain names used with Intune to keep your business identity clear. For more information, see Configure a custom domain name.
Go to Microsoft 365 admin center and sign in using your administrator account.
In the navigation pane, choose Setup.
On the page in the Sign-in and security section, select Get your custom domain set up.
Select Get started to set up your custom domain.
Type your domain name. Then, select Use this domain.

Verify that you are the owner of the domain that you entered in the previous step.
Select the method that you will use to verify your domain.

Note
For TXT record verification details, see Create DNS records at any DNS hosting provider for Microsoft 365.
Confirm your licenses
A Microsoft Intune license is created for you when you sign up for the Intune free trial. As part of this trial, you'll also have a trial Enterprise Mobility + Security (EMS) subscription. An Enterprise Mobility + Security (EMS) subscription includes both Microsoft Entra ID P1 or P2 and Microsoft Intune.
To confirm your Microsoft Entra ID P1 or P2 and Microsoft Intune, see Confirm your licenses.
Admin experiences
There are two admin centers that you will use most often:
The Microsoft Intune admin center (https://intune.microsoft.com) is where you can explore the capabilities of Intune. This is where an admin would work with Intune.
The Microsoft 365 admin center (https://admin.microsoft.com) is where you can add and manage users, if you are not using Microsoft Entra ID for this. You can also manage other aspects of your account, including billing and support.
Next steps
In this topic, you've created a free subscription to try Intune in a test environment. For more information about setting up Intune, see Set up Intune.
To continue to evaluate Microsoft Intune, go to the next step: