Certificates and identifiers in Xamarin.Mac
This guide walks through creating the necessary certificates and identifiers that will be required to publish a Xamarin.Mac app.
Setup
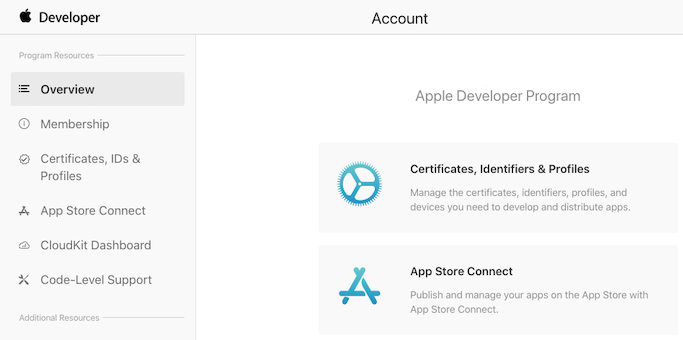
Visit the Apple Developer Member Center to configure the Mac for development. Click on the Account link and sign-in. The main menu is shown below:
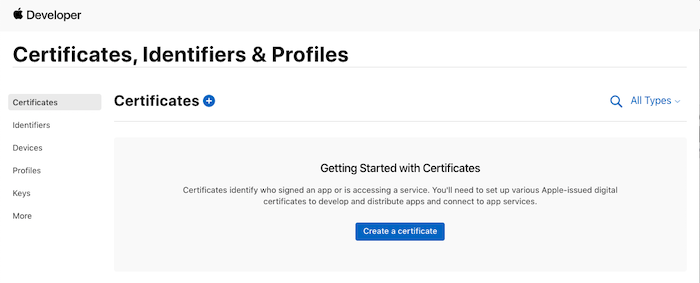
Click on the Certificates, Identifiers & Profiles button (or the plus button near the Certificates heading):
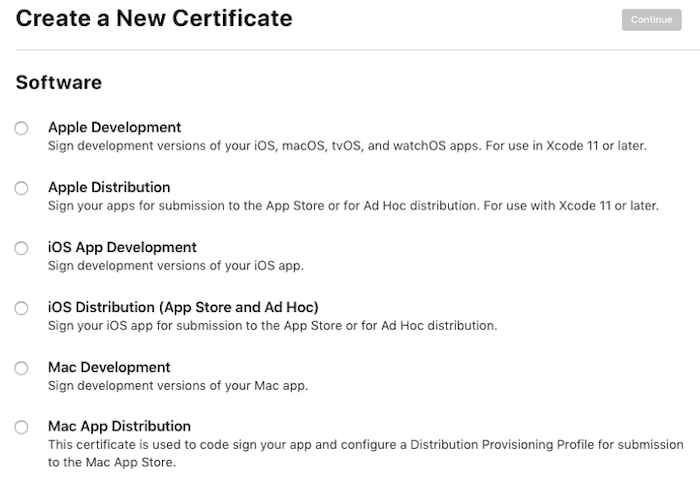
Select a certificate type and click Continue:
From here you can download the Intermediate Certificates (Worldwide Developer Relations Certificate Authority and Developer ID Certificate Authority) if required (last item at the bottom of the page). However, these should automatically be setup for the developer by Xcode.
The remainder of this section walks through the sections relevant to Mac developers:
- Register Mac App ID – The developer will need to follow these steps for each application they write.
- Register macOS Systems – This is only required when adding computers to test with.
- Create Certificates – Only required once when setting-up the certificates, and later when renewing them.
- Create Provisioning Profile – The developer will need to follow these steps for each new application written, and when adding new systems.
Register Mac App ID
You need to register an App ID for every application. Follow the steps below to create an entry:
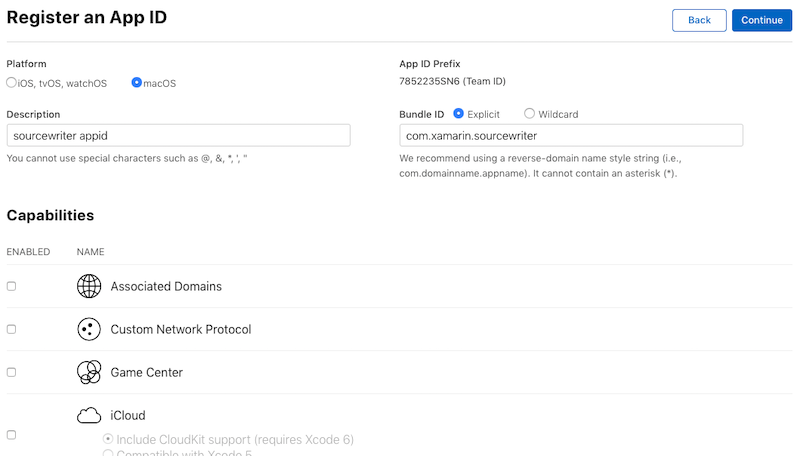
Press the "+" (plus sign) or Register an App ID:
Choose App IDs
Enter a Description, and select any App Services that the application will require: a. Platform should be macOS a. Choose a Description (used only in this portal) a. Enter the Bundle ID, which should match your Info.plist a. Select the capabilities that your app requires
Press Continue to review your selections.
If the information is correct, click Register to complete the setup:
Verify the information and click the Submit button:

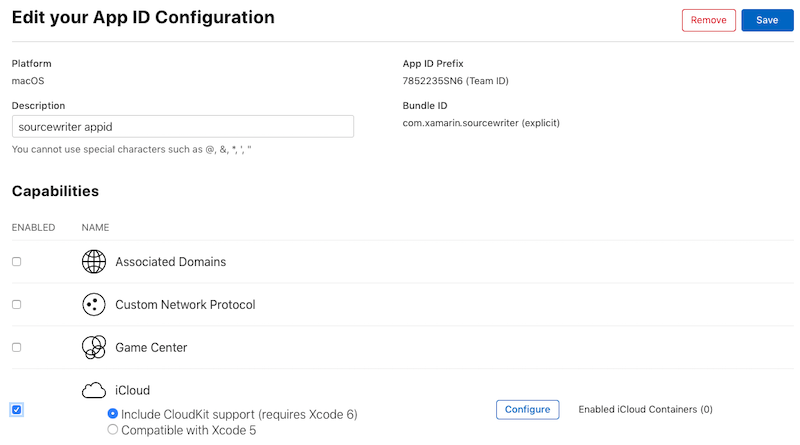
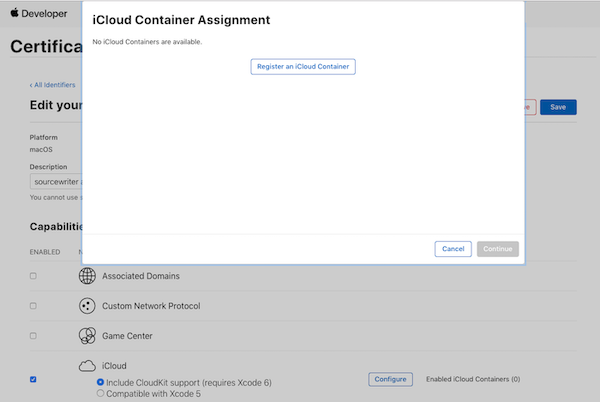
Some App Services might require further configuration (for example, iCloud). If that is the case, select the new App ID just created and click the Edit button:
To configure the iCloud services, for example, click the Edit button:
Register macOS devices
To create a provisioning profile for testing, the developer will need to have their Mac computers registered. A maximum of 100 computers can be registered for testing.
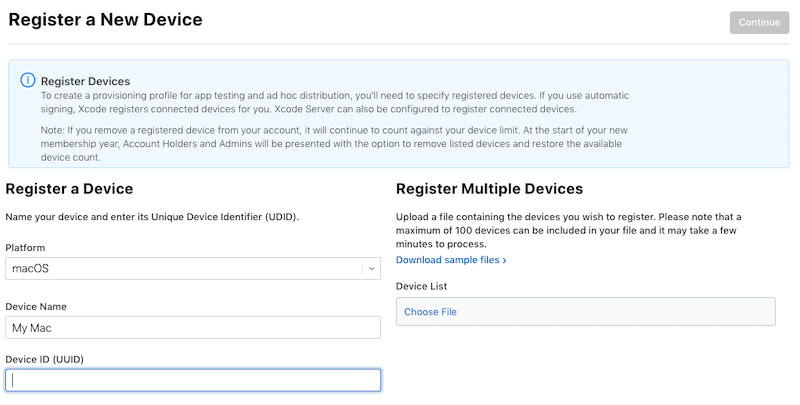
In the Mac Developer Center, select All from the Devices section and click the + button:
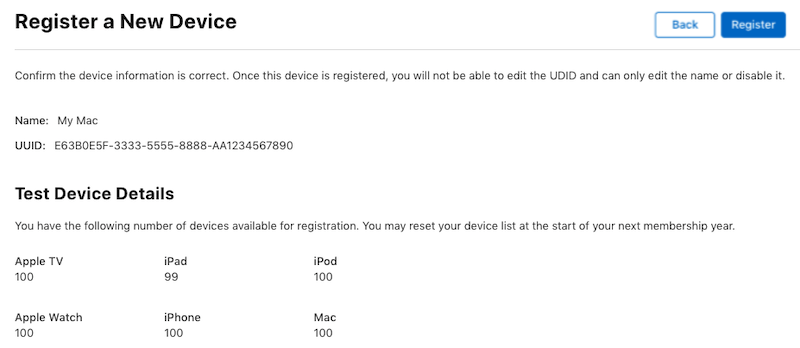
Enter a Name and the UUID of the computer to add and click the Continue button. Review the information and the click Register button:
Review and confirm the data entered:
Create certificates
Use the Certificates section to create several different types of certificates that will be used to sign Mac Applications:
There are five main types of certificate relevant to macOS development:
- Mac Development – Optional for general app development, but required if the developer plans to use features like iCloud or push notifications. The developer will need a Development Certificate before they can create Provisioning Profiles that allow them to access those features.
- Mac App Distribution – The developer will need a certificate for their app and another certificate for the installer.
- Mac Installer Distribution – The developer will need a certificate for their app and another certificate for the installer.
- Developer ID Installer – Certificates for the installer to distribute outside the Mac App Store.
- Developer ID Application – Certificates for the app to distribute outside the Mac App Store.
The following sections will provide examples of creating some of these certificate types.
Mac development certificate
As mentioned previously, Mac Development certificate isn't required unless macOS features like iCloud or push notifications are being used.
Do the following to created a new Development Certificate:
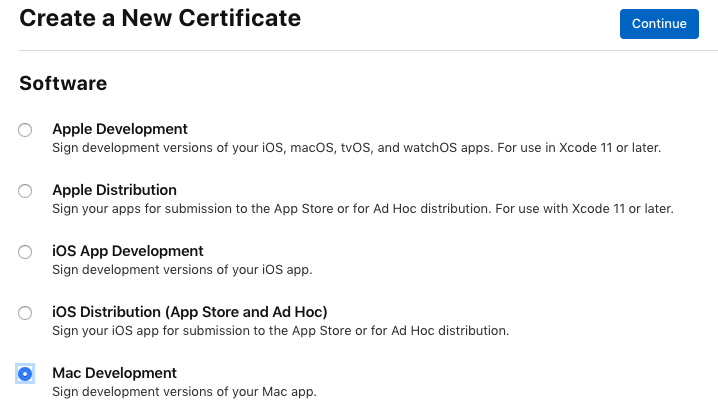
Select the Mac Development radio button and click Continue:
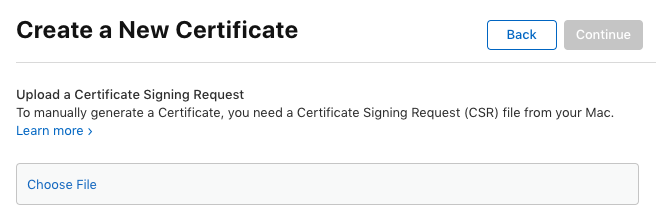
Upload a certificate signing request. The certificate request file (extension
.certSigningRequest) will be saved locally on the Mac. Click Choose file to select the certificate request, then press Continue.Follow the Learn more > link for instructions on how to use Keychain Access to create a certificate request file.
Press Download to get the certificate file, and double-click it to install:
As previously mentioned the Developer certificate is not always required unless the developer is implementing macOS features like iCloud and push notifications. It is also required to create a Development Provisioning Profile, which will be needed to test Mac App Store apps.
Mac App Store certificates
To release an app on the App Store, you'll need two certificates:
- Mac App Distribution certificate that will be used to sign the application; and
- Mac Installer Distribution certificate, to sign the installer.
Tip
Be careful when naming the certificate requests for these keys: use descriptive names that include the text Application and Installer so they can be distinguished later.
First, create the installer certificate:
Select Mac Installer Distribution as the certificate type and click the Continue button:
The next page explains how to use Keychain Access to generate a certificate request file. Follow the instructions:
Follow the Learn more > link for instructions on how to use Keychain Access to create a certificate request file. Remember to choose a certificate name that reflects the type of certificate (Application or Installer).
Click Download to get your certificate and double-click to install it in the Keychain:
Follow the same steps for the Mac App Distribution certificate.

Developer ID certificates
To self-release a Xamarin.Mac application (not release via the Apple App Store), you'll need two certificates:
- Developer ID Installer certificate that will be used to sign the application; and
- Developer ID Application certificate, to sign the installer.
Tip
Be careful when naming the certificate requests for these keys: use descriptive names that include the text Application and Installer so they can be distinguished later.
Once you have created, downloaded, and installed certificates, they'll be visible in Keychain Access:
Keychain Access certificate list
