Grant users access to a report server
SQL Server 2016 (13.x) Reporting Services and later
SQL Server Reporting Services (SSRS) uses role-based security to grant users access to a report server. On a new report server installation, only users who are members of the local Administrators group can access report server content and operations. To make the report server available to other users, you must create role assignments that map user or group accounts to a predefined role that specifies a collection of tasks.
This article focuses on using the web portal to assign users to a role. This information applies to a native mode report server.
If your report server is configured for SharePoint integrated mode, you configure access from a SharePoint site by using SharePoint permissions. Permission levels on the SharePoint site determine access to report server content and operations. You must be a site administrator to grant permissions on a SharePoint site. For more information, see Grant permissions on report server items on a SharePoint site.
Prerequisites
- A configured native mode report server. For more information, see Configure a native mode report server for local administration.
- Membership in the local Administrators group on the report server.
- Optionally, roles that are customized or defined for tasks. For example, if you want to use custom security settings for individual items, you can create a new role definition that grants view-access to folders. For more information, see Predefined roles in Reporting Services and Create, delete, or modify a role (Management Studio).
Role types
There are two general types of roles that you can assign to users and groups:
Item-level roles are used to view, add, and manage report server content, subscriptions, report processing, and report history. You define item-level role assignments on the root node (the Home folder) or on specific folders or items farther down the hierarchy.
System-level roles grant access to site-wide operations that aren't bound to any specific item. Examples include using Report Builder and shared schedules.
The two types of roles complement each other and should be used together. For this reason, adding a user to a report server is a two-part operation. If you assign a user to an item-level role, you should also assign them to a system-level role.
When you assign a user to a role, you must select a role that's already defined. To create, modify, or delete roles, use SQL Server Management Studio. For more information, see Create, delete, or modify a role (Management Studio).
Delegate the assignment task
To delegate the task of assigning roles to other users, create role assignments that map user accounts to Content Manager and System Administrator roles. Users who have Content Manager and System Administrator permissions can add users to a report server. For more information, see Predefined roles in Reporting Services.
Add a user or group to a system role
Go to the report server web portal.
In the upper-right corner, select the gear icon, and then select Site settings.

Under Site settings, select Security.
Select Add group or user.

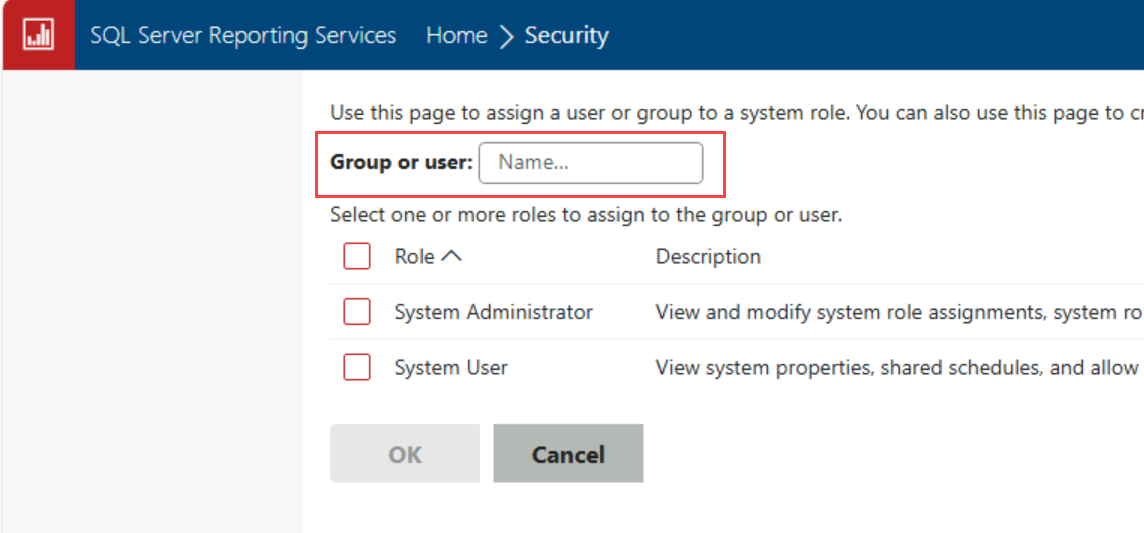
For Group or user, enter a Windows domain user or group account in the following format: <domain>\<account>.

Note
If you're using forms authentication or custom security, specify the user or group account in the format that's correct for your deployment.
Select a system role, and then select OK.
Roles are cumulative, so if you select System Administrator and System User, the user or group can perform the tasks in both roles.
Repeat these steps to create assignments for more users or groups.
Add a user or group to an item role
Go to the report server web portal and locate the report item for which you want to add a user or group.
On the report item, select the ellipsis to open the More info menu, and then select Manage.

Under Manage, select Security.
If the report item currently inherits security settings from a parent item, take the following actions. Otherwise, go to the next step.
- On the toolbar, select Customize security.
- Confirm that you want to change the security settings.
Select Add group or user.

For Group or user, enter a Windows domain user or group account in the following format: <domain>\<account>. If you're using forms authentication or custom security, specify the user or group account in the format that's correct for your deployment.

Select one or more role definitions that describe how the user or group should access the item, and then select OK.
Repeat these steps to create assignments for more users or groups.