Nota
L'accesso a questa pagina richiede l'autorizzazione. Puoi provare ad accedere o a cambiare directory.
L'accesso a questa pagina richiede l'autorizzazione. Puoi provare a cambiare directory.
Servizi di Azure DevOps
Use a pipeline to automatically build and test your Go projects.
Create your first pipeline
New to Azure Pipelines? If so, then we recommend you try this section before moving on to other sections.
Fork the following repo at GitHub:
https://github.com/MicrosoftDocs/pipelines-go
Sign in to Azure Pipelines
Accedere ad Azure Pipelines. Dopo l'accesso, il browser passa a https://dev.azure.com/my-organization-name e visualizza il dashboard di Azure DevOps.
- In un browser, vai su dev.azure.com e accedi.
- Selezionare l'organizzazione.
- Creare un nuovo progetto selezionando Nuovo progetto o Crea progetto se si crea il primo progetto nell'organizzazione.
- Immettere il nome del progetto.
- Seleziona la Visibilità per il tuo progetto.
- Fare clic su Crea.
Create the pipeline
Accedere all'organizzazione di Azure DevOps e passare al progetto.
Passare a Pipeline e quindi selezionare Nuova pipeline o Crea pipeline se si crea la prima pipeline.
Eseguire i passaggi della procedura guidata selezionando prima di tutto GitHub come posizione del codice sorgente.
Si potrebbe essere reindirizzati a GitHub per l'accesso. In questo caso, immettere le credenziali di GitHub.
Quando si vede l’elenco dei repository, selezionarne uno.
È possibile che si venga reindirizzati a GitHub per installare l'app Azure Pipelines. In tal caso, selezionare Approva e installa.
When the Configure tab appears, select Go. Your new pipeline appears, with the azure-pipelines.yml YAML file ready to be configured. See the following sections to learn some of the more common ways to customize your pipeline.
Build environment
You can use Azure Pipelines to build your Go projects without setting up any infrastructure of your own. È possibile usare agenti Linux, macOS o Windows per eseguire le compilazioni.
Update the following snippet in your azure-pipelines.yml file to select the appropriate image.
pool:
  vmImage: 'ubuntu-latest'
Modern versions of Go are pre-installed on Microsoft-hosted agents. For the exact versions of pre-installed Go, refer to Microsoft-hosted agents in Azure Pipelines.
Set up Go
Starting with Go 1.11, you no longer need to define a $GOPATH environment, set up a workspace layout, or use the dep module. Dependency management is now built in.
This YAML implements the go get command to download Go packages and their dependencies. It then uses go build to generate the content that is published with PublishBuildArtifacts@1 task.
trigger:
 - main

pool:
   vmImage: 'ubuntu-latest'

steps:
- task: GoTool@0
  inputs:
    version: '1.13.5'
- task: Go@0
  inputs:
    command: 'get'
    arguments: '-d'
    workingDirectory: '$(System.DefaultWorkingDirectory)'
- task: Go@0
  inputs:
    command: 'build'
    workingDirectory: '$(System.DefaultWorkingDirectory)'
- task: CopyFiles@2
  inputs:
    TargetFolder: '$(Build.ArtifactStagingDirectory)'
- task: PublishBuildArtifacts@1
  inputs:
     artifactName: drop
Costruire
Use go build to build your Go project. Aggiungere il frammento di codice seguente al azure-pipelines.yml file:
- task: Go@0
  inputs:
    command: 'build'
    workingDirectory: '$(System.DefaultWorkingDirectory)'
Test
Use go test to test your Go module and its subdirectories (./...). Aggiungere il frammento di codice seguente al azure-pipelines.yml file:
- task: Go@0
  inputs:
    command: 'test'
    arguments: '-v'
    workingDirectory: '$(System.DefaultWorkingDirectory)'
When you're ready, commit a new azure-pipelines.yml file to your repository and update the commit message. Seleziona Salva ed Esegui.

If you want to watch your pipeline in action, select the build in the Jobs option on your Azure Pipelines dashboard.
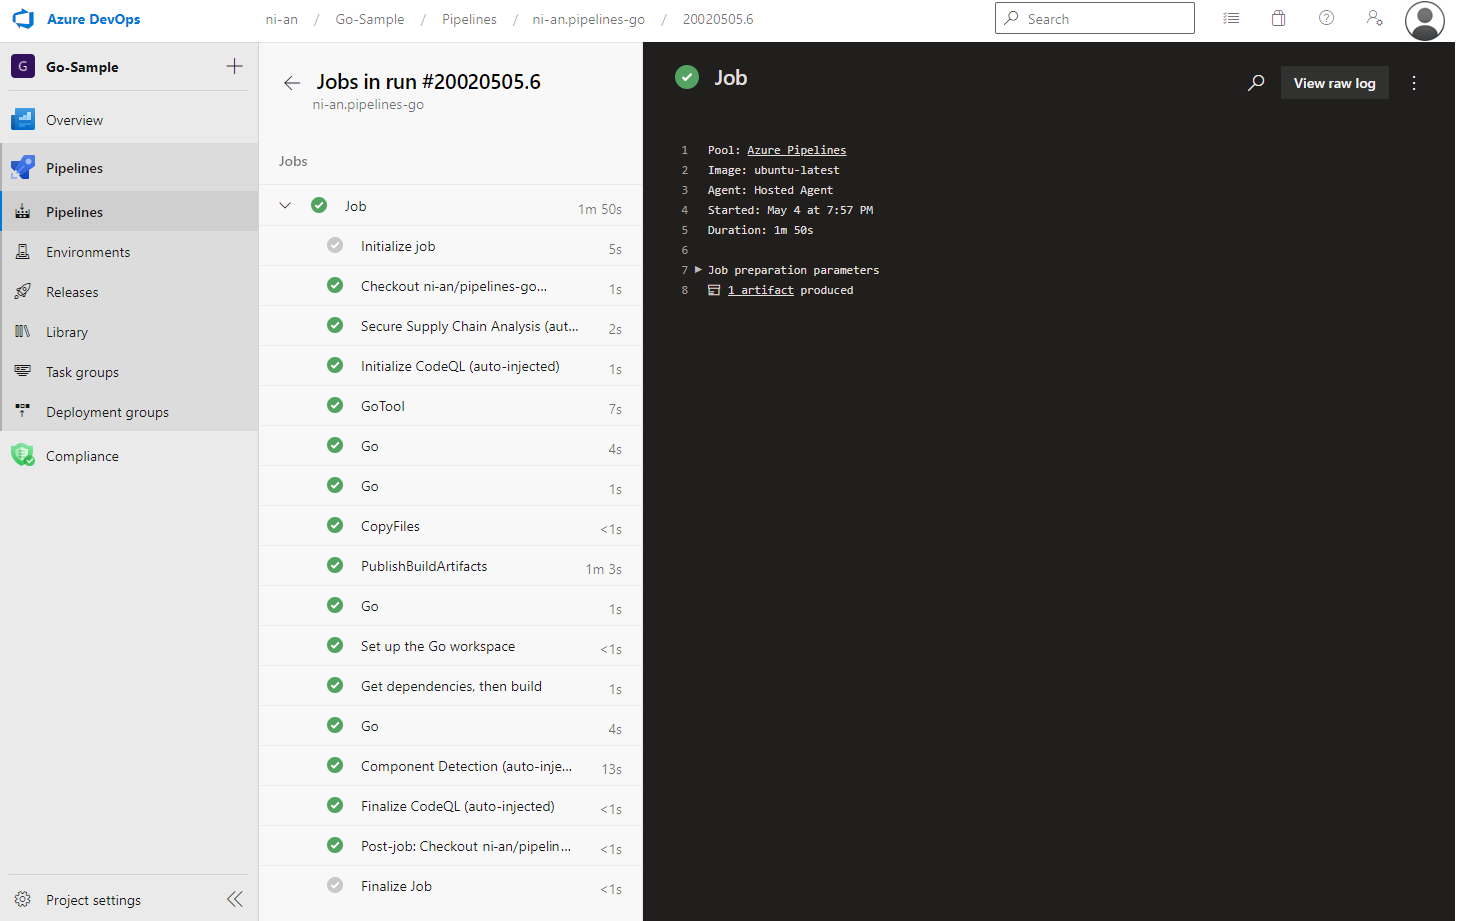
Because your code appeared to be a good match for the Go template, we automatically created your pipeline.
È ora disponibile una pipeline YAML funzionante (azure-pipelines.yml) nel repository che è pronta per la personalizzazione.
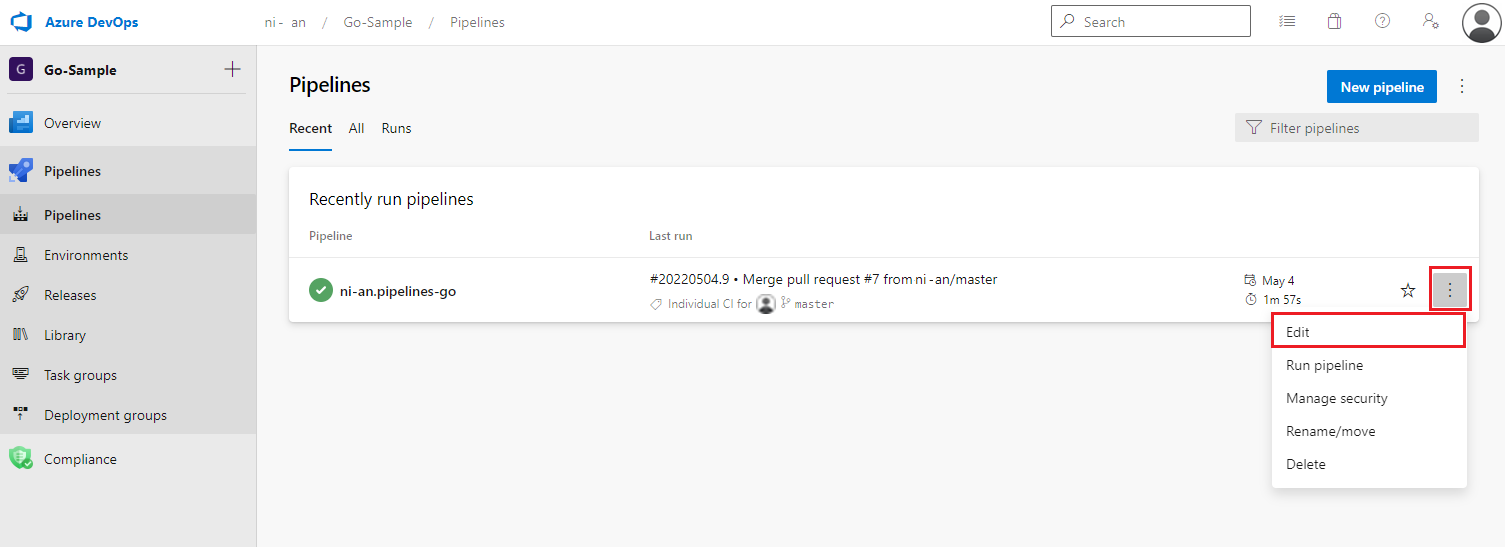
Quando si è pronti per apportare modifiche alla pipeline, selezionarla nella pagina Pipeline e quindi Modificare il azure-pipelines.yml file.
Suggerimento
To make changes to the YAML file as described in this article, select the pipeline in Pipelines page, and then select Edit to open an editor for the azure-pipelines.yml file.
Creare un'immagine ed eseguire il push nel registro di container
For your Go app, you can also build an image and push it to a container registry.