Manage Microsoft Entra token-based users in Azure confidential ledger
Articolo
Microsoft Entra ID-based users are identified by their Microsoft Entra object ID.
Users with Administrator privileges can manage users of the confidential ledger. Available roles are Reader (read-only), Contributor (read and write), and Administrator (read, write, and manage users).
Sign in to Azure
Sign in to Azure using the Azure CLI az login command or the Azure PowerShell Connect-AzAccount cmdlet.
If the CLI or PowerShell can open your default browser, it will do so and load an Azure sign-in page. Otherwise, visit https://aka.ms/devicelogin and enter the authorization code displayed in your terminal.
If prompted, sign in with your account credentials in the browser.
Get the confidential ledger's name and the identity service URI from the Azure portal as it is needed to create a client to manage the users. This image shows the appropriate properties in the Azure portal.
Replace instances of contoso and https://contoso.confidential-ledger.azure.com in the following code snippets with the respective values from the Azure portal.
from azure.identity import DefaultAzureCredential
from azure.confidentialledger import ConfidentialLedgerClient
from azure.confidentialledger.identity_service import ConfidentialLedgerIdentityServiceClient
from azure.confidentialledger import LedgerUserRole
identity_client = ConfidentialLedgerCertificateClient()
network_identity = identity_client.get_ledger_identity(
ledger_id="contoso"
)
ledger_tls_cert_file_name = "ledger_certificate.pem"with open(ledger_tls_cert_file_name, "w") as cert_file:
cert_file.write(network_identity["ledgerTlsCertificate"])
# The DefaultAzureCredential will use the current Azure context to authenticate to Azure
credential = DefaultAzureCredential()
ledger_client = ConfidentialLedgerClient(
endpoint="https://contoso.confidential-ledger.azure.com",
credential=credential,
ledger_certificate_path=ledger_tls_cert_file_name
)
# Add a user with the contributor role# Other supported roles are Contributor and Administrator
user_id = "Azure AD object id of the user"
user = ledger_client.create_or_update_user(
user_id, {"assignedRole": "Contributor"}
)
# Get the user and check their properties
user = ledger_client.get_user(user_id)
assert user["userId"] == user_id
assert user["assignedRole"] == "Contributor"# Delete the user
ledger_client.delete_user(user_id)
Sign in to Azure
Sign in to Azure using the Azure CLI az login command or the Azure PowerShell Connect-AzAccount cmdlet.
If the CLI or PowerShell can open your default browser, it will do so and load an Azure sign-in page. Otherwise, visit https://aka.ms/devicelogin and enter the authorization code displayed in your terminal.
If prompted, sign in with your account credentials in the browser.
Get the confidential ledger's name and the identity service URI from the Azure portal as it is needed to create a client to manage the users. This image shows the appropriate properties in the Azure portal.
Replace instances of contoso and https://contoso.confidential-ledger.azure.com in the following code snippets with the respective values from the Azure portal.
using Azure.Core;
using Azure.Identity;
using Azure.Security.ConfidentialLedger;

internal class ACLUserManagement
{
    static void Main(string[] args)
    {
      // Create a ConfidentialLedgerClient instance
      // The DefaultAzureCredential will use the current Azure context to authenticate to Azure
      var ledgerClient = new ConfidentialLedgerClient(new Uri("https://contoso.confidential-ledger.azure.com"), new DefaultAzureCredential());

      string userId = "Azure AD object id of the user";

      // Add the user with the Reader role
      // Other supported roles are Contributor and Administrator
      ledgerClient.CreateOrUpdateUser(
         userId,
         RequestContent.Create(new { assignedRole = "Reader" }));

      // Get the user and print their properties
      Azure.Response response = ledgerClient.GetUser(userId);
      var aclUser = System.Text.Json.JsonDocument.Parse(response.Content.ToString());

      Console.WriteLine($"Assigned Role is = {aclUser.RootElement.GetProperty("assignedRole").ToString()}");
      Console.WriteLine($"User id is = {aclUser.RootElement.GetProperty("userId").ToString()}");

      // Delete the user
      ledgerClient.DeleteUser(userId);
    }
}
Sign in to Azure
Sign in to Azure using the Azure CLI az login command or the Azure PowerShell Connect-AzAccount cmdlet.
If the CLI or PowerShell can open your default browser, it will do so and load an Azure sign-in page. Otherwise, visit https://aka.ms/devicelogin and enter the authorization code displayed in your terminal.
If prompted, sign in with your account credentials in the browser.
Get the confidential ledger's name and the identity service URI from the Azure portal as it is needed to create a client to manage the users. This image shows the appropriate properties in the Azure portal.
Replace instances of contoso and https://contoso.confidential-ledger.azure.com in the following code snippets with the respective values from the Azure portal.
import ConfidentialLedger, { getLedgerIdentity } from"@azure-rest/confidential-ledger";
import { DefaultAzureCredential } from"@azure/identity";
exportasyncfunctionmain() {
// Get the signing certificate from the confidential ledger Identity Serviceconst ledgerIdentity = await getLedgerIdentity("contoso");
// Create the confidential ledger Clientconst confidentialLedger = ConfidentialLedger(
"https://contoso.confidential-ledger.azure.com",
ledgerIdentity.ledgerIdentityCertificate,
new DefaultAzureCredential()
);
// Azure AD object id of the userconst userId = "Azure AD Object id"// Other supported roles are Reader and Contributorconst createUserParams: CreateOrUpdateUserParameters = {
contentType: "application/merge-patch+json",
body: {
assignedRole: "Contributor",
userId: `${userId}`
}
}
// Add the uservar response = await confidentialLedger.path("/app/users/{userId}", userId).patch(createUserParams)
// Check for a non-success responseif (response.status !== "200") {
throw response.body.error;
}
// Print the responseconsole.log(response.body);
// Get the user
response = await confidentialLedger.path("/app/users/{userId}", userId).get()
// Check for a non-success responseif (response.status !== "200") {
throw response.body.error;
}
// Print the responseconsole.log(response.body);
// Set the user role to Readerconst updateUserParams: CreateOrUpdateUserParameters = {
contentType: "application/merge-patch+json",
body: {
assignedRole: "Reader",
userId: `${userId}`
}
}
// Update the user
response = await confidentialLedger.path("/app/users/{userId}", userId).patch(updateUserParams)
// Check for a non-success responseif (response.status !== "200") {
throw response.body.error;
}
// Print the responseconsole.log(response.body);
// Delete the userawait confidentialLedger.path("/app/users/{userId}", userId).delete()
// Get the user to make sure it is deleted
response = await confidentialLedger.path("/app/users/{userId}", userId).get()
// Check for a non-success responseif (response.status !== "200") {
throw response.body.error;
}
}
main().catch((err) => {
console.error(err);
});
Azure portal
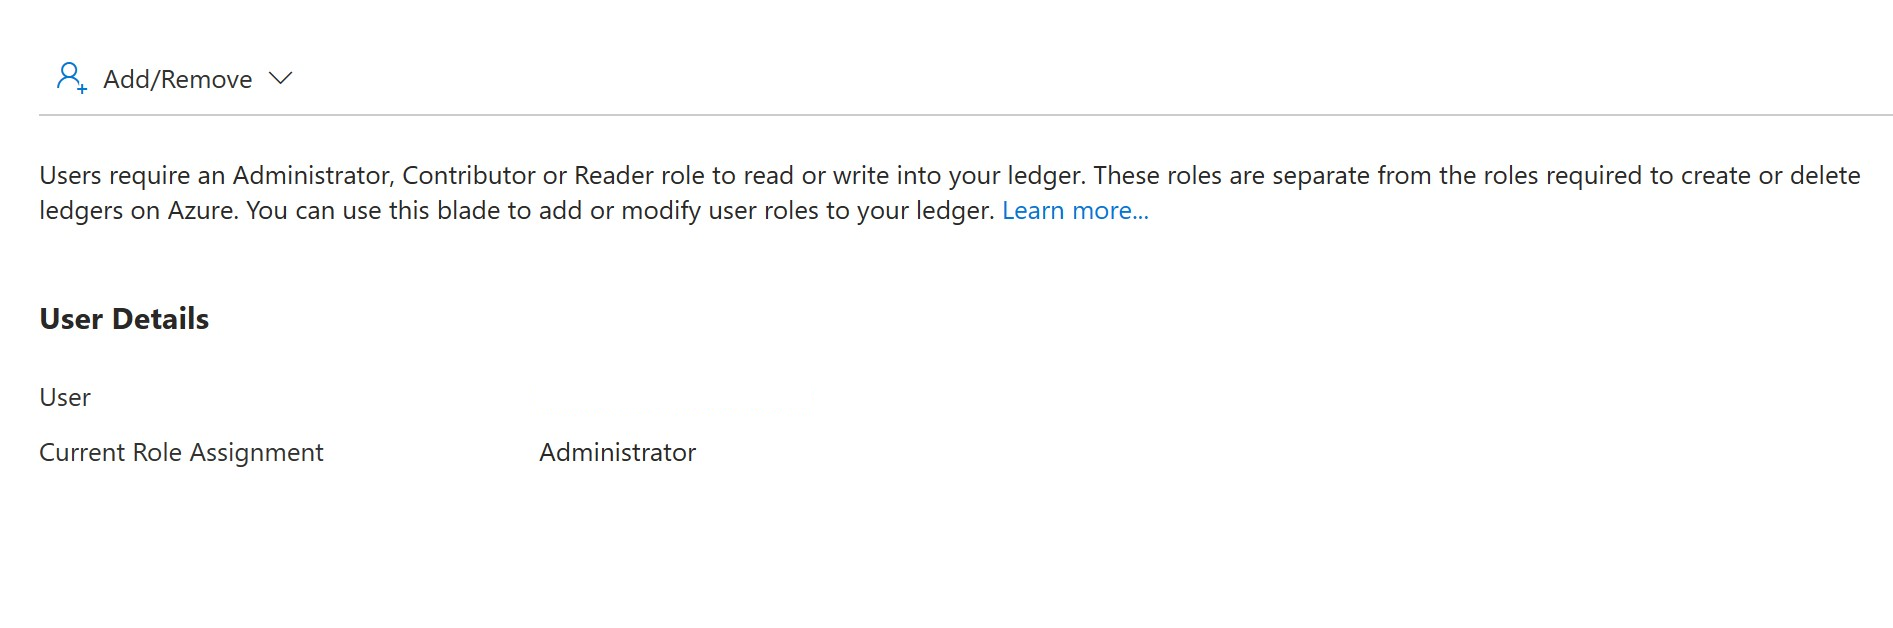
Navigate to the Azure portal and access the Manage users blade. You can add, update, and delete users from this blade.
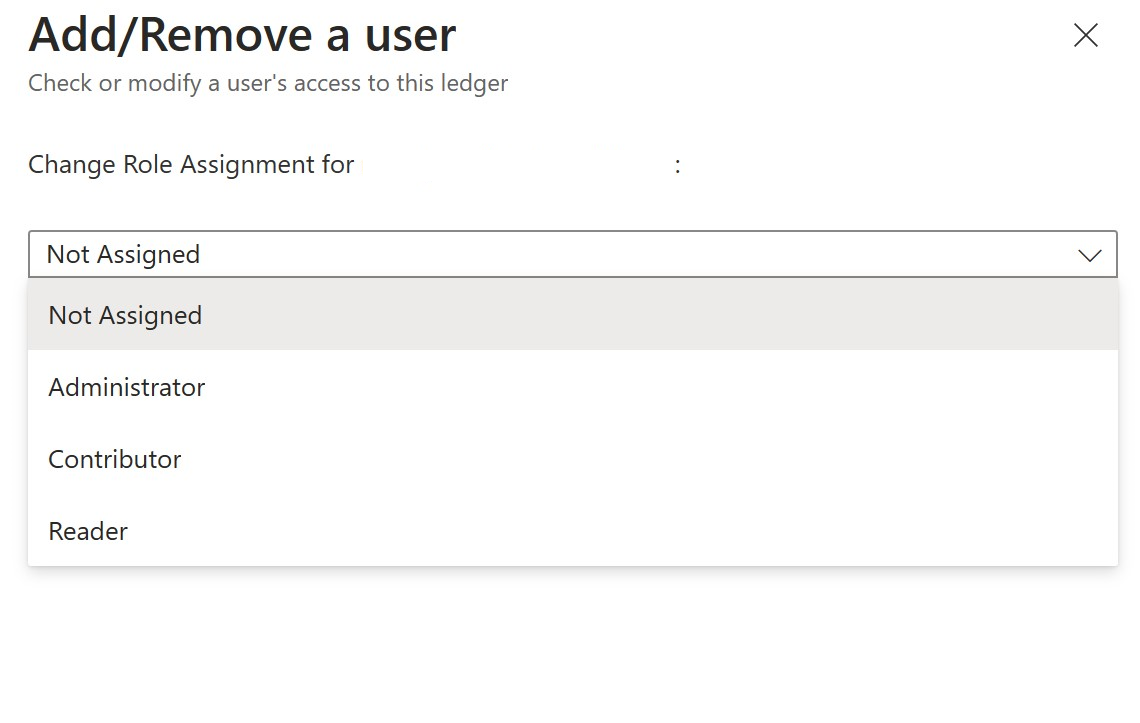
To add a user, click on the Add/Remove button, pick a user and select the role for the user, and Apply the changes. The user will be added to the list of users with the selected role.
To remove a user from the ledger, select the Not Assigned role, and click on the Apply button. The user will be removed from the list of users.
L'accesso ai carichi di lavoro basati sul cloud deve essere controllato a livello centralizzato fornendo un'identità definitiva per ogni utente e risorsa. È possibile verificare che dipendenti e fornitori dispongano di diritti di accesso sufficienti per svolgere il proprio lavoro.
Illustrare le funzionalità di Microsoft Entra ID per modernizzare le soluzioni di identità, implementare soluzioni ibride e implementare la governance delle identità.
In questa guida introduttiva viene creato un gruppo di risorse di Azure, una stringa casuale e un libro mastro riservato di Azure con un ruolo e un tipo specificati, tutti in una posizione specificata.