Nota
L'accesso a questa pagina richiede l'autorizzazione. È possibile provare ad accedere o modificare le directory.
L'accesso a questa pagina richiede l'autorizzazione. È possibile provare a modificare le directory.
SI APPLICA A:  Azure Stack Edge Pro - GPUAzure Stack Edge Pro 2Azure Stack Edge Pro RAzure Stack Edge Mini R
Questo articolo descrive come convertire i certificati in un formato appropriato per il caricamento nel dispositivo Azure Stack Edge. Questa procedura è in genere necessaria quando si mettono i propri certificati.
Per altre informazioni su come creare questi certificati, vedere Creare certificati con Azure PowerShell.
Preparare i certificati
Se si mettono i propri certificati, i certificati creati per il dispositivo per impostazione predefinita risiedono nell'archivio personale nel client. Questi certificati devono essere esportati nel client in file di formato appropriati che possono quindi essere caricati nel dispositivo.
Preparare i certificati radice: il certificato radice deve essere esportato come formato DER con
.cerestensione. Per i passaggi dettagliati, vedere Esportare i certificati come formato DER.Preparare i certificati dell'endpoint: i certificati endpoint devono essere esportati come file con estensione pfx con chiavi private. Per i passaggi dettagliati, vedere Esportare i certificati come file con estensione pfx con chiavi private.
Esportare i certificati come formato DER
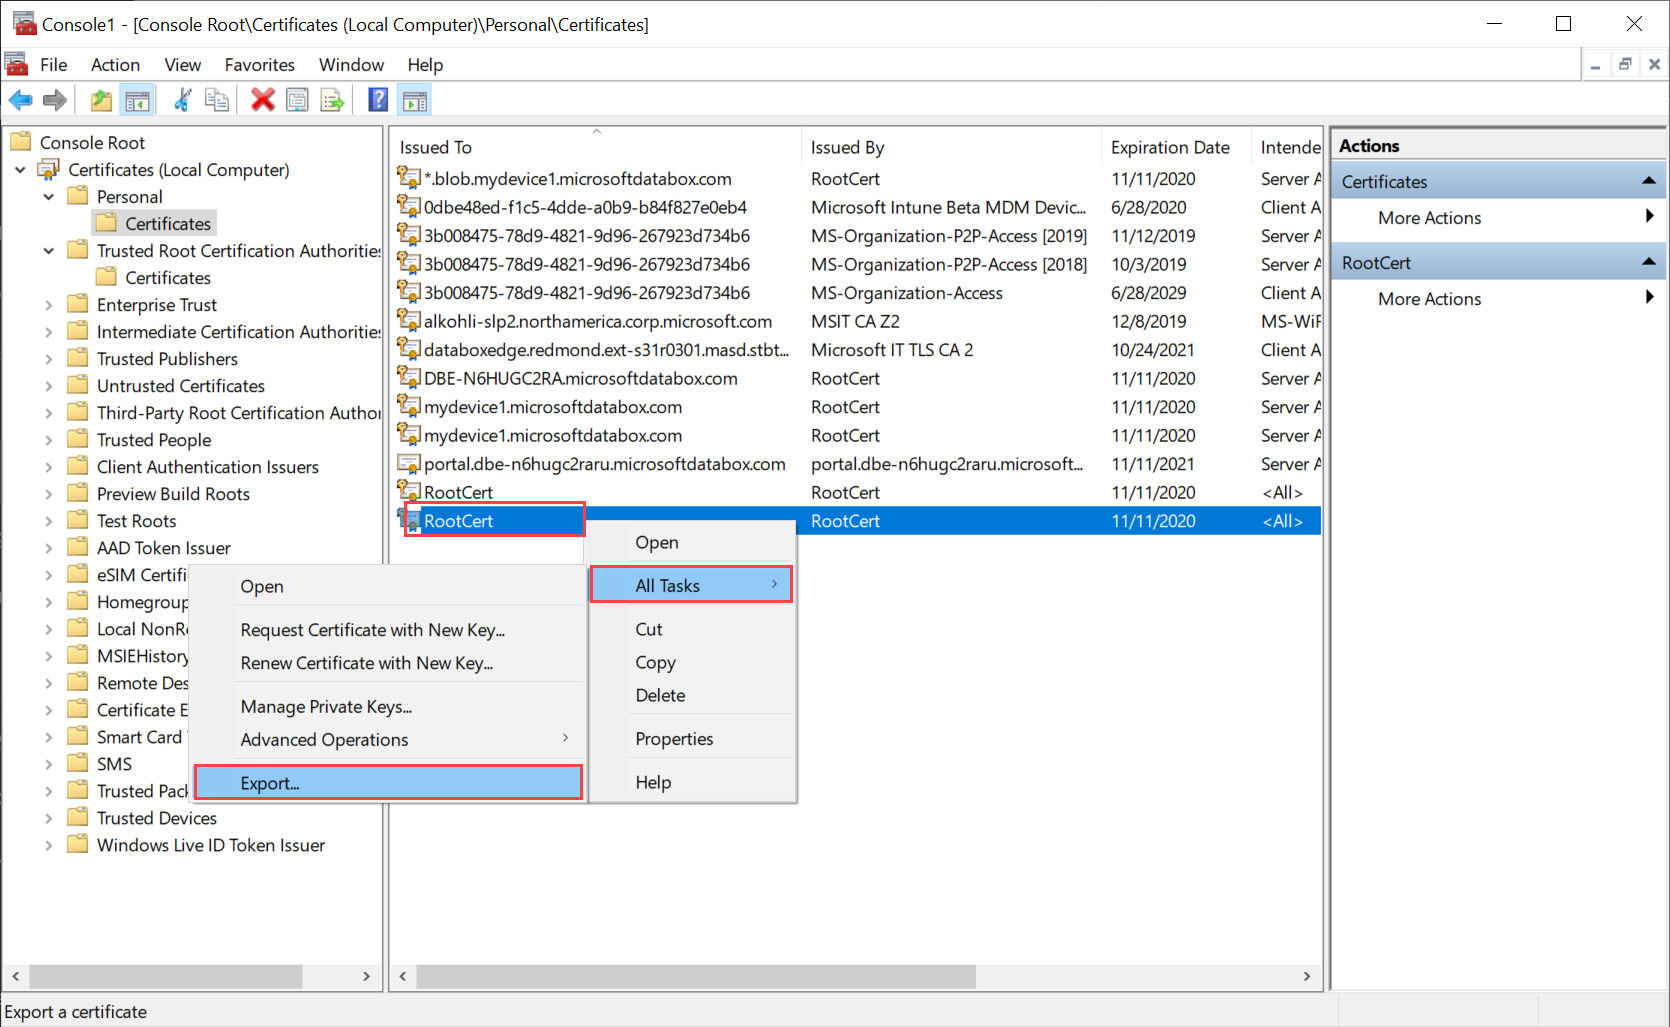
Eseguire certlm.msc per avviare l'archivio certificati del computer locale.
Nell'archivio certificati personali selezionare il certificato radice. Fare clic con il pulsante destro del mouse e selezionare Tutte le attività > esportate...
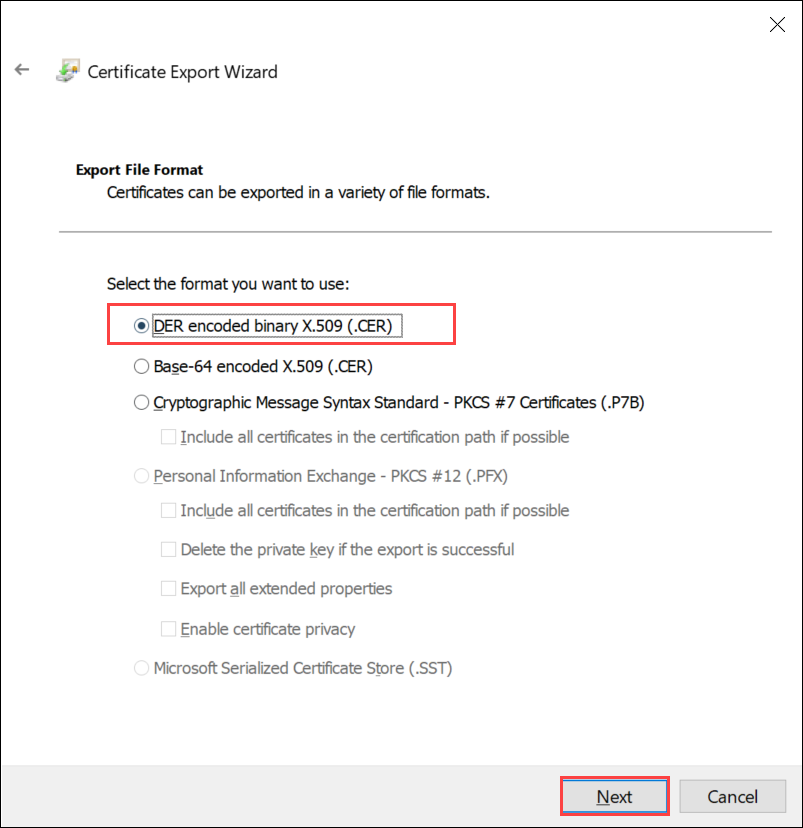
Verrà visualizzata la procedura guidata per il certificato. Selezionare il formato binario codificato DER X.509 (.cer).Select the format DER encoded binary X.509 (.cer). Selezionare Avanti.
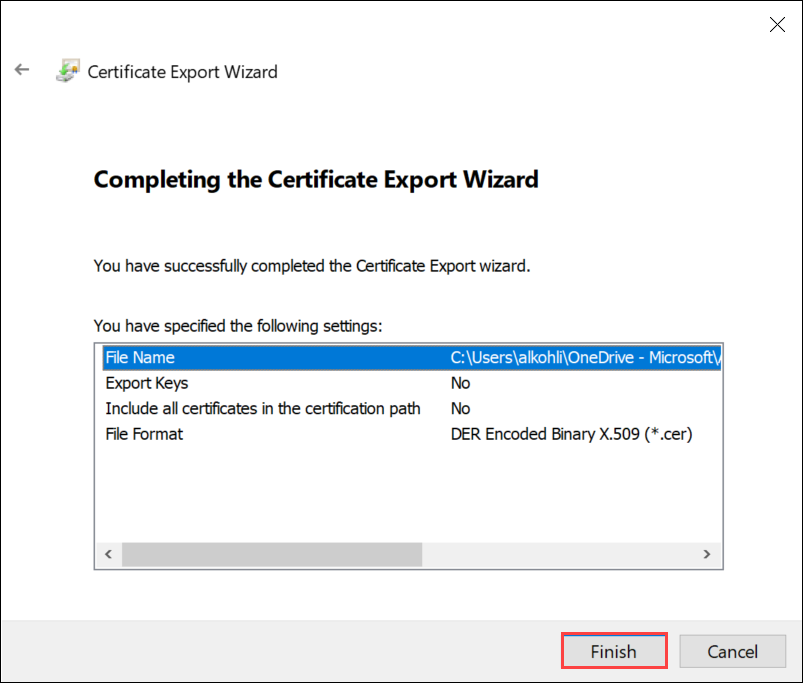
Individuare e selezionare il percorso in cui si vuole esportare il file di formato .cer.

Selezionare Fine.
Esportare i certificati come formato pfx con chiave privata
Seguire questa procedura per esportare un certificato SSL con chiave privata in un computer Windows.
Importante
Eseguire questi passaggi nello stesso computer usato per creare il certificato.
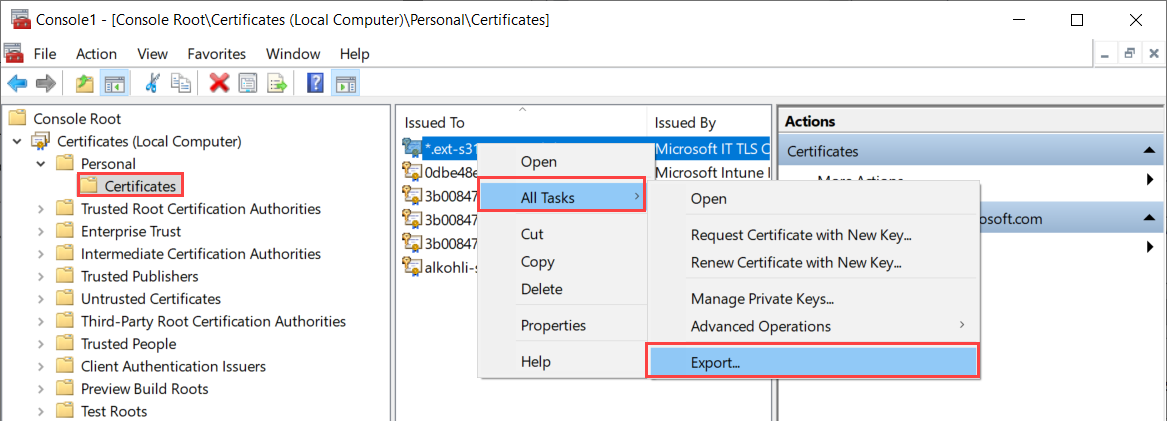
Eseguire certlm.msc per avviare l'archivio certificati del computer locale.
Fare doppio clic sulla cartella Personale e quindi su Certificati.
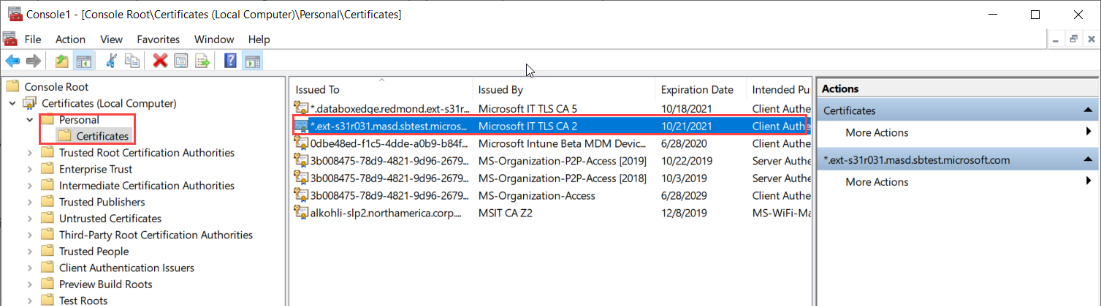
Fare clic con il pulsante destro del mouse sul certificato di cui si vuole eseguire il backup e scegliere Tutte le attività > Esporta.
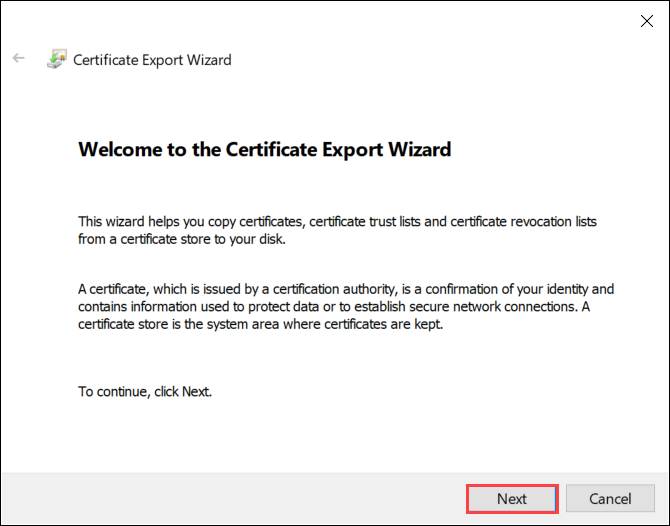
Seguire l'Esportazione guidata certificati per eseguire il backup del certificato in un file con estensione pfx.
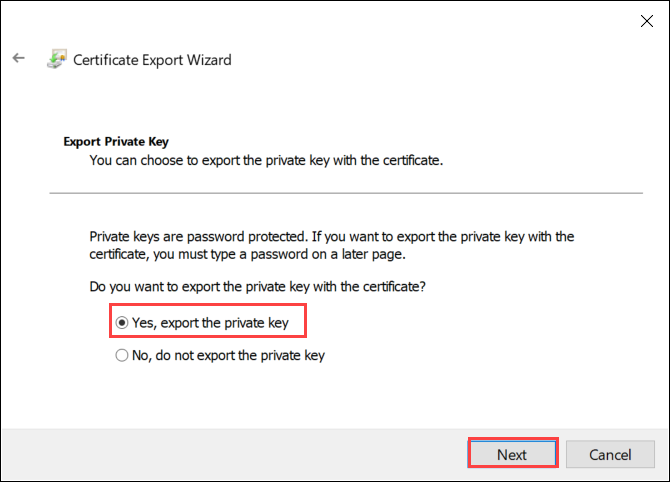
Scegliere Sì, esportare la chiave privata.
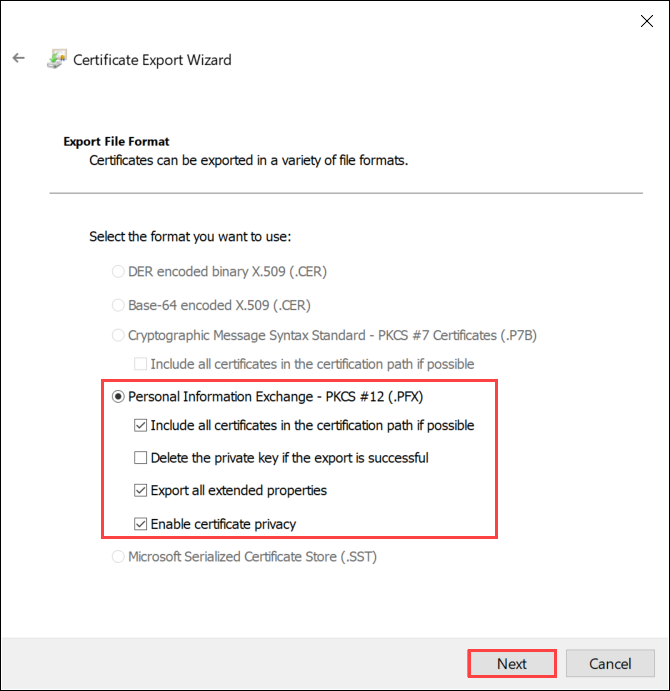
Scegliere Includi tutti i certificati nel percorso del certificato, se possibile, Esporta tutte le proprietà estese e Abilita privacy dei certificati.
Quando si includono tutti i certificati nell'esportazione, non è necessario aggiungere separatamente la catena di firma prima di aggiungere tale certificato quando si configurano i certificati usando l'interfaccia utente Web locale. Per altre informazioni, vedere Bring Your Own Certificates.For more information, see Bring your own certificates.
Importante
NON selezionare l'opzione Elimina chiave privata se l'esportazione ha esito positivo.
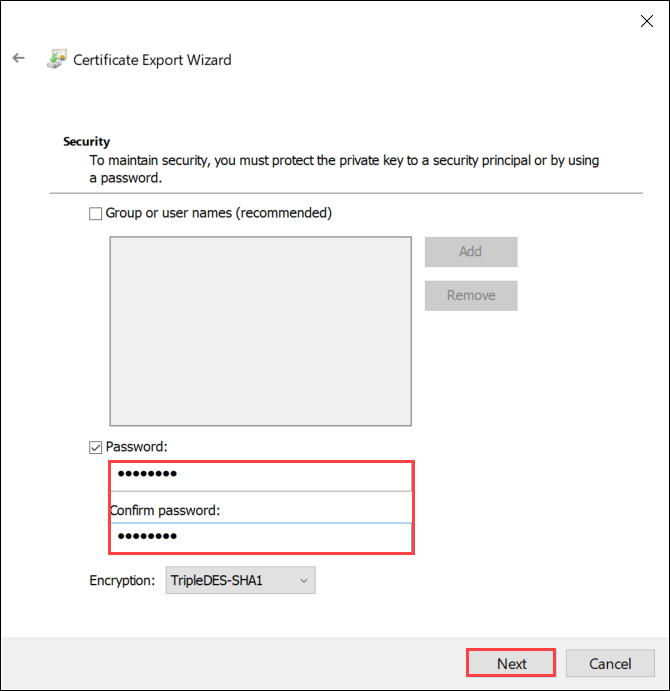
Immettere una password che si ricorderà. Confermare la password. La password protegge la chiave privata.
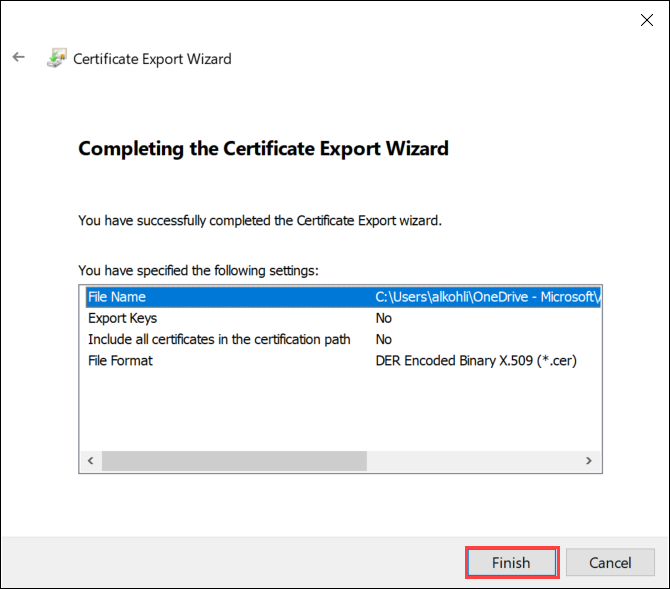
Scegliere di salvare il file in un percorso impostato.

Selezionare Fine.
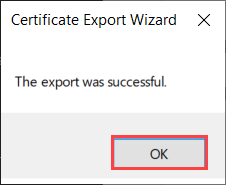
Viene visualizzato un messaggio che informa che l'esportazione ha avuto esito positivo. Seleziona OK.
Il backup del file con estensione pfx viene ora salvato nel percorso selezionato ed è pronto per essere spostato o archiviato per la conservazione sicura.
Passaggi successivi
Informazioni su come caricare i certificati nel dispositivo.