In this article, you learn how to deploy an AutoML-trained machine learning model to an online real-time inference endpoint. Automated machine learning, also referred to as automated ML or AutoML, is the process of automating the time-consuming, iterative tasks of developing a machine learning model. For more information, see What is automated machine learning (AutoML)?
In the following sections, you learn how to deploy AutoML trained machine learning model to online endpoints using:
Deploy from Azure Machine Learning studio and no code
Deploying an AutoML-trained model from the Automated ML page is a no-code experience. That is, you don't need to prepare a scoring script and environment because both are autogenerated.
In Azure Machine Learning studio, go to the Automated ML page.
Select your experiment and run it.
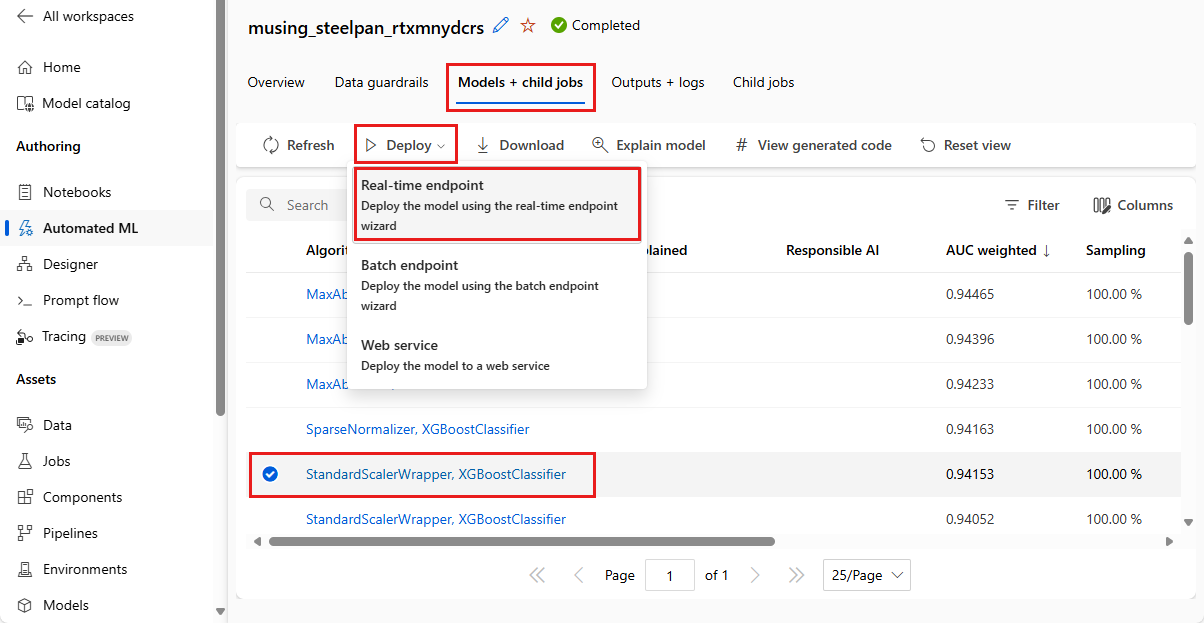
Choose the Models + child jobs tab.
Select the model that you want to deploy.
After you select a model, the Deploy button is available with a dropdown menu.
Select Real-time endpoint option.
The system generates the Model and Environment needed for the deployment.
Deploy manually from the studio or command line
If you want to have more control over the deployment, you can download the training artifacts and deploy them.
To download the components, you need for deployment:
Go to your Automated ML experiment and run it in your machine learning workspace.
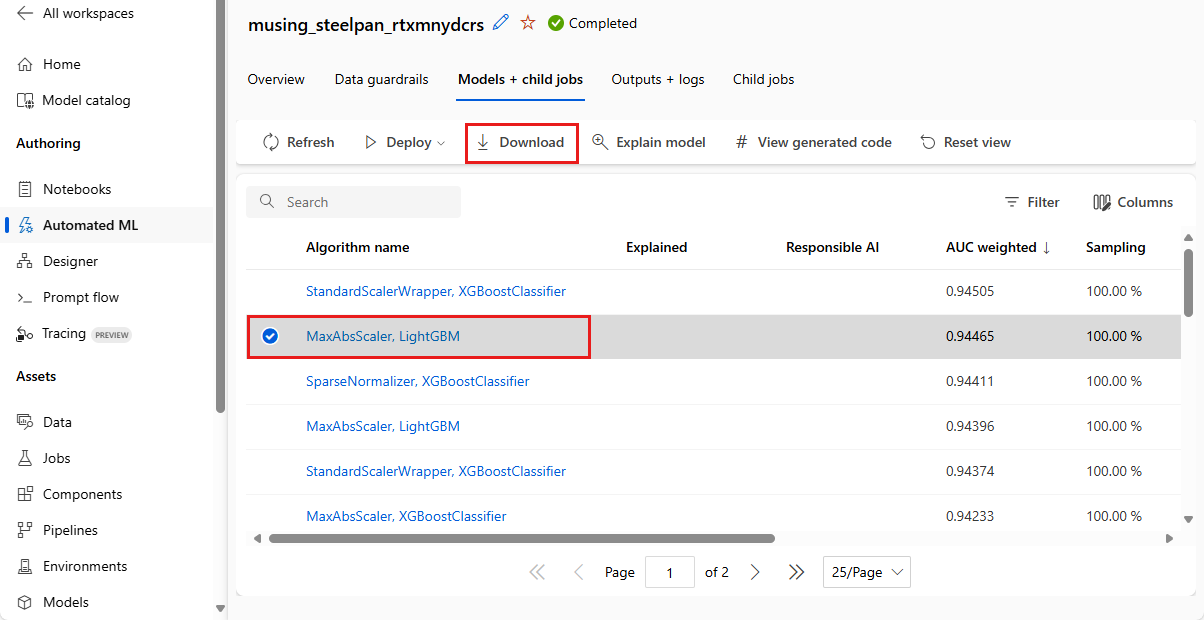
Choose the Models + child jobs tab.
Select the model you want to use. After you select a model, the Download button is enabled.
Choose Download.
You receive a .zip file that contains:
A conda environment specification file named conda_env_<VERSION>.yml
A Python scoring file named scoring_file_<VERSION>.py
The model itself, in a Python .pkl file named model.pkl
To deploy using these files, you can use either the studio or the Azure CLI.
In Azure Machine Learning studio, go to the Models page.
Select Select + Register > From local files.
Register the model you downloaded from Automated ML run.
Go to the Environments page, select Custom environment, and select + Create to create an environment for your deployment. Use the downloaded conda yaml to create a custom environment.
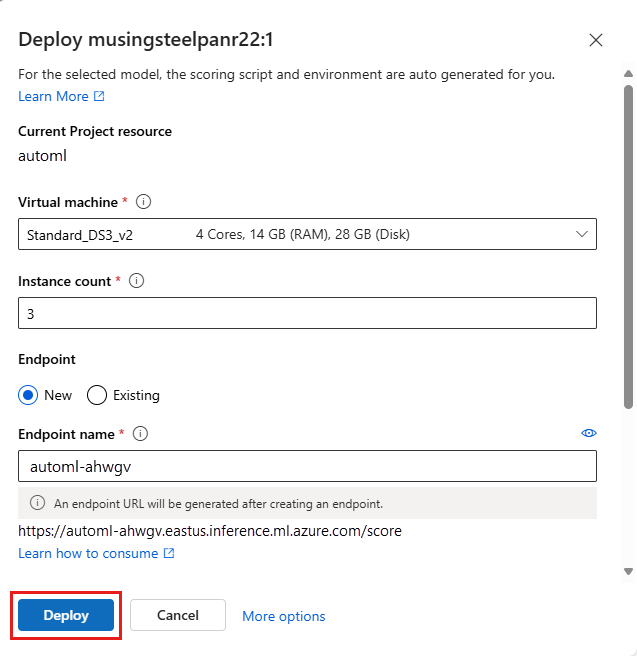
Select the model, and from the Deploy dropdown menu, select Real-time endpoint.
Complete all the steps in wizard to create an online endpoint and deployment.
To create a deployment from the CLI, you need the Azure CLI with the ML v2 extension. Run the following command to confirm:
az version
If you receive an error message or you don't see Extensions: ml in the response, follow the steps at Install and set up the CLI (v2).
Sign in.
az login
If you have access to multiple Azure subscriptions, you can set your active subscription.
az account set -s "<YOUR_SUBSCRIPTION_NAME_OR_ID>"
Set the default resource group and workspace to where you want to create the deployment.
az configure --defaults group=$GROUP workspace=$WORKSPACE location=$LOCATION
Put the scoring file in its own directory
Create a directory called src. Save the scoring file that you downloaded to it. This directory is uploaded to Azure and contains all the source code necessary to do inference. For an AutoML model, there's just the single scoring file.
Create the endpoint and deployment yaml file
To create an online endpoint from the command line, create an endpoint.yml and a deployment.yml file. The following code, taken from the Azure Machine Learning Examples repo, shows the endpoints/online/managed/sample/, which captures all the required inputs.
You need to modify this file to use the files you downloaded from the AutoML Models page.
Create a file automl_endpoint.yml and automl_deployment.yml and paste the contents of the preceding examples.
Change the value of the name of the endpoint. The endpoint name needs to be unique within the Azure region. The name for an endpoint must start with an upper- or lowercase letter and only consist of '-'s and alphanumeric characters.
In the automl_deployment.yml file, change the value of the keys at the following paths.
Path
Change to
model:path
The path to the model.pkl file you downloaded.
code_configuration:code:path
The directory in which you placed the scoring file.
code_configuration:scoring_script
The name of the Python scoring file (scoring_file_<VERSION>.py).
environment:conda_file
A file URL for the downloaded conda environment file (conda_env_<VERSION>.yml).
Create a directory called src. Save the scoring file that you downloaded to it. This directory is uploaded to Azure and contains all the source code necessary to do inference. For an AutoML model, there's just the single scoring file.
Connect to Azure Machine Learning workspace
Import the required libraries.
# import required libraries
from azure.ai.ml import MLClient
from azure.ai.ml.entities import (
    ManagedOnlineEndpoint,
    ManagedOnlineDeployment,
    Model,
    Environment,
    CodeConfiguration,
)
from azure.identity import DefaultAzureCredential
Configure workspace details and get a handle to the workspace.
# enter details of your Azure Machine Learning workspace
subscription_id = "<SUBSCRIPTION_ID>"
resource_group = "<RESOURCE_GROUP>"
workspace = "<AZUREML_WORKSPACE_NAME>"
# get a handle to the workspace
ml_client = MLClient(
    DefaultAzureCredential(), subscription_id, resource_group, workspace
)
Create the endpoint and deployment
Create the managed online endpoints and deployments.
Configure online endpoint.
Tip
name: The name of the endpoint. It must be unique in the Azure region. The name for an endpoint must start with an upper- or lowercase letter and only consist of '-'s and alphanumeric characters. For more information on the naming rules, see endpoint limits.
auth_mode : Use key for key-based authentication. Use aml_token for Azure Machine Learning token-based authentication. A key doesn't expire, but aml_token does expire. For more information on authenticating, see Authenticate to an online endpoint.
# Creating a unique endpoint name with current datetime to avoid conflicts
import datetime

online_endpoint_name = "endpoint-" + datetime.datetime.now().strftime("%m%d%H%M%f")

# create an online endpoint
endpoint = ManagedOnlineEndpoint(
    name=online_endpoint_name,
    description="this is a sample online endpoint",
    auth_mode="key",
)
Create the endpoint.
Using the MLClient created earlier, create the Endpoint in the workspace. This command starts the endpoint creation. It returns a confirmation response while the endpoint creation continues.
ml_client.begin_create_or_update(endpoint)
Configure online deployment.
A deployment is a set of resources required for hosting the model that does the actual inferencing. Create a deployment for our endpoint using the ManagedOnlineDeployment class.
In this example, the files you downloaded from the AutoML Models page are in the src directory. You can modify the parameters in the code to suit your situation.
Parameter
Change to
model:path
The path to the model.pkl file you downloaded.
code_configuration:code:path
The directory in which you placed the scoring file.
code_configuration:scoring_script
The name of the Python scoring file (scoring_file_<VERSION>.py).
environment:conda_file
A file URL for the downloaded conda environment file (conda_env_<VERSION>.yml).
Create the deployment.
Using the MLClient created earlier, create the deployment in the workspace. This command starts creating the deployment. It returns a confirmation response while the deployment creation continues.
 Azure CLI ml extension v2 (current)