Nota
L'accesso a questa pagina richiede l'autorizzazione. È possibile provare ad accedere o modificare le directory.
L'accesso a questa pagina richiede l'autorizzazione. È possibile provare a modificare le directory.
Si applica a: ✔️ Macchine virtuali Linux ✔️ Macchine virtuali Windows ✔️ Set di scalabilità flessibili ✔️ Set di scalabilità uniformi
In questo articolo si crea una risorsa di accesso al disco e si usano endpoint privati per limitare l'esportazione e l'importazione di dischi gestiti tramite un collegamento privato dai client nella rete virtuale di Azure. Questa configurazione garantisce che le operazioni di importazione/esportazione su dischi con questa configurazione si verifichino all'interno della rete virtuale di Azure.
Seguendo la procedura descritta in questo articolo, l'importazione e l'esportazione dei dischi non influisce sulla capacità delle macchine virtuali di accedere direttamente ai dischi collegati.
Prerequisiti
None
Limitazioni
- Non è possibile importare o esportare più di 100 dischi o snapshot contemporaneamente con la stessa risorsa di accesso al disco
- Non è possibile caricare in un disco con una risorsa di accesso al disco e un set di crittografia del disco
- Oltre alle destinazioni di scalabilità che si applicano ai singoli dischi, le risorse di accesso al disco hanno più destinazioni di scalabilità incentrate sull'ingresso/uscita dei dati. Questi limiti si applicano cumulativamente a tutti i dischi associati a una risorsa di accesso al disco. Per informazioni dettagliate, vedere qui
Creare una risorsa di accesso al disco
Per usare il collegamento privato per esportare e importare dischi gestiti, creare una risorsa di accesso al disco e collegarla a una rete virtuale nella stessa sottoscrizione creando un endpoint privato. Associare quindi un disco o uno snapshot a un'istanza di accesso al disco.
Accedere al portale di Azure e passare a Accesso al disco.
Selezionare + Crea per creare una nuova risorsa di accesso al disco.
Nel riquadro Crea un accesso a un disco selezionare la sottoscrizione e un gruppo di risorse. In Dettagli istanza immettere un nome e selezionare un'area.
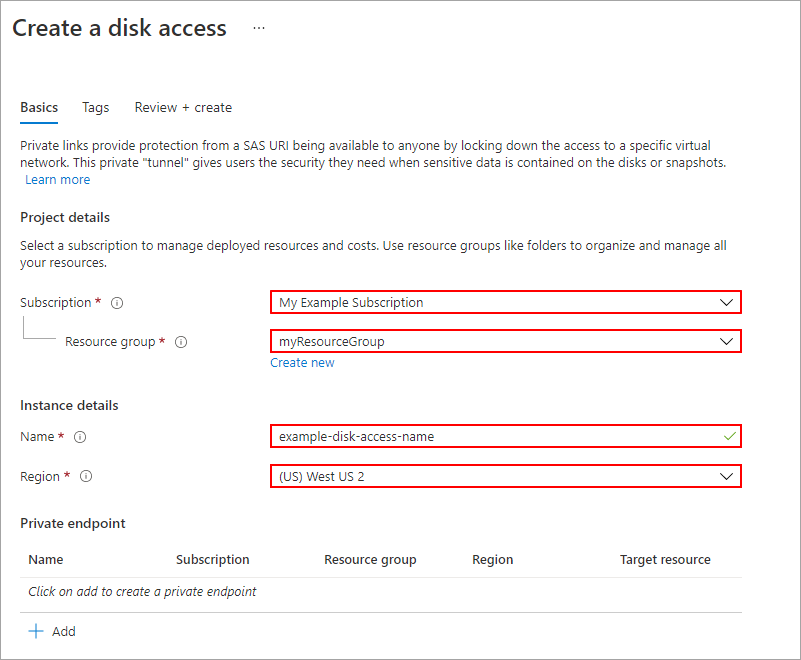
Selezionare Rivedi e crea.
Dopo aver creato la risorsa, passare direttamente a essa.

Creare un endpoint privato
Successivamente, sarà necessario creare un endpoint privato e configurarlo per l'accesso al disco.
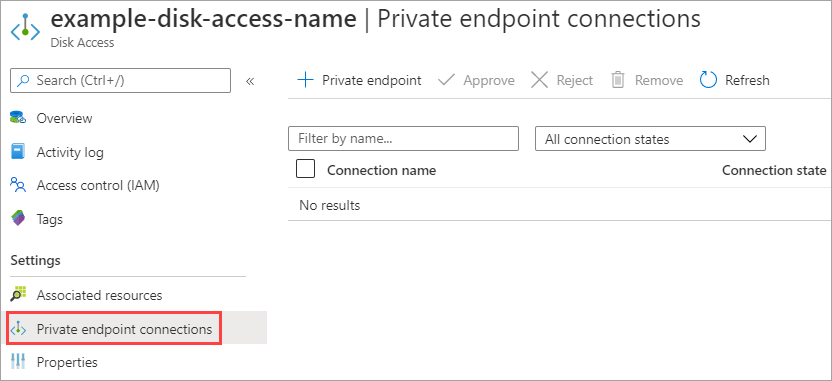
Dalla risorsa di accesso al disco, in Impostazioni selezionare Connessioni endpoint privato.
Selezionare + Endpoint privato.
Nel riquadro Crea un endpoint privato selezionare un gruppo di risorse.
Specificare un nome e selezionare la stessa area in cui è stata creata la risorsa di accesso al disco.

Selezionare Avanti: Risorsa.
Nel riquadro Risorsa selezionare Connetti a una risorsa di Azure nella directory.
In Tipo di risorsaselezionare Microsoft.Compute/diskAccesses.
In Risorsa selezionare la risorsa di accesso al disco creata in precedenza.
Lasciare la sotto-risorsa di destinazione come dischi.
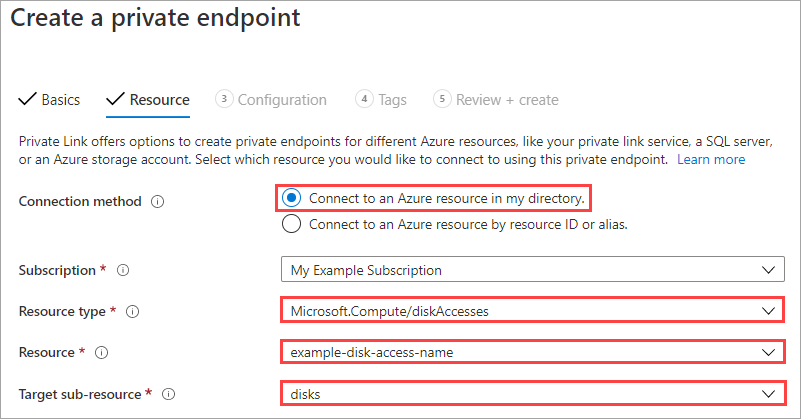
Selezionare Avanti : Configurazione.
Selezionare la rete virtuale a cui limitare l'importazione e l'esportazione del disco. Ciò impedisce l'importazione e l'esportazione del disco in altre reti virtuali.
Annotazioni
Se è abilitato un gruppo di sicurezza di rete per la subnet selezionata, verrà disabilitato solo per gli endpoint privati in questa subnet. Altre risorse in questa subnet manterranno l'applicazione del gruppo di sicurezza di rete.
Selezionare la subnet appropriata.
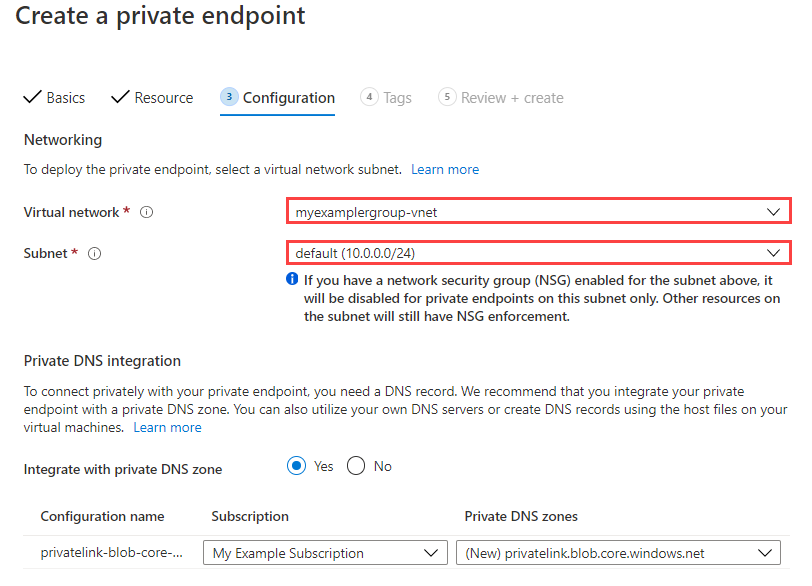
Selezionare Rivedi e crea.
Abilitare l'endpoint privato sul disco
Segui questi passaggi:
Passare al disco che si vuole configurare.
In Impostazioni selezionare Rete.
Selezionare Endpoint privato (tramite accesso al disco) e selezionare l'accesso al disco creato in precedenza.
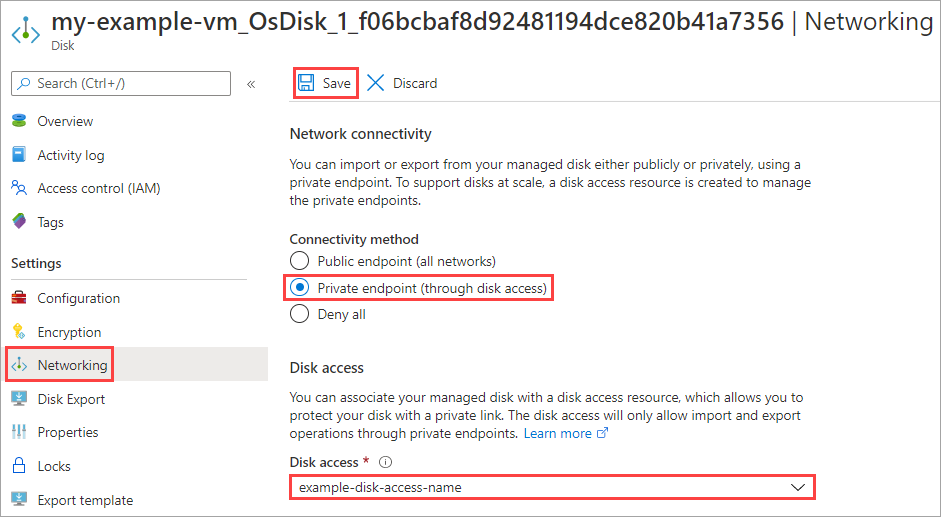
Seleziona Salva.
È stato configurato un collegamento privato che è possibile usare per importare ed esportare il disco gestito. È possibile importare usando l'interfaccia della riga di comando di Azure o il modulo Azure PowerShell. È possibile esportare dischi rigidi virtuali Windows o Linux .