Nota
L'accesso a questa pagina richiede l'autorizzazione. È possibile provare ad accedere o modificare le directory.
L'accesso a questa pagina richiede l'autorizzazione. È possibile provare a modificare le directory.
This tutorial guides you through the steps for logging into PlayFab using Steam through SteamWorks and Unity.
Prerequisites
Before beginning, you should have:
- A Unity project with an imported PlayFab SDK, and a configured title ID.
- A Steam Application with:
- The AppID already set up. The AppID can be acquired through the Steam Direct (Formerly Greenlight) process.
- A Steam Publisher Web API Key. To generate a publisher key, follow Creating a Publisher Web API Key in the Steamworks documentation.
- Familiarity with Login basics and Best Practices.
Setting up a PlayFab title with Steam integration
To enable support for Steam authorization, PlayFab requires you to enable the Steam add-on.
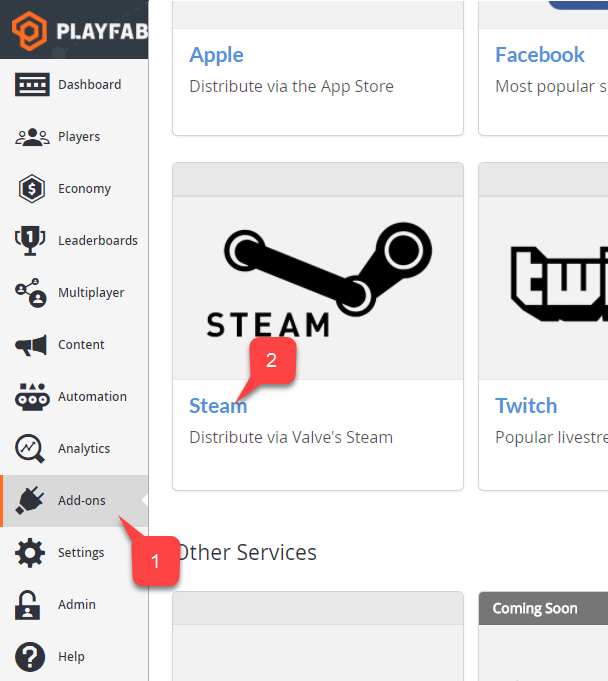
Go to your Game Manager page:
- Select the Add-ons menu item.
- In the list of available Add-ons, locate Steam and select the title link:
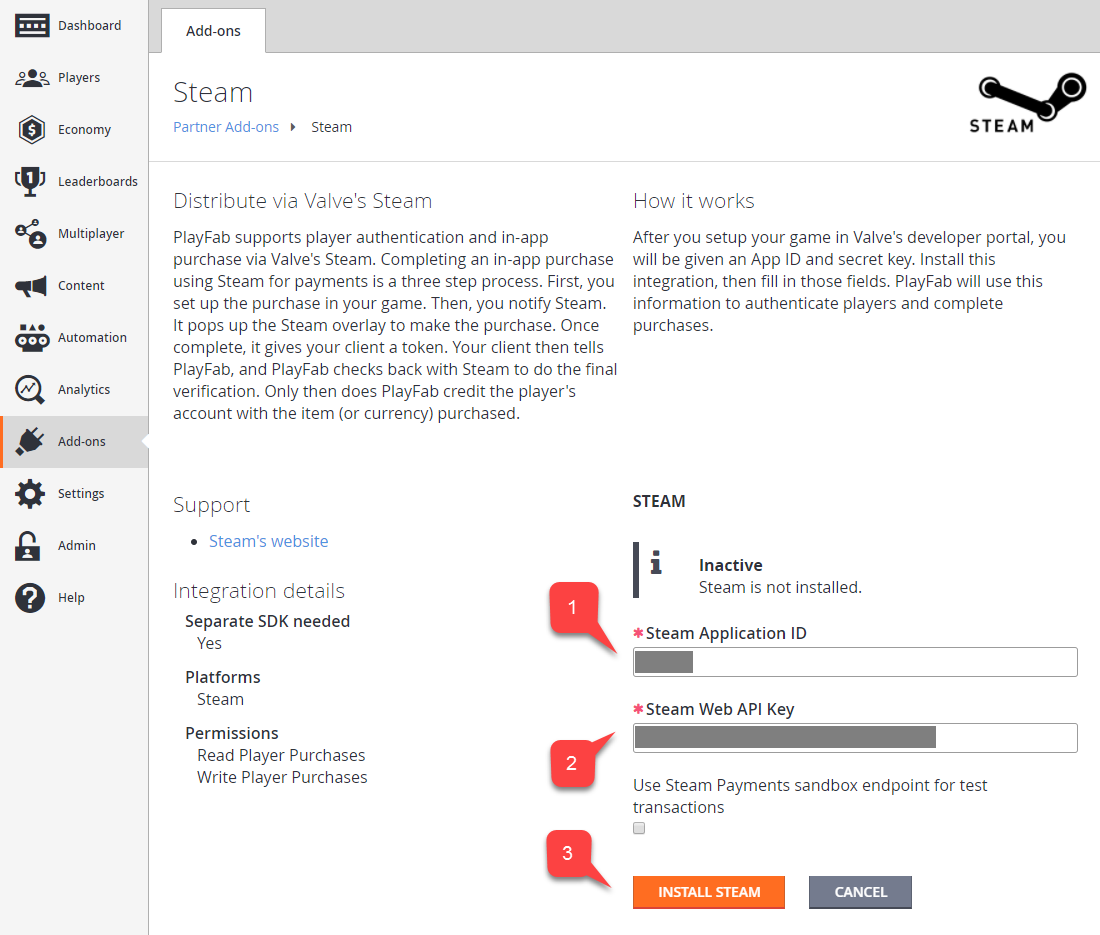
- Enter your App ID.
- Enter the Web API Key.
- Then select Install Steam.
Setting up a Unity project
Start by downloading the latest release of Steamworks.NET from the Releases page.
- Get the Unity Package version of the release, and import it into the project.
- Once you import the package, close Unity.
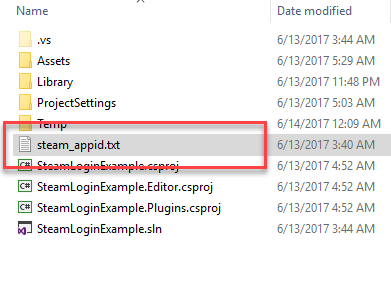
- Navigate to the Project root folder.
- Locate the steam_appid.txt file.
- Open the file and replace the App ID value with your own.
Re-open Unity and create a new scene.
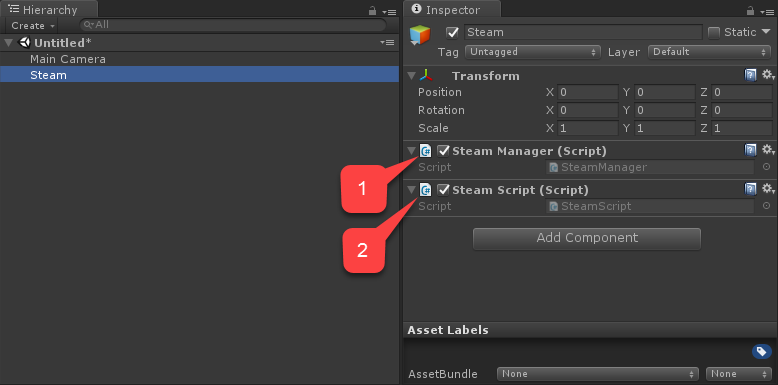
Inside that scene, create a new GameObject called Steam:
- Add a SteamManager component to the GameObject. This component is part of Steamworks.Net.
- Create and add a SteamScript component to the GameObject.
The following example shows the code for the SteamScript component.
using System.Text;
using PlayFab;
using PlayFab.ClientModels;
using Steamworks;
using UnityEngine;

public class SteamScript : MonoBehaviour
{
    protected Callback<GetTicketForWebApiResponse_t> m_OnGetSteamAuthTicket;

    // Alternatively, you can use this callback if you choose to call SteamUser.GetAuthSessionTicket(...) instead
    // TicketIsServiceSpecific in the PlayFabLoginRequest should be false in this case
    // protected Callback<GetAuthSessionTicketResponse_t> m_OnGetSteamAuthTicketAlternate;

    private HAuthTicket m_hTicket;

    public void Awake()
    {
        m_OnGetSteamAuthTicket = Callback<GetTicketForWebApiResponse_t>.Create(OnGetSteamAuthTicket);
    }

    public void OnGUI()
    {
        if (GUILayout.Button("Log In") && SteamManager.Initialized)
        {
            GetSteamAuthTicket();
        }
    }

    private void GetSteamAuthTicket()
    {
        m_hTicket = SteamUser.GetAuthTicketForWebApi("AzurePlayFab");

        if (m_hTicket == HAuthTicket.Invalid)
        {
            Debug.Log("Failed to request steam auth ticket");
        }
        else
        {
            Debug.Log("Steam auth ticket requested");
        }
    }

    private void OnGetSteamAuthTicket(GetTicketForWebApiResponse_t pCallback)
    {
        Debug.Log("Steam auth ticket callback invoked");

        if (pCallback.m_eResult != EResult.k_EResultOK)
        {
            Debug.Log("Failed to get steam auth ticket: " + pCallback.m_eResult);
        }

        StringBuilder sb = new();
        for (int i = 0; i < pCallback.m_cubTicket; ++i)
        {
            sb.AppendFormat("{0:x2}", pCallback.m_rgubTicket[i]);
        }

        PlayFabClientAPI.LoginWithSteam(new LoginWithSteamRequest
        {
            CreateAccount = true,
            SteamTicket = sb.ToString(),
            TicketIsServiceSpecific = true
        }, OnComplete, OnFailed);
    }

    private void OnComplete(LoginResult obj)
    {
        SteamUser.CancelAuthTicket(m_hTicket);
        Debug.Log("Success!");
    }

    private void OnFailed(PlayFabError error)
    {
        SteamUser.CancelAuthTicket(m_hTicket);
        Debug.Log("Failed PlayFab login: " + error.GenerateErrorReport());
    }
}
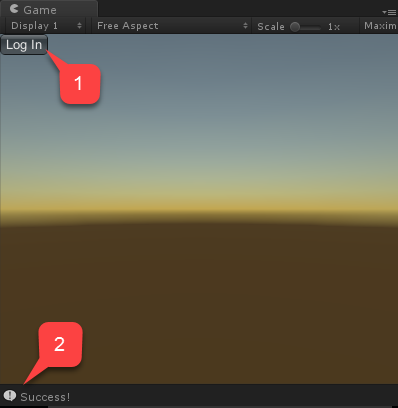
Testing
You may test right inside the editor:
- Run the scene and select the Log In button.
- The console message should appear after a moment, indicating the authentication result Success!.