Using the Portal
![]()
You may access the Freta portal here: https://freta.microsoft.com/
Default View
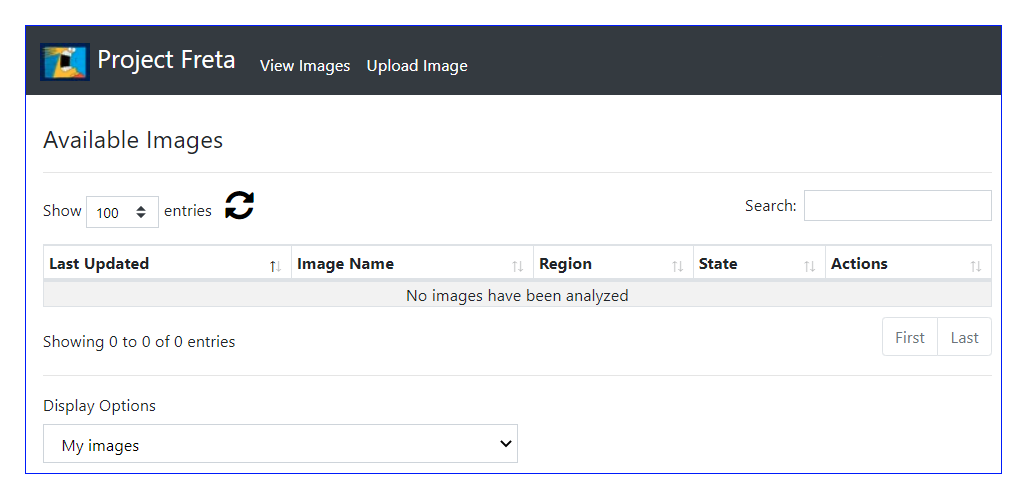
Upon authentication to the portal, you're presented with the following view:
After you either submit a few images or change the Display Options, your view might start to look like this:
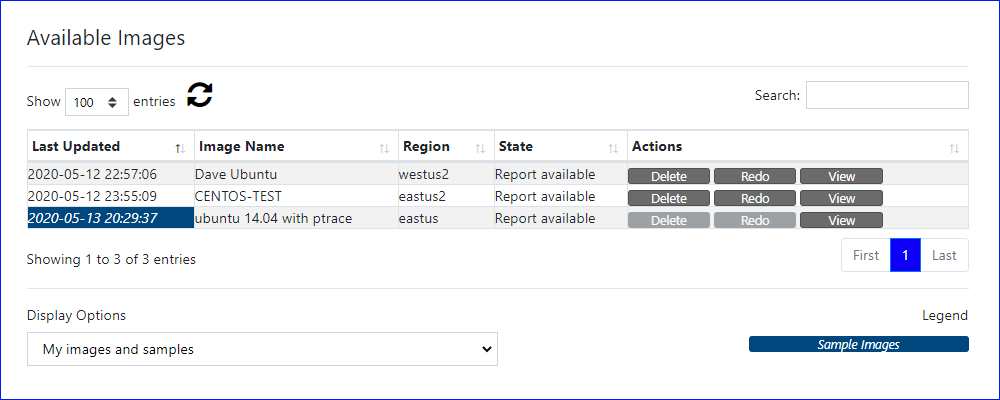
Let's walk through what's going on here. The following table describes each column of the reported data.
| Column | Description | Notes |
|---|---|---|
| Last Updated | Timestamp of the image submission | The background color indicates the image type; a key to the colors is found in the lower right of the view |
| Image Name | User-defined image name | This name may be changed by the image owner |
| Region | The Azure region that stores the image | Set at submission, cannot be changed |
| State | Status of image in the analysis workflow | Submitted, Report Available, and indications of stale analysis or error condition |
| Actions | Functions that may be performed on the image | Note that if a button is grayed out, you do not have rights to perform that function against the image |
Display Options
Your uploaded images are always visible in the table, and you may choose to optionally include the built-in sample images as well via Display Options drop down list.
Actions
There are three actions for each image. Note that only the image owner may delete or redo the analysis.
| Action | Description |
|---|---|
| Delete | Permanently remove this image |
| Redo | The Azure region that stores the image |
| View | Link to the front page of the Report |
Warning
Choosing to delete an image permanently removes the result record and associated image file. This is not recoverable.
Renaming an Image
Choosing to View the image redirects your browser to the image's Report.
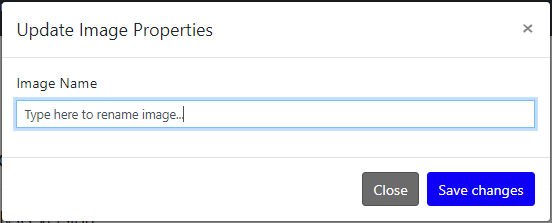
You may modify an image's name by clicking the Image Properties button at the top right of any image report page; this will launch the Update Image Properties dialog box. Provide the new name and click Save changes.
Exporting Report Data
Choosing to View the image redirects your browser to the image's Report. Note the Downloads links under the report name at the top-left:
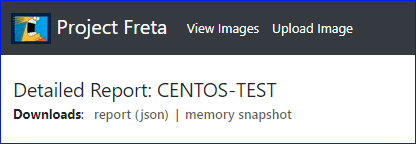
Click the report (json) link to download the report data in JSON format.
Click the memory snapshot to download the originally-uploaded memory snapshot. (Note that this file may several gigabytes in length.)
Submitting an Image
Once you've obtained a memory snapshot, you may submit it to portal. From the default view, click the Upload Image link on the left side of the header bar. This will bring you to the Upload Image page:
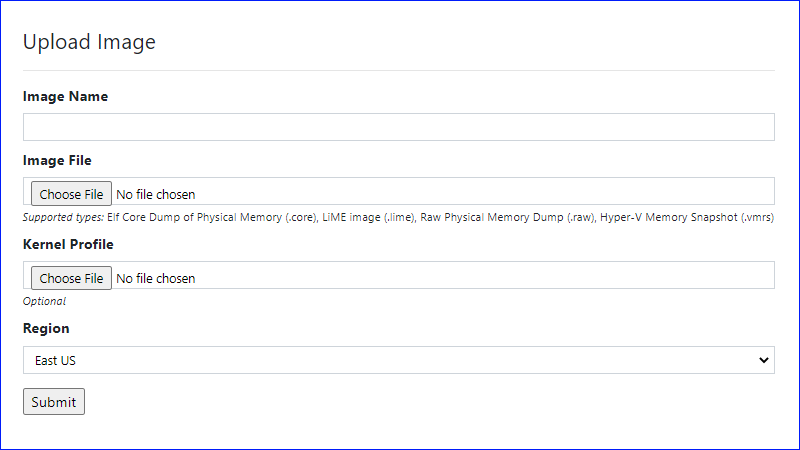
The following table explains each of the input values:
| Column | Description |
|---|---|
| Image Name | Choose any name to describe this image. Example: Ubuntu-test or production-sql-05. |
| Image File | Click on Choose File to locate the memory image you'd like to submit |
| Kernel Profile | (Optional) Click on Choose File to locate the kernel profile associated with your image. This is only necessary if you are submitting an unsupported kernel for analysis. |
| Region | Please select the Azure region to host the image (typically the one most geographically proximate to you) |
Once you've provided these options, click the Submit button to submit
the image for analysis. Please find this image in the list to track its
progress via the State column.