フォルダー内のすべての Excel ファイルでスクリプトを実行する
このプロジェクトは、OneDrive for Businessのフォルダー内にあるすべてのファイルに対して一連の自動化タスクを実行します。 SharePoint フォルダーでも使用できます。 Excel ファイルに対して計算を実行し、書式設定を追加し、同僚 @mentions コメントを挿入します。
Excel ファイルのサンプル
このサンプルに必要なすべてのブックの highlight-alert-excel-files.zip をダウンロードします。 これらのファイルを Sales という名前のフォルダーに抽出します。 次のスクリプトをスクリプト コレクションに追加して、サンプルを自分で試してみてください。
サンプル コード: 書式設定を追加し、コメントを挿入する
これは、個々のブックで実行されるスクリプトです。 Excel で、[新しいスクリプトの自動化] を>使用してコードを貼り付け、スクリプトを保存します。 レビュー スクリプトとして保存し、サンプルを自分で試してください。
function main(workbook: ExcelScript.Workbook) {
  // Get the table named "Table1" in the workbook.
  const table1 = workbook.getTable("Table1");

  // If the table is empty, end the script.
  const rowCount = table1.getRowCount();
  if (rowCount === 0) {
    return;
  }

  // Force the workbook to be completely recalculated.
  workbook.getApplication().calculate(ExcelScript.CalculationType.full);

  // Get the "Amount Due" column from the table.
  const amountDueColumn = table1.getColumnByName('Amount Due');
  const amountDueValues = amountDueColumn.getRangeBetweenHeaderAndTotal().getValues();

  // Find the highest amount that's due.
  let highestValue = amountDueValues[0][0];
  let row = 0;
  for (let i = 1; i < amountDueValues.length; i++) {
    if (amountDueValues[i][0] > highestValue) {
      highestValue = amountDueValues[i][0];
      row = i;
    }
  }

  let highestAmountDue = table1.getColumn("Amount due").getRangeBetweenHeaderAndTotal().getRow(row);

  // Set the fill color to yellow for the cell with the highest value in the "Amount Due" column.
  highestAmountDue.getFormat().getFill().setColor("FFFF00");

  // Insert an @mention comment in the cell.
  workbook.addComment(highestAmountDue, {
    mentions: [{
      email: "AdeleV@M365x904181.OnMicrosoft.com",
      id: 0,
      name: "Adele Vance"
    }],
    richContent: "<at id=\"0\">Adele Vance</at> Please review this amount"
  }, ExcelScript.ContentType.mention);
}
Power Automate フロー: フォルダー内のすべてのブックでスクリプトを実行します
このフローでは、"Sales" フォルダー内のすべてのブックでスクリプトが実行されます。
新しい インスタント クラウド フローを作成します。
[ フローを手動でトリガーする ] を選択し、[ 作成] を選択します。
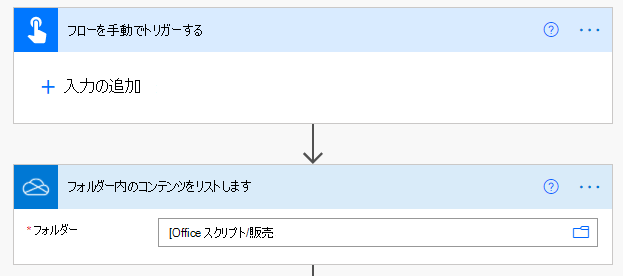
フロー ビルダーで、[アクションの追加] + ボタンを選択 します。 OneDrive for Business コネクタの [フォルダー内のファイルの一覧表示] アクションを使用します。 アクションには次の値を使用します。
- フォルダー: /Sales (ファイル ピッカーによって選択)
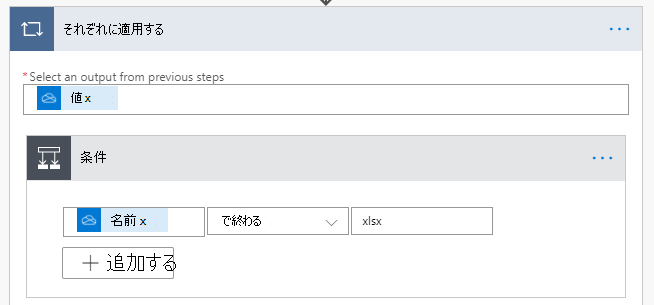
ブックのみが選択されていることを確認します。 新しい 条件 コントロール アクションを追加します。 条件には次の値を使用します。
- 値の選択: 名前 (フォルダー内のファイルの一覧表示の動的コンテンツ)
- で終わる: (ドロップダウン リストから)
- 値の選択: .xlsx
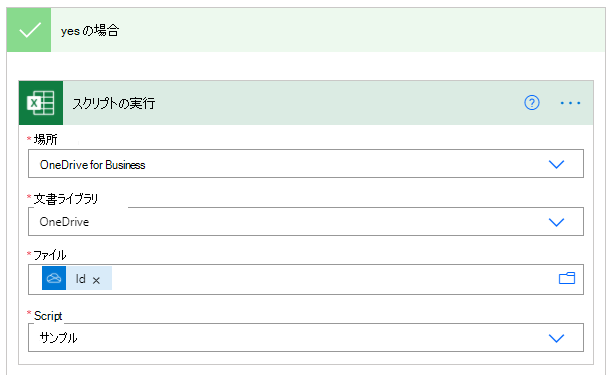
[True] ブランチで、新しいアクションを追加します。 Excel Online (Business) コネクタの [スクリプトの実行] アクションを選択します。 アクションには次の値を使用します。
- 場所: OneDrive for Business
- ドキュメント ライブラリ: OneDrive
- ファイル: ID (フォルダー内のファイルの一覧からの動的コンテンツ)
- スクリプト: レビュー スクリプト
フローを保存します。 フロー デザイナーは次の図のようになります。
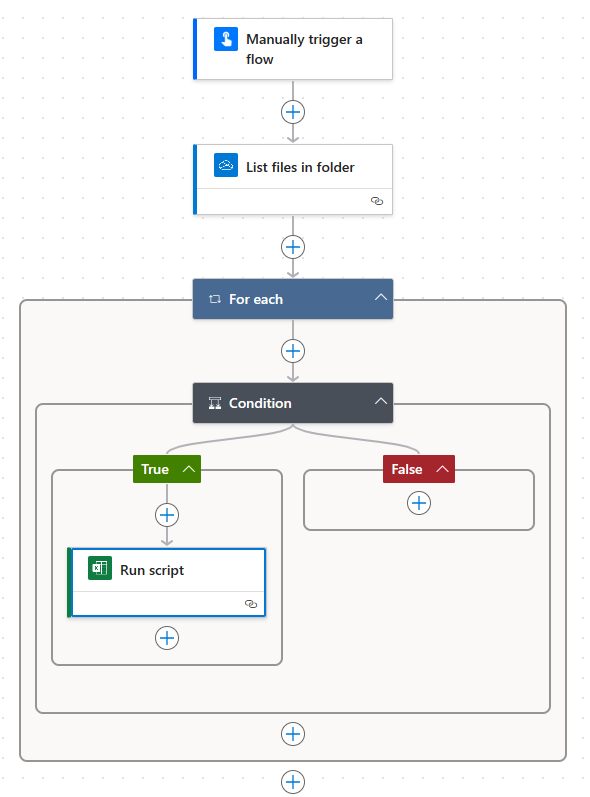
ぜひ、お試しください。 フロー エディター ページの [テスト ] ボタンを使用するか、[ マイ フロー ] タブでフローを実行します。プロンプトが表示されたら、必ずアクセスを許可してください。
トレーニング ビデオ: フォルダー内のすべての Excel ファイルに対してスクリプトを実行する
Office Scripts
フィードバック
以下は間もなく提供いたします。2024 年を通じて、コンテンツのフィードバック メカニズムとして GitHub の issue を段階的に廃止し、新しいフィードバック システムに置き換えます。 詳細については、「https://aka.ms/ContentUserFeedback」を参照してください。
フィードバックの送信と表示