著者: Tom Dykstra
Contoso University のサンプル Web アプリケーションでは、Entity Framework 5 Code First と Visual Studio 2012 を使用して ASP.NET MVC 4 アプリケーションを作成する方法を示します。 チュートリアル シリーズについては、シリーズの最初のチュートリアルを参照してください。
Note
解決できない問題が発生した場合は、完了した章をダウンロードして、問題を再現してみてください。 通常、完成したコードと自分のコードを比較することで、問題の解決策を見つけることができます。 一般的なエラーとその解決方法については、「エラーと回避策」をご覧ください。
前のチュートリアルでは、Entity Framework と SQL Server LocalDB を使ってデータを保存して表示する MVC アプリケーションを作成しました。 このチュートリアルでは、MVC スキャフォールディングがコントローラーとビュー用に自動的に作成する CRUD (作成、読み取り、更新、削除) コードを確認およびカスタマイズします。
Note
コントローラーとデータ アクセス層の間に抽象化レイヤーを作成するためにリポジトリ パターンを実装することは、よく行われることです。 これらのチュートリアルが複雑にならないようにするために、このシリーズの後のチュートリアルまでリポジトリを実装しません。
このチュートリアルでは、次の Web ページを作成します。
![[学生の削除] ページを示すスクリーンショット。](implementing-basic-crud-functionality-with-the-entity-framework-in-asp-net-mvc-application/_static/image4.png)
Details ページの作成
Students Index ページのスキャフォールディングされたコードでは、Enrollments プロパティが省略されています。これは、このプロパティがコレクションを保持しているためです。 Details ページでは、コレクションの内容を HTML テーブルで表示します。
Controllers\StudentController.cs に含まれる Details ビューのアクション メソッドでは、Find メソッドを使って 1 つの Student エンティティを取得しています。
public ActionResult Details(int id = 0)
{
    Student student = db.Students.Find(id);
    if (student == null)
    {
        return HttpNotFound();
    }
    return View(student);
}
キー値は id パラメーターとしてメソッドに渡され、[Index] ページの Details ハイパーリンクのルート データから取得されます。
Views\Student\Details.cshtml を開きます。 次の例で示すように、
DisplayForヘルパーを使って各フィールドが表示されます。<div class="display-label"> @Html.DisplayNameFor(model => model.LastName) </div> <div class="display-field"> @Html.DisplayFor(model => model.LastName) </div>次の例で示すように、
EnrollmentDateフィールドの後から、終了タグfieldsetの直前までに、登録の一覧を表示するコードを追加します。<div class="display-label"> @Html.LabelFor(model => model.Enrollments) </div> <div class="display-field"> <table> <tr> <th>Course Title</th> <th>Grade</th> </tr> @foreach (var item in Model.Enrollments) { <tr> <td> @Html.DisplayFor(modelItem => item.Course.Title) </td> <td> @Html.DisplayFor(modelItem => item.Grade) </td> </tr> } </table> </div> </fieldset> <p> @Html.ActionLink("Edit", "Edit", new { id=Model.StudentID }) | @Html.ActionLink("Back to List", "Index") </p>このコードは、
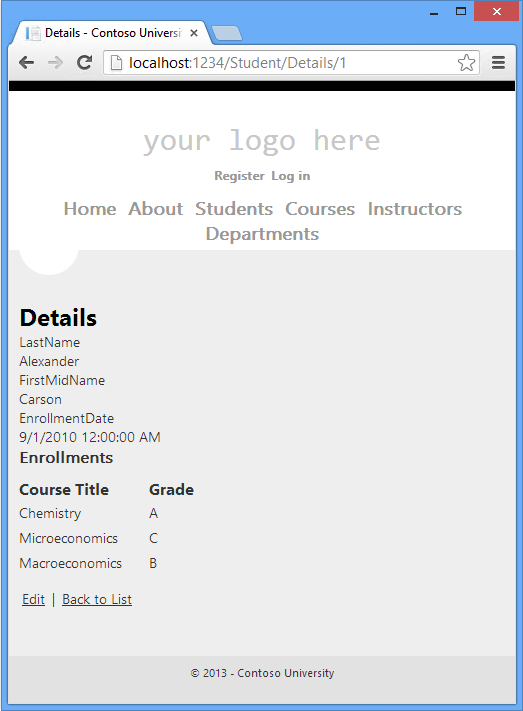
Enrollmentsナビゲーション プロパティ内のエンティティをループ処理します。 プロパティ内のEnrollmentエンティティごとに、コースのタイトルとグレードが表示されます。 コース タイトルは、EnrollmentsエンティティのCourseナビゲーション プロパティに格納されているCourseエンティティから取得されます。 このデータはすべて、必要なときにデータベースから自動的に取得されます。 (つまり、ここでは遅延読み込みを使用しています。Coursesナビゲーション プロパティに "一括読み込み" を指定しなかったため、そのプロパティに初めてアクセスしようとすると、データを取得するためのクエリがデータベースに送信されます。遅延読み込みと一括読み込みの詳細については、このシリーズの後半の関連データの読み取りに関するチュートリアルを参照してください。)[Students] タブを選択し、Alexander Carson の [Details] リンクをクリックして、ページを実行します。 選んだ受講者のコースとグレードの一覧が表示されます。
Create ページの更新
Controllers\StudentController.cs で、
HttpPost``Createアクション メソッドを次のコードに置き換えて、スキャフォールディングされたメソッドにtry-catchブロックと Bind 属性を追加します。[HttpPost] [ValidateAntiForgeryToken] public ActionResult Create( [Bind(Include = "LastName, FirstMidName, EnrollmentDate")] Student student) { try { if (ModelState.IsValid) { db.Students.Add(student); db.SaveChanges(); return RedirectToAction("Index"); } } catch (DataException /* dex */) { //Log the error (uncomment dex variable name after DataException and add a line here to write a log. ModelState.AddModelError("", "Unable to save changes. Try again, and if the problem persists see your system administrator."); } return View(student); }このコードは、ASP.NET MVC モデル バインダーによって作成された
StudentエンティティをStudentsエンティティ セットに追加した後、変更をデータベースに保存します。 ("モデル バインダー" とは、フォームによって送信されたデータの操作を容易にする ASP.NET MVC の機能です。モデル バインダーは、ポストされたフォーム値を CLR 型に変換して、パラメーター内のアクション メソッドに渡します。この例のモデル バインダーは、Formコレクションからのプロパティ値を使って、Studentエンティティを自動的にインスタンス化します。)ValidateAntiForgeryToken属性は、クロスサイト リクエスト フォージェリ攻撃を防ぐのに役立ちます。
> [!WARNING]
> Security - The `Bind` attribute is added to protect against *over-posting*. For example, suppose the `Student` entity includes a `Secret` property that you don't want this web page to update.
>
> [!code-csharp[Main](implementing-basic-crud-functionality-with-the-entity-framework-in-asp-net-mvc-application/samples/sample5.cs?highlight=7)]
>
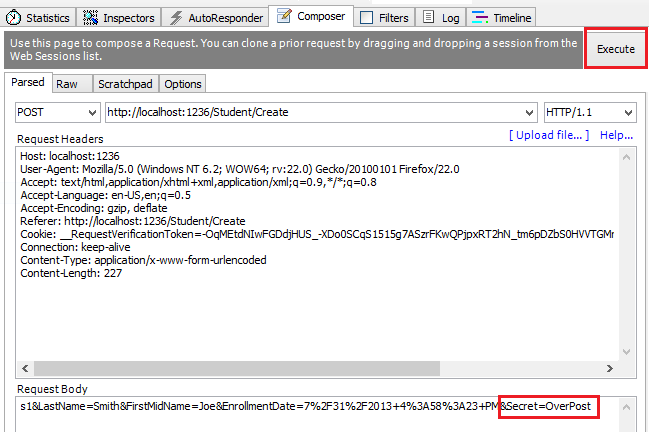
> Even if you don't have a `Secret` field on the web page, a hacker could use a tool such as [fiddler](http://fiddler2.com/home), or write some JavaScript, to post a `Secret` form value. Without the [Bind](https://msdn.microsoft.com/library/system.web.mvc.bindattribute(v=vs.108).aspx) attribute limiting the fields that the model binder uses when it creates a `Student` instance*,* the model binder would pick up that `Secret` form value and use it to update the `Student` entity instance. Then whatever value the hacker specified for the `Secret` form field would be updated in your database. The following image shows the fiddler tool adding the `Secret` field (with the value "OverPost") to the posted form values.
>
> 
>
> The value "OverPost" would then be successfully added to the `Secret` property of the inserted row, although you never intended that the web page be able to update that property.
>
> It's a security best practice to use the `Include` parameter with the `Bind` attribute to *allowed attributes* fields. It's also possible to use the `Exclude` parameter to *blocked attributes* fields you want to exclude. The reason `Include` is more secure is that when you add a new property to the entity, the new field is not automatically protected by an `Exclude` list.
>
> Another alternative approach, and one preferred by many, is to use only view models with model binding. The view model contains only the properties you want to bind. Once the MVC model binder has finished, you copy the view model properties to the entity instance.
Other than the `Bind` attribute, the `try-catch` block is the only change you've made to the scaffolded code. If an exception that derives from [DataException](https://msdn.microsoft.com/library/system.data.dataexception.aspx) is caught while the changes are being saved, a generic error message is displayed. [DataException](https://msdn.microsoft.com/library/system.data.dataexception.aspx) exceptions are sometimes caused by something external to the application rather than a programming error, so the user is advised to try again. Although not implemented in this sample, a production quality application would log the exception (and non-null inner exceptions ) with a logging mechanism such as [ELMAH](https://code.google.com/p/elmah/).
The code in *Views\Student\Create.cshtml* is similar to what you saw in *Details.cshtml*, except that `EditorFor` and `ValidationMessageFor` helpers are used for each field instead of `DisplayFor`. The following example shows the relevant code:
[!code-cshtml[Main](implementing-basic-crud-functionality-with-the-entity-framework-in-asp-net-mvc-application/samples/sample6.cshtml)]
*Create.cshtml* also includes `@Html.AntiForgeryToken()`, which works with the `ValidateAntiForgeryToken` attribute in the controller to help prevent [cross-site request forgery](../../security/xsrfcsrf-prevention-in-aspnet-mvc-and-web-pages.md) attacks.
No changes are required in *Create.cshtml*.
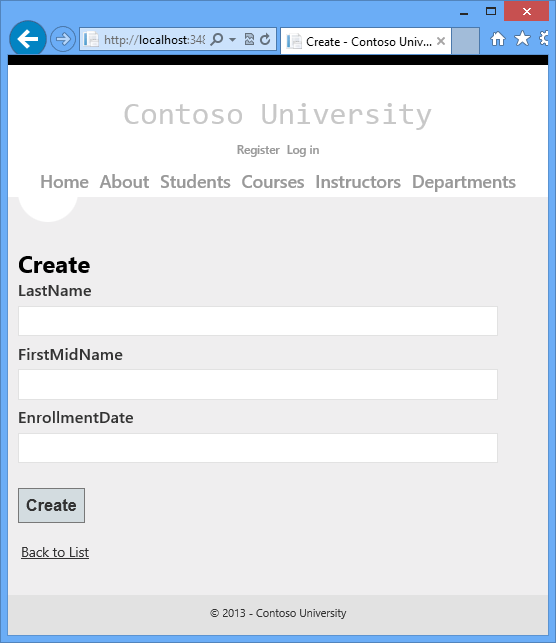
[Students] タブを選択し、[Create New] をクリックして、ページを実行します。
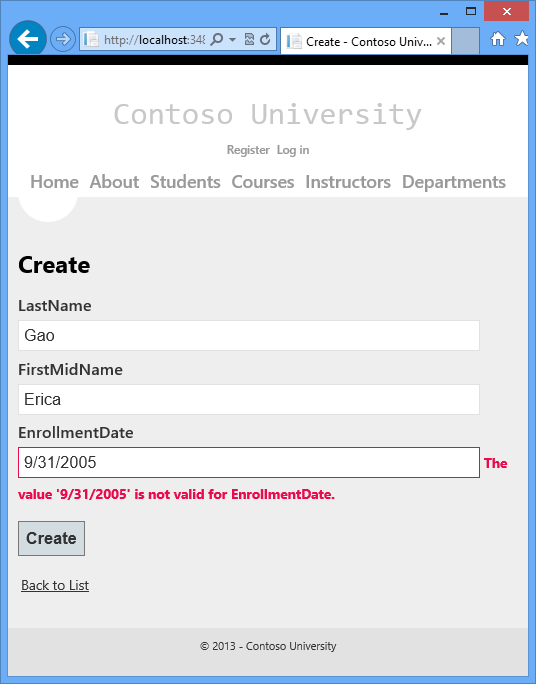
既定で何らかのデータ検証が機能します。 名前と無効な日付を入力し、[Create] をクリックすると、エラー メッセージが表示されます。
次の強調表示されたコードは、モデル検証チェックを示しています。
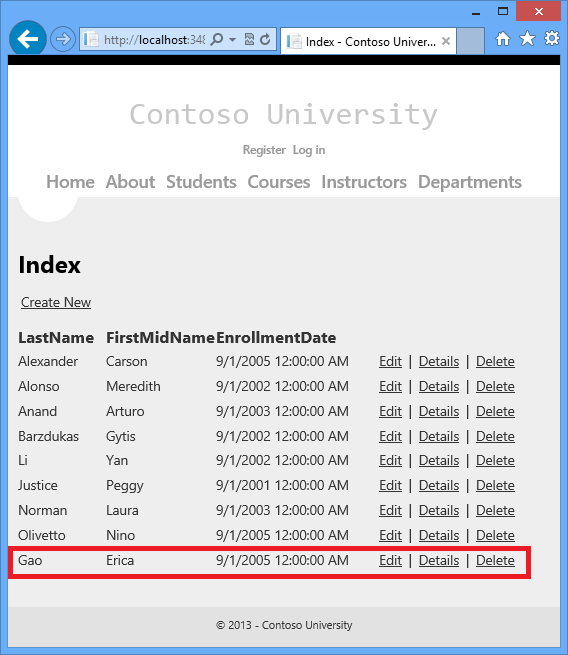
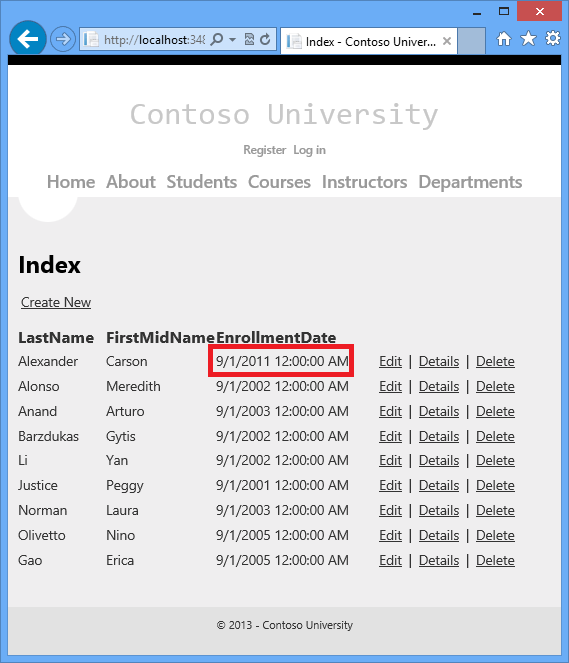
[HttpPost]
[ValidateAntiForgeryToken]
public ActionResult Create(Student student)
{
    if (ModelState.IsValid)
    {
        db.Students.Add(student);
        db.SaveChanges();
        return RedirectToAction("Index");
    }

    return View(student);
}
日付を 9/1/2005 などの有効な値に変更し、[Create] をクリックして、新しい学生が [Index] ページに表示されることを確認します。
Edit POST ページの更新
Controllers\StudentController.csでは、HttpGet Edit メソッド (HttpPost属性を持たないメソッド) は、Find メソッドを使用して、Details メソッドで確認したように、選択したStudent エンティティを取得します。 このメソッドを変更する必要はありません。
ただし、 HttpPost Edit アクション メソッドを次のコードに置き換えて、 try-catch ブロックと Bind 属性を追加します。
[HttpPost]
[ValidateAntiForgeryToken]
public ActionResult Edit(
   [Bind(Include = "StudentID, LastName, FirstMidName, EnrollmentDate")]
   Student student)
{
   try
   {
      if (ModelState.IsValid)
      {
         db.Entry(student).State = EntityState.Modified;
         db.SaveChanges();
         return RedirectToAction("Index");
      }
   }
   catch (DataException /* dex */)
   {
      //Log the error (uncomment dex variable name after DataException and add a line here to write a log.
      ModelState.AddModelError("", "Unable to save changes. Try again, and if the problem persists see your system administrator.");
   }
   return View(student);
}
このコードは、 HttpPost Create メソッドで確認したコードと似ています。 ただし、このコードでは、モデル バインダーによって作成されたエンティティをエンティティ セットに追加するのではなく、変更されたことを示すフラグをエンティティに設定します。 SaveChanges メソッドが呼び出されると、Modified フラグによって、Entity Framework はデータベースの行を更新する SQL ステートメントを作成します。 ユーザーが変更しなかった列を含め、データベース行のすべての列が更新され、コンカレンシーの競合は無視されます。 (このシリーズの後のチュートリアルで、コンカレンシーを処理する方法について説明します。)
エンティティの状態と Attach および SaveChanges メソッド
データベース コンテキストは、メモリ内のエンティティがデータベースの対応する行と同期しているかどうかを追跡しており、この情報により、SaveChanges メソッドを呼び出したときの処理が決まります。 たとえば、新しいエンティティを Add メソッドに渡すと、そのエンティティの状態は Added に設定されます。 その後、SaveChanges メソッドを呼び出すと、データベース コンテキストは SQL の INSERT コマンドを発行します。
エンティティは、次のいずれかの状態になる可能性があります。
Added. エンティティはデータベースにまだ存在しません。SaveChangesメソッドはINSERTステートメントを発行する必要があります。Unchanged.SaveChangesメソッドはこのエンティティに対し何も行う必要はありません。 データベースからエンティティを読み取ると、エンティティはこの状態で開始します。Modified. エンティティのプロパティ値の一部またはすべてが変更されています。SaveChangesメソッドはUPDATEステートメントを発行する必要があります。Deleted. エンティティには削除のマークが付けられています。SaveChangesメソッドはDELETEステートメントを発行する必要があります。Detached. エンティティはデータベース コンテキストによって追跡されていません。
デスクトップ アプリケーションにおいて、通常、状態の変更は自動的に設定されます。 デスクトップ タイプのアプリケーションでは、エンティティを読み取って一部のプロパティの値を変更すると、 そのエンティティの状態は自動的に Modified に変更されます。 その後、SaveChanges を呼び出すと、Entity Framework は、変更された実際のプロパティのみを更新する SQL UPDATE ステートメントを生成します。
Web アプリは切断されているため、この連続したシーケンスには対応できません。 エンティティを読み取る DbContext は、ページがレンダリングされた後に破棄されます。 HttpPost Edit アクション メソッドが呼び出されると、新しい要求が行われ、DbContextの新しいインスタンスが作成されるため、エンティティの状態を手動で Modified. に設定する必要があります。その後、SaveChangesを呼び出すと、コンテキストで変更したプロパティを知る方法がないため、Entity Framework はデータベース行のすべての列を更新します。
SQL Update ステートメントでユーザーが実際に変更したフィールドのみを更新する場合は、元の値 (非表示フィールドなど) を保存して、 HttpPost Edit メソッドが呼び出されたときに使用できるようにすることができます。 その後、元の値を使って Student エンティティを作成し、元のバージョンのエンティティで Attach メソッドを呼び出して、エンティティの値を新しい値に更新した後、SaveChanges. を呼び出すことができます。詳細については、MSDN Data Developer Center の「エンティティの状態と SaveChanges」および「ローカル データ」を参照してください。
Views\Student\Edit.cshtml のコードは、Create.cshtml で確認したコードと似ています。変更は必要ありません。
[Students] タブを選択し、[Edit] ハイパーリンクをクリックして、ページを実行します。
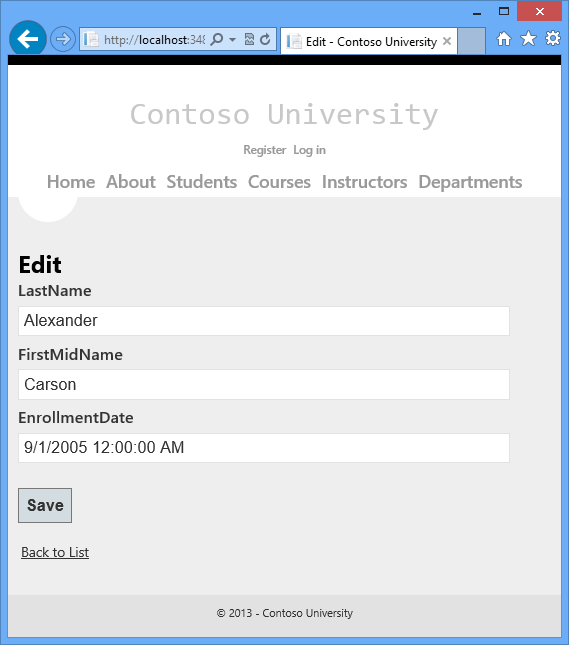
データをいくつか変更し、 [Save] をクリックします。 [Index] ページに、変更したデータが表示されます。
Delete ページの更新
Controllers\StudentController.cs では、HttpGet Delete メソッドのテンプレート コードでは、DetailsメソッドとEdit メソッドで確認したように、Find メソッドを使用して選択したStudent エンティティを取得します。 ただし、SaveChanges の呼び出しが失敗したときのカスタム エラー メッセージを実装するには、何らかの機能とその対応するビューをこのメソッドに追加します。
更新および作成操作で見たように、削除操作にも 2 つのアクション メソッドが必要です。 GET 要求に応答して呼び出されるメソッドは、ユーザーが削除操作を承認またはキャンセルできるビューを表示します。 ユーザーが操作を承認すると、POST 要求が作成されます。 その場合、 HttpPost Delete メソッドが呼び出され、そのメソッドが実際に削除操作を実行します。
HttpPost Delete メソッドにtry-catch ブロックを追加して、データベースの更新時に発生する可能性のあるエラーを処理します。 エラーが発生した場合、 HttpPost Delete メソッドは HttpGet Delete メソッドを呼び出し、エラーが発生したことを示すパラメーターを渡します。 HttpGet Delete メソッドは、確認ページとエラー メッセージを再び表示し、ユーザーがもう一度実行するか取り消すことができるようにします。
HttpGetDeleteアクション メソッドを、エラー報告を管理する次のコードに置き換えます。public ActionResult Delete(bool? saveChangesError=false, int id = 0) { if (saveChangesError.GetValueOrDefault()) { ViewBag.ErrorMessage = "Delete failed. Try again, and if the problem persists see your system administrator."; } Student student = db.Students.Find(id); if (student == null) { return HttpNotFound(); } return View(student); }このコードは、変更保存の失敗後にメソッドが呼び出されたかどうかを示す省略可能な Boolean 型のパラメーターを受け取ります。 このパラメーターは、
HttpGetDeleteメソッドが以前のエラーなしで呼び出されたときにfalseされます。 データベース更新エラーに応答してHttpPostDeleteメソッドによって呼び出されると、パラメーターはtrueされ、エラー メッセージがビューに渡されます。HttpPostDeleteアクション メソッド (DeleteConfirmedという名前) を、実際の削除操作を実行し、データベース更新エラーをキャッチする次のコードに置き換えます。[HttpPost] [ValidateAntiForgeryToken] public ActionResult Delete(int id) { try { Student student = db.Students.Find(id); db.Students.Remove(student); db.SaveChanges(); } catch (DataException/* dex */) { // uncomment dex and log error. return RedirectToAction("Delete", new { id = id, saveChangesError = true }); } return RedirectToAction("Index"); }このコードは、選択されたエンティティを取得した後、Remove メソッドを呼び出して、エンティティの状態を
Deletedに設定します。SaveChangesが呼び出された場合、SQL のDELETEコマンドが生成されます。 また、アクション メソッドの名前をDeleteConfirmedからDeleteに変更しています。HttpPostメソッドに一意のシグネチャを与えるためにDeleteConfirmedHttpPostDeleteメソッドという名前のスキャフォールディングされたコード。 (CLR では、さまざまなメソッド パラメーターを持つために、オーバーロードされたメソッドを必要とします。)シグネチャが一意になっているので、MVC 規則に準拠し、HttpPostとHttpGet削除メソッドに同じ名前を利用できます。大規模なアプリケーションでのパフォーマンス向上が優先される場合は、黄色の強調表示で示されているように、
FindとRemoveメソッドを呼び出すコード行を次のコードに置き換えることで、行を取得するための不必要な SQL クエリが実行されないようにすることができます。Student studentToDelete = new Student() { StudentID = id }; db.Entry(studentToDelete).State = EntityState.Deleted;このコードは、主キーの値のみを使用して
Studentエンティティをインスタンス化し、エンティティの状態をDeletedに設定します。 エンティティを削除するために Entity Framework に必要なものは主キーの値だけです前に示したように、
HttpGetDeleteメソッドはデータを削除しません。 GET 要求の応答で削除操作を実行すると (さらに言えば、編集操作、作成操作、データを変更するその他のあらゆる操作を実行すると)、セキュリティ上のリスクが生じます。 詳細については、Stephen Walther のブログで「ASP.NET MVC Tip #46 — Don't use Delete Links because they create Security Holes」を参照してください。Views\Student\Delete.cshtml で、次の例に示すように、
h2見出しとh3見出しの間にエラー メッセージを追加します。<h2>Delete</h2> <p class="error">@ViewBag.ErrorMessage</p> <h3>Are you sure you want to delete this?</h3>[Students] タブを選択し、[Delete] ハイパーリンクをクリックして、ページを実行します。
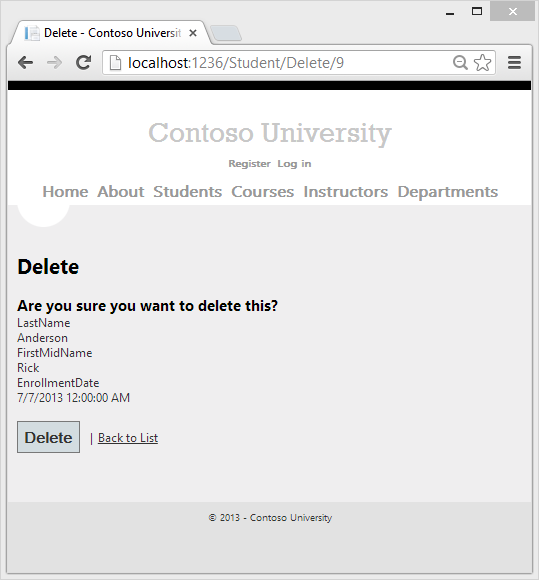
[Delete] をクリックします。 削除された学生を含まない [Index] ページが表示されます (アクションでのエラー処理コードの例は、このシリーズの後にあるコンカレンシーの処理に関するチュートリアルをご覧ください。)
データベース接続が開いたままでないことを確認する
データベース接続が適切に閉じられ、保持されているリソースが解放されたことを確認するために、コンテキスト インスタンスが破棄されていることを確認する必要があります。 そのため、スキャフォールディングされたコードは、次の例に示すように、StudentController.cs の StudentController クラスの末尾に Dispose メソッドを提供します。
protected override void Dispose(bool disposing)
{
    db.Dispose();
    base.Dispose(disposing);
}
基底 Controller クラスは既に IDisposable インターフェイスを実装しているため、このコードは、コンテキスト インスタンスを明示的に破棄するために Dispose(bool) メソッドにオーバーライドを追加するだけです。
まとめ
Student エンティティに対して簡単な CRUD 操作を実行するページの完全なセットができあがりました。 MVC ヘルパーを使用して、データ フィールドの UI 要素を生成しました。 MVC ヘルパーの詳細については、「HTML ヘルパーによるフォームのレンダリング」を参照してください (このページは MVC 3 用ですが、MVC 4 にも引き続き関連しています)。
次のチュートリアルでは、並べ替えとページングを追加することにより、[Index] ページの機能を拡張します。
他の Entity Framework リソースへのリンクは、ASP.NET データ アクセス コンテンツ マップに関するページにあります。