作成者: Rick Anderson
このチュートリアルでは、ユーザーが Facebook、Twitter、LinkedIn、Microsoft、Google などの外部認証プロバイダーの資格情報と OAuth 2.0 を使用してログインできるようにする ASP.NET MVC 5 Web アプリケーションを構築する方法について説明します。 わかりやすくするために、このチュートリアルでは Facebook と Google の資格情報の操作に重点を置いています。
Web サイト内でこれらの資格情報を有効にすると、何百万人ものユーザーが既にこれらの外部プロバイダーにアカウントを持っているため、大きな利点があります。 これらのユーザーは、新しい資格情報のセットを作成して覚える必要がなければ、サイトにサインアップする傾向がより高くなります。
「SMS や電子メールで 2 要素認証する ASP.NET MVC 5 アプリ」も参照してください。
このチュートリアルでは、ユーザーのプロファイル データを追加する方法と、Membership API を使用してロールを追加する方法についても説明します。 このチュートリアルは Rick Anderson が作成しました (Twitter でフォローしてください: @RickAndMSFT)。
はじめに
まず、Visual Studio Express 2013 for Web または Visual Studio 2013 をインストールして実行します。 Visual Studio 2013 Update 3 以上をインストールしてください。
Note
Google OAuth 2 を使用し、SSL 警告を発生させずにローカルでデバッグするには、Visual Studio 2013 Update 3 以上をインストールする必要があります。
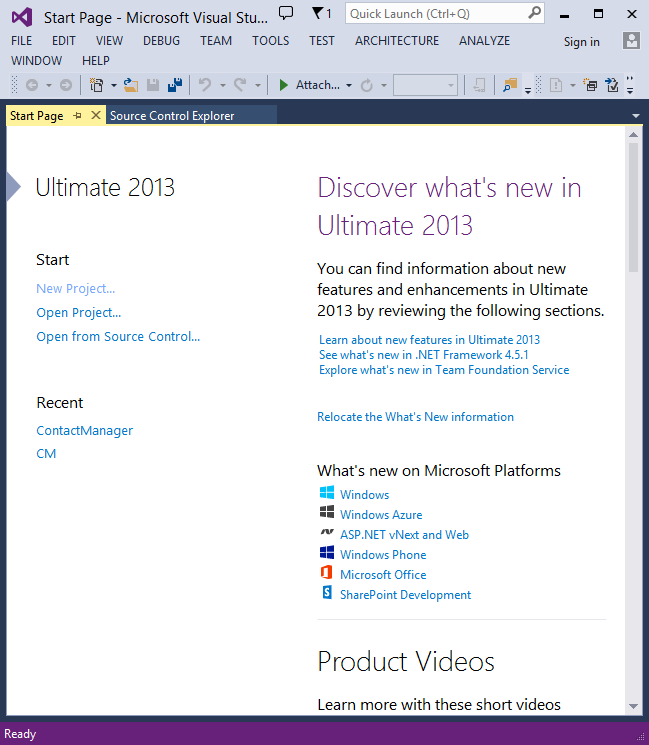
[スタート] ページで [新しいプロジェクト] をクリックするか、メニューを使用して [ファイル]、それから [新しいプロジェクト] を選択します。
初めてのアプリケーションの作成
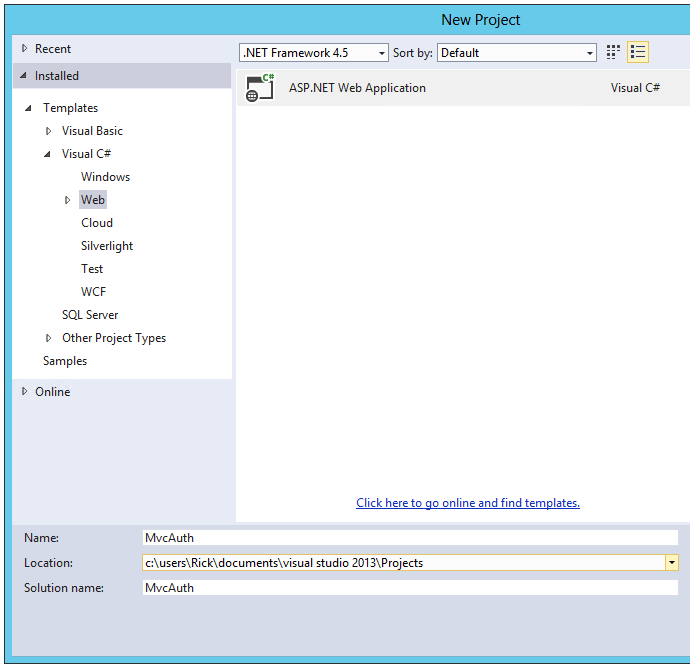
[新しいプロジェクト] をクリックし、左側の [Visual C#] を選択して、[Web]、それから [ASP.NET Web アプリケーション] を選択します。 このプロジェクトに「MvcAuth」という名前を付け、[OK] をクリックします。
[新しい ASP.NET プロジェクト] ダイアログ内で [MVC] をクリックします。 認証が [個別のユーザー アカウント] ではない場合は、[認証の変更] ボタンをクリックし、[個別のユーザー アカウント] を選択します。 [クラウドにホストする] をオンにすると、このアプリを Azure 内でホストするのが非常に簡単になります。
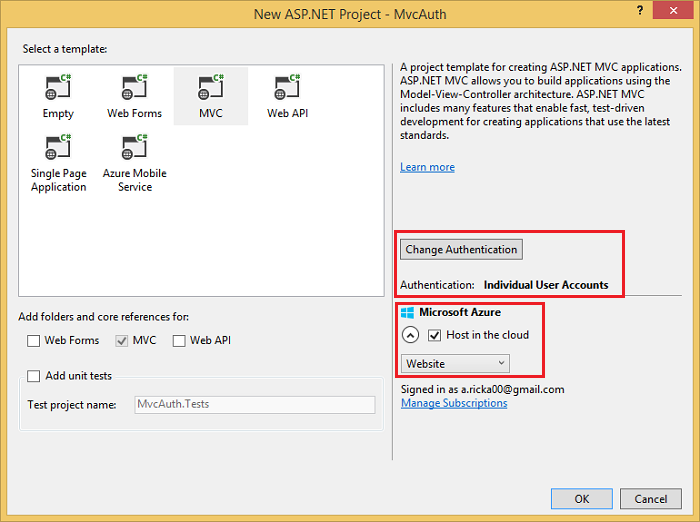
[クラウドにホストする] を選択した場合は、構成ダイアログを完了します。

NuGet を使用して最新の OWIN ミドルウェアに更新する
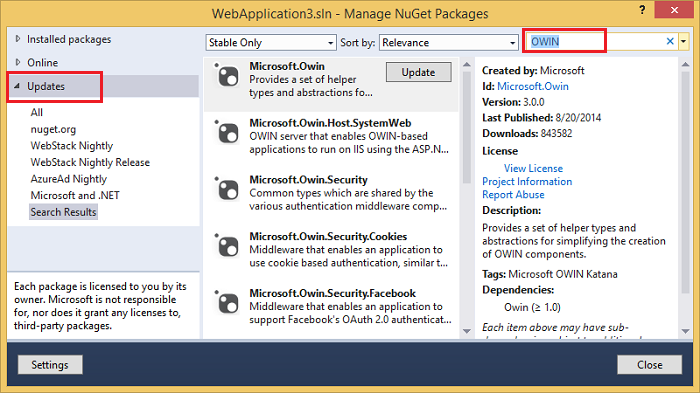
NuGet パッケージ マネージャーを使用して OWIN ミドルウェアを更新します。 左側のメニュー内で [更新プログラム] を選択します。 [すべて更新] ボタンをクリックするか、OWIN パッケージのみを検索できます (次の画像内に示します)。
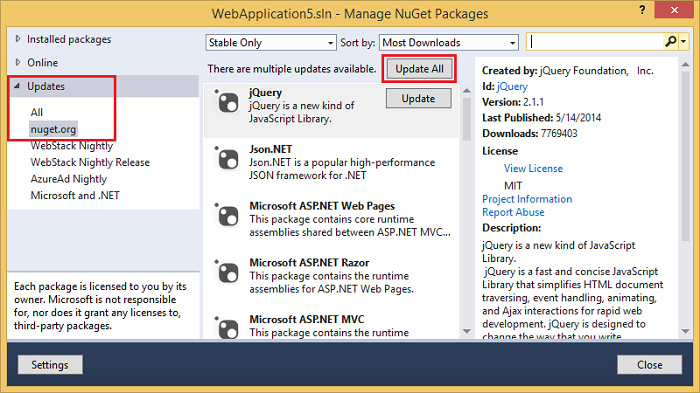
以下の画像内では OWIN パッケージのみが表示されています。
パッケージ マネージャー コンソール (PMC) から Update-Package コマンドを入力すると、すべてのパッケージが更新されます。
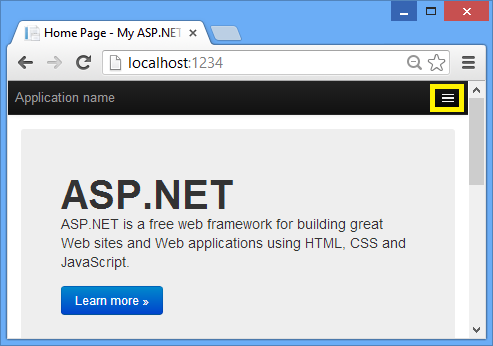
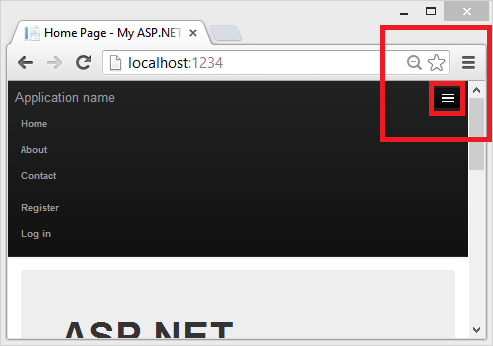
F5 キーまたは Ctrl + F5 キーを押して、アプリケーションを実行します。 以下の画像内で、ポート番号は "1234" です。 アプリケーションを実行すると、別のポート番号が表示されます。
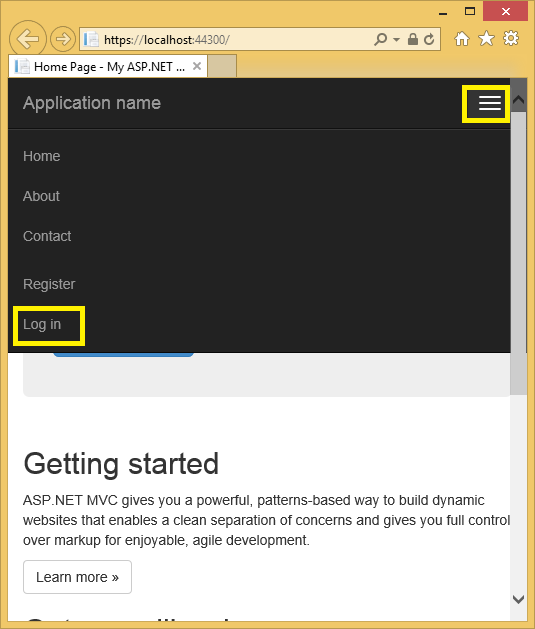
ブラウザー ウィンドウのサイズによっては、ナビゲーション アイコンをクリックして、[ホーム]、[バージョン情報]、[連絡先]、[登録]、[ログイン] のリンクを表示する必要があります。
プロジェクトでの SSL の設定
Google や Facebook などの認証プロバイダーに接続するには、SSL を使用するように IIS-Express を設定する必要があります。 ログイン後も SSL を使用し続け、HTTP に戻さないことが重要です。ログイン Cookie はユーザー名やパスワードと同様にシークレットであり、SSL を使用しなければ、クリア テキストで、ネットワークを通じてそれを送信してしまいます。 さらに、MVC パイプラインを実行する前に、ハンドシェイクを実行してチャネルをセキュリティで保護すること (HTTPS が HTTP よりも遅くなる主な原因です) に既に時間がかかっています。そのため、ログイン後に HTTP に戻しても、現在の要求も今後の要求も、さらに速くなることはありません。
[ソリューション エクスプローラー] 内で、[MvcAuth] プロジェクトをクリックします。
F4 キーを押して、プロジェクトのプロパティを表示します。 または、[表示] メニューから [プロパティ ウィンドウ] を選択できます。
[SSL 有効] を [True] に変更します。

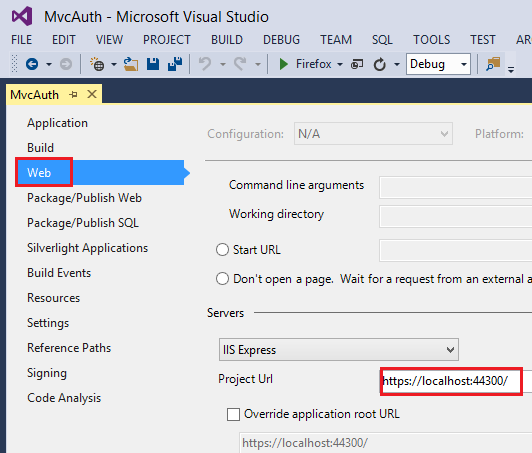
SSL URL をコピーします (他の SSL プロジェクトを作成していない限り
https://localhost:44300/です)。[ソリューション エクスプローラー] 内で [MvcAuth] プロジェクトを右クリックし、[プロパティ] を選択します。
[Web] タブを選択し、[プロジェクト URL] ボックス内に SSL URL を貼り付けます。 ファイルを保存します (Ctrl + S キー)。 Facebook および Google 認証アプリを構成するには、この URL が必要になります。
すべての要求で HTTPS の使用を必須にするには、RequireHttps 属性を
Homeコントローラーに追加します。 より安全なアプローチは、RequireHttps フィルターをアプリケーションに追加することです。 認証および SQL DB を使用する ASP.NET MVC アプリの作成と、Azure App Service へのデプロイのチュートリアル内の、「SSL と Authorize 属性を使用してアプリケーションを保護する」のセクションを参照してください。 ホーム コントローラーの一部を以下に示します。[RequireHttps] public class HomeController : Controller { public ActionResult Index() { return View(); }Ctrl キーを押しながら F5 キーを押してアプリケーションを実行します。 過去に証明書をインストールしたことがある場合は、このセクションの残りをスキップして、「OAuth 2 用の Google アプリを作成し、そのアプリをプロジェクトに接続する」に進んでください。それ以外の場合は、IIS Express で生成した自己署名証明書を信頼する手順に従ってください。
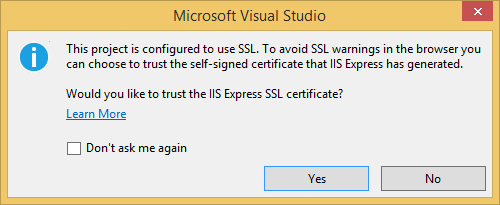
[セキュリティ警告] ダイアログを読み、localhost を表す証明書をインストールする場合は [はい] をクリックします。

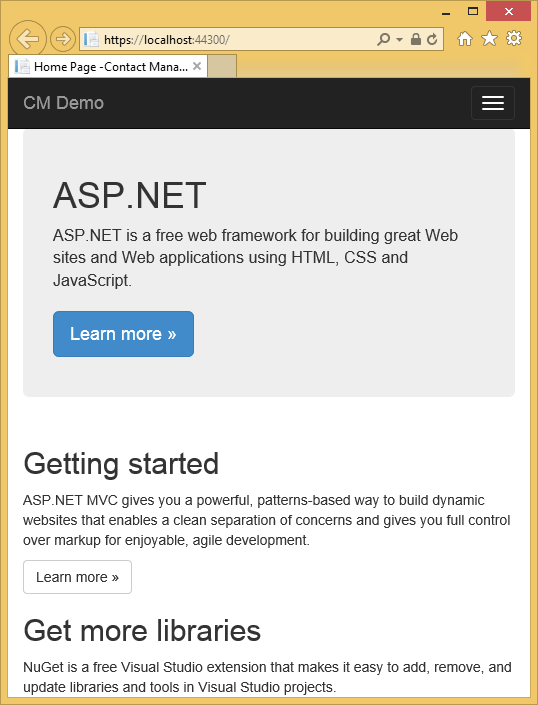
IE は ホーム ページを表示し、SSL の警告はありません。
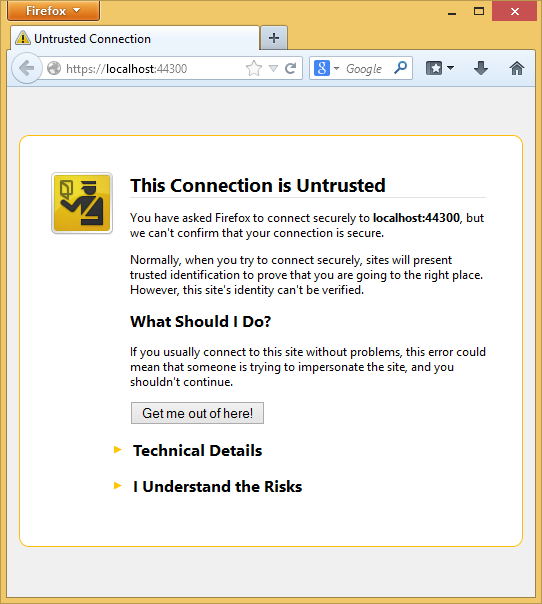
Google Chrome も、証明書を受け入れると警告なしで HTTPS コンテンツが表示されます。 Firefox は独自の証明書ストアを使用するため、警告が表示されます。 このアプリケーションでは、[危険性を理解した上で接続するには] をクリックして構いません。
OAuth 2 用の Google アプリを作成し、そのアプリをプロジェクトに接続する
警告
現在の Google OAuth の手順については、ASP.NET Core での Google 認証の構成を参照してください。
Google Developers Consoleにアクセスします。
まだプロジェクトを作成していない場合は、左側のタブ内で [認証情報] を選択し、[作成] を選択します。
左側のタブ内で、[認証情報] をクリックします。
[認証情報を作成]、それから [OAuth クライアント ID] をクリックします。
- [クライアント ID の作成] ダイアログ内で、[アプリケーションの種類] に既定の [ウェブ アプリケーション] をそのまま使用します。
- [承認済みの JavaScript 生成元] に、上記で使用した SSL URL を設定します (他の SSL プロジェクトを作成していない限り
https://localhost:44300/) - [承認済みのリダイレクト URI] に次を設定します。
https://localhost:44300/signin-google
メニュー項目の [OAuth 同意画面] をクリックし、メール アドレスと製品名を設定します。 フォームの入力が完了したら、[保存] をクリックします。
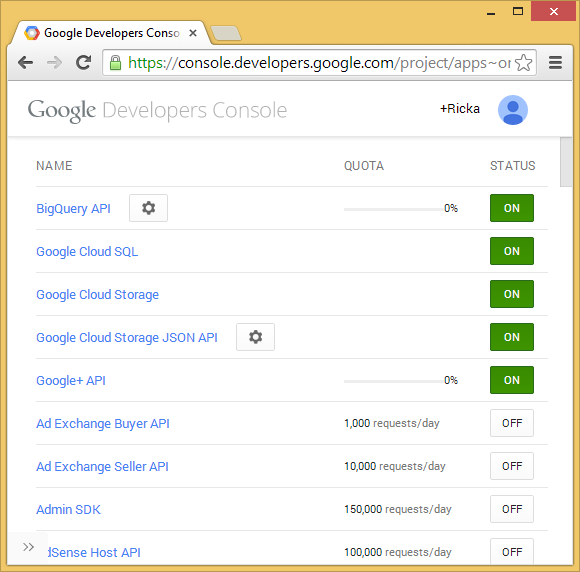
メニュー項目の [ライブラリ] をクリックして、「Google+ API」を検索し、それをクリックして [有効にする] を押します。
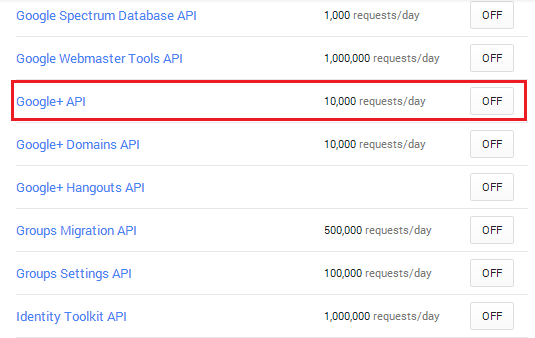
以下の画像は有効な API を示しています。
Google API の API Manager から、[認証情報] タブにアクセスして [クライアント ID] を取得します。 アプリケーション シークレットを含む JSON ファイルをダウンロードして保存します。 client_id と client_secret をコピーし、App_Start フォルダー内の Startup.Auth.cs ファイル内にある
UseGoogleAuthenticationメソッドの中に貼り付けます。 以下に示す ClientId と ClientSecret の値はサンプルであり、機能しません。public void ConfigureAuth(IAppBuilder app) { // Configure the db context and user manager to use a single instance per request app.CreatePerOwinContext(ApplicationDbContext.Create); app.CreatePerOwinContext<ApplicationUserManager>(ApplicationUserManager.Create); // Enable the application to use a cookie to store information for the signed in user // and to use a cookie to temporarily store information about a user logging in with a third party login provider // Configure the sign in cookie app.UseCookieAuthentication(new CookieAuthenticationOptions { AuthenticationType = DefaultAuthenticationTypes.ApplicationCookie, LoginPath = new PathString("/Account/Login"), Provider = new CookieAuthenticationProvider { OnValidateIdentity = SecurityStampValidator.OnValidateIdentity<ApplicationUserManager, ApplicationUser>( validateInterval: TimeSpan.FromMinutes(30), regenerateIdentity: (manager, user) => user.GenerateUserIdentityAsync(manager)) } }); app.UseExternalSignInCookie(DefaultAuthenticationTypes.ExternalCookie); // Uncomment the following lines to enable logging in with third party login providers //app.UseMicrosoftAccountAuthentication( // clientId: "", // clientSecret: ""); //app.UseTwitterAuthentication( // consumerKey: "", // consumerSecret: ""); //app.UseFacebookAuthentication( // appId: "", // appSecret: ""); app.UseGoogleAuthentication( clientId: "000-000.apps.googleusercontent.com", clientSecret: "00000000000"); }警告
セキュリティ - 機密データをソース コード内に保存しないでください。 アカウントと資格情報を上記のコードに追加したのは、サンプルをわかりやすくするためです。 「ASP.NET と Azure App Service にパスワードやその他の機密データを配置するためのベスト プラクティス」を参照してください。
Ctrl キーを押しながら F5 キーを押して アプリケーションをビルドし、実行します。 [Log in] リンクをクリックします。
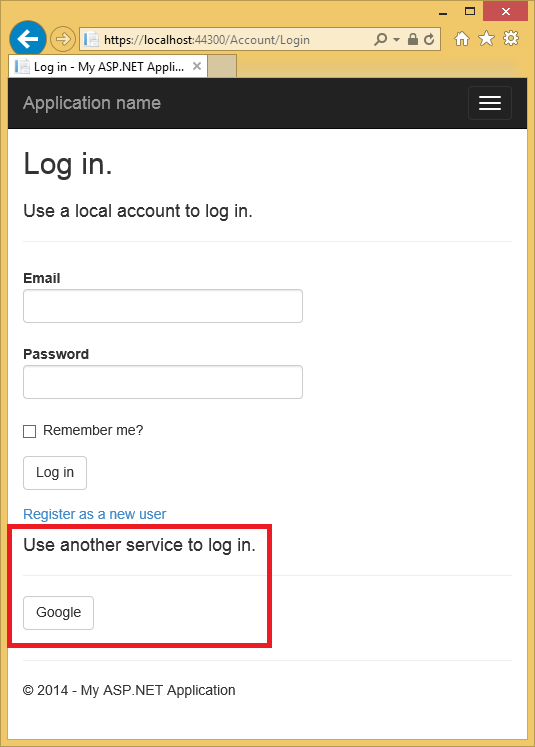
[別のサービスを使用してログインします] の下にある [Google] をクリックします。
Note
上記のいずれかの手順が実行されていないと、HTTP 401 エラーが発生します。 上記の手順を再確認してください。 必要な設定 (製品名など) がされていない場合は、不足している項目を追加して保存します。認証が機能するまで数分かかる場合があります。
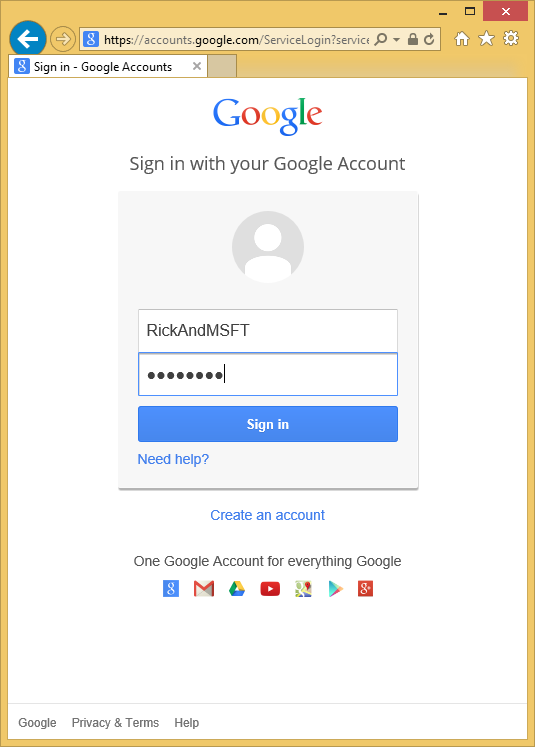
資格情報を入力する Google のサイトにリダイレクトされます。
資格情報を入力すると、つい先ほど作成した Web アプリケーションにアクセス許可を付与するように求められます。
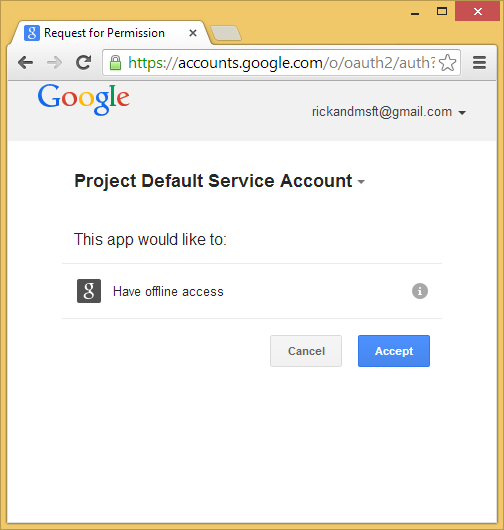
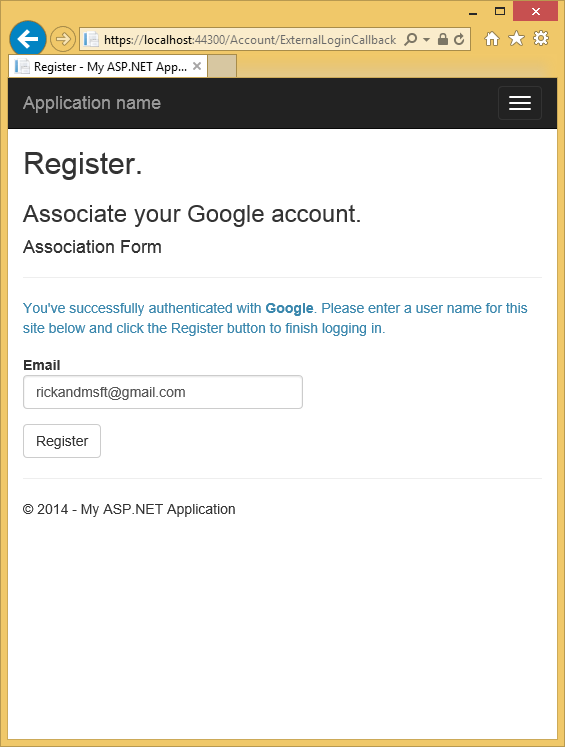
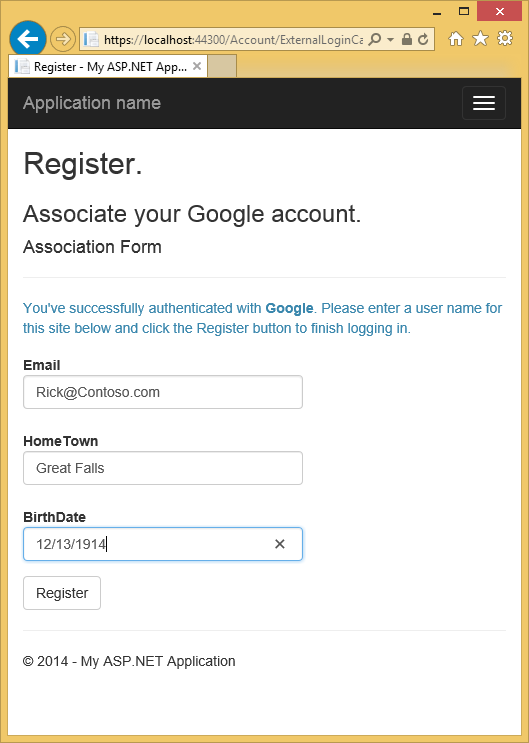
承諾をクリックします。 これで、Google アカウントを登録できる MvcAuth アプリケーションの [登録] ページにリダイレクトされます。 Google アカウントに使用するローカルの電子メール登録名を変更できますが、通常は既定の電子メール エイリアス (認証に使用したエイリアス) を変更しません。 [登録] をクリックします。
Facebook でアプリを作成し、アプリをプロジェクトに接続する
警告
現在の Facebook OAuth2 認証手順については、Facebook 認証の構成を参照してください
サーバー エクスプローラーを使用してメンバーシップ データを確認する
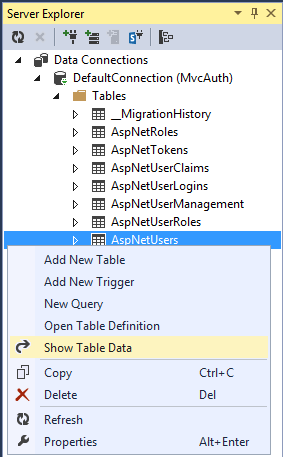
[表示] メニュー内で、[サーバー エクスプローラー] をクリックします。
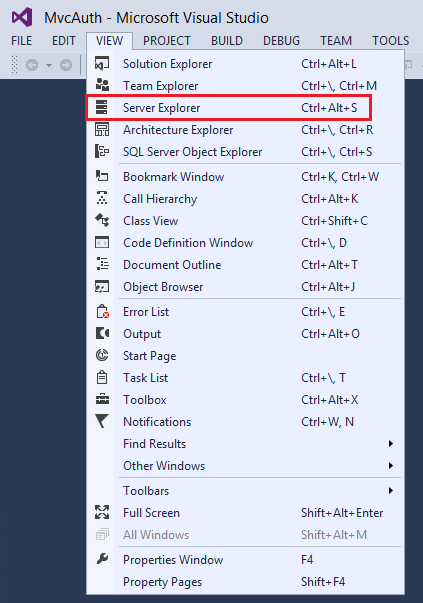
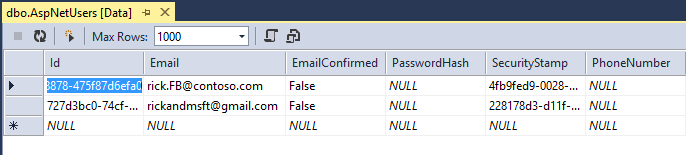
[DefaultConnection (MvcAuth)] を展開し、[テーブル] を展開して、[AspNetUsers] を右クリックし、[テーブル データの表示] をクリックします。

ユーザー クラスへのプロファイル データの追加
このセクションでは、次の画像内に示すように、登録時に生年月日と出身地をユーザー データに追加します。
Models\IdentityModels.cs ファイルを開き、生年月日と出身地のプロパティを追加します。
public class ApplicationUser : IdentityUser
{
    public string HomeTown { get; set; }
    public System.DateTime? BirthDate { get; set; }
    public async Task<ClaimsIdentity> GenerateUserIdentityAsync(UserManager<ApplicationUser> manager)
    {
        // Note the authenticationType must match the one defined in CookieAuthenticationOptions.AuthenticationType
        var userIdentity = await manager.CreateIdentityAsync(this, DefaultAuthenticationTypes.ApplicationCookie);
        // Add custom user claims here
        return userIdentity;
    }
}
Models\AccountViewModels.cs ファイルを開き、ExternalLoginConfirmationViewModel 内に生年月日と出身地のプロパティを設定します。
public class ExternalLoginConfirmationViewModel
{
    [Required]
    [EmailAddress]
    [Display(Name = "Email")]
    public string Email { get; set; }

    public string HomeTown { get; set; }
    public System.DateTime? BirthDate { get; set; }
}
Controllers\AccountController.cs ファイルを開き、次に示すように ExternalLoginConfirmation アクション メソッド内に生年月日と出身地のコードを追加します。
[HttpPost]
[AllowAnonymous]
[ValidateAntiForgeryToken]
public async Task<ActionResult> ExternalLoginConfirmation(ExternalLoginConfirmationViewModel model, string returnUrl)
{
    if (User.Identity.IsAuthenticated)
    {
        return RedirectToAction("Manage");
    }

    if (ModelState.IsValid)
    {
        // Get the information about the user from the external login provider
        var info = await AuthenticationManager.GetExternalLoginInfoAsync();
        if (info == null)
        {
            return View("ExternalLoginFailure");
        }
        var user = new ApplicationUser()
        {
            UserName = model.Email, Email = model.Email,
            BirthDate = model.BirthDate,
            HomeTown  = model.HomeTown

        };
        IdentityResult result = await UserManager.CreateAsync(user);
        if (result.Succeeded)
        {
            result = await UserManager.AddLoginAsync(user.Id, info.Login);
            if (result.Succeeded)
            {
                await SignInAsync(user, isPersistent: false);

                // For more information on how to enable account confirmation and password reset please visit https://go.microsoft.com/fwlink/?LinkID=320771
                // Send an email with this link
                // string code = await UserManager.GenerateEmailConfirmationTokenAsync(user.Id);
                // var callbackUrl = Url.Action("ConfirmEmail", "Account", new { userId = user.Id, code = code }, protocol: Request.Url.Scheme);
                // SendEmail(user.Email, callbackUrl, "Confirm your account", "Please confirm your account by clicking this link");

                return RedirectToLocal(returnUrl);
            }
        }
        AddErrors(result);
    }

    ViewBag.ReturnUrl = returnUrl;
    return View(model);
}
Views\Account\ExternalLoginConfirmation.cshtml ファイルに生年月日と出身地を追加します。
@model MvcAuth.Models.ExternalLoginConfirmationViewModel
@{
    ViewBag.Title = "Register";
}
<h2>@ViewBag.Title.</h2>
<h3>Associate your @ViewBag.LoginProvider account.</h3>

@using (Html.BeginForm("ExternalLoginConfirmation", "Account", new { ReturnUrl = ViewBag.ReturnUrl }, FormMethod.Post, new { @class = "form-horizontal", role = "form" }))
{
    @Html.AntiForgeryToken()

    <h4>Association Form</h4>
    <hr />
    @Html.ValidationSummary(true, "", new { @class = "text-danger" })
    <p class="text-info">
        You've successfully authenticated with <strong>@ViewBag.LoginProvider</strong>.
            Please enter a user name for this site below and click the Register button to finish
            logging in.
    </p>
    <div class="form-group">
        @Html.LabelFor(m => m.Email, new { @class = "col-md-2 control-label" })
        <div class="col-md-10">
            @Html.TextBoxFor(m => m.Email, new { @class = "form-control" })
            @Html.ValidationMessageFor(m => m.Email, "", new { @class = "text-danger" })
        </div>
    </div>
    <div class="form-group">
        @Html.LabelFor(m => m.HomeTown, new { @class = "col-md-2 control-label" })
        <div class="col-md-10">
            @Html.TextBoxFor(m => m.HomeTown, new { @class = "form-control" })
            @Html.ValidationMessageFor(m => m.HomeTown)
        </div>
    </div>
    <div class="form-group">
        @Html.LabelFor(m => m.BirthDate, new { @class = "col-md-2 control-label" })
        <div class="col-md-10">
            @Html.TextBoxFor(m => m.BirthDate, new { @class = "form-control" })
            @Html.ValidationMessageFor(m => m.BirthDate)
        </div>
    </div>
    <div class="form-group">
        <div class="col-md-offset-2 col-md-10">
            <input type="submit" class="btn btn-default" value="Register" />
        </div>
    </div>
}

@section Scripts {
    @Scripts.Render("~/bundles/jqueryval")
}
メンバーシップのデータベースを削除することで、Facebook アカウントをアプリケーションに再登録し、新しい生年月日と出身地のプロファイル情報を追加できることを確認できるようにします。
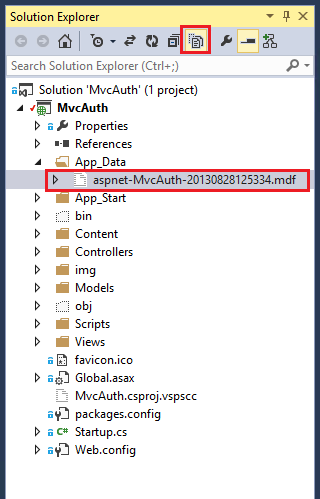
[ソリューション エクスプローラー] で、[すべてのファイルの表示] アイコンをクリックし、[Add_Data\aspnet-MvcAuth-<dateStamp>.mdf] を右クリックして、[削除] をクリックします。
[ツール] メニューで [NuGet パッケージ マネージャー] をクリックし、[パッケージ マネージャー コンソール] (PMC) をクリックします。 PMC 内に次のコマンドを入力します。
- Enable-Migrations
- Add-Migration Init
- Update-Database
アプリケーションを実行し、FaceBook と Google を使用してログインし、ユーザーを何人か登録します。
メンバーシップ データを調べる
[表示] メニュー内で、[サーバー エクスプローラー] をクリックします。

[AspNetUsers] を右クリックし、[テーブル データの表示] をクリックします。
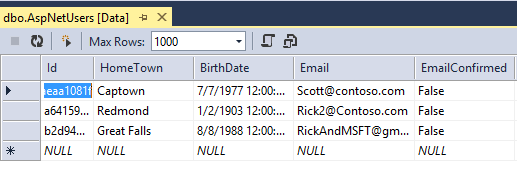
HomeTown と BirthDate フィールドを以下に示します。
アプリのログオフと別アカウントでのログイン
Facebook を使用してアプリにログオンし、ログアウトしてから別の Facebook アカウントで (同じブラウザーを使用して) もう一度ログインしようとすると、以前使用した Facebook アカウントにすぐにログインしてしまいます。 別のアカウントを使用するには、Facebook に移動して Facebook でログアウトする必要があります。 他のサード パーティ認証プロバイダーにも同じルールが適用されます。 または、別のブラウザーを使用して別のアカウントでログインすることもできます。
次のステップ
認証および SQL DB を使用する ASP.NET MVC アプリの作成と、Azure App Service へのデプロイのチュートリアルに従って、このチュートリアルの続きでは次の内容について説明します。
- アプリを Azure にデプロイする方法。
- ロールを使用して、アプリをセキュリティで保護する方法。
- RequireHttps および Authorize フィルターを使用して、アプリをセキュリティで保護する方法。
- Membership API を使用してユーザーとロールを追加する方法。
ASP.NET 外部認証サービスのしくみについてのわかりやすい説明は、Robert McMurray の外部認証サービスを参照してください。 Robert の記事では、Microsoft と Twitter の認証を有効にする方法についても詳しく説明されています。 Tom Dykstra の優れた EF/MVC チュートリアルでは、Entity Framework を操作する方法について説明します。