適用対象:  従業員テナント 外部テナント (詳細)
このクイック スタートでは、サンプルシングルページ アプリ (SPA) を使用して、Proof Key for Code Exchange (PKCE) で 承認コード フロー を使用してユーザーをサインインさせ、Microsoft Graph API を呼び出す方法を示します。 このサンプルでは、 Microsoft 認証ライブラリ を使用して認証を処理します。
[前提条件]
- アクティブなサブスクリプションを持つ Azure アカウント。 アカウントをまだお持ちでない場合は、 無料でアカウントを作成してください。
- この Azure アカウントには、アプリケーションを管理するためのアクセス許可が必要です。 以下のいずれの Microsoft Entra ロールにも、必要なアクセス許可が含まれています。
- アプリケーション管理者
- アプリケーション開発者
- 従業員テナント。 既定のディレクトリを使用するか、 新しいテナントを設定できます。
- Visual Studio Code または別のコード エディター。
-
この組織のディレクトリ内のアカウント専用に構成された Microsoft Entra 管理センターに新しいアプリを登録します。 詳細については、「 アプリケーションの登録 」を参照してください。 後で使用するために、アプリケーション の [概要 ] ページから次の値を記録します。
- アプリケーション (クライアント) ID
- ディレクトリ (テナント) ID
-
シングルページ アプリケーション プラットフォーム構成を使用して、次のリダイレクト URI を追加します。 詳細については、「 アプリケーションにリダイレクト URI を追加する方法 」を参照してください。
-
リダイレクト URI:
http://localhost:3000/
-
リダイレクト URI:
- Node.js
サンプル アプリケーションを複製またはダウンロードする
サンプル アプリケーションを取得するには、GitHub から複製するか、.zip ファイルとしてダウンロードします。
サンプルを複製するには、コマンド プロンプトを開き、プロジェクトを作成する場所に移動し、次のコマンドを入力します。
git clone https://github.com/Azure-Samples/ms-identity-docs-code-javascript.git.zip ファイルをダウンロードします。 名前の長さが 260 文字未満のファイル パスに抽出します。
プロジェクトを構成する
IDE で、サンプルを含むプロジェクト フォルダー ms-identity-docs-code-javascript を開きます。
vanillajs-spa/App/public/authConfig.js を開き、管理センターに記録された情報で次の値を更新します。
/** * Configuration object to be passed to MSAL instance on creation. * For a full list of MSAL.js configuration parameters, visit: * https://github.com/AzureAD/microsoft-authentication-library-for-js/blob/dev/lib/msal-browser/docs/configuration.md */ const msalConfig = { auth: { clientId: "Enter_the_Application_Id_Here", // WORKFORCE TENANT authority: "https://login.microsoftonline.com/Enter_the_Tenant_Info_Here", // Replace the placeholder with your tenant info // EXTERNAL TENANT // authority: "https://Enter_the_Tenant_Subdomain_Here.ciamlogin.com/", // Replace the placeholder with your tenant subdomain redirectUri: '/', // You must register this URI on App Registration. Defaults to window.location.href e.g. http://localhost:3000/ navigateToLoginRequestUrl: true, // If "true", will navigate back to the original request location before processing the auth code response. }, cache: { cacheLocation: 'sessionStorage', // Configures cache location. "sessionStorage" is more secure, but "localStorage" gives you SSO. storeAuthStateInCookie: false, // set this to true if you have to support IE }, system: { loggerOptions: { loggerCallback: (level, message, containsPii) => { if (containsPii) { return; } switch (level) { case msal.LogLevel.Error: console.error(message); return; case msal.LogLevel.Info: console.info(message); return; case msal.LogLevel.Verbose: console.debug(message); return; case msal.LogLevel.Warning: console.warn(message); return; } }, }, }, }; /** * Scopes you add here will be prompted for user consent during sign-in. * By default, MSAL.js will add OIDC scopes (openid, profile, email) to any login request. * For more information about OIDC scopes, visit: * https://learn.microsoft.com/en-us/entra/identity-platform/permissions-consent-overview#openid-connect-scopes */ const loginRequest = { scopes: ["User.Read"], }; /** * An optional silentRequest object can be used to achieve silent SSO * between applications by providing a "login_hint" property. */ // const silentRequest = { // scopes: ["openid", "profile"], // loginHint: "example@domain.net" // }; // exporting config object for jest if (typeof exports !== 'undefined') { module.exports = { msalConfig: msalConfig, loginRequest: loginRequest, }; }-
clientId- アプリケーションの識別子 。クライアントとも呼ばれます。 引用符で囲まれたテキストを、前に記録した アプリケーション (クライアント) ID 値に置き換えます。 -
authority- 機関は、MSAL がトークンを要求できるディレクトリを示す URL です。 Enter_the_Tenant_Info_Hereを、先ほど記録したディレクトリ (テナント) ID の値に置き換えます。 -
redirectUri- アプリケーションの リダイレクト URI 。 必要に応じて、引用符で囲まれたテキストを、前に記録したリダイレクト URI に置き換えます。
-
アプリケーションを実行してサインインしてサインアウトする
Node.js を使用して Web サーバーでプロジェクトを実行します。
サーバーを起動するには、プロジェクト ディレクトリ内から次のコマンドを実行します。
cd vanillajs-spa/App
npm install
npm start
ターミナルに表示される
httpsURL (https://localhost:3000など) をコピーし、ブラウザーに貼り付けます。 プライベートまたはシークレット のブラウザー セッションを使用することをお勧めします。手順に従い、Microsoft アカウントでサインインするために必要な詳細を入力します。 ワンタイム パスコードを送信できるように、メール アドレスが要求されます。 メッセージが表示されたら、コードを入力します。
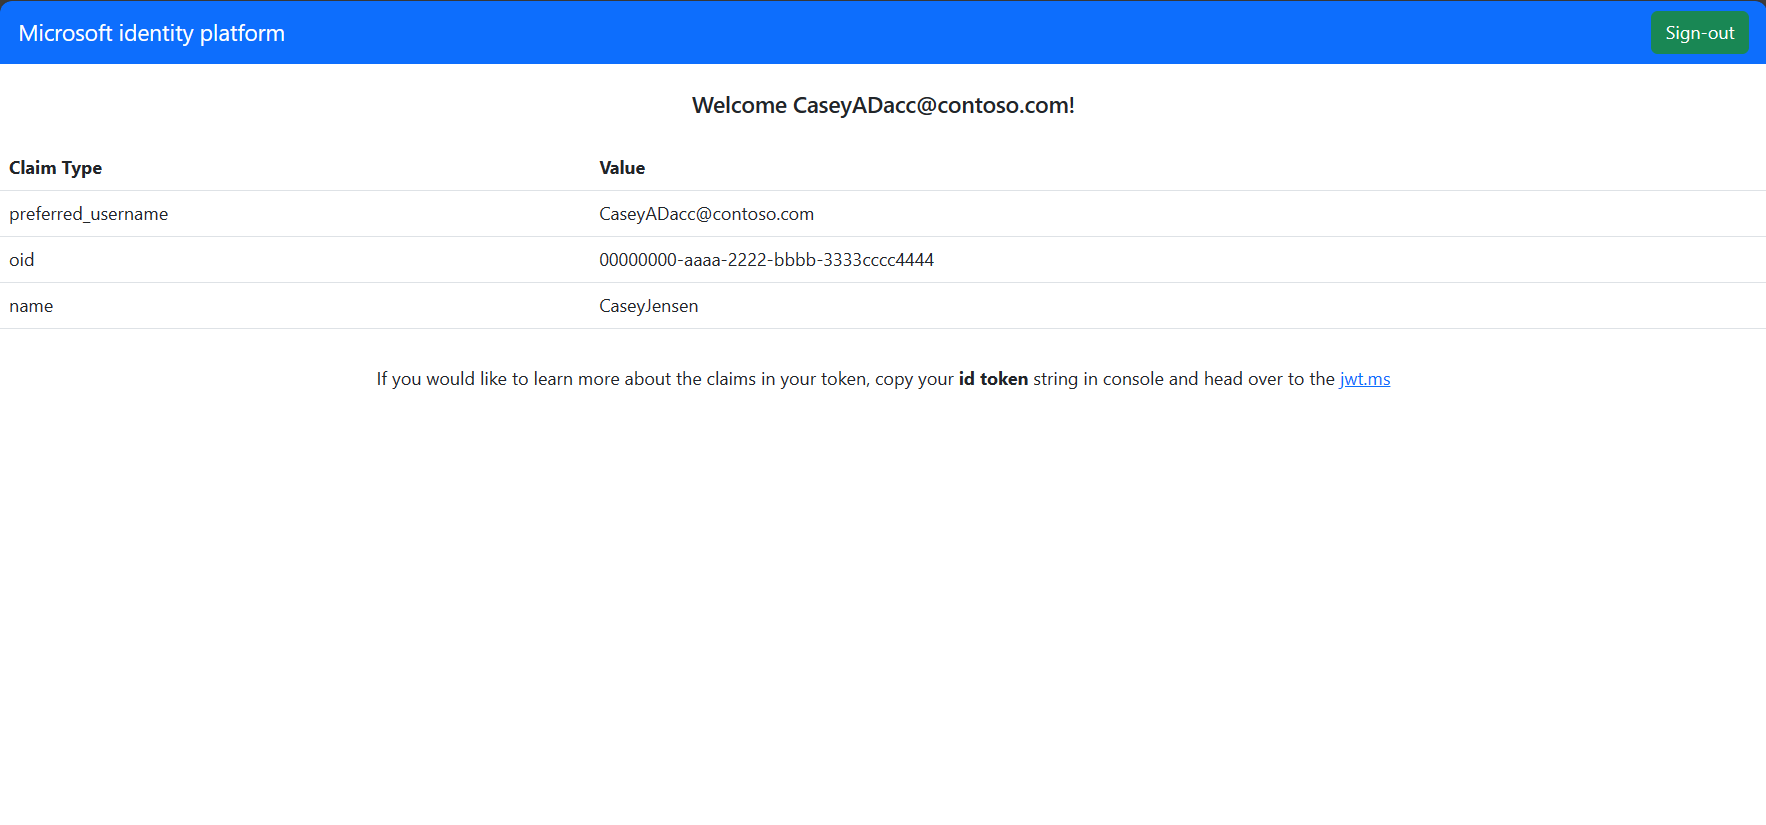
アプリケーションは、アクセス権を付与したデータへのアクセスを維持し、サインインしてプロファイルを読み取るアクセス許可を要求します。 [ 承諾] を選択します。 次のスクリーンショットは、アプリケーションにサインインし、Microsoft Graph API からプロファイルの詳細にアクセスしたことを示しています。


[前提条件]
- アクティブなサブスクリプションを持つ Azure アカウント。 アカウントをまだお持ちでない場合は、 無料でアカウントを作成してください。
- この Azure アカウントには、アプリケーションを管理するためのアクセス許可が必要です。 以下のいずれの Microsoft Entra ロールにも、必要なアクセス許可が含まれています。
- アプリケーション管理者
- アプリケーション開発者
- 外部テナント。 作成するには、次の方法から選択します。
- Microsoft Entra 外部 ID 拡張機能を使用して、Visual Studio Code で外部テナントを直接設定します。 (おすすめ)
- Microsoft Entra 管理センターで新しい外部テナントを作成します。
- ユーザーの流れ。 詳細については、 外部テナント内のアプリのセルフサービス サインアップ ユーザー フローを作成する方法に関するページを参照してください。 このユーザー フローは、複数のアプリケーションに使用できます。
- Visual Studio Code または別のコード エディター。
-
この組織のディレクトリ内のアカウント専用に構成された Microsoft Entra 管理センターに新しいアプリを登録します。 詳細については、「 アプリケーションの登録 」を参照してください。 後で使用するために、アプリケーション の [概要 ] ページから次の値を記録します。
- アプリケーション (クライアント) ID
- ディレクトリ (テナント) ID
-
シングルページ アプリケーション プラットフォーム構成を使用して、次のリダイレクト URI を追加します。 詳細については、「 アプリケーションにリダイレクト URI を追加する方法 」を参照してください。
-
リダイレクト URI:
http://localhost:3000/
-
リダイレクト URI:
- アプリケーションをユーザー フローに追加する
- Node.js
サンプル SPA を複製またはダウンロードする
サンプル アプリケーションを取得するには、GitHub から複製するか、.zip ファイルとしてダウンロードします。
サンプルを複製するには、コマンド プロンプトを開き、プロジェクトを作成する場所に移動し、次のコマンドを入力します。
git clone https://github.com/Azure-Samples/ms-identity-ciam-javascript-tutorial.gitサンプルをダウンロードします。 名前の長さが 260 文字未満のファイル パスに抽出します。
サンプル SPA を構成する
App/public/authConfig.js開き、次の値を Microsoft Entra 管理センターから取得した値に置き換えます。-
Enter_the_Application_Id_Hereを、前に登録したアプリのアプリケーション (クライアント) ID に置き換えます。 -
Enter_the_Tenant_Subdomain_Hereをディレクトリ (テナント) サブドメインに置き換えます。 たとえば、テナントのプライマリ ドメインがcontoso.onmicrosoft.comの場合は、contosoを使用します。 テナント名がない場合は、 テナントの詳細を読み取る方法について説明します。
-
ファイルを保存します。
プロジェクトを実行してサインインする
サーバーを起動するには、プロジェクト ディレクトリ内から次のコマンドを実行します。
cd 1-Authentication\0-sign-in-vanillajs\App
npm install
npm start
ターミナルに表示される
httpsURL (https://localhost:3000など) をコピーし、ブラウザーに貼り付けます。 プライベートまたはシークレット のブラウザー セッションを使用することをお勧めします。テナントに登録されているアカウントでサインインします。
次のスクリーンショットは、アプリケーションにサインインし、Microsoft Graph API からプロファイルの詳細にアクセスしたことを示しています。


アプリケーションからサインアウトする
- ページの [サインアウト ] ボタンを見つけて選択します。
- サインアウト元のアカウントを選択するように求められます。 サインインに使用したアカウントを選択します。
サインアウトしたことを示すメッセージが表示されます。ブラウザー ウィンドウを閉じることができるようになりました。