PowerShell を使用して、SendGrid によって Runbook からメールを送信できます。
Azure サブスクリプションをお持ちでない場合は、開始する前に 無料アカウント を作成してください。
前提条件
SendGrid 送信者の確認。 ドメインまたは単一の送信者のいずれか
少なくとも 1 つのユーザー割り当てマネージド ID を持つ Azure Automation アカウント。 詳細については、マネージド ID の有効化に関するページを参照してください。
Az モジュール:
Az.AccountsおよびAz.KeyVaultが Automation アカウントにインポートされている。 詳細については、「Az モジュールをインポートする」を参照してください。Azure Az PowerShell モジュールがマシンにインストールされている。 インストールまたはアップグレードするには、Azure Az PowerShell モジュールをインストールする方法に関するページを参照してください。
Azure Key Vault を作成する
Azure Key Vault と、指定されたキー コンテナー内のキー コンテナー シークレットを資格情報で取得および設定できるようにする Key Vault アクセス ポリシーを作成します。
Connect-AzAccount コマンドレットを使用して、Azure に対話的にサインインし、指示に従います。
# Sign in to your Azure subscription
$sub = Get-AzSubscription -ErrorAction SilentlyContinue
if(-not($sub))
{
    Connect-AzAccount
}

# If you have multiple subscriptions, set the one to use
# Select-AzSubscription -SubscriptionId <SUBSCRIPTIONID>
下の変数に適切な値を指定し、スクリプトを実行します。
$resourceGroup = "<Resource group>"
$automationAccount = "<Automation account>"
$region = "<Region>"
$SendGridAPIKey = "<SendGrid API key>"
$VaultName = "<A universally unique vault name>"

$userAssignedManagedIdentity = "<User-assigned managed identity>"
Key Vault を作成し、アクセス許可を割り当てます。
# Create the new key vault
$newKeyVault = New-AzKeyVault `
    -VaultName $VaultName `
    -ResourceGroupName $resourceGroup `
    -Location $region

$resourceId = $newKeyVault.ResourceId

# Convert the SendGrid API key into a SecureString
$Secret = ConvertTo-SecureString -String $SendGridAPIKey `
    -AsPlainText -Force

Set-AzKeyVaultSecret -VaultName $VaultName `
    -Name 'SendGridAPIKey' `
    -SecretValue $Secret

# Grant Key Vault access to the Automation account's system-assigned managed identity.
$SA_PrincipalId = (Get-AzAutomationAccount `
    -ResourceGroupName $resourceGroup `
    -Name $automationAccount).Identity.PrincipalId

Set-AzKeyVaultAccessPolicy `
    -VaultName $vaultName `
    -ObjectId $SA_PrincipalId `
    -PermissionsToSecrets Set, Get

# Grant Key Vault access to the user-assigned managed identity.
$UAMI = Get-AzUserAssignedIdentity `
    -ResourceGroupName $resourceGroup `
    -Name $userAssignedManagedIdentity

Set-AzKeyVaultAccessPolicy `
    -VaultName $vaultName `
    -ObjectId $UAMI.PrincipalId `
    -PermissionsToSecrets Set, Get
Azure Key Vault を作成してシークレットを格納するその他の方法については、Key Vault のクイックスタートを参照してください。
マネージド ID にアクセス許可を割り当てる
適切なマネージド ID にアクセス許可を割り当てます。 Runbook では、Automation アカウントのシステム割り当てマネージド ID またはユーザー割り当てマネージド ID のいずれかを使用できます。 以下に、各 ID にアクセス許可を割り当てる手順を示します。 次の手順では PowerShell を使用します。 ポータルを使用する場合は、「Azure portal を使用して Azure ロールを割り当てる」を参照してください。
PowerShell コマンドレット New-AzRoleAssignment を使用して、システム割り当てマネージド ID にロールを割り当てます。
New-AzRoleAssignment `
    -ObjectId $SA_PrincipalId `
    -ResourceGroupName $resourceGroup `
    -RoleDefinitionName "Reader"
ユーザー割り当てマネージド ID にロールを割り当てる
New-AzRoleAssignment `
    -ObjectId $UAMI.PrincipalId`
    -ResourceGroupName $resourceGroup `
    -RoleDefinitionName "Reader"
システム割り当てマネージド ID の場合は、
ClientIdを表示し、後で使用するためにその値を記録します。$UAMI.ClientId
Runbook を作成してメールを送信する
Key Vault を作成し、SendGrid API キーを格納したら、次に、API キーを取得してメールを送信する Runbook を作成します。 Azure Key Vault からシークレットを取得するために、システム割り当てマネージド ID を使用して Azure に対して認証する Runbook を使用しましょう。
Send-GridMailMessage Runbook を呼び出します。 さまざまなシナリオに使用される PowerShell スクリプトを変更できます。
Azure portal にサインインし、お使いの Automation アカウントに移動します。
開いている [Automation アカウント] ページの [プロセス オートメーション] で、 [Runbook] を選択します。
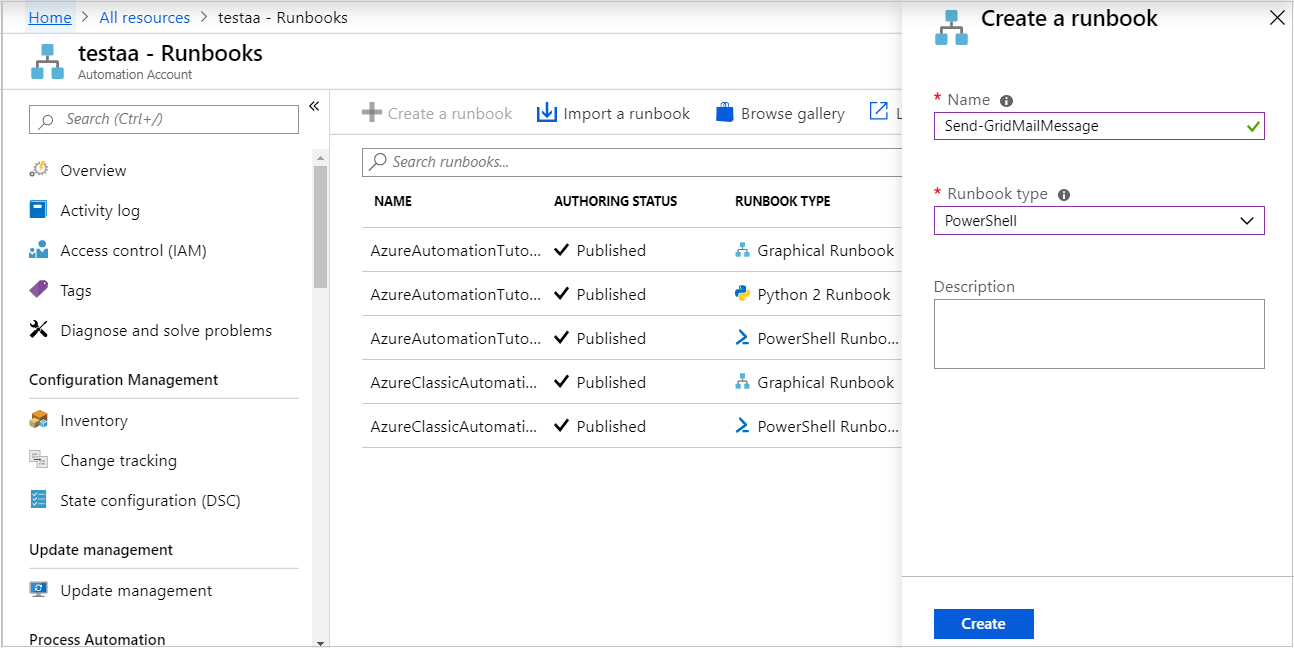
[+ Runbook の作成] を選択します。
- Runbook に
Send-GridMailMessageという名前を付けます。 - [Runbook の種類] ドロップダウン メニューから、[PowerShell] を選択します。
- [作成] を選択します
- Runbook に
Runbook が作成され、[PowerShell Runbook の編集] ページが開きます。
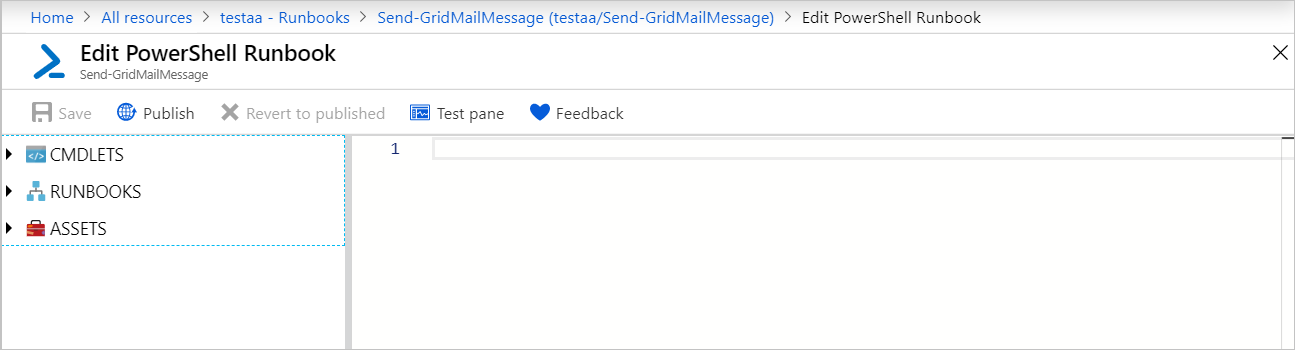
[編集] ページに、次の PowerShell の例をコピーします。
VaultNameには、Key Vault に対して選択した名前が指定されていることを確認します。Param( [Parameter(Mandatory=$True)] [String] $destEmailAddress, [Parameter(Mandatory=$True)] [String] $fromEmailAddress, [Parameter(Mandatory=$True)] [String] $subject, [Parameter(Mandatory=$True)] [String] $content, [Parameter(Mandatory=$True)] [String] $ResourceGroupName ) # Ensures you do not inherit an AzContext in your runbook Disable-AzContextAutosave -Scope Process # Connect to Azure with system-assigned managed identity $AzureContext = (Connect-AzAccount -Identity).context # set and store context $AzureContext = Set-AzContext -SubscriptionName $AzureContext.Subscription -DefaultProfile $AzureContext $VaultName = "<Enter your vault name>" $SENDGRID_API_KEY = Get-AzKeyVaultSecret ` -VaultName $VaultName ` -Name "SendGridAPIKey" ` -AsPlainText -DefaultProfile $AzureContext $headers = New-Object "System.Collections.Generic.Dictionary[[String],[String]]" $headers.Add("Authorization", "Bearer " + $SENDGRID_API_KEY) $headers.Add("Content-Type", "application/json") $body = @{ personalizations = @( @{ to = @( @{ email = $destEmailAddress } ) } ) from = @{ email = $fromEmailAddress } subject = $subject content = @( @{ type = "text/plain" value = $content } ) } $bodyJson = $body | ConvertTo-Json -Depth 4 $response = Invoke-RestMethod -Uri https://api.sendgrid.com/v3/mail/send -Method Post -Headers $headers -Body $bodyJsonRunbook をシステム割り当てマネージド ID で実行する場合は、コードをそのままにしておきます。 ユーザー割り当てマネージド ID を使用する場合は、次のようにします。
- 18 行目から、
$AzureContext = (Connect-AzAccount -Identity).contextを削除し、 - それを
$AzureContext = (Connect-AzAccount -Identity -AccountId <ClientId>).contextに置き換えた後、 - 前に取得したクライアント ID を入力します。
- 18 行目から、
[保存]、[発行] の順に選択し、確認を求められたら [はい] を選択します。
Runbook が正常に実行されることを確認するには、「Runbook をテストする」または Runbook の開始に関するページの手順に従います。
最初にテスト用のメールが表示されない場合は、迷惑メールおよびスパムのフォルダーを確認してください。
リソースをクリーンアップする
Runbook が必要なくなったら、それを Runbook の一覧で選択し、[削除] を選択します。
キー コンテナーを削除するには、Remove-AzKeyVault コマンドレットを使用します。
$VaultName = "<your KeyVault name>"
$resourceGroup = "<your ResourceGroup name>"
Remove-AzKeyVault -VaultName $VaultName -ResourceGroupName $resourceGroup
次のステップ
- Runbook ジョブのデータを Log Analytics ワークスペースに送信するには、「Azure Monitor ログに Azure Automation のジョブ データを転送する」を参照してください。
- 基本レベルのメトリックとログを監視するには、「Azure Automation Runbook をトリガーするアラートを使用する」を参照してください。