カオス実験テンプレートを使用して、自動スケールが無効になっている仮想マシン スケール セットの可用性ゾーンを停止する
カオス実験を使用して、制御された環境で障害を引き起こすことで、アプリケーションにこれらの障害に対する回復性があることを確認できます。 この記事では、事前設定された実験テンプレートと Azure Chaos Studio を使用して、仮想マシン スケール セット インスタンスの可用性ゾーン (自動スケールが無効) を停止します。
前提条件
- Azure サブスクリプション。 Azure サブスクリプションをお持ちでない場合は、開始する前に Azure 無料アカウントを作成してください。
- 仮想マシン スケール セット インスタンス。
- 自動スケール 設定 インスタンス。
仮想マシン スケール セットと自動スケール 設定 インスタンスで Chaos Studio を有効にする
Azure Chaos Studio は、そのリソースが Chaos Studio に追加されるまで、リソースに対して障害を挿入できません。 Chaos Studio にリソースを追加するには、そのリソースにターゲットと機能を作成します。 Virtual Machine Scale Sets のターゲットの種類は 1 つのみ (Microsoft-VirtualMachineScaleSet)、機能も 1 つのみ (shutdown) です。 自動スケール 設定には、ターゲットの種類 () と機能 (Microsoft-AutoScaleSettingsdisableAutoscale) が 1 つだけ含まれます。 その他のリソースには、ターゲットの種類が最大 2 つ含まれます。 ターゲットの種類の 1 つはサービスダイレクト障害用です。 もう 1 つのターゲットの種類はエージェントベース障害用です。 他のリソースには、他にも多くの機能がある場合があります。
Azure portal を開きます。
検索バーで「Chaos Studio」を検索します。
[ターゲット] を選択し、自動スケール設定リソースを見つけます。
自動スケール設定リソースを選択し、[Enable targets Enable service-direct targets]\(ターゲット>を有効にする\) を選択します。
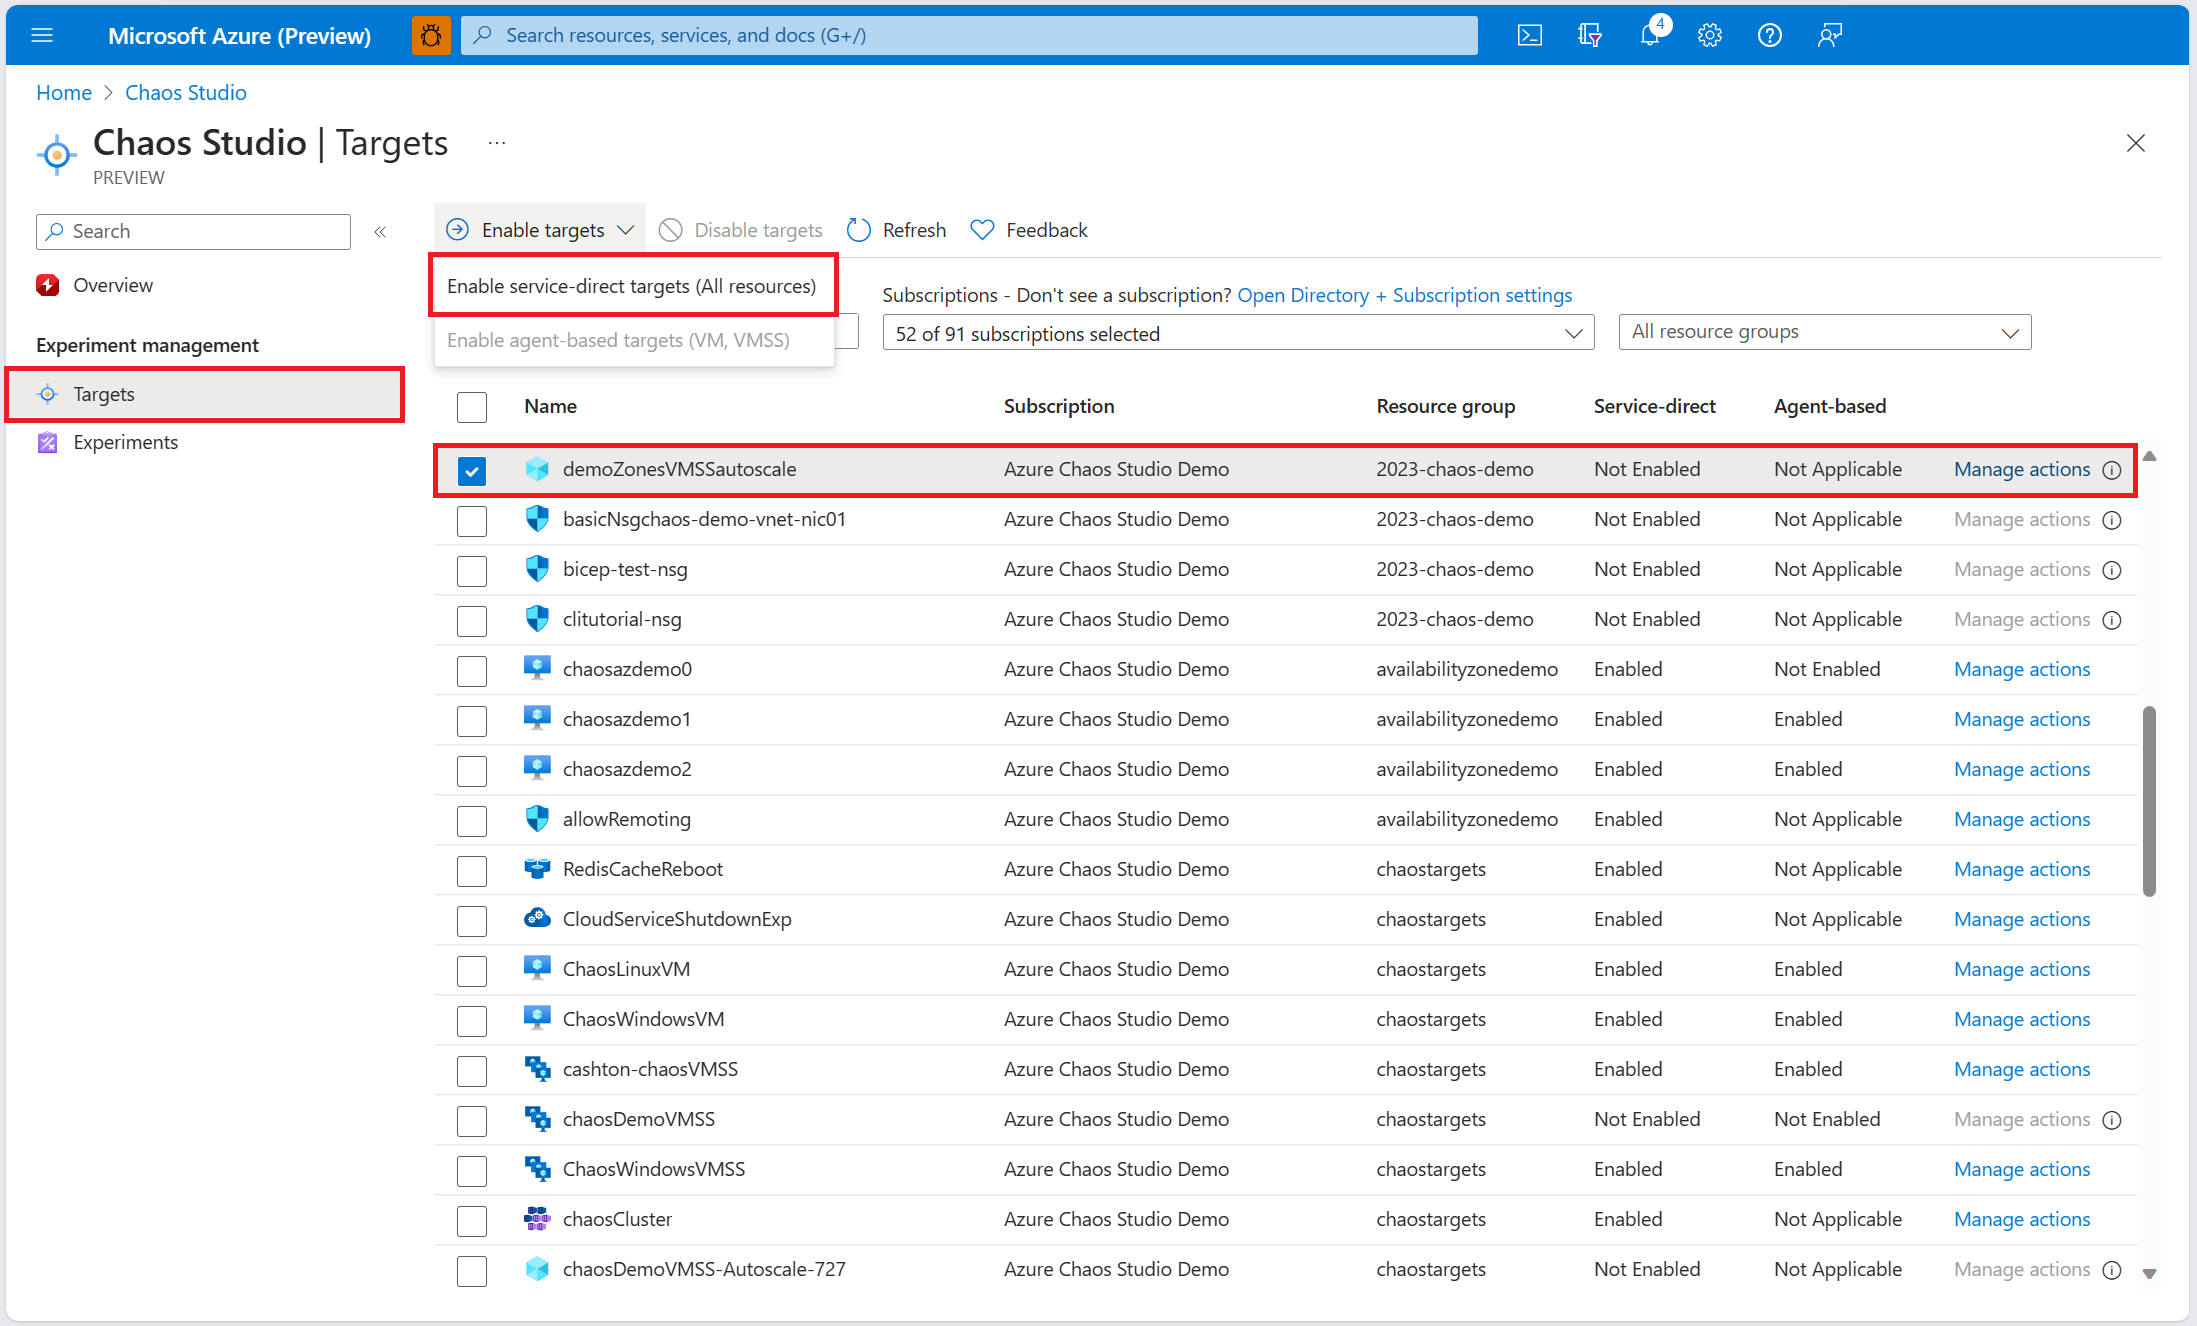
[確認と有効化]>[有効化] を選択します。
仮想マシン スケール セット リソースを見つけます。
仮想マシン スケール セット リソースを選択し、[ターゲットの有効化]>[サービスダイレクト ターゲットを有効にする] を順に選択します。

[確認と有効化]>[有効化] を選択します。


これで、自動スケール設定と仮想マシン スケール セットが Chaos Studio に正常に追加されました。
テンプレートから実験を作成する
自動的に入力された実験テンプレートから実験を作成できるようになりました。 カオス実験では、ターゲット リソースに対して実行するアクションを定義します。 アクションは編成され、順番に実行されます。 また、カオス実験では、並列で実行されるブランチに対して実行するアクションも定義します。
Chaos Studio で、[実験]>[作成]>[テンプレートから新規作成] に移動します。

[可用性ゾーンダウン] を選択 します。

リソースの名前付けのガイドラインに準拠した実験の名前を追加します。 Permissions(次へ: アクセス許可) をクリックします。

カオス実験を正常に実行するには、ターゲット リソースに対する十分なアクセス許可が付与されている必要があります。 実験のためのシステム割り当てマネージド ID またはユーザー割り当てマネージド ID を選びます。 Chaos Studio での実行 (カスタム ロールの形式で) に必要なアクセス許可を実験の ID に追加する場合は、カスタム ロールの割り当てを有効にすることができます。 [Next: Experiment designer] (次へ: 実験デザイナー >) を選択します。

自動スケールの無効化エラー内で、[編集] を選択します。

障害パラメーターを確認して、[次へ: ターゲット リソース] を選択します。

実験で使用する自動スケール設定リソースを選択します。 [保存] を選択します。

VMSS シャットダウン (バージョン 2.0) エラー内で、[編集] を選択します。

障害パラメーターを確認して、[次へ: ターゲット リソース] を選択します。
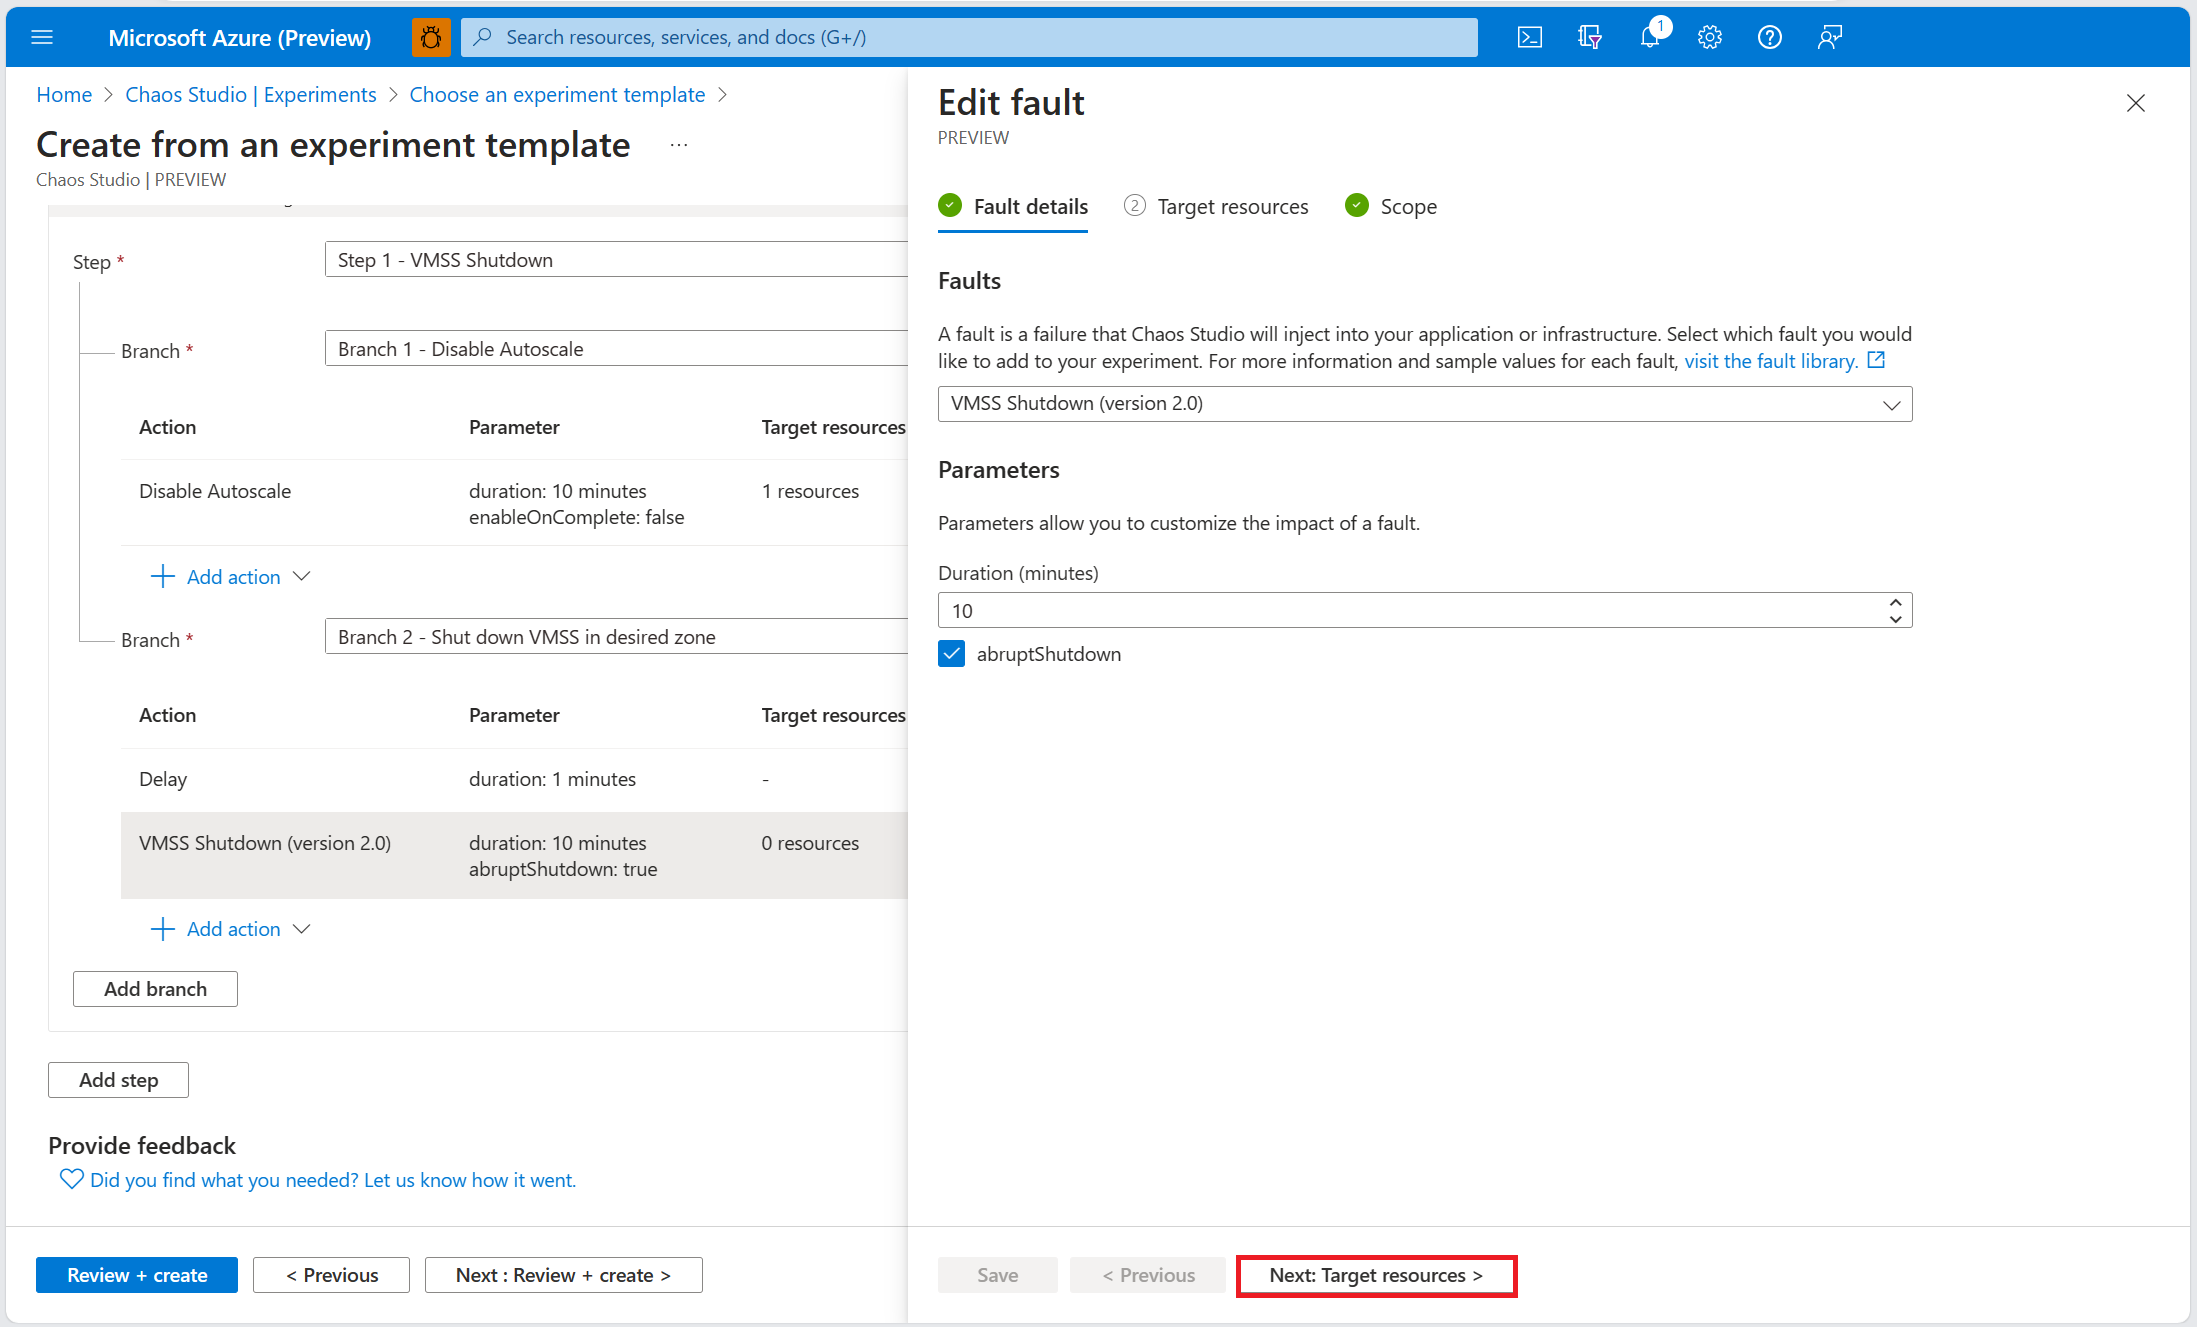
実験で使用する仮想マシン スケール セット リソースを選択します。 [次へ: スコープ] を選択します。

停止する仮想マシン スケール セット内のゾーンを選択します。 [保存] を選択します。
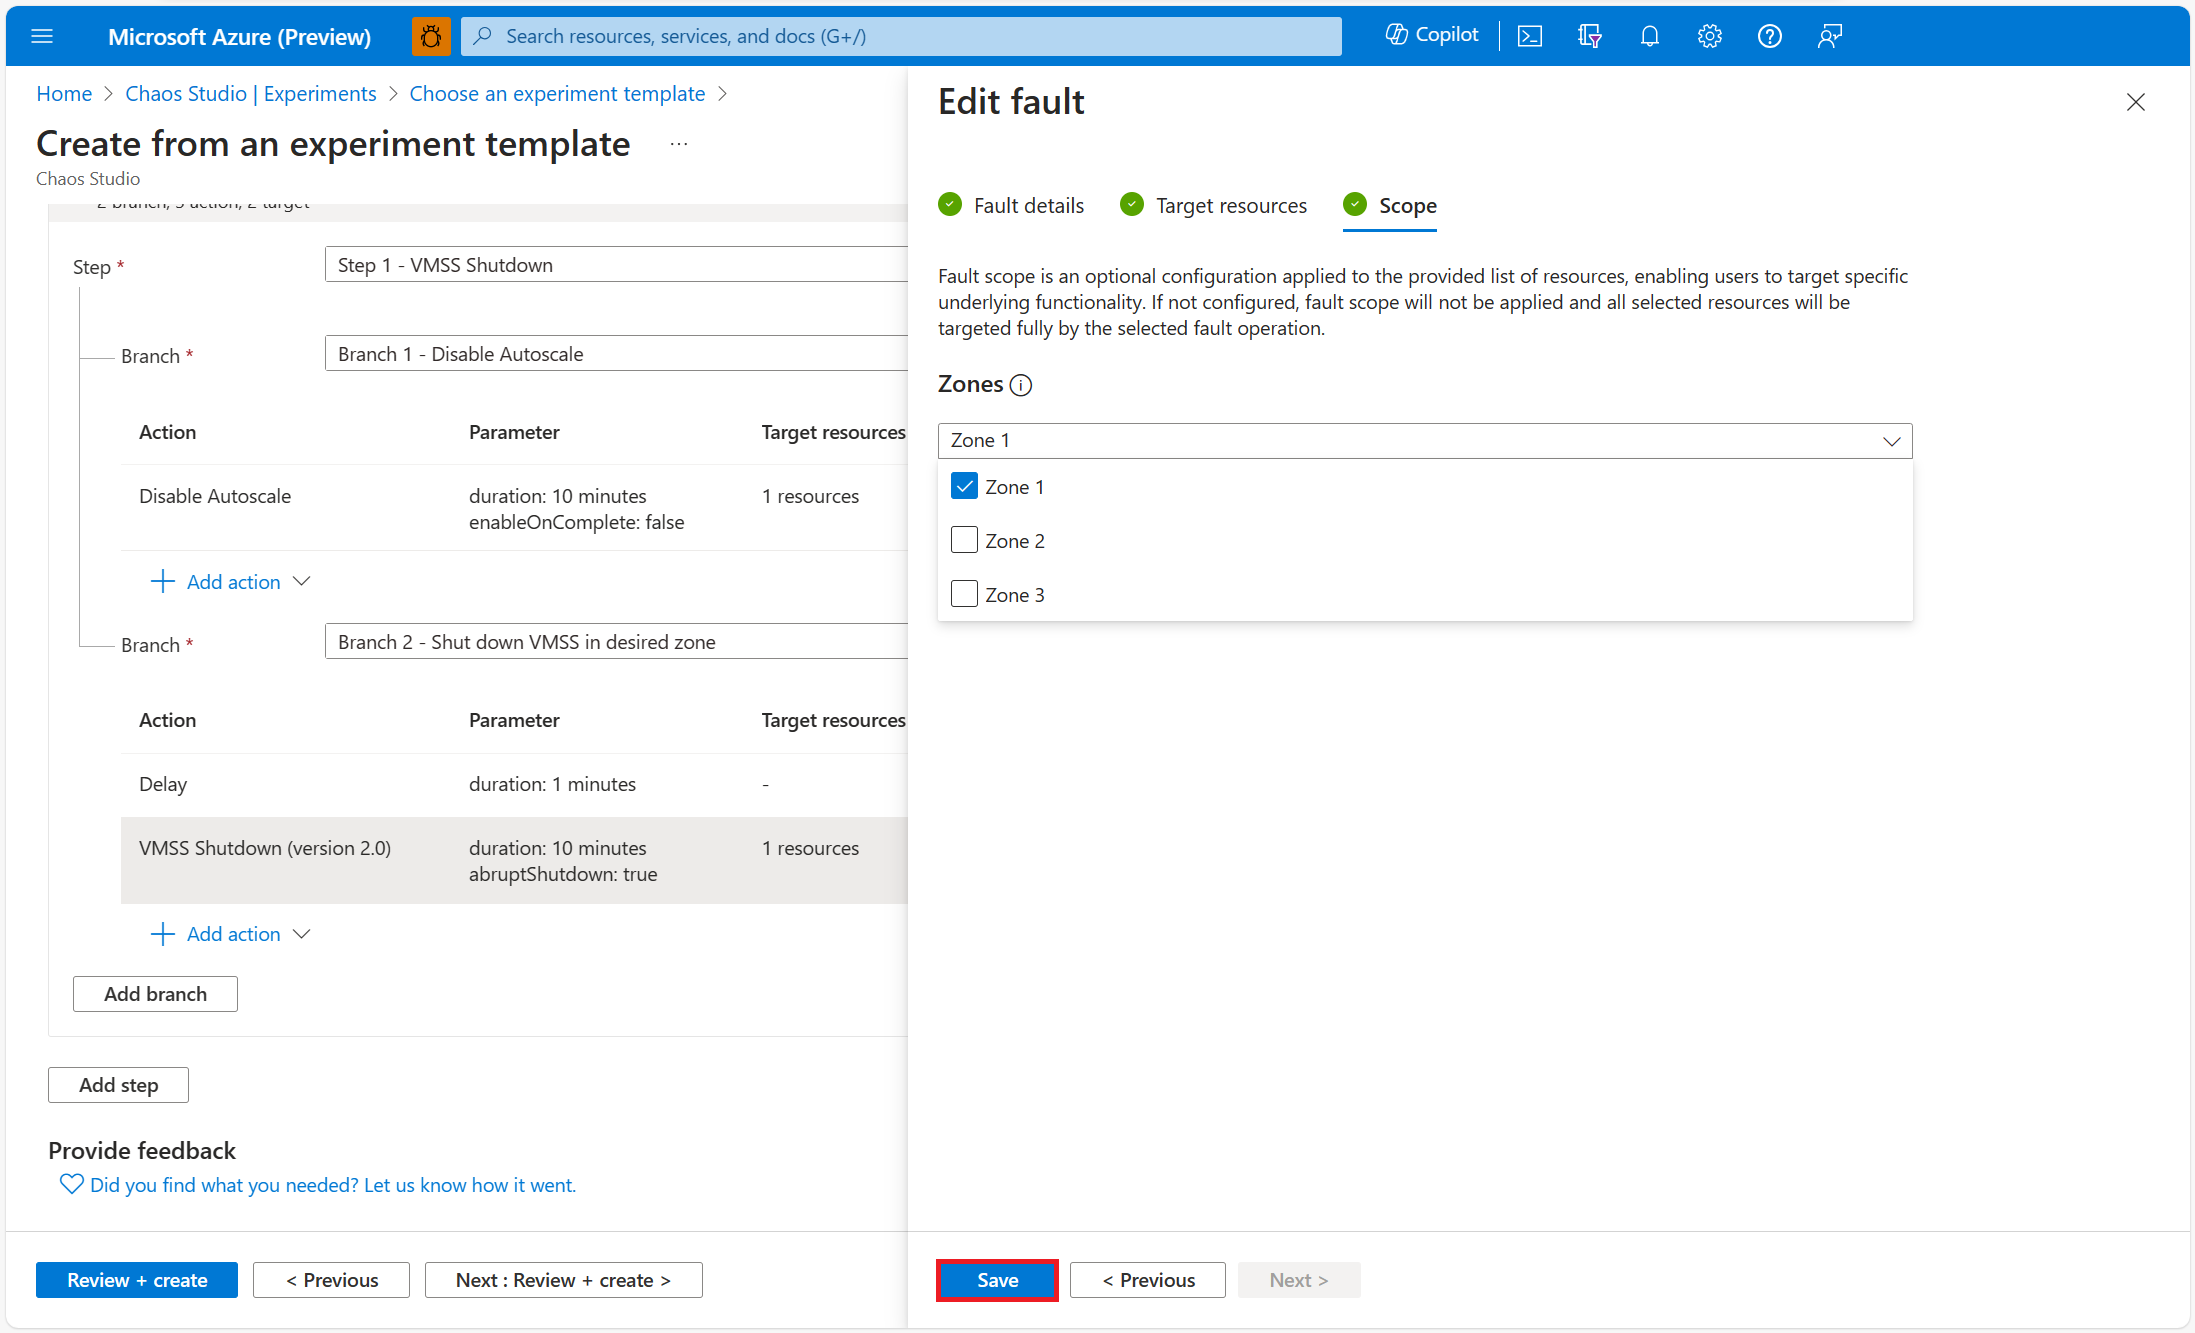
[確認と作成]>[作成] を選択して、実験を保存します。


実験を実行する
これで、実験を実行する準備が整いました。
- [実験] ビューで実験を選びます。 [スタート]>[OK] を選択します。
- [状態] が [実行中] に変わったら、[履歴] の下にある最新の実行の [詳細] を選択して、実行中の実験の詳細を確認します。
次のステップ
可用性ゾーンダウン テンプレートの実験を実行したので、次の準備ができました。