クイックスタート: Custom Vision クライアント ライブラリを使用して物体検出プロジェクトを作成する
.NET 用 Custom Vision クライアント ライブラリの使用を開始します。 以下の手順に従って、パッケージをインストールし、物体検出モデルを構築するためのコード例を試してみましょう。 プロジェクトを作成し、タグを追加し、サンプル画像でプロジェクトをトレーニングして、プロジェクトの予測エンドポイント URL を使用してプログラムでテストします。 この例は、独自の画像認識アプリを構築するためのテンプレートとしてご利用ください。
Note
コードを記述 "せずに" 物体検出モデルの構築とトレーニングを行う場合は、代わりにブラウザーベースのガイダンスを参照してください。
リファレンス ドキュメント | ライブラリのソース コード (トレーニング)(予測) | パッケージ (NuGet) (トレーニング)(予測) | サンプル
前提条件
- Azure サブスクリプション - 無料アカウントを作成します
- Visual Studio IDE または現在のバージョンの .NET Core。
- Azure サブスクリプションを入手したら、Azure portal で Custom Vision リソースを作成し、トレーニングおよび予測リソースを作成します。
- Free 価格レベル (
F0) を使用してサービスを試用し、後から運用環境用の有料レベルにアップグレードすることができます。
- Free 価格レベル (
環境変数を作成する
この例では、アプリケーションを実行しているローカル コンピューター上の環境変数に資格情報を書き込みます。
Azure Portal にアクセスします。 「前提条件」セクションで作成した Custom Vision リソースが正常にデプロイされたら、[次の手順] の [リソースに移動] ボタンを選択します。 キーとエンドポイントは、リソースの [キー] および [エンドポイント] ページの [リソース管理] にあります。 API エンドポイントに加え、トレーニング リソース用と予測リソース用の両方のキーを取得する必要があります。
予測リソース ID は、Azure portal の対象の予測リソースの [プロパティ] タブに、リソース ID として表示されます。
ヒント
https://www.customvision.ai/ を使用してもこれらの値を取得できます。 サインインしたら、右上にある [設定] アイコンを選択します。 [設定] ページで、すべてのキー、リソース ID、エンドポイントを表示できます。
注意
キーは、コードに直接含めないようにし、公開しないでください。 Azure Key Vault などのその他の認証オプションについては、Azure AI サービスのセキュリティに関する記事を参照してください。
環境変数を設定するには、コンソール ウィンドウを開き、オペレーティング システムと開発環境の指示に従います。
VISION_TRAINING KEY環境変数を設定するには、your-training-keyをトレーニング用のリソースのキーの 1 つに置き換えます。VISION_TRAINING_ENDPOINT環境変数を設定するには、your-training-endpointをトレーニング用のリソースのエンドポイントに置き換えます。VISION_PREDICTION_KEY環境変数を設定するには、your-prediction-keyを予測リソースのキーの 1 つに置き換えます。VISION_PREDICTION_ENDPOINT環境変数を設定するには、your-prediction-endpointを予測リソースのエンドポイントに置き換えます。VISION_PREDICTION_RESOURCE_ID環境変数を設定するには、your-resource-idを予測リソースのリソース ID に置き換えます。
setx VISION_TRAINING_KEY your-training-key
setx VISION_TRAINING_ENDPOINT your-training-endpoint
setx VISION_PREDICTION_KEY your-prediction-key
setx VISION_PREDICTION_ENDPOINT your-prediction-endpoint
setx VISION_PREDICTION_RESOURCE_ID your-resource-id
実行中のプログラムのうち、環境変数の読み取りを必要とするプログラム (コンソール ウィンドウを含む) については、環境変数を読み込む再起動が必要となる場合があります。
設定
新しい C# アプリケーションを作成する
Visual Studio を使用して、新しい .NET Core アプリケーションを作成します。
クライアント ライブラリをインストールする
新しいプロジェクトを作成したら、ソリューション エクスプローラーでプロジェクト ソリューションを右クリックし、 [NuGet パッケージの管理] を選択して、クライアント ライブラリをインストールします。 パッケージ マネージャーが開いたら、[参照] を選択し、[プレリリースを含める] をオンにして、Microsoft.Azure.CognitiveServices.Vision.CustomVision.Training と Microsoft.Azure.CognitiveServices.Vision.CustomVision.Prediction を検索します。 最新バージョンを選択し、 [インストール] を選択します。
ヒント
クイックスタートのコード ファイル全体を一度にご覧いただけます。 これは GitHub にあり、このクイックスタートのコード例が含まれています。
プロジェクト ディレクトリから program.cs ファイルを開いて、次の using ディレクティブを追加します。
using Microsoft.Azure.CognitiveServices.Vision.CustomVision.Prediction;
using Microsoft.Azure.CognitiveServices.Vision.CustomVision.Training;
using Microsoft.Azure.CognitiveServices.Vision.CustomVision.Training.Models;
using System;
using System.Collections.Generic;
using System.IO;
using System.Linq;
using System.Threading;
アプリケーションの Main メソッドで、環境変数からリソースのキーとエンドポイントを取得する変数を作成します。 さらに、後で使用するいくつかの基本的なオブジェクトを宣言します。
    string trainingEndpoint = Environment.GetEnvironmentVariable("VISION_TRAINING_ENDPOINT");

    string trainingKey = Environment.GetEnvironmentVariable("VISION_TRAINING_KEY");
    string predictionEndpoint = Environment.GetEnvironmentVariable("VISION_PREDICTION_ENDPOINT");
    string predictionKey = Environment.GetEnvironmentVariable("VISION_PREDICTION_KEY");

    private static Iteration iteration;
    private static string publishedModelName = "CustomODModel";
アプリケーションの Main メソッドで、このクイックスタートで使用するメソッドの呼び出しを追加します。 これらは後で実装します。
CustomVisionTrainingClient trainingApi = AuthenticateTraining(trainingEndpoint, trainingKey);
CustomVisionPredictionClient predictionApi = AuthenticatePrediction(predictionEndpoint, predictionKey);

Project project = CreateProject(trainingApi);
AddTags(trainingApi, project);
UploadImages(trainingApi, project);
TrainProject(trainingApi, project);
PublishIteration(trainingApi, project);
TestIteration(predictionApi, project);
クライアントを認証する
新しいメソッドで、エンドポイントとキーを使用してトレーニング クライアントと予測クライアントをインスタンス化します。
private CustomVisionTrainingClient AuthenticateTraining(string endpoint, string trainingKey, string predictionKey)
{
    // Create the Api, passing in the training key
    CustomVisionTrainingClient trainingApi = new CustomVisionTrainingClient(new Microsoft.Azure.CognitiveServices.Vision.CustomVision.Training.ApiKeyServiceClientCredentials(trainingKey))
    {
        Endpoint = endpoint
    };
    return trainingApi;
}
private CustomVisionPredictionClient AuthenticatePrediction(string endpoint, string predictionKey)
{
    // Create a prediction endpoint, passing in the obtained prediction key
    CustomVisionPredictionClient predictionApi = new CustomVisionPredictionClient(new Microsoft.Azure.CognitiveServices.Vision.CustomVision.Prediction.ApiKeyServiceClientCredentials(predictionKey))
    {
        Endpoint = endpoint
    };
    return predictionApi;
}
新しい Custom Vision プロジェクトを作成する
次のメソッドは、物体検出プロジェクトを作成します。 作成したプロジェクトは、Custom Vision Web サイトに表示されます。 プロジェクトを作成するときに他のオプションを指定するには、CreateProject メソッドを参照してください (検出機能の構築に関する Web ポータル ガイドで説明されています)。
private Project CreateProject(CustomVisionTrainingClient trainingApi)
{
    // Find the object detection domain
    var domains = trainingApi.GetDomains();
    var objDetectionDomain = domains.FirstOrDefault(d => d.Type == "ObjectDetection");

    // Create a new project
    Console.WriteLine("Creating new project:");
    project = trainingApi.CreateProject("My New Project", null, objDetectionDomain.Id);

    return project;
}
プロジェクトにタグを追加する
このメソッドでは、モデルをトレーニングするタグを定義します。
private void AddTags(CustomVisionTrainingClient trainingApi, Project project)
{
    // Make two tags in the new project
    var forkTag = trainingApi.CreateTag(project.Id, "fork");
    var scissorsTag = trainingApi.CreateTag(project.Id, "scissors");
}
画像をアップロードし、タグ付けする
最初に、このプロジェクト用のサンプル画像をダウンロードします。 サンプル画像フォルダーの内容をお使いのローカル デバイスに保存します。
物体検出プロジェクトで画像にタグを付ける際は、タグ付けする各物体の領域を正規化座標を使用して指定する必要があります。 次のコードは、それぞれのサンプル画像とそのタグ付け領域とを関連付けるものです。
private void UploadImages(CustomVisionTrainingClient trainingApi, Project project)
{
    Dictionary<string, double[]> fileToRegionMap = new Dictionary<string, double[]>()
    {
        // FileName, Left, Top, Width, Height
        {"scissors_1", new double[] { 0.4007353, 0.194068655, 0.259803921, 0.6617647 } },
        {"scissors_2", new double[] { 0.426470578, 0.185898721, 0.172794119, 0.5539216 } },
        {"scissors_3", new double[] { 0.289215684, 0.259428144, 0.403186262, 0.421568632 } },
        {"scissors_4", new double[] { 0.343137264, 0.105833367, 0.332107842, 0.8055556 } },
        {"scissors_5", new double[] { 0.3125, 0.09766343, 0.435049027, 0.71405226 } },
        {"scissors_6", new double[] { 0.379901975, 0.24308826, 0.32107842, 0.5718954 } },
        {"scissors_7", new double[] { 0.341911763, 0.20714055, 0.3137255, 0.6356209 } },
        {"scissors_8", new double[] { 0.231617644, 0.08459154, 0.504901946, 0.8480392 } },
        {"scissors_9", new double[] { 0.170343131, 0.332957536, 0.767156839, 0.403594762 } },
        {"scissors_10", new double[] { 0.204656869, 0.120539248, 0.5245098, 0.743464053 } },
        {"scissors_11", new double[] { 0.05514706, 0.159754932, 0.799019635, 0.730392158 } },
        {"scissors_12", new double[] { 0.265931368, 0.169558853, 0.5061275, 0.606209159 } },
        {"scissors_13", new double[] { 0.241421565, 0.184264734, 0.448529422, 0.6830065 } },
        {"scissors_14", new double[] { 0.05759804, 0.05027781, 0.75, 0.882352948 } },
        {"scissors_15", new double[] { 0.191176474, 0.169558853, 0.6936275, 0.6748366 } },
        {"scissors_16", new double[] { 0.1004902, 0.279036, 0.6911765, 0.477124184 } },
        {"scissors_17", new double[] { 0.2720588, 0.131977156, 0.4987745, 0.6911765 } },
        {"scissors_18", new double[] { 0.180147052, 0.112369314, 0.6262255, 0.6666667 } },
        {"scissors_19", new double[] { 0.333333343, 0.0274019931, 0.443627447, 0.852941155 } },
        {"scissors_20", new double[] { 0.158088237, 0.04047389, 0.6691176, 0.843137264 } },
        {"fork_1", new double[] { 0.145833328, 0.3509314, 0.5894608, 0.238562092 } },
        {"fork_2", new double[] { 0.294117659, 0.216944471, 0.534313738, 0.5980392 } },
        {"fork_3", new double[] { 0.09191177, 0.0682516545, 0.757352948, 0.6143791 } },
        {"fork_4", new double[] { 0.254901975, 0.185898721, 0.5232843, 0.594771266 } },
        {"fork_5", new double[] { 0.2365196, 0.128709182, 0.5845588, 0.71405226 } },
        {"fork_6", new double[] { 0.115196079, 0.133611143, 0.676470637, 0.6993464 } },
        {"fork_7", new double[] { 0.164215669, 0.31008172, 0.767156839, 0.410130739 } },
        {"fork_8", new double[] { 0.118872553, 0.318251669, 0.817401946, 0.225490168 } },
        {"fork_9", new double[] { 0.18259804, 0.2136765, 0.6335784, 0.643790841 } },
        {"fork_10", new double[] { 0.05269608, 0.282303959, 0.8088235, 0.452614367 } },
        {"fork_11", new double[] { 0.05759804, 0.0894935, 0.9007353, 0.3251634 } },
        {"fork_12", new double[] { 0.3345588, 0.07315363, 0.375, 0.9150327 } },
        {"fork_13", new double[] { 0.269607842, 0.194068655, 0.4093137, 0.6732026 } },
        {"fork_14", new double[] { 0.143382356, 0.218578458, 0.7977941, 0.295751631 } },
        {"fork_15", new double[] { 0.19240196, 0.0633497, 0.5710784, 0.8398692 } },
        {"fork_16", new double[] { 0.140931368, 0.480016381, 0.6838235, 0.240196079 } },
        {"fork_17", new double[] { 0.305147052, 0.2512582, 0.4791667, 0.5408496 } },
        {"fork_18", new double[] { 0.234068632, 0.445702642, 0.6127451, 0.344771236 } },
        {"fork_19", new double[] { 0.219362751, 0.141781077, 0.5919118, 0.6683006 } },
        {"fork_20", new double[] { 0.180147052, 0.239820287, 0.6887255, 0.235294119 } }
    };
注意
対象のプロジェクトで、領域の座標をマークするためのクリックアンドドラッグ ユーティリティがない場合は、Custom Vision Web サイトで Web UI を使用できます。 この例では、座標は既に指定されています。
さらに、この関連付けのマップを使用して、それぞれのサンプル画像を対応する領域の座標と共にアップロードします。 1 回のバッチで最大 64 個の画像をアップロードできます。 適切なフォルダーの場所を指すように imagePath 値を変更する必要がある場合があります。
    // Add all images for fork
    var imagePath = Path.Combine("Images", "fork");
    var imageFileEntries = new List<ImageFileCreateEntry>();
    foreach (var fileName in Directory.EnumerateFiles(imagePath))
    {
        var region = fileToRegionMap[Path.GetFileNameWithoutExtension(fileName)];
        imageFileEntries.Add(new ImageFileCreateEntry(fileName, File.ReadAllBytes(fileName), null, new List<Region>(new Region[] { new Region(forkTag.Id, region[0], region[1], region[2], region[3]) })));
    }
    trainingApi.CreateImagesFromFiles(project.Id, new ImageFileCreateBatch(imageFileEntries));

    // Add all images for scissors
    imagePath = Path.Combine("Images", "scissors");
    imageFileEntries = new List<ImageFileCreateEntry>();
    foreach (var fileName in Directory.EnumerateFiles(imagePath))
    {
        var region = fileToRegionMap[Path.GetFileNameWithoutExtension(fileName)];
        imageFileEntries.Add(new ImageFileCreateEntry(fileName, File.ReadAllBytes(fileName), null, new List<Region>(new Region[] { new Region(scissorsTag.Id, region[0], region[1], region[2], region[3]) })));
    }
    trainingApi.CreateImagesFromFiles(project.Id, new ImageFileCreateBatch(imageFileEntries));
}
この時点で、すべてのサンプル画像はアップロード済みです。それぞれの画像には、関連するピクセル四角形と共にタグ (fork または scissors) が付けられています。
プロジェクトをトレーニングする
このメソッドは、プロジェクトにおけるトレーニングの初回イテレーションを作成するものです。 トレーニングが完了するまで、サービスに対してクエリが実行されます。
private void TrainProject(CustomVisionTrainingClient trainingApi, Project project)
{

    // Now there are images with tags start training the project
    Console.WriteLine("\tTraining");
    iteration = trainingApi.TrainProject(project.Id);

    // The returned iteration will be in progress, and can be queried periodically to see when it has completed
    while (iteration.Status == "Training")
    {
        Thread.Sleep(1000);

        // Re-query the iteration to get its updated status
        iteration = trainingApi.GetIteration(project.Id, iteration.Id);
    }
}
ヒント
選択したタグでトレーニングする
必要に応じて、適用したタグのサブセットのみでトレーニングできます。 ある特定のタグが十分に適用されていないが、他のタグが十分に適用されている場合に、これを行うことができます。 TrainProject 呼び出しで、trainingParameters パラメーターを使用します。 TrainingParameters を構築し、その SelectedTags プロパティを、使用するタグの ID の一覧に設定します。 モデルは、そのリストのタグのみを認識するようにトレーニングします。
現在のイテレーションを公開する
このメソッドでは、モデルの現在のイテレーションをクエリの実行に使用できるようにします。 モデル名は、予測要求を送信するための参照として使用できます。 predictionResourceId には、独自の値を入力する必要があります。 予測リソース ID は、Azure portal の対象のリソースの [プロパティ] タブに、リソース ID として表示されます。
private void PublishIteration(CustomVisionTrainingClient trainingApi, Project project)
{

    // The iteration is now trained. Publish it to the prediction end point.
    var predictionResourceId = Environment.GetEnvironmentVariable("VISION_PREDICTION_RESOURCE_ID");
    trainingApi.PublishIteration(project.Id, iteration.Id, publishedModelName, predictionResourceId);
    Console.WriteLine("Done!\n");
}
予測エンドポイントをテストする
このメソッドでは、テスト画像を読み込み、モデル エンドポイントを照会して、予測データをコンソールに出力します。
private void TestIteration(CustomVisionPredictionClient predictionApi, Project project)
{

    // Make a prediction against the new project
    Console.WriteLine("Making a prediction:");
    var imageFile = Path.Combine("Images", "test", "test_image.jpg");
    using (var stream = File.OpenRead(imageFile))
    {
        var result = predictionApi.DetectImage(project.Id, publishedModelName, stream);

        // Loop over each prediction and write out the results
        foreach (var c in result.Predictions)
        {
            Console.WriteLine($"\t{c.TagName}: {c.Probability:P1} [ {c.BoundingBox.Left}, {c.BoundingBox.Top}, {c.BoundingBox.Width}, {c.BoundingBox.Height} ]");
        }
    }
    Console.ReadKey();
}
アプリケーションの実行
IDE ウィンドウの上部にある [デバッグ] ボタンをクリックして、アプリケーションを実行します。
アプリケーションを実行すると、コンソール ウィンドウが開いて、次の出力が書き込まれます。
Creating new project:
        Training
Done!

Making a prediction:
        fork: 98.2% [ 0.111609578, 0.184719115, 0.6607002, 0.6637112 ]
        scissors: 1.2% [ 0.112389535, 0.119195729, 0.658031344, 0.7023591 ]
Images/Test/ 内のテスト画像にタグが適切に付けられていること、また検出の領域が正しいことを確認してください。 この時点で、任意のキーを押してアプリケーションを終了できます。
リソースをクリーンアップする
独自の物体検出プロジェクトを実装したい (または画像分類プロジェクトを試したい) 場合、この例のフォーク/ハサミの検出プロジェクトは削除してかまいません。 無料サブスクリプションでは、2 つの Custom Vision プロジェクトを利用できます。
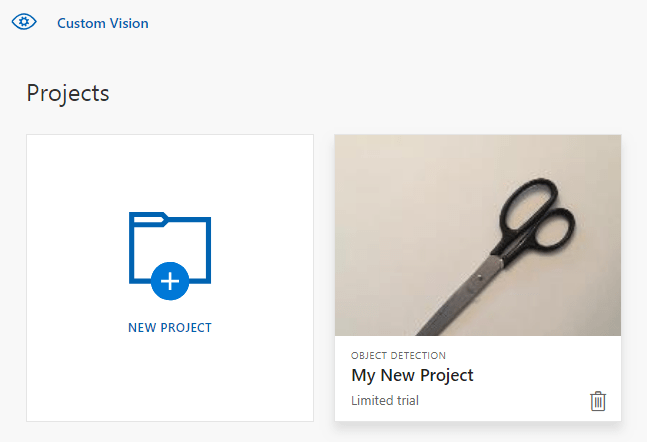
Custom Vision Web サイトで、 [Projects](プロジェクト) に移動し、[My New Project](自分用の新しいプロジェクト) のごみ箱アイコンを選択します。
次のステップ
以上、物体検出処理の各ステップをコードで実行しました。 このサンプルで実行したトレーニングのイテレーションは 1 回だけですが、多くの場合、精度を高めるために、モデルのトレーニングとテストは複数回行う必要があります。 次のガイドでは、画像の分類について取り上げていますが、その原理は物体の検出と似ています。
- Custom Vision とは
- このサンプルのソース コードは、GitHub にあります。
- SDK のリファレンス ドキュメント
このガイドでは、Go 用の Custom Vision クライアント ライブラリを使用して物体検出モデルを構築する際の足がかりとして役立つ手順とサンプル コードを紹介します。 プロジェクトを作成し、タグを追加し、プロジェクトをトレーニングして、プロジェクトの予測エンドポイント URL を使用してプログラムでテストします。 この例は、独自の画像認識アプリを構築するためのテンプレートとしてご利用ください。
Note
コードを記述 "せずに" 物体検出モデルの構築とトレーニングを行う場合は、代わりにブラウザーベースのガイダンスを参照してください。
.Go 用 Custom Vision クライアント ライブラリを使用すると、次のことができます。
- 新しい Custom Vision プロジェクトを作成する
- プロジェクトにタグを追加する
- 画像をアップロードし、タグ付けする
- プロジェクトをトレーニングする
- 現在のイテレーションを公開する
- 予測エンドポイントをテストする
前提条件
- Azure サブスクリプション - 無料アカウントを作成します
- Go 1.8+
- Azure サブスクリプションを入手したら、Azure portal で Custom Vision リソースを作成し、トレーニングおよび予測リソースを作成します。
- Free 価格レベル (
F0) を使用してサービスを試用し、後から運用環境用の有料レベルにアップグレードすることができます。
- Free 価格レベル (
環境変数を作成する
この例では、アプリケーションを実行しているローカル コンピューター上の環境変数に資格情報を書き込みます。
Azure Portal にアクセスします。 「前提条件」セクションで作成した Custom Vision リソースが正常にデプロイされたら、[次の手順] の [リソースに移動] ボタンを選択します。 キーとエンドポイントは、リソースの [キー] および [エンドポイント] ページの [リソース管理] にあります。 API エンドポイントに加え、トレーニング リソース用と予測リソース用の両方のキーを取得する必要があります。
予測リソース ID は、Azure portal の対象の予測リソースの [プロパティ] タブに、リソース ID として表示されます。
ヒント
https://www.customvision.ai/ を使用してもこれらの値を取得できます。 サインインしたら、右上にある [設定] アイコンを選択します。 [設定] ページで、すべてのキー、リソース ID、エンドポイントを表示できます。
注意
キーは、コードに直接含めないようにし、公開しないでください。 Azure Key Vault などのその他の認証オプションについては、Azure AI サービスのセキュリティに関する記事を参照してください。
環境変数を設定するには、コンソール ウィンドウを開き、オペレーティング システムと開発環境の指示に従います。
VISION_TRAINING KEY環境変数を設定するには、your-training-keyをトレーニング用のリソースのキーの 1 つに置き換えます。VISION_TRAINING_ENDPOINT環境変数を設定するには、your-training-endpointをトレーニング用のリソースのエンドポイントに置き換えます。VISION_PREDICTION_KEY環境変数を設定するには、your-prediction-keyを予測リソースのキーの 1 つに置き換えます。VISION_PREDICTION_ENDPOINT環境変数を設定するには、your-prediction-endpointを予測リソースのエンドポイントに置き換えます。VISION_PREDICTION_RESOURCE_ID環境変数を設定するには、your-resource-idを予測リソースのリソース ID に置き換えます。
setx VISION_TRAINING_KEY your-training-key
setx VISION_TRAINING_ENDPOINT your-training-endpoint
setx VISION_PREDICTION_KEY your-prediction-key
setx VISION_PREDICTION_ENDPOINT your-prediction-endpoint
setx VISION_PREDICTION_RESOURCE_ID your-resource-id
実行中のプログラムのうち、環境変数の読み取りを必要とするプログラム (コンソール ウィンドウを含む) については、環境変数を読み込む再起動が必要となる場合があります。
設定
Custom Vision クライアント ライブラリをインストールする
Go 用の Custom Vision で画像分析アプリを作成するには、Custom Vision のサービス クライアント ライブラリが必要です。 PowerShell で次のコマンドを実行します。
go get -u github.com/Azure/azure-sdk-for-go/...
または、dep を使用している場合は、リポジトリ内で次を実行します。
dep ensure -add github.com/Azure/azure-sdk-for-go
サンプル画像を取得する
この例では、GitHub の Azure AI サービス Python SDK サンプル リポジトリにある画像を使用します。 このリポジトリをお使いの開発環境に複製またはダウンロードしてください。 後の手順のために、フォルダーの場所を覚えておいてください。
Custom Vision プロジェクトを作成する
任意のプロジェクト ディレクトリに sample.go という新しいファイルを作成し、任意のコード エディターで開きます。
新しい Custom Vision Service プロジェクトを作成するための次のコードをスクリプトに追加します。
プロジェクトを作成するときに他のオプションを指定するには、CreateProject メソッドを参照してください (検出機能の構築に関する Web ポータル ガイドで説明されています)。
import(
    "context"
    "bytes"
    "fmt"
    "io/ioutil"
    "path"
    "log"
    "time"
    "github.com/Azure/azure-sdk-for-go/services/cognitiveservices/v3.0/customvision/training"
    "github.com/Azure/azure-sdk-for-go/services/cognitiveservices/v3.0/customvision/prediction"
)

// retrieve environment variables:
var (
    training_key string = os.Getenv("VISION_TRAINING_KEY")
    prediction_key string = os.Getenv("VISION_PREDICTION_KEY")
    prediction_resource_id = os.Getenv("VISION_PREDICTION_RESOURCE_ID")
    endpoint string = os.Getenv("VISION_ENDPOINT")

    project_name string = "Go Sample OD Project"
    iteration_publish_name = "detectModel"
    sampleDataDirectory = "<path to sample images>"
)

func main() {
    fmt.Println("Creating project...")

    ctx = context.Background()

    trainer := training.New(training_key, endpoint)

    var objectDetectDomain training.Domain
    domains, _ := trainer.GetDomains(ctx)

    for _, domain := range *domains.Value {
        fmt.Println(domain, domain.Type)
        if domain.Type == "ObjectDetection" && *domain.Name == "General" {
            objectDetectDomain = domain
            break
        }
    }
    fmt.Println("Creating project...")
    project, _ := trainer.CreateProject(ctx, project_name, "", objectDetectDomain.ID, "")
プロジェクトにタグを作成する
プロジェクトに分類タグを作成するため、sample.go の最後に次のコードを追加します。
# Make two tags in the new project
forkTag, _ := trainer.CreateTag(ctx, *project.ID, "fork", "A fork", string(training.Regular))
scissorsTag, _ := trainer.CreateTag(ctx, *project.ID, "scissors", "Pair of scissors", string(training.Regular))
画像をアップロードし、タグ付けする
物体検出プロジェクトで画像にタグを付ける際は、タグ付けする各物体の領域を正規化座標を使用して指定する必要があります。
注意
領域の座標をマークするためのクリックアンド ドラッグ ユーティリティがない場合は、Customvision.ai で Web UI を使用できます。 この例では、座標は既に指定されています。
画像、タグ、領域をプロジェクトに追加するには、タグの作成後、次のコードを挿入します。 このチュートリアルでは、コード内に領域をハードコーディングしていることに注意してください。 各領域は、正規化座標で境界ボックスを指定しており、座標は、左、上、幅、高さの順に指定しています。
forkImageRegions := map[string][4]float64{
    "fork_1.jpg": [4]float64{ 0.145833328, 0.3509314, 0.5894608, 0.238562092 },
    "fork_2.jpg": [4]float64{ 0.294117659, 0.216944471, 0.534313738, 0.5980392 },
    "fork_3.jpg": [4]float64{ 0.09191177, 0.0682516545, 0.757352948, 0.6143791 },
    "fork_4.jpg": [4]float64{ 0.254901975, 0.185898721, 0.5232843, 0.594771266 },
    "fork_5.jpg": [4]float64{ 0.2365196, 0.128709182, 0.5845588, 0.71405226 },
    "fork_6.jpg": [4]float64{ 0.115196079, 0.133611143, 0.676470637, 0.6993464 },
    "fork_7.jpg": [4]float64{ 0.164215669, 0.31008172, 0.767156839, 0.410130739 },
    "fork_8.jpg": [4]float64{ 0.118872553, 0.318251669, 0.817401946, 0.225490168 },
    "fork_9.jpg": [4]float64{ 0.18259804, 0.2136765, 0.6335784, 0.643790841 },
    "fork_10.jpg": [4]float64{ 0.05269608, 0.282303959, 0.8088235, 0.452614367 },
    "fork_11.jpg": [4]float64{ 0.05759804, 0.0894935, 0.9007353, 0.3251634 },
    "fork_12.jpg": [4]float64{ 0.3345588, 0.07315363, 0.375, 0.9150327 },
    "fork_13.jpg": [4]float64{ 0.269607842, 0.194068655, 0.4093137, 0.6732026 },
    "fork_14.jpg": [4]float64{ 0.143382356, 0.218578458, 0.7977941, 0.295751631 },
    "fork_15.jpg": [4]float64{ 0.19240196, 0.0633497, 0.5710784, 0.8398692 },
    "fork_16.jpg": [4]float64{ 0.140931368, 0.480016381, 0.6838235, 0.240196079 },
    "fork_17.jpg": [4]float64{ 0.305147052, 0.2512582, 0.4791667, 0.5408496 },
    "fork_18.jpg": [4]float64{ 0.234068632, 0.445702642, 0.6127451, 0.344771236 },
    "fork_19.jpg": [4]float64{ 0.219362751, 0.141781077, 0.5919118, 0.6683006 },
    "fork_20.jpg": [4]float64{ 0.180147052, 0.239820287, 0.6887255, 0.235294119 },
}

scissorsImageRegions := map[string][4]float64{
    "scissors_1.jpg": [4]float64{ 0.4007353, 0.194068655, 0.259803921, 0.6617647 },
    "scissors_2.jpg": [4]float64{ 0.426470578, 0.185898721, 0.172794119, 0.5539216 },
    "scissors_3.jpg": [4]float64{ 0.289215684, 0.259428144, 0.403186262, 0.421568632 },
    "scissors_4.jpg": [4]float64{ 0.343137264, 0.105833367, 0.332107842, 0.8055556 },
    "scissors_5.jpg": [4]float64{ 0.3125, 0.09766343, 0.435049027, 0.71405226 },
    "scissors_6.jpg": [4]float64{ 0.379901975, 0.24308826, 0.32107842, 0.5718954 },
    "scissors_7.jpg": [4]float64{ 0.341911763, 0.20714055, 0.3137255, 0.6356209 },
    "scissors_8.jpg": [4]float64{ 0.231617644, 0.08459154, 0.504901946, 0.8480392 },
    "scissors_9.jpg": [4]float64{ 0.170343131, 0.332957536, 0.767156839, 0.403594762 },
    "scissors_10.jpg": [4]float64{ 0.204656869, 0.120539248, 0.5245098, 0.743464053 },
    "scissors_11.jpg": [4]float64{ 0.05514706, 0.159754932, 0.799019635, 0.730392158 },
    "scissors_12.jpg": [4]float64{ 0.265931368, 0.169558853, 0.5061275, 0.606209159 },
    "scissors_13.jpg": [4]float64{ 0.241421565, 0.184264734, 0.448529422, 0.6830065 },
    "scissors_14.jpg": [4]float64{ 0.05759804, 0.05027781, 0.75, 0.882352948 },
    "scissors_15.jpg": [4]float64{ 0.191176474, 0.169558853, 0.6936275, 0.6748366 },
    "scissors_16.jpg": [4]float64{ 0.1004902, 0.279036, 0.6911765, 0.477124184 },
    "scissors_17.jpg": [4]float64{ 0.2720588, 0.131977156, 0.4987745, 0.6911765 },
    "scissors_18.jpg": [4]float64{ 0.180147052, 0.112369314, 0.6262255, 0.6666667 },
    "scissors_19.jpg": [4]float64{ 0.333333343, 0.0274019931, 0.443627447, 0.852941155 },
    "scissors_20.jpg": [4]float64{ 0.158088237, 0.04047389, 0.6691176, 0.843137264 },
}
さらに、この関連付けのマップを使用して、それぞれのサンプル画像を対応する領域の座標と共にアップロードします (1 回のバッチで最大 64 個の画像をアップロードできます。)。 次のコードを追加します。
Note
画像のパスは、事前に Azure AI サービス Go SDK サンプル プロジェクトをダウンロードした場所に応じて変更する必要があります。
// Go through the data table above and create the images
fmt.Println("Adding images...")
var fork_images []training.ImageFileCreateEntry
for file, region := range forkImageRegions {
imageFile, _ := ioutil.ReadFile(path.Join(sampleDataDirectory, "fork", file))
regiontest := forkImageRegions[file]
imageRegion := training.Region{
TagID: forkTag.ID,
Left: ®iontest[0],
Top: ®iontest[1],
Width: ®iontest[2],
Height: ®iontest[3],
}
var fileName string = file
fork_images = append(fork_images, training.ImageFileCreateEntry{
Name: &fileName,
Contents: &imageFile,
Regions: &[]training.Region{imageRegion}
})
}
fork_batch, _ := trainer.CreateImagesFromFiles(ctx, *project.ID, training.ImageFileCreateBatch{
Images: &fork_images,
})
if (!*fork_batch.IsBatchSuccessful) {
fmt.Println("Batch upload failed.")
}
var scissor_images []training.ImageFileCreateEntry
for file, region := range scissorsImageRegions {
imageFile, _ := ioutil.ReadFile(path.Join(sampleDataDirectory, "scissors", file))
imageRegion := training.Region {
TagID:scissorsTag.ID,
Left:®ion[0],
Top:®ion[1],
Width:®ion[2],
Height:®ion[3],
}
scissor_images = append(scissor_images, training.ImageFileCreateEntry {
Name: &file,
Contents: &imageFile,
Regions: &[]training.Region{ imageRegion },
})
}
scissor_batch, _ := trainer.CreateImagesFromFiles(ctx, *project.ID, training.ImageFileCreateBatch{
Images: &scissor_images,
})
if (!*scissor_batch.IsBatchSuccessful) {
fmt.Println("Batch upload failed.")
}
プロジェクトをトレーニングして公開する
このコードにより、予測モデルの最初のイテレーションが作成され、そのイテレーションが予測エンドポイントに公開されます。 公開されたイテレーションに付けられた名前は、予測要求を送信するために使用できます。 イテレーションは、公開されるまで予測エンドポイントで利用できません。
iteration, _ := trainer.TrainProject(ctx, *project.ID)
fmt.Println("Training status:", *iteration.Status)
for {
    if *iteration.Status != "Training" {
        break
    }
    time.Sleep(5 * time.Second)
    iteration, _ = trainer.GetIteration(ctx, *project.ID, *iteration.ID)
    fmt.Println("Training status:", *iteration.Status)
}

trainer.PublishIteration(ctx, *project.ID, *iteration.ID, iteration_publish_name, prediction_resource_id))
予測エンドポイントを使用する
画像を予測エンドポイントに送信し、予測を取得するには、ファイルの末尾に以下のコードを追加します。
    fmt.Println("Predicting...")
    predictor := prediction.New(prediction_key, endpoint)

    testImageData, _ := ioutil.ReadFile(path.Join(sampleDataDirectory, "Test", "test_od_image.jpg"))
    results, _ := predictor.DetectImage(ctx, *project.ID, iteration_publish_name, ioutil.NopCloser(bytes.NewReader(testImageData)), "")

    for _, prediction := range *results.Predictions    {
        boundingBox := *prediction.BoundingBox

        fmt.Printf("\t%s: %.2f%% (%.2f, %.2f, %.2f, %.2f)",
            *prediction.TagName,
            *prediction.Probability * 100,
            *boundingBox.Left,
            *boundingBox.Top,
            *boundingBox.Width,
            *boundingBox.Height)
        fmt.Println("")
    }
}
アプリケーションの実行
sample.go を実行します。
go run sample.go
コンソールにアプリケーションの出力が表示されると思います。 samples/vision/images/Test 内のテスト画像にタグが適切に付けられていること、また検出の領域が正しいことを確認してください。
リソースをクリーンアップする
独自の物体検出プロジェクトを実装したい (または画像分類プロジェクトを試したい) 場合、この例のフォーク/ハサミの検出プロジェクトは削除してかまいません。 無料サブスクリプションでは、2 つの Custom Vision プロジェクトを利用できます。
Custom Vision Web サイトで、 [Projects](プロジェクト) に移動し、[My New Project](自分用の新しいプロジェクト) のごみ箱アイコンを選択します。
次のステップ
以上、物体検出処理の各ステップをコードで実行しました。 このサンプルで実行したトレーニングのイテレーションは 1 回だけですが、多くの場合、精度を高めるために、モデルのトレーニングとテストは複数回行う必要があります。 次のガイドでは、画像の分類について取り上げていますが、その原理は物体の検出と似ています。
- Custom Vision とは
- SDK のリファレンス ドキュメント (トレーニング)
- SDK のリファレンス ドキュメント (予測)
Java 用の Custom Vision クライアント ライブラリを使用して物体検出モデルを構築してみましょう。 以下の手順に従って、パッケージをインストールし、基本タスクのコード例を試してみましょう。 この例は、独自の画像認識アプリを構築するためのテンプレートとしてご利用ください。
Note
コードを記述 "せずに" 物体検出モデルの構築とトレーニングを行いたい場合は、代わりにブラウザーベースのガイダンスを参照してください。
Java 用 Custom Vision クライアント ライブラリを使用すると、次のことができます。
- 新しい Custom Vision プロジェクトを作成する
- プロジェクトにタグを追加する
- 画像をアップロードし、タグ付けする
- プロジェクトをトレーニングする
- 現在のイテレーションを公開する
- 予測エンドポイントをテストする
リファレンス ドキュメント | ライブラリのソース コード (トレーニング)(予測)| 成果物 (Maven) (トレーニング)(予測) | サンプル
前提条件
- Azure サブスクリプション - 無料アカウントを作成します
- 最新バージョンの Java Development Kit(JDK)
- Gradle ビルド ツール、または別の依存関係マネージャー。
- Azure サブスクリプションを入手したら、Azure portal で Custom Vision リソースを作成し、トレーニングおよび予測リソースを作成します。
- Free 価格レベル (
F0) を使用してサービスを試用し、後から運用環境用の有料レベルにアップグレードすることができます。
- Free 価格レベル (
環境変数を作成する
この例では、アプリケーションを実行しているローカル コンピューター上の環境変数に資格情報を書き込みます。
Azure Portal にアクセスします。 「前提条件」セクションで作成した Custom Vision リソースが正常にデプロイされたら、[次の手順] の [リソースに移動] ボタンを選択します。 キーとエンドポイントは、リソースの [キー] および [エンドポイント] ページの [リソース管理] にあります。 API エンドポイントに加え、トレーニング リソース用と予測リソース用の両方のキーを取得する必要があります。
予測リソース ID は、Azure portal の対象の予測リソースの [プロパティ] タブに、リソース ID として表示されます。
ヒント
https://www.customvision.ai/ を使用してもこれらの値を取得できます。 サインインしたら、右上にある [設定] アイコンを選択します。 [設定] ページで、すべてのキー、リソース ID、エンドポイントを表示できます。
注意
キーは、コードに直接含めないようにし、公開しないでください。 Azure Key Vault などのその他の認証オプションについては、Azure AI サービスのセキュリティに関する記事を参照してください。
環境変数を設定するには、コンソール ウィンドウを開き、オペレーティング システムと開発環境の指示に従います。
VISION_TRAINING KEY環境変数を設定するには、your-training-keyをトレーニング用のリソースのキーの 1 つに置き換えます。VISION_TRAINING_ENDPOINT環境変数を設定するには、your-training-endpointをトレーニング用のリソースのエンドポイントに置き換えます。VISION_PREDICTION_KEY環境変数を設定するには、your-prediction-keyを予測リソースのキーの 1 つに置き換えます。VISION_PREDICTION_ENDPOINT環境変数を設定するには、your-prediction-endpointを予測リソースのエンドポイントに置き換えます。VISION_PREDICTION_RESOURCE_ID環境変数を設定するには、your-resource-idを予測リソースのリソース ID に置き換えます。
setx VISION_TRAINING_KEY your-training-key
setx VISION_TRAINING_ENDPOINT your-training-endpoint
setx VISION_PREDICTION_KEY your-prediction-key
setx VISION_PREDICTION_ENDPOINT your-prediction-endpoint
setx VISION_PREDICTION_RESOURCE_ID your-resource-id
実行中のプログラムのうち、環境変数の読み取りを必要とするプログラム (コンソール ウィンドウを含む) については、環境変数を読み込む再起動が必要となる場合があります。
設定
新しい Gradle プロジェクトを作成する
コンソール ウィンドウ (cmd、PowerShell、Bash など) で、ご利用のアプリ用に新しいディレクトリを作成し、そこに移動します。
mkdir myapp && cd myapp
作業ディレクトリから gradle init コマンドを実行します。 次のコマンドを実行すると、build.gradle.kts を含む、Gradle 用の重要なビルド ファイルが作成されます。これは、アプリケーションを作成して構成するために、実行時に使用されます。
gradle init --type basic
DSL を選択するよう求められたら、Kotlin を選択します。
クライアント ライブラリをインストールする
build.gradle.kts を検索し、任意の IDE またはテキスト エディターで開きます。 その後、次のビルド構成をコピーします。 この構成では、エントリ ポイントが CustomVisionQuickstart クラスである Java アプリケーションとしてプロジェクトを定義します。 これによって、Custom Vision ライブラリがインポートされます。
plugins {
    java
    application
}
application {
    mainClassName = "CustomVisionQuickstart"
}
repositories {
    mavenCentral()
}
dependencies {
    compile(group = "com.azure", name = "azure-cognitiveservices-customvision-training", version = "1.1.0-preview.2")
    compile(group = "com.azure", name = "azure-cognitiveservices-customvision-prediction", version = "1.1.0-preview.2")
}
Java ファイルを作成する
作業ディレクトリから次のコマンドを実行し、プロジェクト ソース フォルダーを作成します。
mkdir -p src/main/java
新しいフォルダーに移動し、CustomVisionQuickstart.java という名前のファイルを作成します。 それを任意のエディターまたは IDE で開き、以下の import ステートメントを追加します。
import java.util.Collections;
import java.util.HashMap;
import java.util.List;
import java.util.UUID;

import com.google.common.io.ByteStreams;

import com.microsoft.azure.cognitiveservices.vision.customvision.training.models.Classifier;
import com.microsoft.azure.cognitiveservices.vision.customvision.training.models.Domain;
import com.microsoft.azure.cognitiveservices.vision.customvision.training.models.DomainType;
import com.microsoft.azure.cognitiveservices.vision.customvision.training.models.ImageFileCreateBatch;
import com.microsoft.azure.cognitiveservices.vision.customvision.training.models.ImageFileCreateEntry;
import com.microsoft.azure.cognitiveservices.vision.customvision.training.models.Iteration;
import com.microsoft.azure.cognitiveservices.vision.customvision.training.models.Project;
import com.microsoft.azure.cognitiveservices.vision.customvision.training.models.Region;
import com.microsoft.azure.cognitiveservices.vision.customvision.training.models.TrainProjectOptionalParameter;
import com.microsoft.azure.cognitiveservices.vision.customvision.training.CustomVisionTrainingClient;
import com.microsoft.azure.cognitiveservices.vision.customvision.training.Trainings;
import com.microsoft.azure.cognitiveservices.vision.customvision.training.CustomVisionTrainingManager;
import com.microsoft.azure.cognitiveservices.vision.customvision.prediction.models.ImagePrediction;
import com.microsoft.azure.cognitiveservices.vision.customvision.prediction.models.Prediction;
import com.microsoft.azure.cognitiveservices.vision.customvision.prediction.CustomVisionPredictionClient;
import com.microsoft.azure.cognitiveservices.vision.customvision.prediction.CustomVisionPredictionManager;
import com.microsoft.azure.cognitiveservices.vision.customvision.training.models.Tag;
ヒント
クイックスタートのコード ファイル全体を一度にご覧いただけます。 これは GitHub にあり、このクイックスタートのコード例が含まれています。
アプリケーションの CustomVisionQuickstart クラスで、環境変数からリソースのキーとエンドポイントを取得する変数を作成します。
// retrieve environment variables
final static String trainingApiKey = System.getenv("VISION_TRAINING_KEY");
final static String trainingEndpoint = System.getenv("VISION_TRAINING_ENDPOINT");
final static String predictionApiKey = System.getenv("VISION_PREDICTION_KEY");
final static String predictionEndpoint = System.getenv("VISION_PREDICTION_ENDPOINT");
final static String predictionResourceId = System.getenv("VISION_PREDICTION_RESOURCE_ID");
アプリケーションの main メソッドで、このクイックスタートで使用するメソッドの呼び出しを追加します。 その定義は後から行います。
Project projectOD = createProjectOD(trainClient);
addTagsOD(trainClient, projectOD);
uploadImagesOD(trainClient, projectOD);
trainProjectOD(trainClient, projectOD);
publishIterationOD(trainClient, project);
testProjectOD(predictor, projectOD);
オブジェクト モデル
以下のクラスとインターフェイスにより、Custom Vision Java クライアント ライブラリの主要な機能の一部が処理されます。
| 名前 | 説明 |
|---|---|
| CustomVisionTrainingClient | このクラスでは、モデルの作成、トレーニング、および公開を処理します。 |
| CustomVisionPredictionClient | このクラスでは、物体検出予測のために、モデルに対するクエリ実行を処理します。 |
| ImagePrediction | このクラスでは、単一の画像に対して単一の物体予測を定義します。 これには、オブジェクト ID と名前、オブジェクトの境界ボックスの位置、および信頼度スコアのプロパティが含まれます。 |
コード例
これらのコード スニペットでは、Java 用 Custom Vision クライアント ライブラリを使用して次のタスクを実行する方法を示します。
- クライアントを認証する
- 新しい Custom Vision プロジェクトを作成する
- プロジェクトにタグを追加する
- 画像をアップロードし、タグ付けする
- プロジェクトをトレーニングする
- 現在のイテレーションを公開する
- 予測エンドポイントをテストする
クライアントを認証する
main メソッドで、エンドポイントとキーを使用してトレーニング クライアントと予測クライアントをインスタンス化します。
// Authenticate
CustomVisionTrainingClient trainClient = CustomVisionTrainingManager
        .authenticate(trainingEndpoint, trainingApiKey)
        .withEndpoint(trainingEndpoint);
CustomVisionPredictionClient predictor = CustomVisionPredictionManager
        .authenticate(predictionEndpoint, predictionApiKey)
        .withEndpoint(predictionEndpoint);
新しい Custom Vision プロジェクトを作成する
次のメソッドは、物体検出プロジェクトを作成します。 作成したプロジェクトは、先ほどアクセスした Custom Vision Web サイトに表示されます。 プロジェクトを作成するときに他のオプションを指定するには、CreateProject メソッドのオーバーロードを参照してください (検出器の構築に関する Web ポータル ガイドで説明されています)。
public static Project createProjectOD(CustomVisionTrainingClient trainClient) {
    Trainings trainer = trainClient.trainings();

    // find the object detection domain to set the project type
    Domain objectDetectionDomain = null;
    List<Domain> domains = trainer.getDomains();
    for (final Domain domain : domains) {
        if (domain.type() == DomainType.OBJECT_DETECTION) {
            objectDetectionDomain = domain;
            break;
        }
    }

    if (objectDetectionDomain == null) {
        System.out.println("Unexpected result; no objects were detected.");
    }

    System.out.println("Creating project...");
    // create an object detection project
    Project project = trainer.createProject().withName("Sample Java OD Project")
            .withDescription("Sample OD Project").withDomainId(objectDetectionDomain.id())
            .withClassificationType(Classifier.MULTILABEL.toString()).execute();

    return project;
}
タグをプロジェクトに追加する
このメソッドでは、モデルをトレーニングするタグを定義します。
public static void addTagsOD(CustomVisionTrainingClient trainClient, Project project) {
    Trainings trainer = trainClient.trainings();
    // create fork tag
    Tag forkTag = trainer.createTag().withProjectId(project.id()).withName("fork").execute();

    // create scissors tag
    Tag scissorsTag = trainer.createTag().withProjectId(project.id()).withName("scissor").execute();
}
画像をアップロードし、タグ付けする
最初に、このプロジェクト用のサンプル画像をダウンロードします。 サンプル画像フォルダーの内容をお使いのローカル デバイスに保存します。
Note
トレーニングを完了するために、より広範なイメージのセットが必要ですか。 Trove (Microsoft Garage プロジェクト) を使用すると、トレーニング目的で画像のセットを収集して購入することができます。 画像を収集したら、それらをダウンロードした後、通常の方法で Custom Vision プロジェクトにインポートできます。 詳細については、Trove ページを参照してください。
物体検出プロジェクトで画像にタグを付ける際は、タグ付けする各物体の領域を正規化座標を使用して指定する必要があります。 次のコードは、それぞれのサンプル画像とそのタグ付け領域とを関連付けるものです。
注意
領域の座標をマークするためのクリックアンド ドラッグ ユーティリティがない場合は、Customvision.ai で Web UI を使用できます。 この例では、座標は既に指定されています。
public static void uploadImagesOD(CustomVisionTrainingClient trainClient, Project project) {
    // Mapping of filenames to their respective regions in the image. The
    // coordinates are specified
    // as left, top, width, height in normalized coordinates. I.e. (left is left in
    // pixels / width in pixels)

    // This is a hardcoded mapping of the files we'll upload along with the bounding
    // box of the object in the
    // image. The boudning box is specified as left, top, width, height in
    // normalized coordinates.
    // Normalized Left = Left / Width (in Pixels)
    // Normalized Top = Top / Height (in Pixels)
    // Normalized Bounding Box Width = (Right - Left) / Width (in Pixels)
    // Normalized Bounding Box Height = (Bottom - Top) / Height (in Pixels)
    HashMap<String, double[]> regionMap = new HashMap<String, double[]>();
    regionMap.put("scissors_1.jpg", new double[] { 0.4007353, 0.194068655, 0.259803921, 0.6617647 });
    regionMap.put("scissors_2.jpg", new double[] { 0.426470578, 0.185898721, 0.172794119, 0.5539216 });
    regionMap.put("scissors_3.jpg", new double[] { 0.289215684, 0.259428144, 0.403186262, 0.421568632 });
    regionMap.put("scissors_4.jpg", new double[] { 0.343137264, 0.105833367, 0.332107842, 0.8055556 });
    regionMap.put("scissors_5.jpg", new double[] { 0.3125, 0.09766343, 0.435049027, 0.71405226 });
    regionMap.put("scissors_6.jpg", new double[] { 0.379901975, 0.24308826, 0.32107842, 0.5718954 });
    regionMap.put("scissors_7.jpg", new double[] { 0.341911763, 0.20714055, 0.3137255, 0.6356209 });
    regionMap.put("scissors_8.jpg", new double[] { 0.231617644, 0.08459154, 0.504901946, 0.8480392 });
    regionMap.put("scissors_9.jpg", new double[] { 0.170343131, 0.332957536, 0.767156839, 0.403594762 });
    regionMap.put("scissors_10.jpg", new double[] { 0.204656869, 0.120539248, 0.5245098, 0.743464053 });
    regionMap.put("scissors_11.jpg", new double[] { 0.05514706, 0.159754932, 0.799019635, 0.730392158 });
    regionMap.put("scissors_12.jpg", new double[] { 0.265931368, 0.169558853, 0.5061275, 0.606209159 });
    regionMap.put("scissors_13.jpg", new double[] { 0.241421565, 0.184264734, 0.448529422, 0.6830065 });
    regionMap.put("scissors_14.jpg", new double[] { 0.05759804, 0.05027781, 0.75, 0.882352948 });
    regionMap.put("scissors_15.jpg", new double[] { 0.191176474, 0.169558853, 0.6936275, 0.6748366 });
    regionMap.put("scissors_16.jpg", new double[] { 0.1004902, 0.279036, 0.6911765, 0.477124184 });
    regionMap.put("scissors_17.jpg", new double[] { 0.2720588, 0.131977156, 0.4987745, 0.6911765 });
    regionMap.put("scissors_18.jpg", new double[] { 0.180147052, 0.112369314, 0.6262255, 0.6666667 });
    regionMap.put("scissors_19.jpg", new double[] { 0.333333343, 0.0274019931, 0.443627447, 0.852941155 });
    regionMap.put("scissors_20.jpg", new double[] { 0.158088237, 0.04047389, 0.6691176, 0.843137264 });
    regionMap.put("fork_1.jpg", new double[] { 0.145833328, 0.3509314, 0.5894608, 0.238562092 });
    regionMap.put("fork_2.jpg", new double[] { 0.294117659, 0.216944471, 0.534313738, 0.5980392 });
    regionMap.put("fork_3.jpg", new double[] { 0.09191177, 0.0682516545, 0.757352948, 0.6143791 });
    regionMap.put("fork_4.jpg", new double[] { 0.254901975, 0.185898721, 0.5232843, 0.594771266 });
    regionMap.put("fork_5.jpg", new double[] { 0.2365196, 0.128709182, 0.5845588, 0.71405226 });
    regionMap.put("fork_6.jpg", new double[] { 0.115196079, 0.133611143, 0.676470637, 0.6993464 });
    regionMap.put("fork_7.jpg", new double[] { 0.164215669, 0.31008172, 0.767156839, 0.410130739 });
    regionMap.put("fork_8.jpg", new double[] { 0.118872553, 0.318251669, 0.817401946, 0.225490168 });
    regionMap.put("fork_9.jpg", new double[] { 0.18259804, 0.2136765, 0.6335784, 0.643790841 });
    regionMap.put("fork_10.jpg", new double[] { 0.05269608, 0.282303959, 0.8088235, 0.452614367 });
    regionMap.put("fork_11.jpg", new double[] { 0.05759804, 0.0894935, 0.9007353, 0.3251634 });
    regionMap.put("fork_12.jpg", new double[] { 0.3345588, 0.07315363, 0.375, 0.9150327 });
    regionMap.put("fork_13.jpg", new double[] { 0.269607842, 0.194068655, 0.4093137, 0.6732026 });
    regionMap.put("fork_14.jpg", new double[] { 0.143382356, 0.218578458, 0.7977941, 0.295751631 });
    regionMap.put("fork_15.jpg", new double[] { 0.19240196, 0.0633497, 0.5710784, 0.8398692 });
    regionMap.put("fork_16.jpg", new double[] { 0.140931368, 0.480016381, 0.6838235, 0.240196079 });
    regionMap.put("fork_17.jpg", new double[] { 0.305147052, 0.2512582, 0.4791667, 0.5408496 });
    regionMap.put("fork_18.jpg", new double[] { 0.234068632, 0.445702642, 0.6127451, 0.344771236 });
    regionMap.put("fork_19.jpg", new double[] { 0.219362751, 0.141781077, 0.5919118, 0.6683006 });
    regionMap.put("fork_20.jpg", new double[] { 0.180147052, 0.239820287, 0.6887255, 0.235294119 });
次のコード ブロックは、画像をプロジェクトに追加するものです。 ダウンロードした fork フォルダーと scissors フォルダーの場所を指すように、GetImage 呼び出しの引数を変更する必要があります。
    Trainings trainer = trainClient.trainings();

    System.out.println("Adding images...");
    for (int i = 1; i <= 20; i++) {
        String fileName = "fork_" + i + ".jpg";
        byte[] contents = GetImage("/fork", fileName);
        AddImageToProject(trainer, project, fileName, contents, forkTag.id(), regionMap.get(fileName));
    }

    for (int i = 1; i <= 20; i++) {
        String fileName = "scissors_" + i + ".jpg";
        byte[] contents = GetImage("/scissors", fileName);
        AddImageToProject(trainer, project, fileName, contents, scissorsTag.id(), regionMap.get(fileName));
    }
}
前のコード スニペットでは、リソース ストリームとして画像を取得してサービスにアップロードする 2 つのヘルパー関数を使用しています (1 回のバッチで最大 64 個の画像をアップロードできます)。 これらのメソッドを定義します。
private static void AddImageToProject(Trainings trainer, Project project, String fileName, byte[] contents,
        UUID tag, double[] regionValues) {
    System.out.println("Adding image: " + fileName);
    ImageFileCreateEntry file = new ImageFileCreateEntry().withName(fileName).withContents(contents);

    ImageFileCreateBatch batch = new ImageFileCreateBatch().withImages(Collections.singletonList(file));

    // If Optional region is specified, tack it on and place the tag there,
    // otherwise
    // add it to the batch.
    if (regionValues != null) {
        Region region = new Region().withTagId(tag).withLeft(regionValues[0]).withTop(regionValues[1])
                .withWidth(regionValues[2]).withHeight(regionValues[3]);
        file = file.withRegions(Collections.singletonList(region));
    } else {
        batch = batch.withTagIds(Collections.singletonList(tag));
    }

    trainer.createImagesFromFiles(project.id(), batch);
}

private static byte[] GetImage(String folder, String fileName) {
    try {
        return ByteStreams.toByteArray(CustomVisionSamples.class.getResourceAsStream(folder + "/" + fileName));
    } catch (Exception e) {
        System.out.println(e.getMessage());
        e.printStackTrace();
    }
    return null;
}
プロジェクトをトレーニングする
このメソッドは、プロジェクトにおけるトレーニングの初回イテレーションを作成するものです。 トレーニングが完了するまで、サービスに対してクエリが実行されます。
public static String trainProjectOD(CustomVisionTrainingClient trainClient, Project project) {
    Trainings trainer = trainClient.trainings();
    System.out.println("Training...");
    Iteration iteration = trainer.trainProject(project.id(), new TrainProjectOptionalParameter());

    while (iteration.status().equals("Training")) {
        System.out.println("Training Status: " + iteration.status());
        Thread.sleep(5000);
        iteration = trainer.getIteration(project.id(), iteration.id());
    }
    System.out.println("Training Status: " + iteration.status());
}
現在のイテレーションを公開する
このメソッドでは、モデルの現在のイテレーションをクエリの実行に使用できるようにします。 モデル名は、予測要求を送信するための参照として使用できます。 predictionResourceId には、独自の値を入力する必要があります。 予測リソース ID は、Azure portal の対象のリソースの [プロパティ] タブに、リソース ID として表示されます。
public static String publishIterationOD(CustomVisionTrainingClient trainClient, Project project) {
    Trainings trainer = trainClient.trainings();

    // The iteration is now trained. Publish it to the prediction endpoint.
    String publishedModelName = "myModel";
    String predictionID = "<your-prediction-resource-ID>";
    trainer.publishIteration(project.id(), iteration.id(), publishedModelName, predictionID);
    return publishedModelName;
}
予測エンドポイントをテストする
このメソッドでは、テスト画像を読み込み、モデル エンドポイントを照会して、予測データをコンソールに出力します。
public static void testProjectOD(CustomVisionPredictionClient predictor, Project project) {

    // load test image
    byte[] testImage = GetImage("/ObjectTest", "test_image.jpg");

    // predict
    ImagePrediction results = predictor.predictions().detectImage().withProjectId(project.id())
            .withPublishedName(publishedModelName).withImageData(testImage).execute();

    for (Prediction prediction : results.predictions()) {
        System.out.println(String.format("\t%s: %.2f%% at: %.2f, %.2f, %.2f, %.2f", prediction.tagName(),
                prediction.probability() * 100.0f, prediction.boundingBox().left(), prediction.boundingBox().top(),
                prediction.boundingBox().width(), prediction.boundingBox().height()));
    }
}
アプリケーションの実行
次を使用してアプリをビルドできます。
gradle build
gradle run コマンドを使用してアプリケーションを実行します。
gradle run
リソースをクリーンアップする
Azure AI サービス サブスクリプションをクリーンアップして削除したい場合は、リソースまたはリソース グループを削除することができます。 リソース グループを削除すると、それに関連付けられている他のリソースも削除されます。
独自の物体検出プロジェクトを実装したい (または画像分類プロジェクトを試したい) 場合、この例のフォーク/ハサミの検出プロジェクトは削除してかまいません。 無料サブスクリプションでは、2 つの Custom Vision プロジェクトを利用できます。
Custom Vision Web サイトで、 [Projects](プロジェクト) に移動し、[My New Project](自分用の新しいプロジェクト) のごみ箱アイコンを選択します。
次のステップ
以上、物体検出処理の各ステップをコードで実行しました。 このサンプルで実行したトレーニングのイテレーションは 1 回だけですが、多くの場合、精度を高めるために、モデルのトレーニングとテストは複数回行う必要があります。 次のガイドでは、画像の分類について取り上げていますが、その原理は物体の検出と似ています。
- Custom Vision とは
- このサンプルのソース コードは、GitHub にあります。
このガイドでは、Node.js 用の Custom Vision クライアント ライブラリを使用して物体検出モデルを構築する際の足がかりとして役立つ手順とサンプル コードを紹介します。 プロジェクトを作成し、タグを追加し、プロジェクトをトレーニングして、プロジェクトの予測エンドポイント URL を使用してプログラムでテストします。 この例は、独自の画像認識アプリを構築するためのテンプレートとしてご利用ください。
Note
コードを記述 "せずに" 物体検出モデルの構築とトレーニングを行う場合は、代わりにブラウザーベースのガイダンスを参照してください。
.NET 用 Custom Vision クライアント ライブラリを使用すると、次のことができます。
- 新しい Custom Vision プロジェクトを作成する
- プロジェクトにタグを追加する
- 画像をアップロードし、タグ付けする
- プロジェクトをトレーニングする
- 現在のイテレーションを公開する
- 予測エンドポイントをテストする
リファレンス ドキュメント (トレーニング)(予測) | ライブラリのソース コード (トレーニング)(予測) | パッケージ (npm) (トレーニング)(予測) | サンプル
前提条件
- Azure サブスクリプション - 無料アカウントを作成します
- 最新バージョンの Node.js
- Azure サブスクリプションを入手したら、Azure portal で Custom Vision リソースを作成し、トレーニングおよび予測リソースを作成します。
- Free 価格レベル (
F0) を使用してサービスを試用し、後から運用環境用の有料レベルにアップグレードすることができます。
- Free 価格レベル (
環境変数を作成する
この例では、アプリケーションを実行しているローカル コンピューター上の環境変数に資格情報を書き込みます。
Azure Portal にアクセスします。 「前提条件」セクションで作成した Custom Vision リソースが正常にデプロイされたら、[次の手順] の [リソースに移動] ボタンを選択します。 キーとエンドポイントは、リソースの [キー] および [エンドポイント] ページの [リソース管理] にあります。 API エンドポイントに加え、トレーニング リソース用と予測リソース用の両方のキーを取得する必要があります。
予測リソース ID は、Azure portal の対象の予測リソースの [プロパティ] タブに、リソース ID として表示されます。
ヒント
https://www.customvision.ai/ を使用してもこれらの値を取得できます。 サインインしたら、右上にある [設定] アイコンを選択します。 [設定] ページで、すべてのキー、リソース ID、エンドポイントを表示できます。
注意
キーは、コードに直接含めないようにし、公開しないでください。 Azure Key Vault などのその他の認証オプションについては、Azure AI サービスのセキュリティに関する記事を参照してください。
環境変数を設定するには、コンソール ウィンドウを開き、オペレーティング システムと開発環境の指示に従います。
VISION_TRAINING KEY環境変数を設定するには、your-training-keyをトレーニング用のリソースのキーの 1 つに置き換えます。VISION_TRAINING_ENDPOINT環境変数を設定するには、your-training-endpointをトレーニング用のリソースのエンドポイントに置き換えます。VISION_PREDICTION_KEY環境変数を設定するには、your-prediction-keyを予測リソースのキーの 1 つに置き換えます。VISION_PREDICTION_ENDPOINT環境変数を設定するには、your-prediction-endpointを予測リソースのエンドポイントに置き換えます。VISION_PREDICTION_RESOURCE_ID環境変数を設定するには、your-resource-idを予測リソースのリソース ID に置き換えます。
setx VISION_TRAINING_KEY your-training-key
setx VISION_TRAINING_ENDPOINT your-training-endpoint
setx VISION_PREDICTION_KEY your-prediction-key
setx VISION_PREDICTION_ENDPOINT your-prediction-endpoint
setx VISION_PREDICTION_RESOURCE_ID your-resource-id
実行中のプログラムのうち、環境変数の読み取りを必要とするプログラム (コンソール ウィンドウを含む) については、環境変数を読み込む再起動が必要となる場合があります。
設定
新しい Node.js アプリケーションを作成する
コンソール ウィンドウ (cmd、PowerShell、Bash など) で、ご利用のアプリ用に新しいディレクトリを作成し、そこに移動します。
mkdir myapp && cd myapp
npm init コマンドを実行し、package.json ファイルを使用して node アプリケーションを作成します。
npm init
クライアント ライブラリをインストールする
Node.js 用の Custom Vision で画像分析アプリを作成するには、Custom Vision の NPM パッケージが必要です。 これをインストールするには、PowerShell で次のコマンドを実行します。
npm install @azure/cognitiveservices-customvision-training
npm install @azure/cognitiveservices-customvision-prediction
アプリの package.json ファイルが依存関係によって更新されます。
index.js という名前のファイルを作成して次のライブラリをインポートします。
const util = require('util');
const fs = require('fs');
const TrainingApi = require("@azure/cognitiveservices-customvision-training");
const PredictionApi = require("@azure/cognitiveservices-customvision-prediction");
const msRest = require("@azure/ms-rest-js");
ヒント
クイックスタートのコード ファイル全体を一度にご覧いただけます。 これは GitHub にあり、このクイックスタートのコード例が含まれています。
自分のリソースの Azure エンドポイントおよびキー用の変数を作成します。
// retrieve environment variables
const trainingKey = process.env["VISION_TRAINING_KEY"];
const trainingEndpoint = process.env["VISION_TRAINING_ENDPOINT"];

const predictionKey = process.env["VISION_PREDICTION_KEY"];
const predictionResourceId = process.env["VISION_PREDICTION_RESOURCE_ID"];
const predictionEndpoint = process.env["VISION_PREDICTION_ENDPOINT"];
また、プロジェクト名と、非同期呼び出しのタイムアウト パラメーターのフィールドも追加します。
const publishIterationName = "detectModel";
const setTimeoutPromise = util.promisify(setTimeout);
オブジェクト モデル
| 名前 | 説明 |
|---|---|
| TrainingAPIClient | このクラスでは、モデルの作成、トレーニング、および公開を処理します。 |
| PredictionAPIClient | このクラスでは、物体検出予測のために、モデルに対するクエリ実行を処理します。 |
| 予測 | このインターフェイスでは、単一の画像に対して単一の予測を定義します。 これには、オブジェクト ID と名前、および信頼度スコアのプロパティが含まれます。 |
コード例
これらのコード スニペットでは、JavaScript 用 Custom Vision クライアント ライブラリを使用して次のタスクを実行する方法を示します。
- クライアントを認証する
- 新しい Custom Vision プロジェクトを作成する
- プロジェクトにタグを追加する
- 画像をアップロードし、タグ付けする
- プロジェクトをトレーニングする
- 現在のイテレーションを公開する
- 予測エンドポイントをテストする
クライアントを認証する
実際のエンドポイントとキーを使用して、クライアント オブジェクトをインスタンス化します。 自分のキーを使用して ApiKeyCredentials オブジェクトを作成し、それを自分のエンドポイントと共に使用して、TrainingAPIClient および PredictionAPIClient オブジェクトを作成します。
const credentials = new msRest.ApiKeyCredentials({ inHeader: { "Training-key": trainingKey } });
const trainer = new TrainingApi.TrainingAPIClient(credentials, trainingEndpoint);
const predictor_credentials = new msRest.ApiKeyCredentials({ inHeader: { "Prediction-key": predictionKey } });
const predictor = new PredictionApi.PredictionAPIClient(predictor_credentials, predictionEndpoint);
ヘルパー関数を追加する
複数の非同期呼び出しを行うことができるように、次の関数を追加します。 これは後で使用します。
const credentials = new msRest.ApiKeyCredentials({ inHeader: { "Training-key": trainingKey } });
const trainer = new TrainingApi.TrainingAPIClient(credentials, trainingEndpoint);
const predictor_credentials = new msRest.ApiKeyCredentials({ inHeader: { "Prediction-key": predictionKey } });
const predictor = new PredictionApi.PredictionAPIClient(predictor_credentials, predictionEndpoint);
新しい Custom Vision プロジェクトを作成する
すべての Custom Vision 関数呼び出しを含む新しい関数を開始します。 新しい Custom Vision Service プロジェクトを作成するための次のコードを追加します。
(async () => {
    console.log("Creating project...");
    const domains = await trainer.getDomains()
    const objDetectDomain = domains.find(domain => domain.type === "ObjectDetection");
    const sampleProject = await trainer.createProject("Sample Obj Detection Project", { domainId: objDetectDomain.id });
プロジェクトにタグを追加する
プロジェクトに分類タグを作成するには、関数に次のコードを追加します。
const forkTag = await trainer.createTag(sampleProject.id, "Fork");
const scissorsTag = await trainer.createTag(sampleProject.id, "Scissors");
画像をアップロードし、タグ付けする
最初に、このプロジェクト用のサンプル画像をダウンロードします。 サンプル画像フォルダーの内容をお使いのローカル デバイスに保存します。
サンプルの画像をプロジェクトに追加するには、タグ作成後、次のコードを挿入します。 このコードでは、それぞれの画像を対応するタグと共にアップロードします。 物体検出プロジェクトで画像にタグを付ける際は、タグ付けする各物体の領域を正規化座標を使用して指定する必要があります。 このチュートリアルでは、リージョンがコードの行内にハードコードされています。 各領域は、正規化座標で境界ボックスを指定しており、座標は、左、上、幅、高さの順に指定しています。 1 回のバッチで最大 64 個の画像をアップロードできます。
const sampleDataRoot = "Images";

const forkImageRegions = {
    "fork_1.jpg": [0.145833328, 0.3509314, 0.5894608, 0.238562092],
    "fork_2.jpg": [0.294117659, 0.216944471, 0.534313738, 0.5980392],
    "fork_3.jpg": [0.09191177, 0.0682516545, 0.757352948, 0.6143791],
    "fork_4.jpg": [0.254901975, 0.185898721, 0.5232843, 0.594771266],
    "fork_5.jpg": [0.2365196, 0.128709182, 0.5845588, 0.71405226],
    "fork_6.jpg": [0.115196079, 0.133611143, 0.676470637, 0.6993464],
    "fork_7.jpg": [0.164215669, 0.31008172, 0.767156839, 0.410130739],
    "fork_8.jpg": [0.118872553, 0.318251669, 0.817401946, 0.225490168],
    "fork_9.jpg": [0.18259804, 0.2136765, 0.6335784, 0.643790841],
    "fork_10.jpg": [0.05269608, 0.282303959, 0.8088235, 0.452614367],
    "fork_11.jpg": [0.05759804, 0.0894935, 0.9007353, 0.3251634],
    "fork_12.jpg": [0.3345588, 0.07315363, 0.375, 0.9150327],
    "fork_13.jpg": [0.269607842, 0.194068655, 0.4093137, 0.6732026],
    "fork_14.jpg": [0.143382356, 0.218578458, 0.7977941, 0.295751631],
    "fork_15.jpg": [0.19240196, 0.0633497, 0.5710784, 0.8398692],
    "fork_16.jpg": [0.140931368, 0.480016381, 0.6838235, 0.240196079],
    "fork_17.jpg": [0.305147052, 0.2512582, 0.4791667, 0.5408496],
    "fork_18.jpg": [0.234068632, 0.445702642, 0.6127451, 0.344771236],
    "fork_19.jpg": [0.219362751, 0.141781077, 0.5919118, 0.6683006],
    "fork_20.jpg": [0.180147052, 0.239820287, 0.6887255, 0.235294119]
};

const scissorsImageRegions = {
    "scissors_1.jpg": [0.4007353, 0.194068655, 0.259803921, 0.6617647],
    "scissors_2.jpg": [0.426470578, 0.185898721, 0.172794119, 0.5539216],
    "scissors_3.jpg": [0.289215684, 0.259428144, 0.403186262, 0.421568632],
    "scissors_4.jpg": [0.343137264, 0.105833367, 0.332107842, 0.8055556],
    "scissors_5.jpg": [0.3125, 0.09766343, 0.435049027, 0.71405226],
    "scissors_6.jpg": [0.379901975, 0.24308826, 0.32107842, 0.5718954],
    "scissors_7.jpg": [0.341911763, 0.20714055, 0.3137255, 0.6356209],
    "scissors_8.jpg": [0.231617644, 0.08459154, 0.504901946, 0.8480392],
    "scissors_9.jpg": [0.170343131, 0.332957536, 0.767156839, 0.403594762],
    "scissors_10.jpg": [0.204656869, 0.120539248, 0.5245098, 0.743464053],
    "scissors_11.jpg": [0.05514706, 0.159754932, 0.799019635, 0.730392158],
    "scissors_12.jpg": [0.265931368, 0.169558853, 0.5061275, 0.606209159],
    "scissors_13.jpg": [0.241421565, 0.184264734, 0.448529422, 0.6830065],
    "scissors_14.jpg": [0.05759804, 0.05027781, 0.75, 0.882352948],
    "scissors_15.jpg": [0.191176474, 0.169558853, 0.6936275, 0.6748366],
    "scissors_16.jpg": [0.1004902, 0.279036, 0.6911765, 0.477124184],
    "scissors_17.jpg": [0.2720588, 0.131977156, 0.4987745, 0.6911765],
    "scissors_18.jpg": [0.180147052, 0.112369314, 0.6262255, 0.6666667],
    "scissors_19.jpg": [0.333333343, 0.0274019931, 0.443627447, 0.852941155],
    "scissors_20.jpg": [0.158088237, 0.04047389, 0.6691176, 0.843137264]
};

console.log("Adding images...");
let fileUploadPromises = [];

const forkDir = `${sampleDataRoot}/fork`;
const forkFiles = fs.readdirSync(forkDir);

await asyncForEach(forkFiles, async (file) => {
    const region = { tagId: forkTag.id, left: forkImageRegions[file][0], top: forkImageRegions[file][1], width: forkImageRegions[file][2], height: forkImageRegions[file][3] };
    const entry = { name: file, contents: fs.readFileSync(`${forkDir}/${file}`), regions: [region] };
    const batch = { images: [entry] };
    // Wait one second to accommodate rate limit.
    await setTimeoutPromise(1000, null);
    fileUploadPromises.push(trainer.createImagesFromFiles(sampleProject.id, batch));
});

const scissorsDir = `${sampleDataRoot}/scissors`;
const scissorsFiles = fs.readdirSync(scissorsDir);

await asyncForEach(scissorsFiles, async (file) => {
    const region = { tagId: scissorsTag.id, left: scissorsImageRegions[file][0], top: scissorsImageRegions[file][1], width: scissorsImageRegions[file][2], height: scissorsImageRegions[file][3] };
    const entry = { name: file, contents: fs.readFileSync(`${scissorsDir}/${file}`), regions: [region] };
    const batch = { images: [entry] };
    // Wait one second to accommodate rate limit.
    await setTimeoutPromise(1000, null);
    fileUploadPromises.push(trainer.createImagesFromFiles(sampleProject.id, batch));
});

await Promise.all(fileUploadPromises);
重要
画像のパス (sampleDataRoot) は、Azure AI サービス Python SDK サンプル リポジトリをダウンロードした場所に応じて変更する必要があります。
注意
領域の座標をマークするためのクリックアンド ドラッグ ユーティリティがない場合は、Customvision.ai で Web UI を使用できます。 この例では、座標は既に指定されています。
プロジェクトをトレーニングする
このコードにより、予測モデルの最初のイテレーションが作成されます。
console.log("Training...");
let trainingIteration = await trainer.trainProject(sampleProject.id);

// Wait for training to complete
console.log("Training started...");
while (trainingIteration.status == "Training") {
    console.log("Training status: " + trainingIteration.status);
    // wait for ten seconds
    await setTimeoutPromise(10000, null);
    trainingIteration = await trainer.getIteration(sampleProject.id, trainingIteration.id)
}
console.log("Training status: " + trainingIteration.status);
現在のイテレーションを公開する
このコードにより、トレーニング済みのイテレーションを予測エンドポイントに公開します。 公開されたイテレーションに付けられた名前は、予測要求を送信するために使用できます。 イテレーションは、公開されるまで予測エンドポイントで利用できません。
// Publish the iteration to the end point
await trainer.publishIteration(sampleProject.id, trainingIteration.id, publishIterationName, predictionResourceId);
予測エンドポイントをテストする
画像を予測エンドポイントに送信し、予測を取得するには、以下のコードを関数に追加します。
const testFile = fs.readFileSync(`${sampleDataRoot}/test/test_image.jpg`);
const results = await predictor.detectImage(sampleProject.id, publishIterationName, testFile)

// Show results
console.log("Results:");
results.predictions.forEach(predictedResult => {
    console.log(`\t ${predictedResult.tagName}: ${(predictedResult.probability * 100.0).toFixed(2)}% ${predictedResult.boundingBox.left},${predictedResult.boundingBox.top},${predictedResult.boundingBox.width},${predictedResult.boundingBox.height}`);
});
次に、Custom Vision 関数を閉じて呼び出します。
})()
アプリケーションの実行
クイック スタート ファイルで node コマンドを使用して、アプリケーションを実行します。
node index.js
コンソールにアプリケーションの出力が表示されると思います。 <sampleDataRoot>/Test/ 内のテスト画像にタグが適切に付けられていること、また検出の領域が正しいことを確認してください。 Custom Vision Web サイトに戻って、新しく作成されたプロジェクトの現在の状態を確認してもかまいません。
リソースをクリーンアップする
独自の物体検出プロジェクトを実装したい (または画像分類プロジェクトを試したい) 場合、この例のフォーク/ハサミの検出プロジェクトは削除してかまいません。 無料サブスクリプションでは、2 つの Custom Vision プロジェクトを利用できます。
Custom Vision Web サイトで、 [Projects](プロジェクト) に移動し、[My New Project](自分用の新しいプロジェクト) のごみ箱アイコンを選択します。
次のステップ
以上、物体検出処理の各ステップをコードで実行しました。 このサンプルで実行したトレーニングのイテレーションは 1 回だけですが、多くの場合、精度を高めるために、モデルのトレーニングとテストは複数回行う必要があります。 次のガイドでは、画像の分類について取り上げていますが、その原理は物体の検出と似ています。
- Custom Vision とは
- このサンプルのソース コードは、GitHub にあります。
- SDK のリファレンス ドキュメント (トレーニング)
- SDK のリファレンス ドキュメント (予測)
Python 用 Custom Vision クライアント ライブラリの使用を開始します。 以下の手順に従って、パッケージをインストールし、物体検出モデルを構築するためのコード例を試してみましょう。 プロジェクトを作成し、タグを追加し、プロジェクトをトレーニングして、プロジェクトの予測エンドポイント URL を使用してプログラムでテストします。 この例は、独自の画像認識アプリを構築するためのテンプレートとしてご利用ください。
Note
コードを記述 "せずに" 物体検出モデルの構築とトレーニングを行う場合は、代わりにブラウザーベースのガイダンスを参照してください。
Python 用 Custom Vision クライアント ライブラリを使用すると、次のことができます。
- 新しい Custom Vision プロジェクトを作成する
- プロジェクトにタグを追加する
- 画像をアップロードし、タグ付けする
- プロジェクトをトレーニングする
- 現在のイテレーションを公開する
- 予測エンドポイントをテストする
リファレンス ドキュメント | ライブラリのソース コード | パッケージ (PyPI) | サンプル
前提条件
- Azure サブスクリプション - 無料アカウントを作成します
- Python 3.x
- Python のインストールには、pip が含まれている必要があります。 pip がインストールされているかどうかを確認するには、コマンド ラインで
pip --versionを実行します。 最新バージョンの Python をインストールして pip を入手してください。
- Python のインストールには、pip が含まれている必要があります。 pip がインストールされているかどうかを確認するには、コマンド ラインで
- Azure サブスクリプションを入手したら、Azure portal で Custom Vision リソースを作成し、トレーニングおよび予測リソースを作成します。
- Free 価格レベル (
F0) を使用してサービスを試用し、後から運用環境用の有料レベルにアップグレードすることができます。
- Free 価格レベル (
環境変数を作成する
この例では、アプリケーションを実行しているローカル コンピューター上の環境変数に資格情報を書き込みます。
Azure Portal にアクセスします。 「前提条件」セクションで作成した Custom Vision リソースが正常にデプロイされたら、[次の手順] の [リソースに移動] ボタンを選択します。 キーとエンドポイントは、リソースの [キー] および [エンドポイント] ページの [リソース管理] にあります。 API エンドポイントに加え、トレーニング リソース用と予測リソース用の両方のキーを取得する必要があります。
予測リソース ID は、Azure portal の対象の予測リソースの [プロパティ] タブに、リソース ID として表示されます。
ヒント
https://www.customvision.ai/ を使用してもこれらの値を取得できます。 サインインしたら、右上にある [設定] アイコンを選択します。 [設定] ページで、すべてのキー、リソース ID、エンドポイントを表示できます。
注意
キーは、コードに直接含めないようにし、公開しないでください。 Azure Key Vault などのその他の認証オプションについては、Azure AI サービスのセキュリティに関する記事を参照してください。
環境変数を設定するには、コンソール ウィンドウを開き、オペレーティング システムと開発環境の指示に従います。
VISION_TRAINING KEY環境変数を設定するには、your-training-keyをトレーニング用のリソースのキーの 1 つに置き換えます。VISION_TRAINING_ENDPOINT環境変数を設定するには、your-training-endpointをトレーニング用のリソースのエンドポイントに置き換えます。VISION_PREDICTION_KEY環境変数を設定するには、your-prediction-keyを予測リソースのキーの 1 つに置き換えます。VISION_PREDICTION_ENDPOINT環境変数を設定するには、your-prediction-endpointを予測リソースのエンドポイントに置き換えます。VISION_PREDICTION_RESOURCE_ID環境変数を設定するには、your-resource-idを予測リソースのリソース ID に置き換えます。
setx VISION_TRAINING_KEY your-training-key
setx VISION_TRAINING_ENDPOINT your-training-endpoint
setx VISION_PREDICTION_KEY your-prediction-key
setx VISION_PREDICTION_ENDPOINT your-prediction-endpoint
setx VISION_PREDICTION_RESOURCE_ID your-resource-id
実行中のプログラムのうち、環境変数の読み取りを必要とするプログラム (コンソール ウィンドウを含む) については、環境変数を読み込む再起動が必要となる場合があります。
設定
クライアント ライブラリをインストールする
Python 用の Custom Vision で画像分析アプリを作成するには、Custom Vision のクライアント ライブラリが必要です。 Python のインストール後、PowerShell またはコンソール ウィンドウで次のコマンドを実行します。
pip install azure-cognitiveservices-vision-customvision
新しい Python アプリケーションを作成する
新しい Python ファイルを作成して次のライブラリをインポートします。
from azure.cognitiveservices.vision.customvision.training import CustomVisionTrainingClient
from azure.cognitiveservices.vision.customvision.prediction import CustomVisionPredictionClient
from azure.cognitiveservices.vision.customvision.training.models import ImageFileCreateBatch, ImageFileCreateEntry, Region
from msrest.authentication import ApiKeyCredentials
import os, time, uuid
ヒント
クイックスタートのコード ファイル全体を一度にご覧いただけます。 これは GitHub にあり、このクイックスタートのコード例が含まれています。
自分のリソースの Azure エンドポイントおよびキー用の変数を作成します。
# Replace with valid values
ENDPOINT = os.environ["VISION_TRAINING_ENDPOINT"]
training_key = os.environ["VISION_TRAINING_KEY"]
prediction_key = os.environ["VISION_PREDICTION_KEY"]
prediction_resource_id = os.environ["VISION_PREDICTION_RESOURCE_ID"]
オブジェクト モデル
| 名前 | 説明 |
|---|---|
| CustomVisionTrainingClient | このクラスでは、モデルの作成、トレーニング、および公開を処理します。 |
| CustomVisionPredictionClient | このクラスでは、物体検出予測のために、モデルに対するクエリ実行を処理します。 |
| ImagePrediction | このクラスでは、単一の画像に対して単一の物体予測を定義します。 これには、オブジェクト ID と名前、オブジェクトの境界ボックスの位置、および信頼度スコアのプロパティが含まれます。 |
コード例
これらのコード スニペットでは、Python 用 Custom Vision クライアント ライブラリを使用して次のことを実行する方法を示します。
- クライアントを認証する
- 新しい Custom Vision プロジェクトを作成する
- プロジェクトにタグを追加する
- 画像をアップロードし、タグ付けする
- プロジェクトをトレーニングする
- 現在のイテレーションを公開する
- 予測エンドポイントをテストする
クライアントを認証する
エンドポイントとキーを使用してトレーニングと予測のクライアントをインスタンス化します。 自分のキーを指定して ApiKeyServiceClientCredentials オブジェクトを作成し、それを自分のエンドポイントと共に使用して CustomVisionTrainingClient および CustomVisionPredictionClient オブジェクトを作成します。
credentials = ApiKeyCredentials(in_headers={"Training-key": training_key})
trainer = CustomVisionTrainingClient(ENDPOINT, credentials)
prediction_credentials = ApiKeyCredentials(in_headers={"Prediction-key": prediction_key})
predictor = CustomVisionPredictionClient(ENDPOINT, prediction_credentials)
新しい Custom Vision プロジェクトを作成する
新しい Custom Vision Service プロジェクトを作成するための次のコードをスクリプトに追加します。
プロジェクトを作成するときに他のオプションを指定するには、create_project メソッドを参照してください (検出機能の構築に関する Web ポータル ガイドで説明されています)。
publish_iteration_name = "detectModel"

# Find the object detection domain
obj_detection_domain = next(domain for domain in trainer.get_domains() if domain.type == "ObjectDetection" and domain.name == "General")

# Create a new project
print ("Creating project...")
# Use uuid to avoid project name collisions.
project = trainer.create_project(str(uuid.uuid4()), domain_id=obj_detection_domain.id)
プロジェクトにタグを追加する
プロジェクト内にオブジェクト タグを作成するため、次のコードを追加します。
# Make two tags in the new project
fork_tag = trainer.create_tag(project.id, "fork")
scissors_tag = trainer.create_tag(project.id, "scissors")
画像をアップロードし、タグ付けする
最初に、このプロジェクト用のサンプル画像をダウンロードします。 サンプル画像フォルダーの内容をお使いのローカル デバイスに保存します。
物体検出プロジェクトで画像にタグを付ける際は、タグ付けする各物体の領域を正規化座標を使用して指定する必要があります。 次のコードは、それぞれのサンプル画像とそのタグ付け領域とを関連付けるものです。 各領域は、正規化座標で境界ボックスを指定しており、座標は、左、上、幅、高さの順に指定しています。
fork_image_regions = {
    "fork_1": [ 0.145833328, 0.3509314, 0.5894608, 0.238562092 ],
    "fork_2": [ 0.294117659, 0.216944471, 0.534313738, 0.5980392 ],
    "fork_3": [ 0.09191177, 0.0682516545, 0.757352948, 0.6143791 ],
    "fork_4": [ 0.254901975, 0.185898721, 0.5232843, 0.594771266 ],
    "fork_5": [ 0.2365196, 0.128709182, 0.5845588, 0.71405226 ],
    "fork_6": [ 0.115196079, 0.133611143, 0.676470637, 0.6993464 ],
    "fork_7": [ 0.164215669, 0.31008172, 0.767156839, 0.410130739 ],
    "fork_8": [ 0.118872553, 0.318251669, 0.817401946, 0.225490168 ],
    "fork_9": [ 0.18259804, 0.2136765, 0.6335784, 0.643790841 ],
    "fork_10": [ 0.05269608, 0.282303959, 0.8088235, 0.452614367 ],
    "fork_11": [ 0.05759804, 0.0894935, 0.9007353, 0.3251634 ],
    "fork_12": [ 0.3345588, 0.07315363, 0.375, 0.9150327 ],
    "fork_13": [ 0.269607842, 0.194068655, 0.4093137, 0.6732026 ],
    "fork_14": [ 0.143382356, 0.218578458, 0.7977941, 0.295751631 ],
    "fork_15": [ 0.19240196, 0.0633497, 0.5710784, 0.8398692 ],
    "fork_16": [ 0.140931368, 0.480016381, 0.6838235, 0.240196079 ],
    "fork_17": [ 0.305147052, 0.2512582, 0.4791667, 0.5408496 ],
    "fork_18": [ 0.234068632, 0.445702642, 0.6127451, 0.344771236 ],
    "fork_19": [ 0.219362751, 0.141781077, 0.5919118, 0.6683006 ],
    "fork_20": [ 0.180147052, 0.239820287, 0.6887255, 0.235294119 ]
}

scissors_image_regions = {
    "scissors_1": [ 0.4007353, 0.194068655, 0.259803921, 0.6617647 ],
    "scissors_2": [ 0.426470578, 0.185898721, 0.172794119, 0.5539216 ],
    "scissors_3": [ 0.289215684, 0.259428144, 0.403186262, 0.421568632 ],
    "scissors_4": [ 0.343137264, 0.105833367, 0.332107842, 0.8055556 ],
    "scissors_5": [ 0.3125, 0.09766343, 0.435049027, 0.71405226 ],
    "scissors_6": [ 0.379901975, 0.24308826, 0.32107842, 0.5718954 ],
    "scissors_7": [ 0.341911763, 0.20714055, 0.3137255, 0.6356209 ],
    "scissors_8": [ 0.231617644, 0.08459154, 0.504901946, 0.8480392 ],
    "scissors_9": [ 0.170343131, 0.332957536, 0.767156839, 0.403594762 ],
    "scissors_10": [ 0.204656869, 0.120539248, 0.5245098, 0.743464053 ],
    "scissors_11": [ 0.05514706, 0.159754932, 0.799019635, 0.730392158 ],
    "scissors_12": [ 0.265931368, 0.169558853, 0.5061275, 0.606209159 ],
    "scissors_13": [ 0.241421565, 0.184264734, 0.448529422, 0.6830065 ],
    "scissors_14": [ 0.05759804, 0.05027781, 0.75, 0.882352948 ],
    "scissors_15": [ 0.191176474, 0.169558853, 0.6936275, 0.6748366 ],
    "scissors_16": [ 0.1004902, 0.279036, 0.6911765, 0.477124184 ],
    "scissors_17": [ 0.2720588, 0.131977156, 0.4987745, 0.6911765 ],
    "scissors_18": [ 0.180147052, 0.112369314, 0.6262255, 0.6666667 ],
    "scissors_19": [ 0.333333343, 0.0274019931, 0.443627447, 0.852941155 ],
    "scissors_20": [ 0.158088237, 0.04047389, 0.6691176, 0.843137264 ]
}
注意
領域の座標をマークするためのクリックアンド ドラッグ ユーティリティがない場合は、Customvision.ai で Web UI を使用できます。 この例では、座標は既に指定されています。
さらに、この関連付けのマップを使用して、それぞれのサンプル画像を対応する領域の座標と共にアップロードします (1 回のバッチで最大 64 個の画像をアップロードできます。)。 次のコードを追加します。
base_image_location = os.path.join (os.path.dirname(__file__), "Images")

# Go through the data table above and create the images
print ("Adding images...")
tagged_images_with_regions = []

for file_name in fork_image_regions.keys():
    x,y,w,h = fork_image_regions[file_name]
    regions = [ Region(tag_id=fork_tag.id, left=x,top=y,width=w,height=h) ]

    with open(os.path.join (base_image_location, "fork", file_name + ".jpg"), mode="rb") as image_contents:
        tagged_images_with_regions.append(ImageFileCreateEntry(name=file_name, contents=image_contents.read(), regions=regions))

for file_name in scissors_image_regions.keys():
    x,y,w,h = scissors_image_regions[file_name]
    regions = [ Region(tag_id=scissors_tag.id, left=x,top=y,width=w,height=h) ]

    with open(os.path.join (base_image_location, "scissors", file_name + ".jpg"), mode="rb") as image_contents:
        tagged_images_with_regions.append(ImageFileCreateEntry(name=file_name, contents=image_contents.read(), regions=regions))

upload_result = trainer.create_images_from_files(project.id, ImageFileCreateBatch(images=tagged_images_with_regions))
if not upload_result.is_batch_successful:
    print("Image batch upload failed.")
    for image in upload_result.images:
        print("Image status: ", image.status)
    exit(-1)
Note
画像のパスは、事前に Azure AI サービス Python SDK サンプル リポジトリをダウンロードした場所に応じて変更する必要があります。
プロジェクトをトレーニングする
このコードにより、予測モデルの最初のイテレーションが作成されます。
print ("Training...")
iteration = trainer.train_project(project.id)
while (iteration.status != "Completed"):
    iteration = trainer.get_iteration(project.id, iteration.id)
    print ("Training status: " + iteration.status)
    time.sleep(1)
ヒント
選択したタグでトレーニングする
必要に応じて、適用したタグのサブセットのみでトレーニングできます。 ある特定のタグが十分に適用されていないが、他のタグが十分に適用されている場合に、これを行うことができます。 train_project 呼び出しで、使用するタグの ID 文字列の一覧に、オプションのパラメーター selected_tags を設定します。 モデルは、そのリストのタグのみを認識するようにトレーニングします。
現在のイテレーションを公開する
イテレーションは、公開されるまで予測エンドポイントで利用できません。 次のコードでは、モデルの現在のイテレーションをクエリの実行に使用できるようにします。
# The iteration is now trained. Publish it to the project endpoint
trainer.publish_iteration(project.id, iteration.id, publish_iteration_name, prediction_resource_id)
print ("Done!")
予測エンドポイントをテストする
画像を予測エンドポイントに送信し、予測を取得するには、ファイルの末尾に以下のコードを追加します。
# Now there is a trained endpoint that can be used to make a prediction

# Open the sample image and get back the prediction results.
with open(os.path.join (base_image_location, "test", "test_image.jpg"), mode="rb") as test_data:
    results = predictor.detect_image(project.id, publish_iteration_name, test_data)

# Display the results.
for prediction in results.predictions:
    print("\t" + prediction.tag_name + ": {0:.2f}% bbox.left = {1:.2f}, bbox.top = {2:.2f}, bbox.width = {3:.2f}, bbox.height = {4:.2f}".format(prediction.probability * 100, prediction.bounding_box.left, prediction.bounding_box.top, prediction.bounding_box.width, prediction.bounding_box.height))
アプリケーションの実行
CustomVisionQuickstart.py を実行します。
python CustomVisionQuickstart.py
コンソールにアプリケーションの出力が表示されると思います。 <base_image_location>/images/Test 内のテスト画像にタグが適切に付けられていること、また検出の領域が正しいことを確認してください。 Custom Vision Web サイトに戻って、新しく作成されたプロジェクトの現在の状態を確認してもかまいません。
リソースをクリーンアップする
独自の物体検出プロジェクトを実装したい (または画像分類プロジェクトを試したい) 場合、この例のフォーク/ハサミの検出プロジェクトは削除してかまいません。 無料サブスクリプションでは、2 つの Custom Vision プロジェクトを利用できます。
Custom Vision Web サイトで、 [Projects](プロジェクト) に移動し、[My New Project](自分用の新しいプロジェクト) のごみ箱アイコンを選択します。
次のステップ
以上、物体検出処理の各ステップをコードで実行しました。 このサンプルで実行したトレーニングのイテレーションは 1 回だけですが、多くの場合、精度を高めるために、モデルのトレーニングとテストは複数回行う必要があります。 次のガイドでは、画像の分類について取り上げていますが、その原理は物体の検出と似ています。
- Custom Vision とは
- このサンプルのソース コードは、GitHub にあります。
- SDK のリファレンス ドキュメント