Micrometer を使用して、Spring Cloud Resilience4J サーキット ブレーカーのメトリックを収集する (プレビュー)
Note
Azure Spring Apps は、Azure Spring Cloud サービスの新しい名前です。 サービスの名前は新しくなりましたが、スクリーンショット、ビデオ、図などの資産の更新に取り組んでいる間、場所によってはしばらく古い名前が表示されます。
この記事の適用対象: ✔️ Basic または Standard ✔️ Enterprise
この記事では、Application Insights の java インプロセス エージェントを使用して、Spring Cloud Resilience4j サーキット ブレーカーのメトリックを収集する方法を示します。 この機能を使用すると、Micrometer を使用して Application Insights から Resilience4j サーキット ブレーカーのメトリックを監視できます。
spring-cloud-circuit-breaker-demo のデモでは、監視のしくみを示します。
前提条件
- 開発用コンピューターにまだインストールされていない場合は、Git、Maven、Java をインストールします。
アプリをビルドして配置する
サンプル アプリケーションをビルドしてデプロイするには、次の手順を使用します。
次のコマンドを使い、デモ リポジトリをクローンしてビルドします。
git clone https://github.com/spring-cloud-samples/spring-cloud-circuitbreaker-demo.git
cd spring-cloud-circuitbreaker-demo && mvn clean package -DskipTests
次のコマンドを使用して、Azure Spring Apps サービス インスタンスを作成します。
az spring create \
    --resource-group ${resource-group-name} \
    --name ${Azure-Spring-Apps-instance-name}
次のコマンドを使って、エンドポイントを含むアプリケーションを作成します。
az spring app create \
    --resource-group ${resource-group-name} \
    --service ${Azure-Spring-Apps-instance-name} \
    --name resilience4j \
    --assign-endpoint
az spring app create \
    --resource-group ${resource-group-name} \
    --service ${Azure-Spring-Apps-instance-name} \
    --name reactive-resilience4j \
    --assign-endpoint
次のコマンドを使って、アプリケーションをデプロイします。
az spring app deploy \
    --resource-group ${resource-group-name} \
    --service ${Azure-Spring-Apps-instance-name} \
    --name resilience4j \
    --env resilience4j.circuitbreaker.instances.backendA.registerHealthIndicator=true \
    --artifact-path ./spring-cloud-circuitbreaker-demo-resilience4j/target/spring-cloud-circuitbreaker-demo-resilience4j-0.0.1-SNAPSHOT.jar
az spring app deploy \
    --resource-group ${resource-group-name} \
    --service ${Azure-Spring-Apps-instance-name} \
    --name reactive-resilience4j \
    --env resilience4j.circuitbreaker.instances.backendA.registerHealthIndicator=true \
    --artifact-path ./spring-cloud-circuitbreaker-demo-reactive-resilience4j/target/spring-cloud-circuitbreaker-demo-reactive-resilience4j-0.0.1-SNAPSHOT.jar
次のコマンドを使用して、Azure Spring Apps サービス インスタンスを作成します。
Note
Azure Spring Apps の Enterprise プラン インスタンスの作成に使われたことがないサブスクリプションの場合は、次のコマンドを実行する必要があります。
az term accept \
    --publisher vmware-inc
    --product azure-spring-cloud-vmware-tanzu-2
    --plan asa-ent-hr-mtr
az spring create \ --resource-group ${resource-group-name} \ --name ${Azure-Spring-Apps-instance-name} \ --sku Enterprise次のコマンドを使って、エンドポイントを含むアプリケーションを作成します。
az spring app create \
    --resource-group ${resource-group-name} \
    --service ${Azure-Spring-Apps-instance-name} \
    --name resilience4j \
    --assign-endpoint
az spring app create \
    --resource-group ${resource-group-name} \
    --service ${Azure-Spring-Apps-instance-name} \
    --name reactive-resilience4j \
    --assign-endpoint
次のコマンドを使って、アプリケーションをデプロイします。
az spring app deploy \
    --resource-group ${resource-group-name} \
    --service ${Azure-Spring-Apps-instance-name} \
    --name resilience4j \
    --env resilience4j.circuitbreaker.instances.backendA.registerHealthIndicator=true \
    --artifact-path ./spring-cloud-circuitbreaker-demo-resilience4j/target/spring-cloud-circuitbreaker-demo-resilience4j-0.0.1-SNAPSHOT.jar
az spring app deploy \
    --resource-group ${resource-group-name} \
    --service ${Azure-Spring-Apps-instance-name} \
    --name reactive-resilience4j \
    --env resilience4j.circuitbreaker.instances.backendA.registerHealthIndicator=true \
    --artifact-path ./spring-cloud-circuitbreaker-demo-reactive-resilience4j/target/spring-cloud-circuitbreaker-demo-reactive-resilience4j-0.0.1-SNAPSHOT.jar
Note
Resilience4j に必要な依存関係を含めます。
<dependency>
    <groupId>io.github.resilience4j</groupId>
    <artifactId>resilience4j-micrometer</artifactId>
</dependency>
<dependency>
    <groupId>org.springframework.cloud</groupId>
    <artifactId>spring-cloud-starter-circuitbreaker-resilience4j</artifactId>
</dependency>
コードでは、
CircuitBreakerFactoryの API を使用する必要があります。これは、 Spring Cloud サーキット ブレーカー スターターを含めるときに自動的に作成されるbeanとして実装されます。 詳細については、「Spring Cloud サーキット ブレーカー」を参照してください。次の 2 つの依存関係は、Resilient4j パッケージと競合しています。 絶対に含めないでください。
<dependency>
    <groupId>org.springframework.cloud</groupId>
    <artifactId>spring-cloud-starter-sleuth</artifactId>
</dependency>
<dependency>
    <groupId>org.springframework.cloud</groupId>
    <artifactId>spring-cloud-starter-zipkin</artifactId>
</dependency>
ゲートウェイ アプリケーションから提供された URL に移動し、次のようにして spring-cloud-circuit-breaker-demo からエンドポイントにアクセスします。
/get
/delay/{seconds}
/fluxdelay/{seconds}
Azure portal で Resilence4j メトリックを見つける
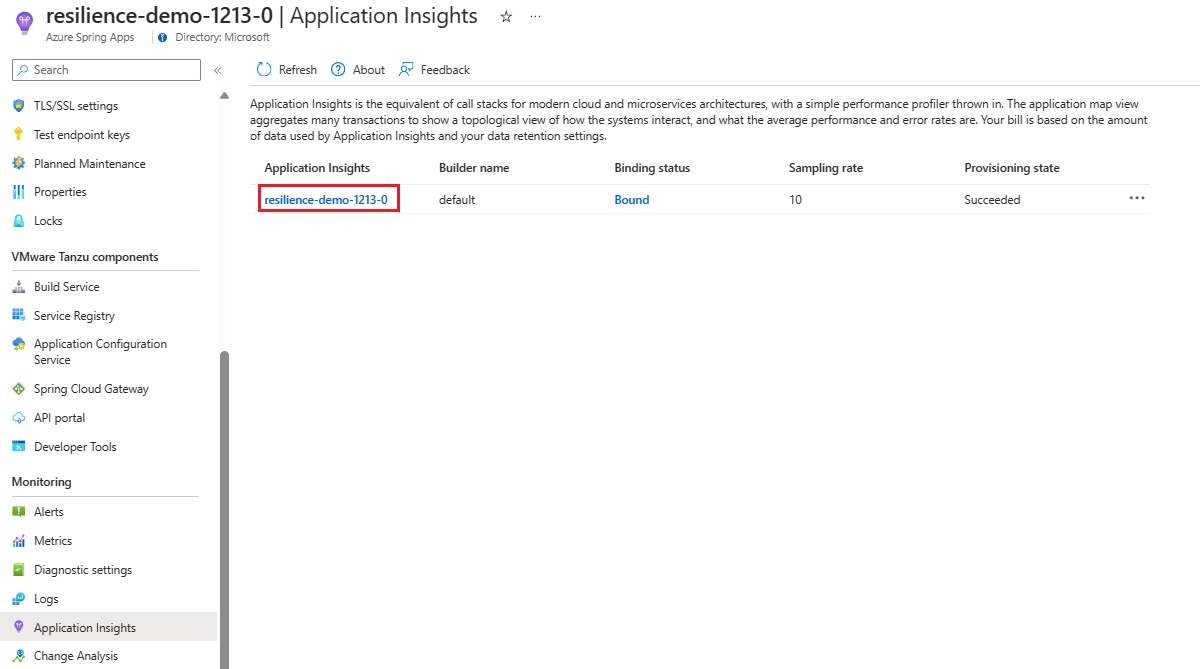
Azure Spring Apps インスタンスで、ナビゲーション ウィンドウの [Application Insights] を選択し、ページで [Application Insights] を選択します。

Note
Application Insights を有効にしない場合は、Java In-Process エージェントを有効にできます。 詳しくは、「Azure Spring Apps で Application Insights Java インプロセス エージェントを使用する」の「Azure portal を使用した Application Insights の管理」をご覧ください。
resilience4j メトリックのディメンション コレクションを有効にします。 詳しくは、「Application Insights のログベースのメトリックと事前に集計されたメトリック」の「カスタム メトリックのディメンションと事前集計」セクションをご覧ください。
ナビゲーション ウィンドウで、[メトリック] を選択します。 [メトリック] ページには、この手順でグラフを定義するためのドロップダウン メニューとオプションが用意されています。 すべてのグラフについて、 メトリック名前空間 を azure.applicationinsights に設定します。
![Azure portal の Application Insights [メトリック] ページのスクリーンショット。[メトリック名前空間] メニューが開き、azure-applicationinsights オプションが強調表示されています。](media/how-to-circuit-breaker-metrics/chart-menus.png)
[メトリック] を [resilience4j_circuitbreaker_buffered_calls] に設定し、[集計] を [平均] に設定します。
![Azure portal の Application Insights [メトリック] ページのスクリーンショット。サーキット ブレーカー バッファー呼び出しと平均の集計が含まれたグラフが示されています。](media/how-to-circuit-breaker-metrics/buffered-calls.png)
[メトリック] を [resilience4j_circuitbreaker_calls] に設定し、[集計] を [平均] に設定します。
![Azure portal の Application Insights [メトリック] ページのスクリーンショット。サーキット ブレーカー呼び出しと平均の集計が含まれたグラフが示されています。](media/how-to-circuit-breaker-metrics/calls.png)
[メトリック] を [resilience4j_circuitbreaker_calls] に設定し、[集計] を [平均] に設定します。[フィルターの追加] を選択し、[名前] を [遅延] に設定します。
![Azure portal の Application Insights [メトリック] ページのスクリーンショット。サーキット ブレーカー呼び出し、平均の集計、待ち時間フィルターが含まれたグラフが示されています。](media/how-to-circuit-breaker-metrics/calls-filter.png)
[メトリック] を [resilience4j_circuitbreaker_calls] に設定し、[集計] を [平均] に設定します。[分割の適用] を選択し、[分割方法] を [種類] に設定します。
![Azure portal の Application Insights [メトリック] ページのスクリーンショット。サーキット ブレーカー呼び出し、平均の集計、分割が含まれたグラフが示されています。](media/how-to-circuit-breaker-metrics/calls-splitting.png)
[メトリック] を [resilience4j_circuitbreaker_calls] に設定し、[集計] を [平均] に設定します。[メトリックの追加] を選択し、[メトリック] を [resilience4j_circuitbreaker_buffered_calls] に設定し、[集計] を [平均] に設定します。もう一度 [メトリックの追加] を選択し、[メトリック] を [resilience4j_circuitbreaker_slow_calls] に設定し、[集計] を [平均] に設定します。
![この手順で説明するグラフを含む Application Insights [メトリック] ページを示す Azure portal のスクリーンショット。](media/how-to-circuit-breaker-metrics/slow-calls.png)

![Azure portal の Application Insights [メトリック] ページのスクリーンショット。[メトリック名前空間] メニューが開き、azure-applicationinsights オプションが強調表示されています。](media/how-to-circuit-breaker-metrics/chart-menus.png#lightbox)
![Azure portal の Application Insights [メトリック] ページのスクリーンショット。サーキット ブレーカー バッファー呼び出しと平均の集計が含まれたグラフが示されています。](media/how-to-circuit-breaker-metrics/buffered-calls.png#lightbox)
![Azure portal の Application Insights [メトリック] ページのスクリーンショット。サーキット ブレーカー呼び出しと平均の集計が含まれたグラフが示されています。](media/how-to-circuit-breaker-metrics/calls.png#lightbox)
![Azure portal の Application Insights [メトリック] ページのスクリーンショット。サーキット ブレーカー呼び出し、平均の集計、待ち時間フィルターが含まれたグラフが示されています。](media/how-to-circuit-breaker-metrics/calls-filter.png#lightbox)
![Azure portal の Application Insights [メトリック] ページのスクリーンショット。サーキット ブレーカー呼び出し、平均の集計、分割が含まれたグラフが示されています。](media/how-to-circuit-breaker-metrics/calls-splitting.png#lightbox)
![この手順で説明するグラフを含む Application Insights [メトリック] ページを示す Azure portal のスクリーンショット。](media/how-to-circuit-breaker-metrics/slow-calls.png#lightbox)
Azure Spring Apps インスタンスで、ナビゲーション ウィンドウの [Application Insights] を選び、ページで既定の [Application Insights] を選びます。
Note
使用できる既定の Application Insights がない場合は、Java In-Process エージェントを有効にできます。 詳しくは、「Azure Spring Apps で Application Insights Java インプロセス エージェントを使用する」の「Azure portal を使用した Application Insights の管理」をご覧ください。
resilience4j メトリックのディメンション コレクションを有効にします。 詳しくは、「Application Insights のログベースのメトリックと事前に集計されたメトリック」の「カスタム メトリックのディメンションと事前集計」セクションをご覧ください。
ナビゲーション ウィンドウで、[メトリック] を選択します。 [メトリック] ページには、この手順でグラフを定義するためのドロップダウン メニューとオプションが用意されています。 すべてのグラフについて、 メトリック名前空間 を azure.applicationinsights に設定します。
[メトリック] を [resilience4j_circuitbreaker_buffered_calls] に設定し、[集計] を [平均] に設定します。
[メトリック] を [resilience4j_circuitbreaker_calls] に設定し、[集計] を [平均] に設定します。
[メトリック] を [resilience4j_circuitbreaker_calls] に設定し、[集計] を [平均] に設定します。[フィルターの追加] を選択し、[名前] を [遅延] に設定します。
[メトリック] を [resilience4j_circuitbreaker_calls] に設定し、[集計] を [平均] に設定します。[分割の適用] を選択し、[分割方法] を [種類] に設定します。
[メトリック] を [resilience4j_circuitbreaker_calls] に設定し、[集計] を [平均] に設定します。[メトリックの追加] を選択し、[メトリック] を [resilience4j_circuitbreaker_buffered_calls] に設定し、[集計] を [平均] に設定します。もう一度 [メトリックの追加] を選択し、[メトリック] を [resilience4j_circuitbreaker_slow_calls] に設定し、[集計] を [平均] に設定します。
