Azurite ストレージ エミュレーターを使用して Azure Blob Storage のプライベート エンドポイントに対して自動テストを書き込む方法について説明します。
ローカル コンピューターでテストを実行する
最新バージョンの Python をインストールします。
Azure Storage Explorer をインストールします。
Azurite をインストールして実行します。
オプション 1: npm を使用して Azurite をインストールし、ローカルで実行します。
# Install Azurite
npm install -g azurite

# Create an Azurite directory
mkdir c:\azurite

# Launch Azurite locally
azurite --silent --location c:\azurite --debug c:\azurite\debug.log
オプション 2: Docker を使用して Azurite を実行します。
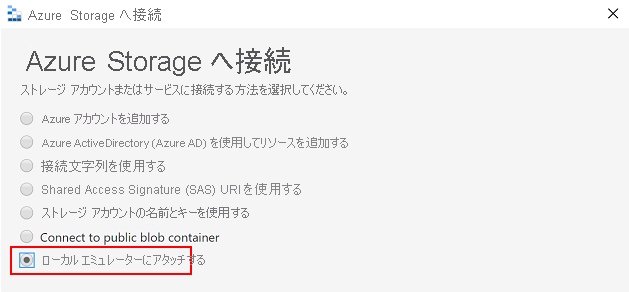
docker run -p 10000:10000 mcr.microsoft.com/azure-storage/azurite azurite-blob --blobHost 0.0.0.0Azure Storage Explorer で、 [Attach to a local emulator](ローカル エミュレーターにアタッチする) を選択します。
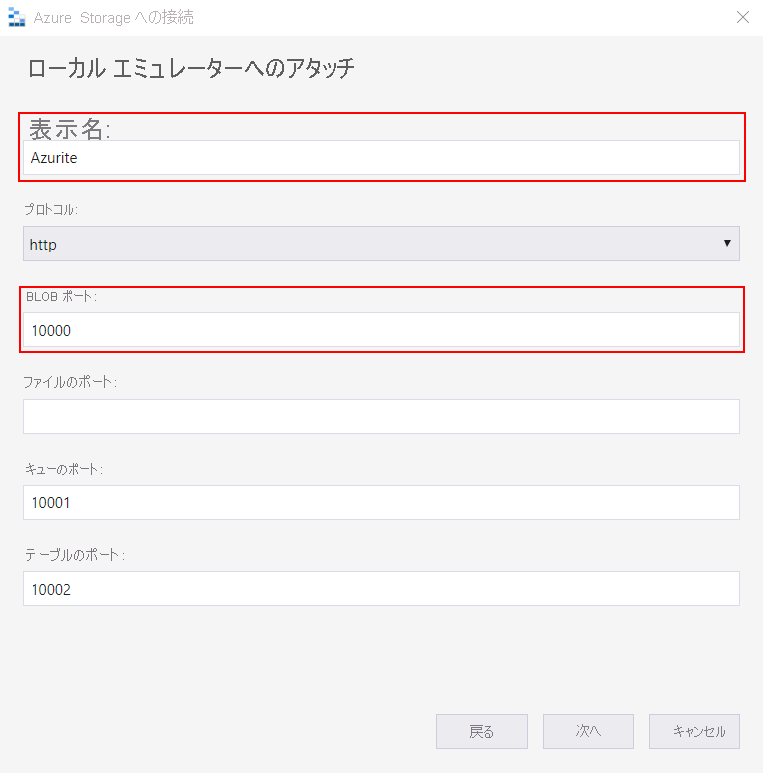
Azurite に接続するための [Display name](表示名) と [Blobs port](Blob ポート) 番号を指定し、Azure Storage Explorer を使用してローカルの Blob Storage を管理します。
仮想 Python 環境を作成する
python -m venv .venvコンテナーを作成し、環境変数を初期化します。 テストを生成するには、PyTestconftest.py ファイルを使用します。 以下に、conftest.py ファイルの例を示します。
from azure.storage.blob import BlobServiceClient
import os

def pytest_generate_tests(metafunc):
   os.environ['AZURE_STORAGE_CONNECTION_STRING'] = 'DefaultEndpointsProtocol=http;AccountName=[name];AccountKey=[key];BlobEndpoint=http://127.0.0.1:10000/devstoreaccount1;'
   os.environ['STORAGE_CONTAINER'] = 'test-container'

   # Create a container for Azurite for the first run
   blob_service_client = BlobServiceClient.from_connection_string(os.environ.get("AZURE_STORAGE_CONNECTION_STRING"))
   try:
      blob_service_client.create_container(os.environ.get("STORAGE_CONTAINER"))
   except Exception as e:
      print(e)
注記
AZURE_STORAGE_CONNECTION_STRINGに表示される値は Azurite の既定値であり、秘密キーではありません。requirements.txt ファイルに一覧表示されている依存関係をインストールします。
pip install -r requirements.txtテストを実行します。
python -m pytest ./tests
テストの実行後、Azure Storage Explorer を使用して、Azurite Blob Storage 内のファイルを確認できます。

Azure Pipelines でテストを実行する
テストをローカルで実行した後、Azure Pipelines でのテストに合格することを確認します。 Azure でホストされたエージェントとして Docker Azurite イメージを使用するか、npm を使用して Azurite をインストールします。 次の Azure Pipelines の例では、npm を使用して Azurite をインストールします。
trigger:
- master

steps:
- task: UsePythonVersion@0
  displayName: 'Use Python 3.7'
  inputs:
    versionSpec: 3.7

- bash: |
    pip install -r requirements_tests.txt
  displayName: 'Setup requirements for tests'

- bash: |
    sudo npm install -g azurite
    sudo mkdir azurite
    sudo azurite --silent --location azurite --debug azurite\debug.log &
  displayName: 'Install and Run Azurite'

- bash: |
    python -m pytest --junit-xml=unit_tests_report.xml --cov=tests --cov-report=html --cov-report=xml ./tests
  displayName: 'Run Tests'

- task: PublishCodeCoverageResults@1
  inputs:
    codeCoverageTool: Cobertura
    summaryFileLocation: '$(System.DefaultWorkingDirectory)/**/coverage.xml'
    reportDirectory: '$(System.DefaultWorkingDirectory)/**/htmlcov'

- task: PublishTestResults@2
  inputs:
    testResultsFormat: 'JUnit'
    testResultsFiles: '**/*_tests_report.xml'
    failTaskOnFailedTests: true
Azure Pipelines テストを実行すると、次のような出力が表示されます。
