ユーザー設定の描画を実行する場合は、指定した位置から 1 本の水平線でテキストを描画できます。 この方法でテキストを描画するには、DrawStringまたはGraphicsパラメーターを受け取るPoint クラスのPointFオーバーロードされたメソッドを使用します。 DrawStringメソッドにはBrushとFontが必要です
DrawTextを受け取るTextRendererのPointオーバーロードメソッドを使用することもできます。 DrawText には、 Color と Fontも必要です。
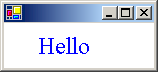
次の図は、 DrawString オーバーロードされたメソッドを使用するときに、指定したポイントに描画されるテキストの出力を示しています。
GDI+ を使用してテキスト行を描画するには
DrawString メソッドを使用して、必要なテキスト、PointまたはPointF、Font、Brushを渡します。
using (Font font1 = new Font("Times New Roman", 24, FontStyle.Bold, GraphicsUnit.Pixel)){
PointF pointF1 = new PointF(30, 10);
e.Graphics.DrawString("Hello", font1, Brushes.Blue, pointF1);
}
Dim font1 As New Font("Times New Roman", 24, FontStyle.Bold, GraphicsUnit.Pixel) Try Dim pointF1 As New PointF(30, 10) e.Graphics.DrawString("Hello", font1, Brushes.Blue, pointF1) Finally font1.Dispose() End Try
GDI でテキスト行を描画するには
DrawText メソッドを使用して、必要なテキスト、Point、Font、Colorを渡します。
using (Font font = new Font("Times New Roman", 24, FontStyle.Bold, GraphicsUnit.Pixel))
{
    Point point1 = new Point(30, 10);
    TextRenderer.DrawText(e.Graphics, "Hello", font, point1, Color.Blue);
}
Dim font As New Font("Times New Roman", 24, FontStyle.Bold, GraphicsUnit.Pixel) Try Dim point1 As New Point(30, 10) TextRenderer.DrawText(e.Graphics, "Hello", font, point1, Color.Blue) Finally font.Dispose() End Try
コードのコンパイル
前の例では、次のものが必要です。
-
PaintEventArgs
eは、 PaintEventHandlerのパラメーターです。
こちらも参照ください
- 方法: GDI を使用してテキストを描画する
- フォントとテキストの使用
- 方法: フォント ファミリとフォント を作成する
- 方法: 四角形内にテキストを折り返して描画する
GitHub で Microsoft と共同作業する
このコンテンツのソースは GitHub にあります。そこで、issue や pull request を作成および確認することもできます。 詳細については、共同作成者ガイドを参照してください。
.NET Desktop feedback