Office スクリプトのサンプル シナリオ: 自動タスクアラーム
このシナリオでは、プロジェクトを管理しています。 Excel ワークシートを使用して、毎月従業員の状態を追跡します。 多くの場合、状態を入力するようにユーザーに通知する必要があるため、そのリマインダー プロセスを自動化することにしました。
ステータス フィールドが見つからないユーザーにメッセージを送信し、その応答をスプレッドシートに適用する Power Automate フローを作成します。 これを行うには、ブックの操作を処理するスクリプトのペアを開発します。 最初のスクリプトは空の状態のユーザーの一覧を取得し、2 番目のスクリプトは右側の行に状態文字列を追加します。 また、 Teams アダプティブ カード を使用して、従業員に通知から直接状態を入力してもらいます。
対象となるスクリプティング スキル
- Power Automate でフローを作成する
- スクリプトにデータを渡す
- スクリプトからデータを返す
- Teams アダプティブ カード
- テーブル
前提条件
このシナリオでは 、Power Automate と Microsoft Teams を使用します。
セットアップ手順
ブックをダウンロードする
サンプル ブックを OneDrive にダウンロードします。
Excel でブックを開きます。
スクリプトを作成する
まず、スプレッドシートに不足している状態レポートを持つすべての従業員を取得するためのスクリプトが必要です。 [ 自動化 ] タブの [ 新しいスクリプト ] を選択し、次のスクリプトをエディターに貼り付けます。
/**
 * This script looks for missing status reports in a project management table.
 *
 * @returns An array of Employee objects (containing their names and emails).
 */
function main(workbook: ExcelScript.Workbook): Employee[] {
  // Get the first worksheet and the first table on that worksheet.
  let sheet = workbook.getFirstWorksheet()
  let table = sheet.getTables()[0];

  // Give the column indices names matching their expected content.
  const NAME_INDEX = 0;
  const EMAIL_INDEX = 1;
  const STATUS_REPORT_INDEX = 2;

  // Get the data for the whole table.
  let bodyRangeValues = table.getRangeBetweenHeaderAndTotal().getValues();

  // Create the array of Employee objects to return.
  let people: Employee[] = [];

  // Loop through the table and check each row for completion.
  for (let i = 0; i < bodyRangeValues.length; i++) {
    let row = bodyRangeValues[i];
    if (row[STATUS_REPORT_INDEX] === "") {
      // Save the email to return.
      people.push({ name: row[NAME_INDEX].toString(), email: row[EMAIL_INDEX].toString() });
    }
  }

  // Log the array to verify we're getting the right rows.
  console.log(people);

  // Return the array of Employees.
  return people;
}

/**
 * An interface representing an employee.
 * An array of Employees will be returned from the script
 * for the Power Automate flow.
 */
interface Employee {
  name: string;
  email: string;
}
Get People という名前でスクリプトを保存します。
次に、ステータス レポート カードを処理し、新しい情報をスプレッドシートに配置する 2 つ目のスクリプトが必要です。 [コード エディター] 作業ウィンドウで、[ 新しいスクリプト ] を選択し、次のスクリプトをエディターに貼り付けます。
/**
 * This script applies the results of a Teams Adaptive Card about
 * a status update to a project management table.
 *
 * @param senderEmail - The email address of the employee updating their status.
 * @param statusReportResponse - The employee's status report.
 */
function main(workbook: ExcelScript.Workbook,
  senderEmail: string,
  statusReportResponse: string) {

  // Get the first worksheet and the first table in that worksheet.
  let sheet = workbook.getFirstWorksheet();
  let table = sheet.getTables()[0];

  // Give the column indices names matching their expected content.
  const NAME_INDEX = 0;
  const EMAIL_INDEX = 1;
  const STATUS_REPORT_INDEX = 2;

  // Get the range and data for the whole table.
  let bodyRange = table.getRangeBetweenHeaderAndTotal();
  let tableRowCount = bodyRange.getRowCount();
  let bodyRangeValues = bodyRange.getValues();

  // Create a flag to denote success.
  let statusAdded = false;

  // Loop through the table and check each row for a matching email address.
  for (let i = 0; i < tableRowCount && !statusAdded; i++) {
    let row = bodyRangeValues[i];

    // Check if the row's email address matches.
    if (row[EMAIL_INDEX] === senderEmail) {
      // Add the Teams Adaptive Card response to the table.
      bodyRange.getCell(i, STATUS_REPORT_INDEX).setValues([
        [statusReportResponse]
      ]);
      statusAdded = true;
    }
  }

  // If successful, log the status update.
  if (statusAdded) {
    console.log(
      `Successfully added status report for ${senderEmail} containing: ${statusReportResponse}`
    );
  }
}
[状態の保存] という名前でスクリプト を保存します。
Power Automate フローを作成する
[Power Automate Create] タブを開きます。
ヒント
以前にフローを作成したことがない場合は、チュートリアル「Power Automate でのスクリプトの使用を開始する」をチェックして、基本を学習してください。
新しい インスタント クラウド フローを作成します。
オプションから [ 手動でフローをトリガー する] を選択し、[ 作成] を選択します。
フローでは、Get People スクリプトを呼び出して、空の状態フィールドを持つすべての従業員を取得する必要があります。 フロー ビルダーで、[アクションの追加] + ボタンを選択 します。 Excel Online (Business) コネクタの [スクリプトの実行] アクションを選択します。 フロー ステップに次のエントリを指定します。
- 場所: OneDrive for Business
- ドキュメント ライブラリ: OneDrive
- ファイル: task-reminders.xlsx (ファイル ブラウザーから選択)
- スクリプト: Peopleを取得する
![完了した [スクリプトの実行] アクション。](../../images/scenario-task-reminders-1.png)
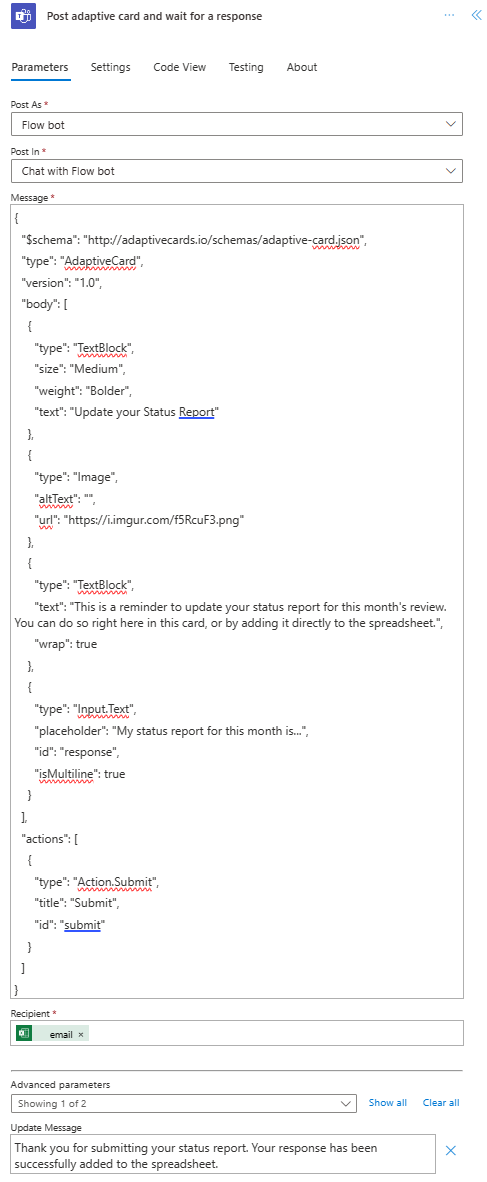
次に、フローでは、スクリプトによって返される配列内の各 Employee を処理する必要があります。 Microsoft Teams コネクタの Post adaptive カードを追加し、応答アクションを待ちます。
アダプティブ カードを送信するには、カードの JSON をメッセージとして指定する必要があります。 アダプティブ カード Designerを使用して、カスタム カードを作成できます。 このサンプルでは、次の JSON を使用します。
{
  "$schema": "http://adaptivecards.io/schemas/adaptive-card.json",
  "type": "AdaptiveCard",
  "version": "1.0",
  "body": [
    {
      "type": "TextBlock",
      "size": "Medium",
      "weight": "Bolder",
      "text": "Update your Status Report"
    },
    {
      "type": "Image",
      "altText": "",
      "url": "https://i.imgur.com/f5RcuF3.png"
    },
    {
      "type": "TextBlock",
      "text": "This is a reminder to update your status report for this month's review. You can do so right here in this card, or by adding it directly to the spreadsheet.",
      "wrap": true
    },
    {
      "type": "Input.Text",
      "placeholder": "My status report for this month is...",
      "id": "response",
      "isMultiline": true
    }
  ],
  "actions": [
    {
      "type": "Action.Submit",
      "title": "Submit",
      "id": "submit"
    }
  ]
}
[ 受信者 ] フィールドに、動的コンテンツから メール を追加します (選択範囲には Excel ロゴが表示されます)。 電子メールを追加すると、フロー ステップが [For each] ブロックで囲まれます。 つまり、配列は Power Automate によって反復処理されます。
残りのフィールドに次のように入力します。
- として投稿: フロー ボット
- 投稿: Flow ボットとチャットする
- 更新メッセージ: 状態レポートを送信していただきありがとうございます。 応答がスプレッドシートに正常に追加されました。
[For each]\(各ブロック\) で、[アダプティブ カードを投稿し、応答アクションを待機します。新しいアクションを追加します。 Excel Online (Business) コネクタの [スクリプトの実行] アクションを選択します。 フロー ステップに次のエントリを指定します。
- 場所: OneDrive for Business
- ドキュメント ライブラリ: OneDrive
- ファイル: task-reminders.xlsx (ファイル ブラウザーから選択)
- スクリプト: 状態の保存
- senderEmail: 電子メール (Excel からの動的コンテンツ)
- statusReportResponse: 応答 (Teams からの動的コンテンツ)

フローを保存します。 フロー デザイナーは次の図のようになります。
![[For each control]\(各コントロール\) に至る 2 つのステップと、For each コントロール内の 2 つのステップを示す、完了したフローの図。](../../images/scenario-task-reminders-4.png)
フローの実行
フローをテストするには、空の状態のテーブル行で Teams アカウントに関連付けられているメール アドレスが使用されていることを確認します (テスト中は、おそらく独自のメール アドレスを使用する必要があります)。 フロー エディター ページの [テスト ] ボタンを使用するか、[ マイ フロー ] タブでフローを実行します。プロンプトが表示されたら、必ずアクセスを許可してください。
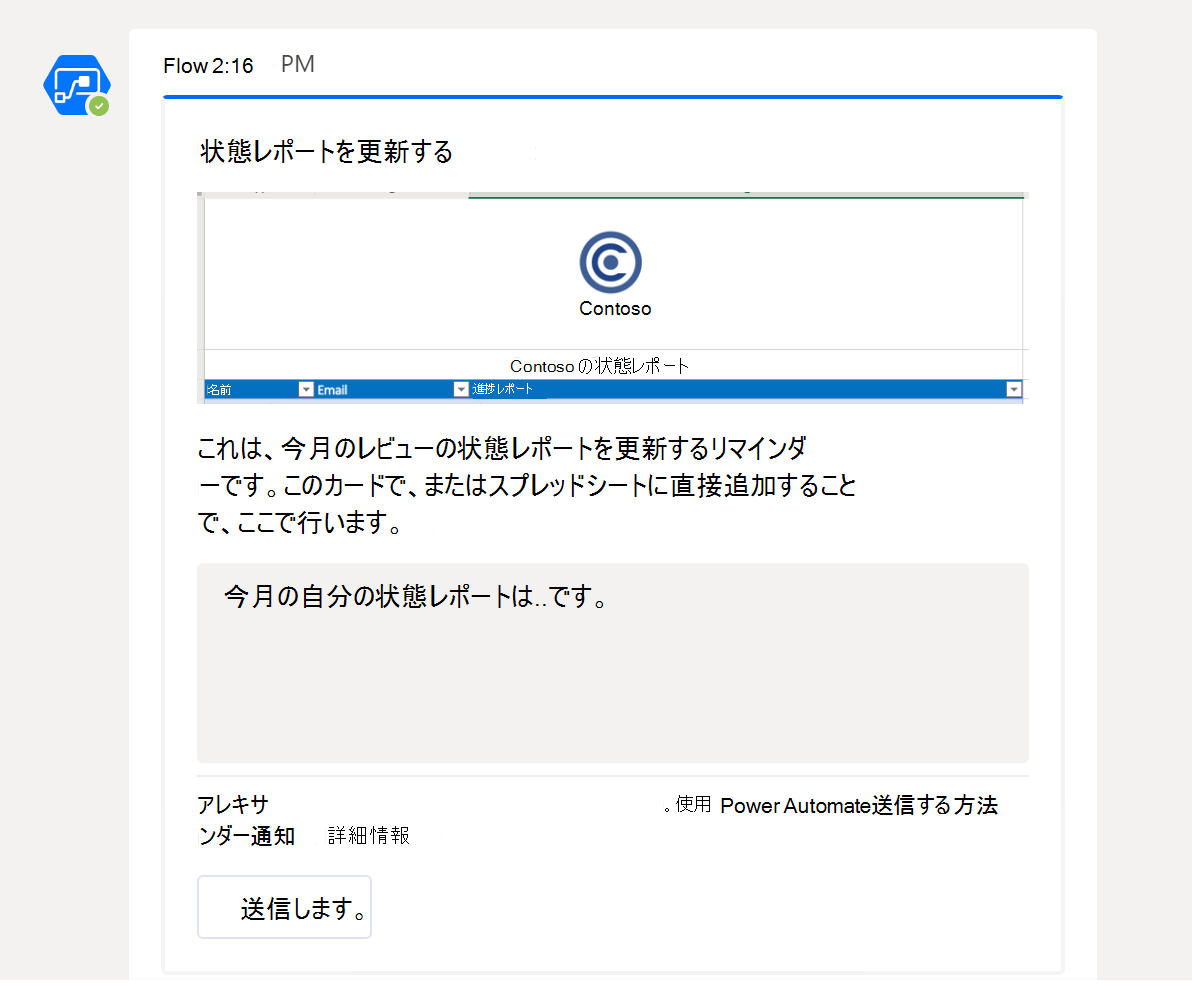
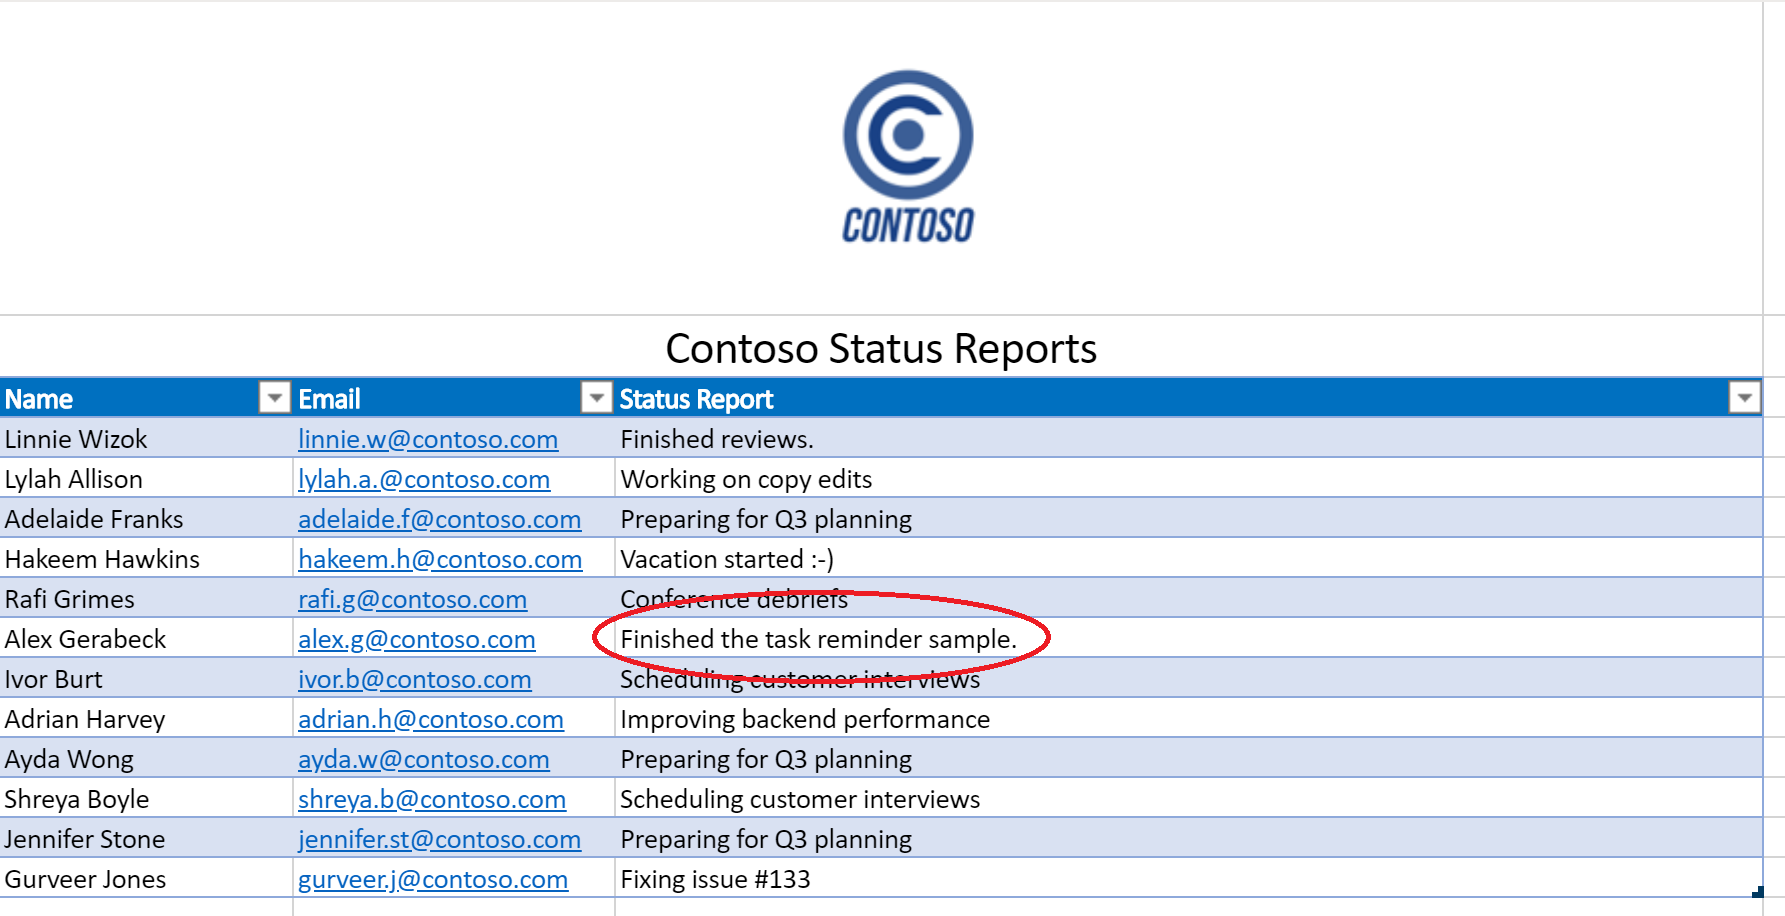
Teams を通じて Power Automate からアダプティブ カードを受け取る必要があります。 カードの状態フィールドに入力すると、フローが続行され、指定した状態でスプレッドシートが更新されます。
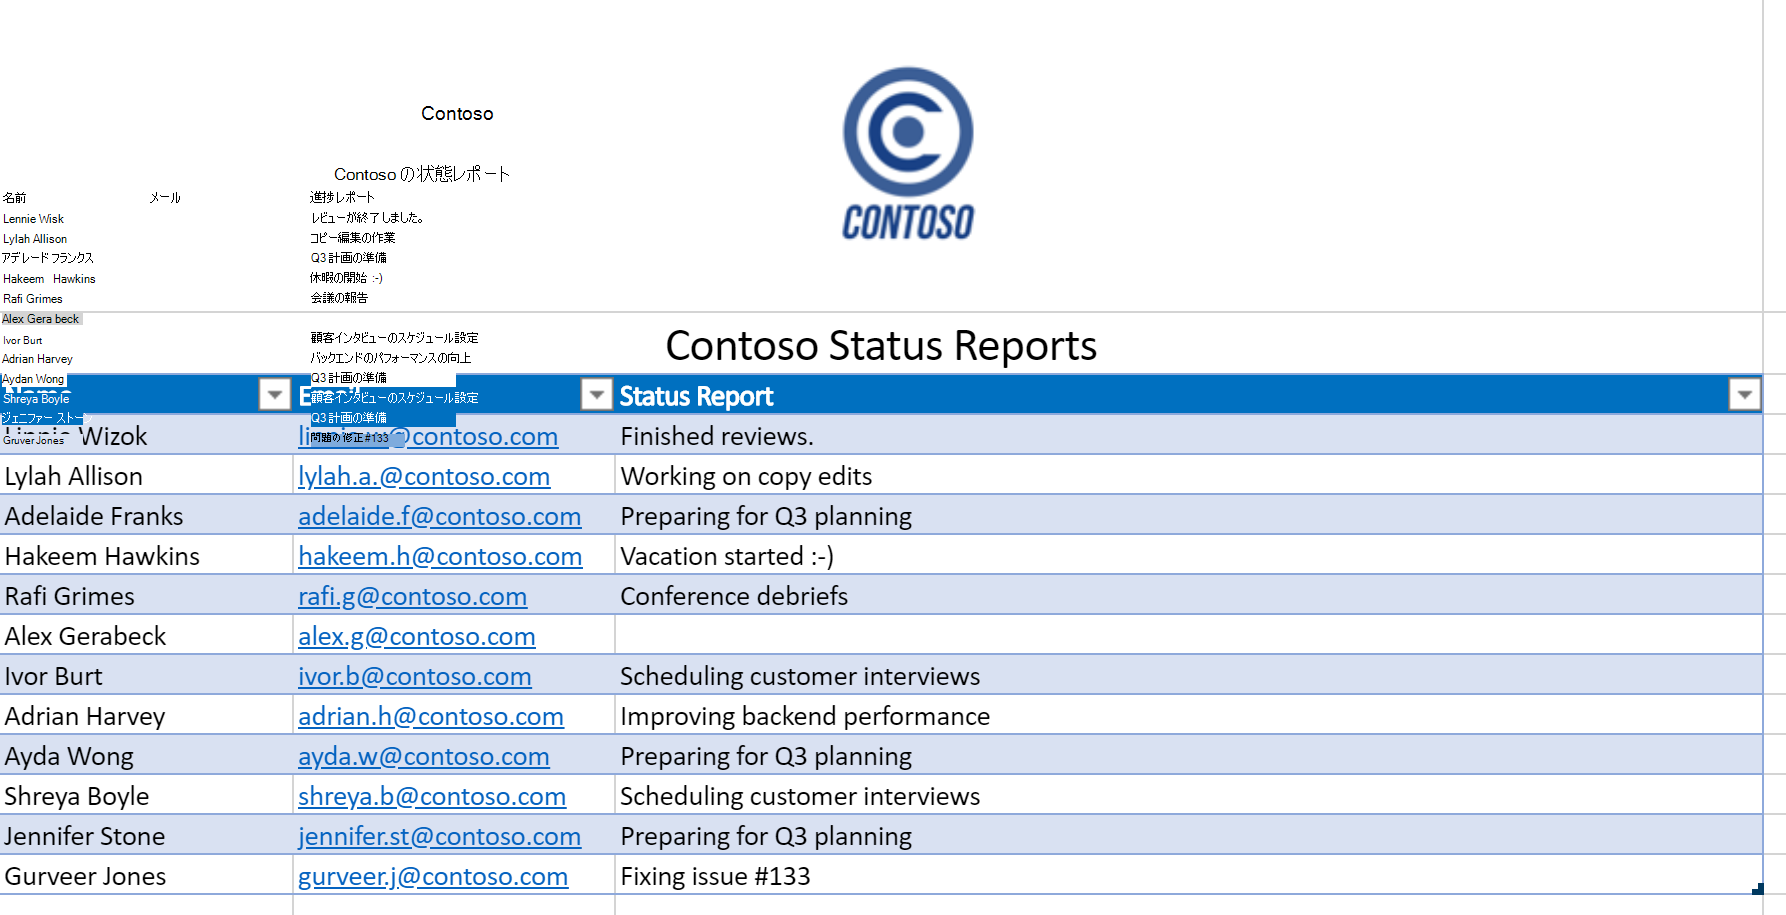
フローを実行する前に
アダプティブ カードの受信
フローを実行した後
Office Scripts
フィードバック
以下は間もなく提供いたします。2024 年を通じて、コンテンツのフィードバック メカニズムとして GitHub の issue を段階的に廃止し、新しいフィードバック システムに置き換えます。 詳細については、「https://aka.ms/ContentUserFeedback」を参照してください。
フィードバックの送信と表示