Azure Portal での Power BI Embedded 容量の一時停止と開始
この記事では、Microsoft Azure で Power BI Embedded の容量を一時停止する方法と開始する方法について説明します。 この記事は、Power BI Embedded の容量があることを前提としています。 作成していない場合、「Azure Portal での Power BI Embedded 容量の作成」を参照して作成してください。
Azure サブスクリプションをお持ちでない場合は、始める前に無料アカウントを作成してください。
容量を一時停止する
容量を一時停止することで課金が止まります。 一定期間容量を使う必要がない場合、容量を一時停止することをお勧めします。 容量は次の手順で一時停止します。
注意
容量を一時停止すると、Power BI 内でコンテンツが利用できなくなることがあります。 ワークスペースの中断を防ぐには、容量を一時停止する前に容量からワークスペースの割り当てを解除してください。
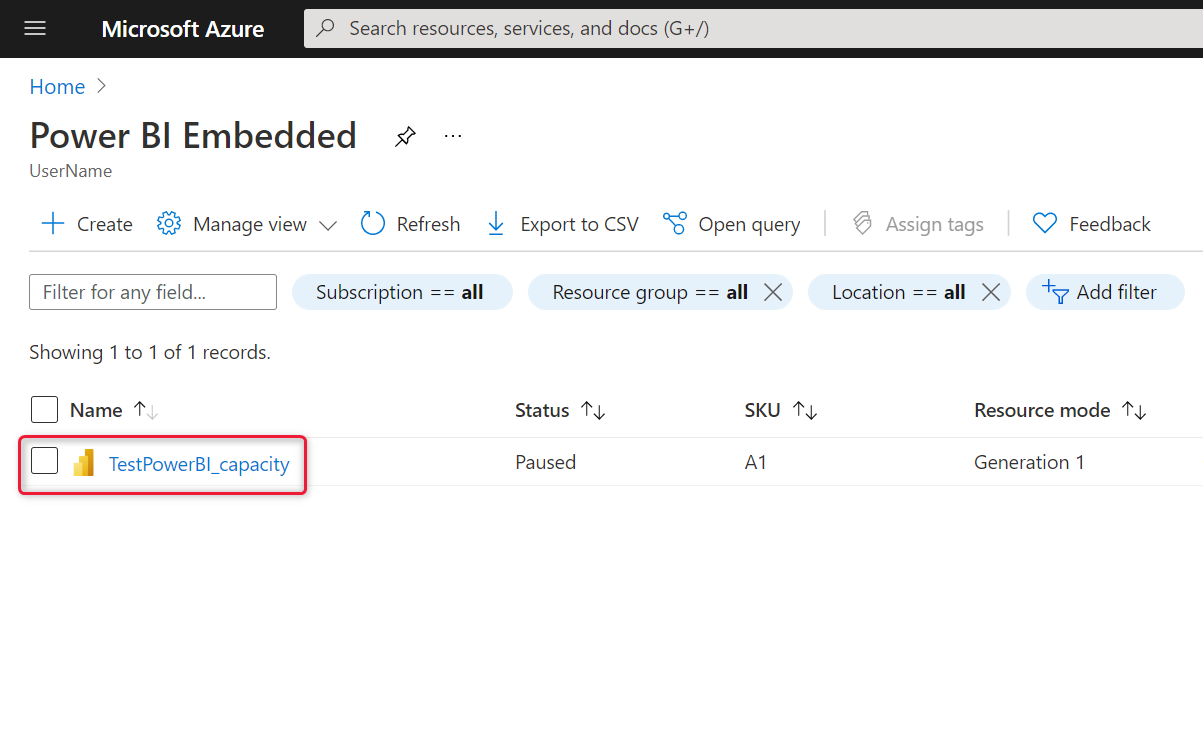
Azure Portal にサインインします。
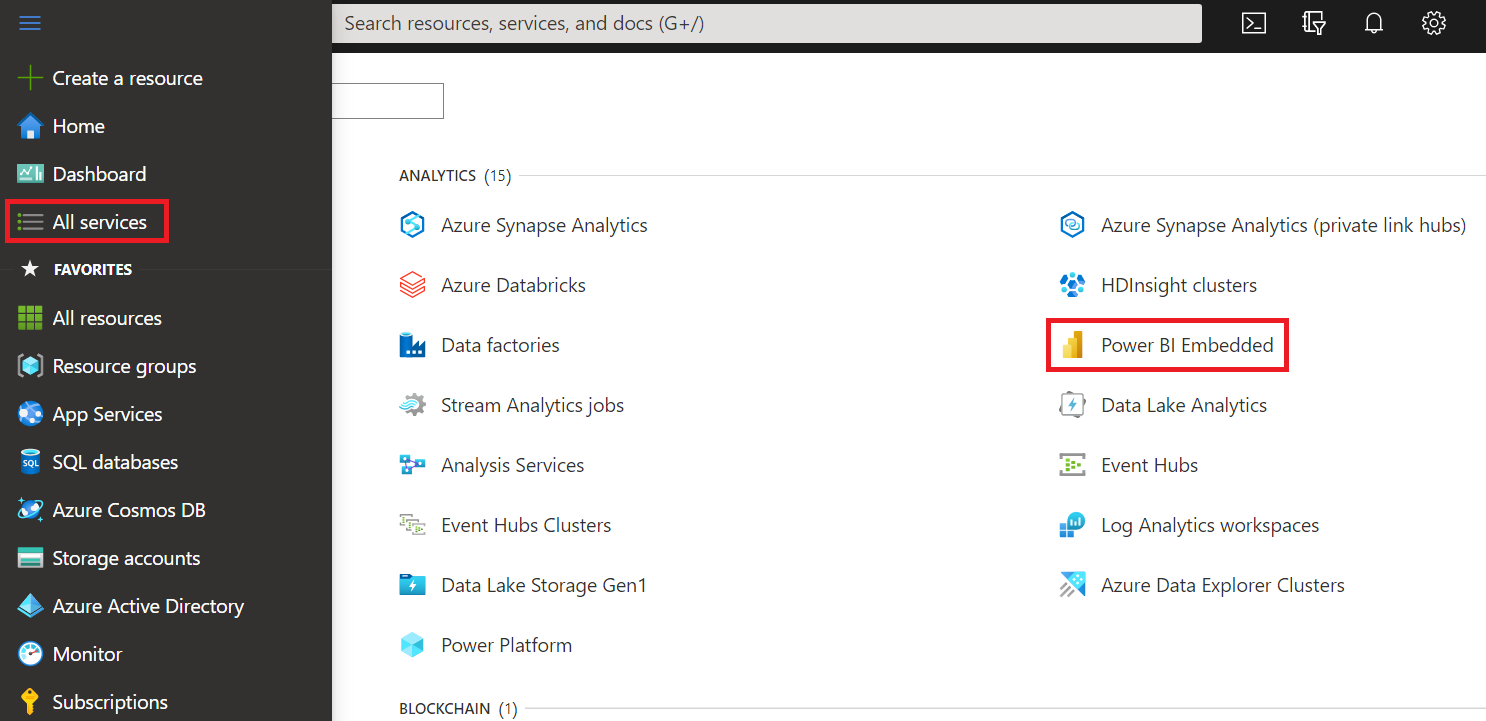
[Azure サービス] で、[Power BI Embedded] を選択して自分の容量を表示します。
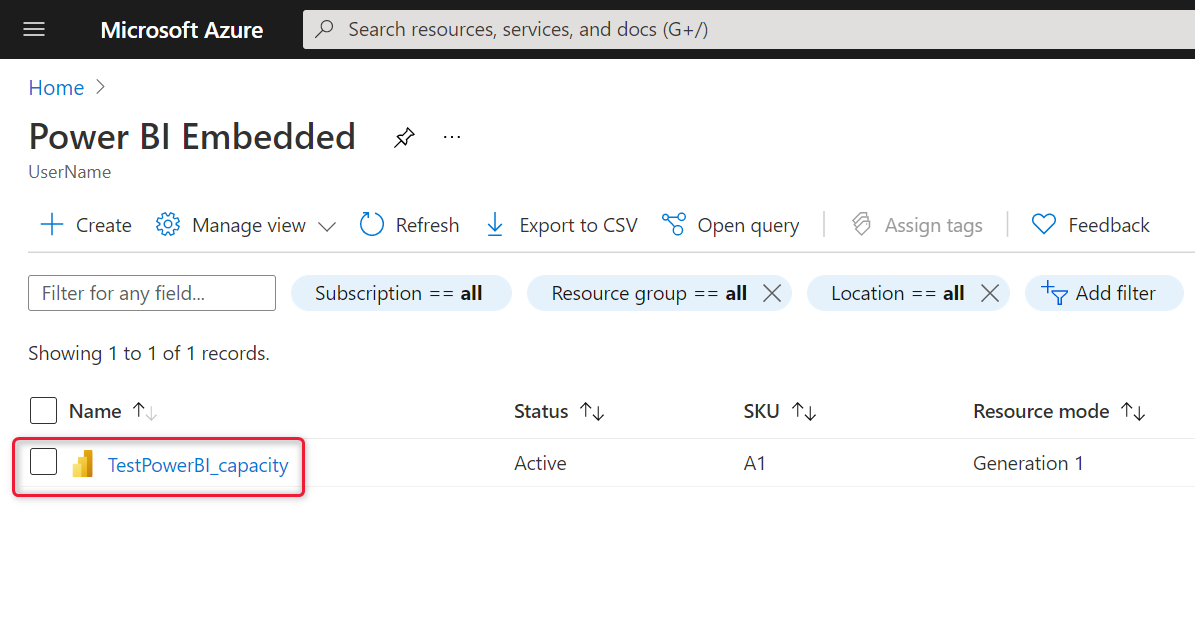
一時停止する容量を選択します。
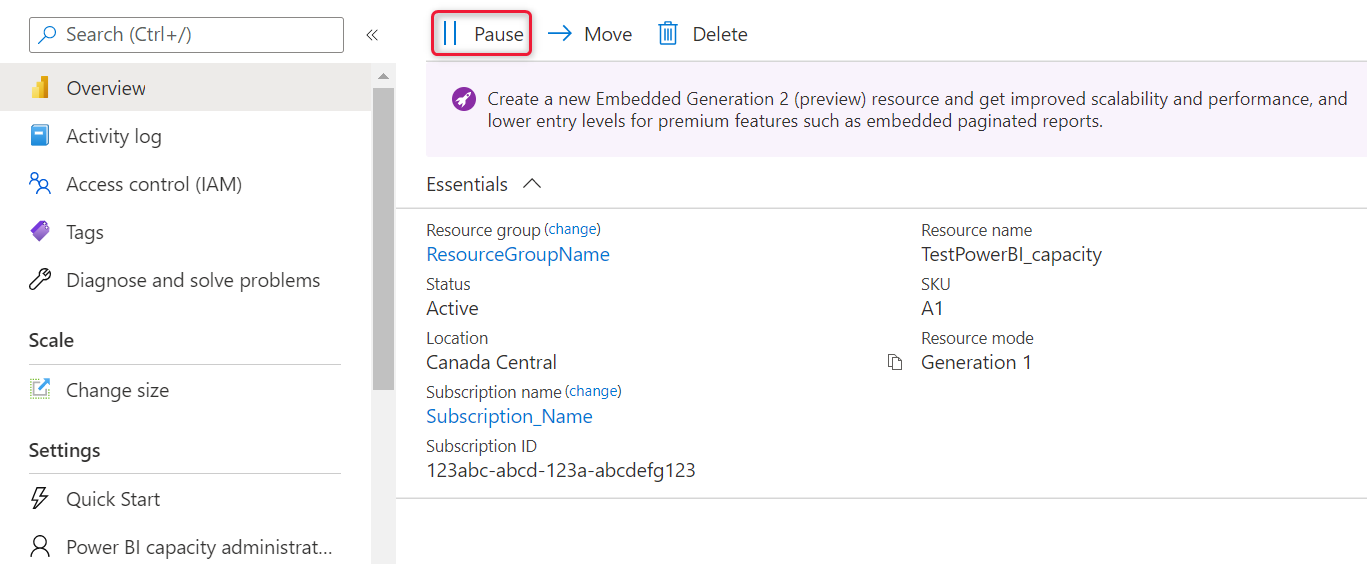
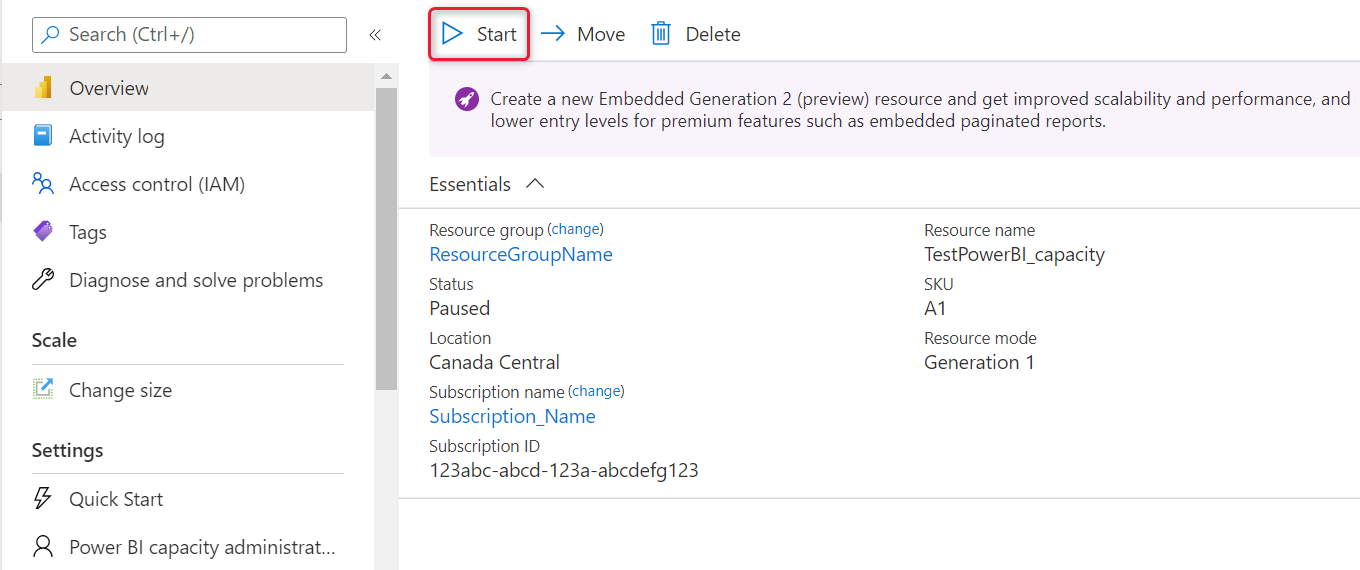
容量詳細の上で [一時停止] を選択します。
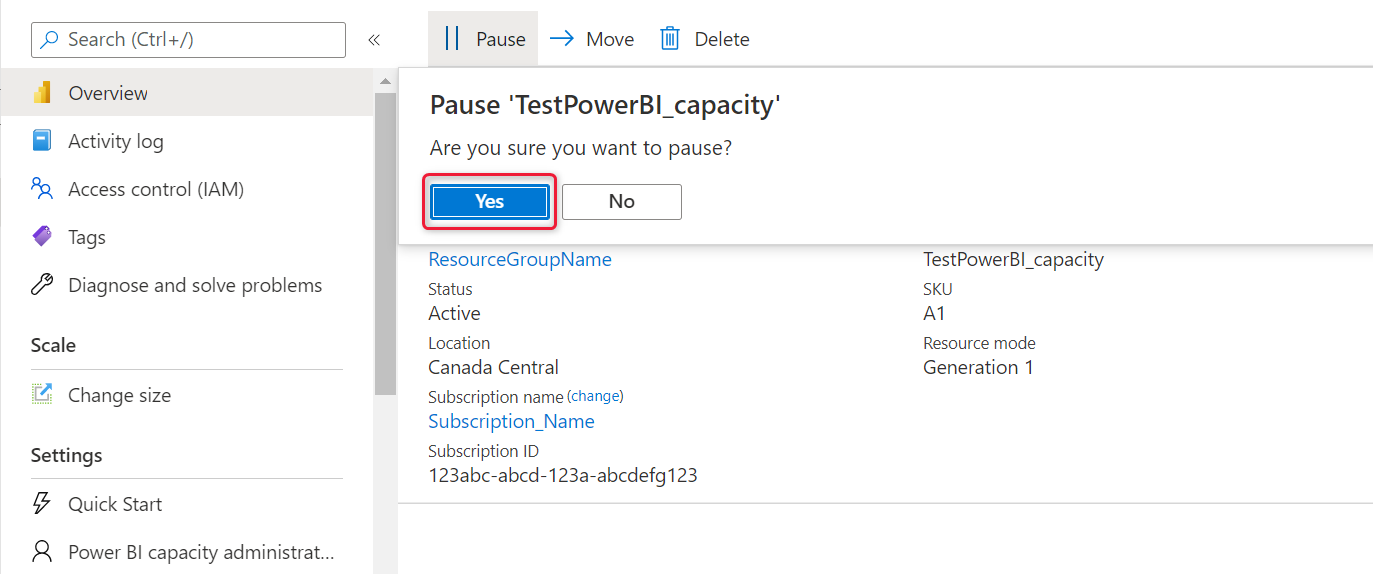
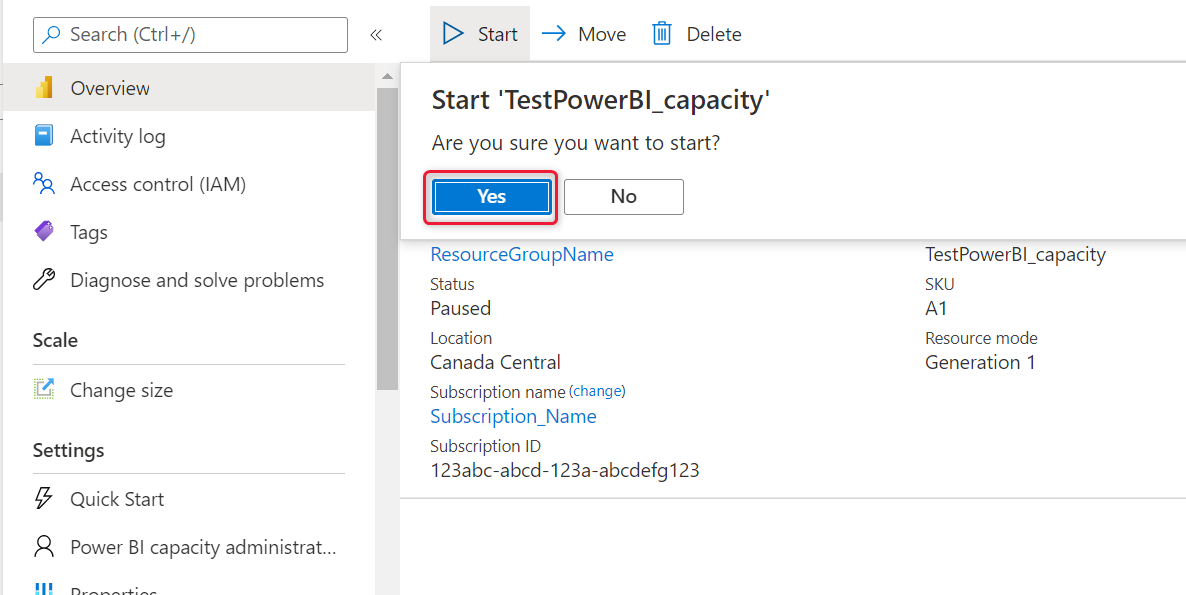
[はい] を選択すると、容量の一時停止が確定します。
容量を開始する
容量を開始することで使用を再開します。 容量を開始すると、請求も再開されます。
Azure Portal にサインインします。
[すべてのサービス]>[Power BI Embedded] の順に選択すると、容量が表示されます。
開始する容量を選択します。
容量詳細の上で [開始] を選択します。
[はい] を選択すると、容量の開始が確定します。
この容量にコンテンツが割り当てられている場合、容量を開始すると、そのコンテンツを使用できるようになります。
CLI を使用して容量を開始または一時停止する
次を使用して、コマンドラインから容量を開始または一時停止することもできます。
次のステップ
その他の質問 Power BI コミュニティで質問してみてください。
フィードバック
以下は間もなく提供いたします。2024 年を通じて、コンテンツのフィードバック メカニズムとして GitHub の issue を段階的に廃止し、新しいフィードバック システムに置き換えます。 詳細については、「https://aka.ms/ContentUserFeedback」を参照してください。
フィードバックの送信と表示