Integrate with ServiceNow change management
TFS 2018
Azure Pipelines support integration with ServiceNow to improve collaboration between development and IT teams. By including change management in release pipelines, teams can reduce the risks associated with changes and follow service management methodologies such as ITIL while taking full advantage of Azure Pipelines.
In this article, you'll learn how to:
- Configure ServiceNow instances.
- Include ServiceNow change management process as a release gate.
- Monitor change management process from release pipelines.
- Keep ServiceNow change requests updated with deployment results.
Prerequisites
This tutorial expands on Use approvals and gates and Define approvals & checks.
An Azure DevOps organization. Create an organization, if you don't have one already.
A non-developer instance of ServiceNow.
Configure the ServiceNow instance
Install the Azure Pipelines extension on your ServiceNow instance. You'll need Hi credentials to complete the installation. See Buying Overview for more details on installing apps from the ServiceNow store.
Create a new user in ServiceNow and grant it the following role:
x_mioms_azpipeline.pipelinesExecution.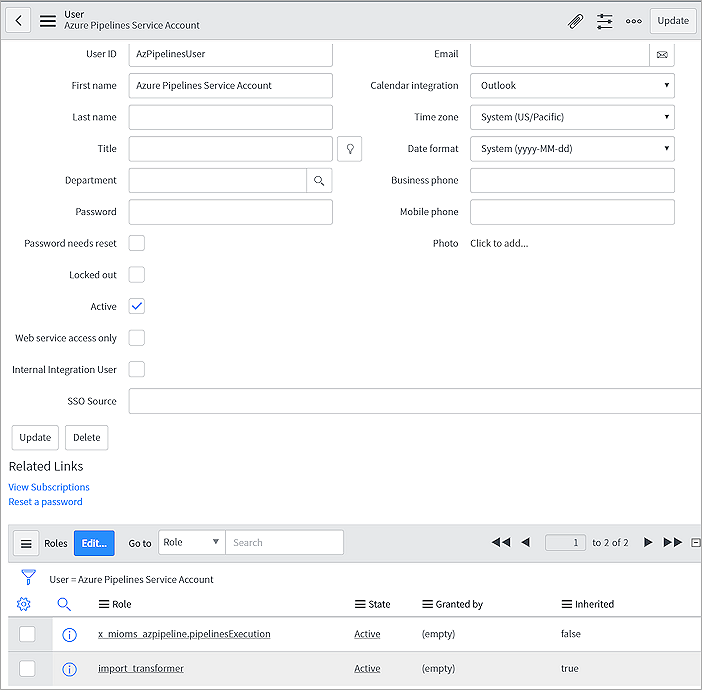
Set up the Azure DevOps organization
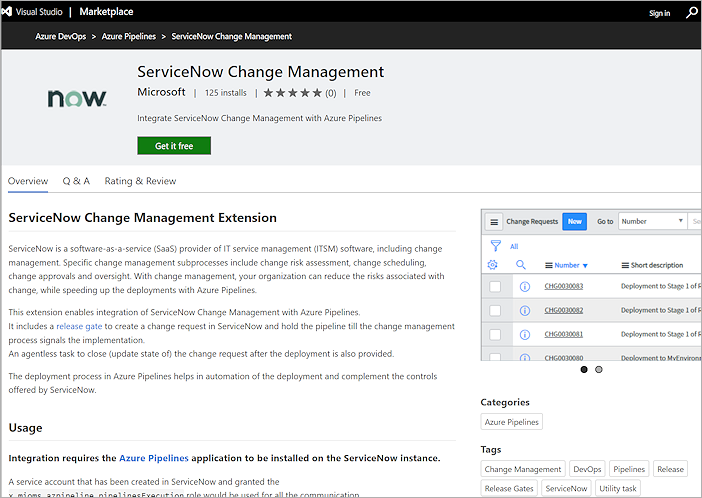
Install the ServiceNow Change Management extension on your Azure DevOps organization.
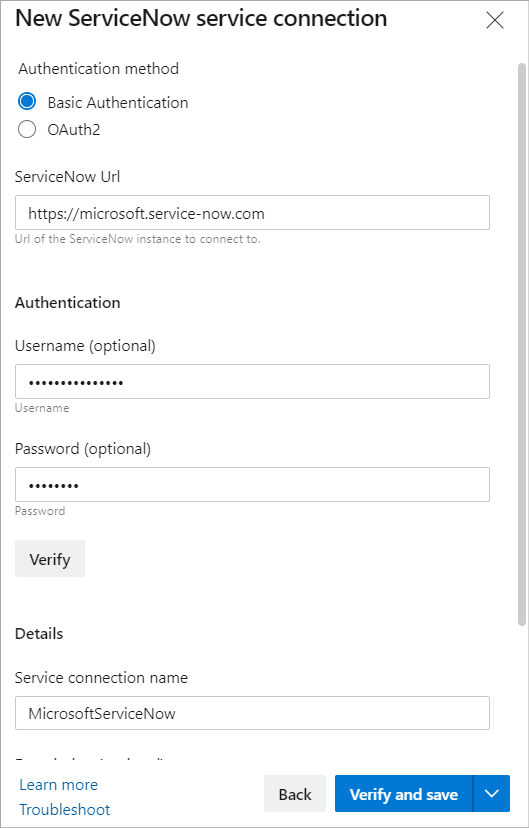
Create a new ServiceNow service connection in your Azure DevOps project as follows. Alternatively, you can also use OAuth2 authentication.
Configure the release pipeline
Navigate to your release pipeline, and then select the Pre-deployment conditions icon. Select Gates and the ServiceNow Change Management pre-deployment gate.

Select the service connection you created earlier and fill out the required fields as follows:
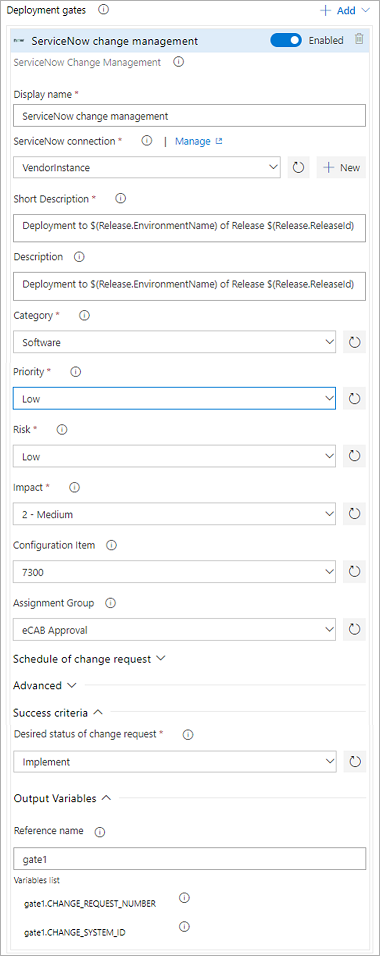
- ServiceNow connection: Connection to the ServiceNow instance used for change management.
- Short description: A summary of the change.
- Description: A detailed description of the change.
- Category: The category of the change. Example: Hardware, Network, Software.
- Priority: Priority of the change.
- Risk: The risk level for the change.
- Impact: The effect that the change has on business.
- Configuration Item: Configuration item (CI) that the change applies to.
- Assignment group: The group that the change is assigned to.
- Schedule of change request: Schedule of the change as honored by the ServiceNow workflow. Date and time should be in UTC and format should be yyyy-MM-ddTHH:mm:ssZ. Example: 2018-01-31T07:56:59Z.
- Additional change request parameters: Name must be field name (not label) prefixed with 'u_'. Example: u_backout_plan. Value must be a valid value in ServiceNow. Invalid entries are ignored.
- Desired state of change request: The gate would succeed and the pipeline continues when the change request status is the same as the provided value.
- Advanced: Specifies an expression that controls when this gate should succeed. The change request is defined as root['result'] in the response from ServiceNow. Example - "and(eq(root['result'].state, 'New'),eq(root['result'].risk, 'Low'))". See Expressions for more details.
- Output Variables : You must specify a reference name to be able to use output variables in your deployment workflow. Gate variables can be accessed by using "PREDEPLOYGATE" as a "prefix" in an agentless job. For example when the reference name is set to 'gate1', the change number can be obtained as follows: $(PREDEPLOYGATE.gate1.CHANGE_REQUEST_NUMBER).
- CHANGE_REQUEST_NUMBER : Number of the change request.
- CHANGE_SYSTEM_ID : System Id of the change request.
At the end of your release pipeline, add an Agentless job with a task Update ServiceNow Change Request.
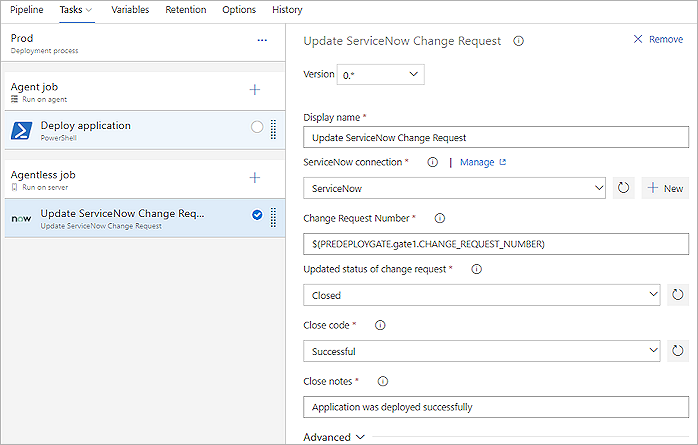
- ServiceNow connection: Connection to the ServiceNow instance used for change management.
- Change request number: Number of the change request to update.
- Updated status of change request : Status to set for the change request. This input is available if Update status is selected.
- Close code and Close notes: Return status.
Note
The Update ServiceNow Change Request task will fail if none of the change request fields are updated during execution. ServiceNow ignores invalid fields and values passed to the task.
Create a release pipeline
Select Create release to start a new release pipeline.
Your pipeline should create a new change request in ServiceNow as part of the pre-deployment conditions you created earlier.
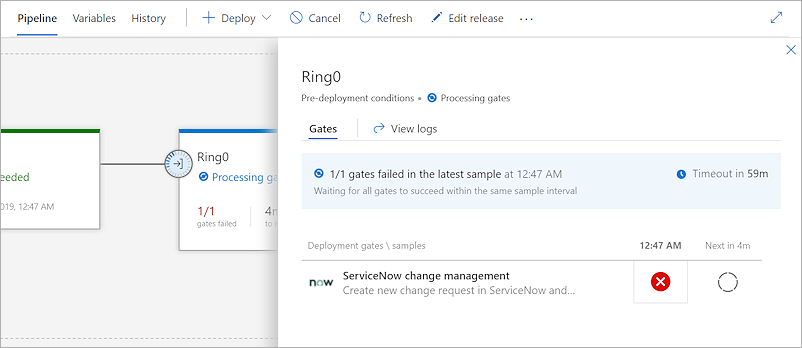
The pipeline will wait for all the gates to succeed within the same sample interval. To check the change number, select the status icon to view your pipeline logs.

The change request will be queued in ServiceNow and can be viewed by the change owner.
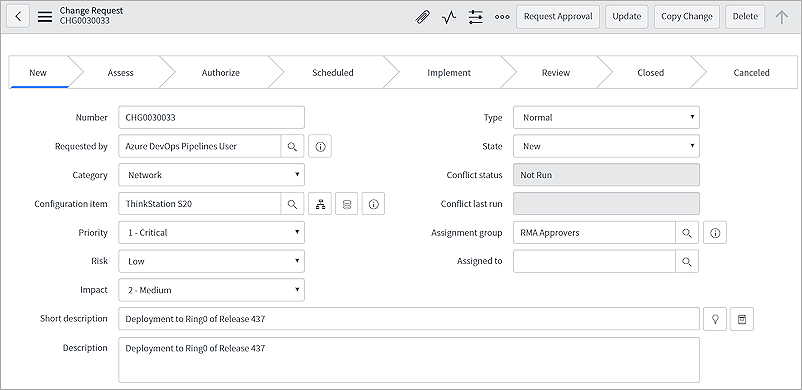
The release pipeline that triggered the new change request can be found under the Azure DevOps Pipeline metadata section.

When the change is ready for implementation (moved to Implement state), the pipeline will resume execution and the gate status should return succeeded.
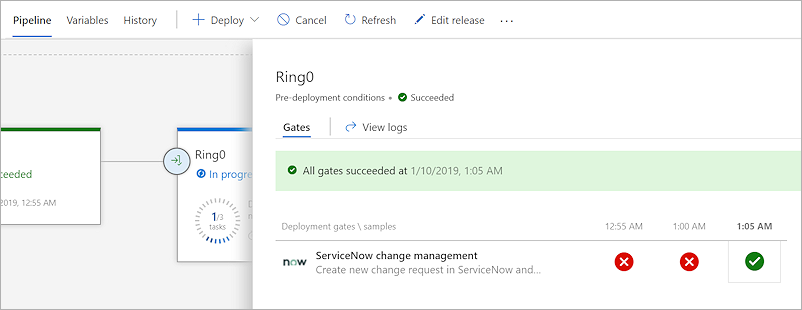
The change request will be closed automatically after deployment.
Yaml pipelines
This tutorial assumes you have a yaml pipeline with a single stage that deploys to a "latest" environment.
Add a check
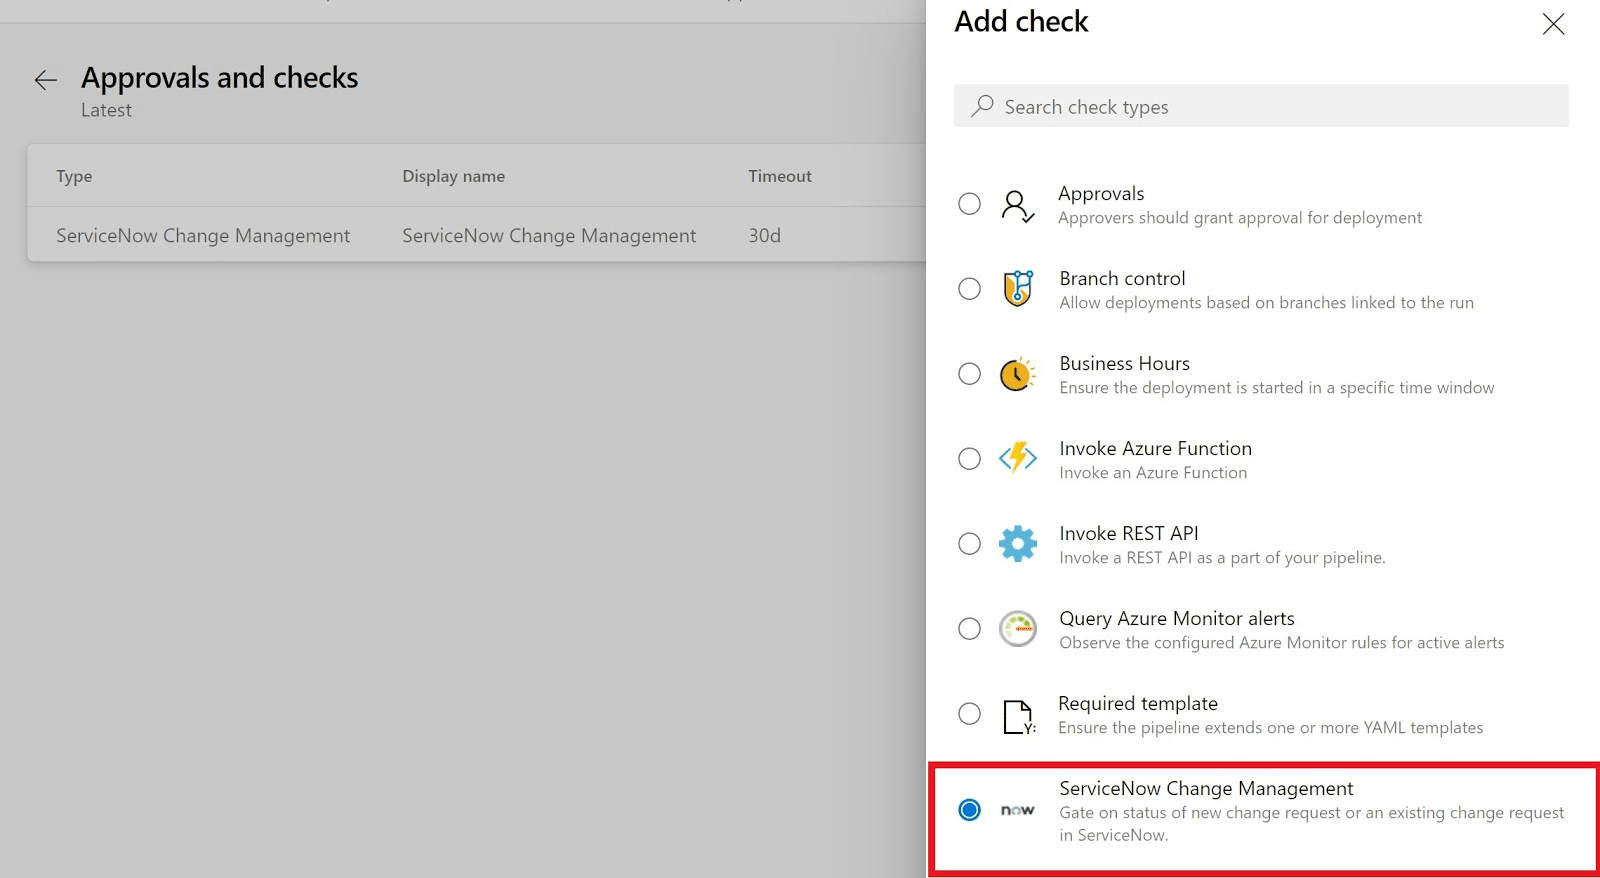
Navigate to your environment "latest", select the ellipsis button and then select Approvals and checks.
Select the plus sign to add a new check, and then add the ServiceNow Change Management check to your environment. Use the same configuration you used for your pre-deployment gate.
Add the yaml task
Add a server job to your stage to update the change request.

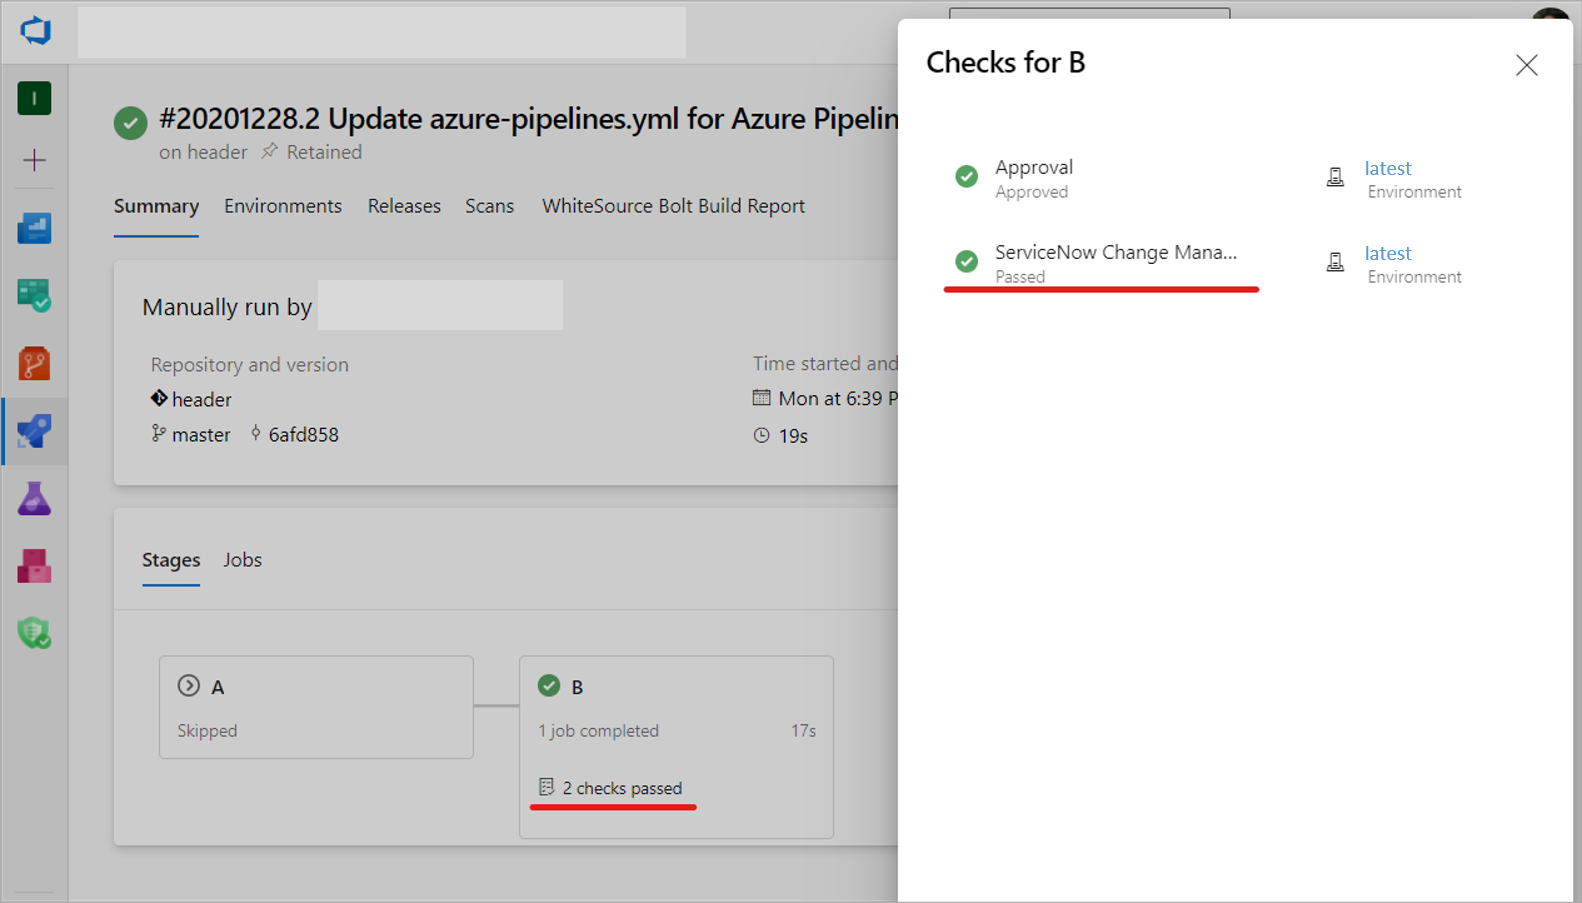
Save and run your pipeline. A new change request will be automatically created and the pipeline will pause and wait for the checks to complete.
Once the checks are completed, the pipeline should resume execution. The change request will be closed automatically after deployment.
FAQs
Q: What versions of ServiceNow are supported?
A: We support the following versions: Kingston, London, New York, Paris, and Quebec.
Q: What types of change request are supported?
A: Normal, standard and emergency change requests are supported with this integration.
Q: How do I set additional change properties?
A: You can specify additional change properties from the Additional change request parameters field. Use a key-value pairs JSON format, with the name being the field name (not the label) prefixed with u_.
Q: Can I update custom fields in the change request with additional change request parameters?
A: If custom fields are defined in the change request, you must add mapping for custom fields in Import set transform map.
Q: I don't see drop-down values populated for Category, Status, and other fields. What should I do?
A: Change Management Core and Change Management - State Model plugins must be active on your ServiceNow instance for the drop-downs to work. See Upgrade change management and Update change request states for more details.
Resources
- Configure your release pipelines for safe deployments
- Twitter sentiment as a release gate
- GitHub issues as a release gate
- Author custom gates.
- ServerTaskHelper Library example