Quickstart: Use Docker with a React Single-page App in Visual Studio
Applies to: ![]() Visual Studio
Visual Studio ![]() Visual Studio for Mac
Visual Studio for Mac
Note
This article applies to Visual Studio 2017. If you're looking for the latest Visual Studio documentation, see Visual Studio documentation. We recommend upgrading to the latest version of Visual Studio. Download it here
With Visual Studio, you can easily build, debug, and run containerized ASP.NET Core apps, including those with client-side JavaScript such as React.js single-page app, and publish them to Azure Container Registry, Docker Hub, Azure App Service, or your own container registry. In this article, we'll publish to Azure Container Registry.
Prerequisites
- Docker Desktop
- Visual Studio 2017 with the Web Development, Azure Tools workload, and/or .NET Core cross-platform development workload installed
- To publish to Azure Container Registry, an Azure subscription. Sign up for a free trial.
- Node.js
- For Windows containers, Windows 10 version 1809 or later, to use the Docker images referenced in this article.
Installation and setup
For Docker installation, first review the information at Docker Desktop for Windows: What to know before you install. Next, install Docker Desktop.
Create a project and add Docker support
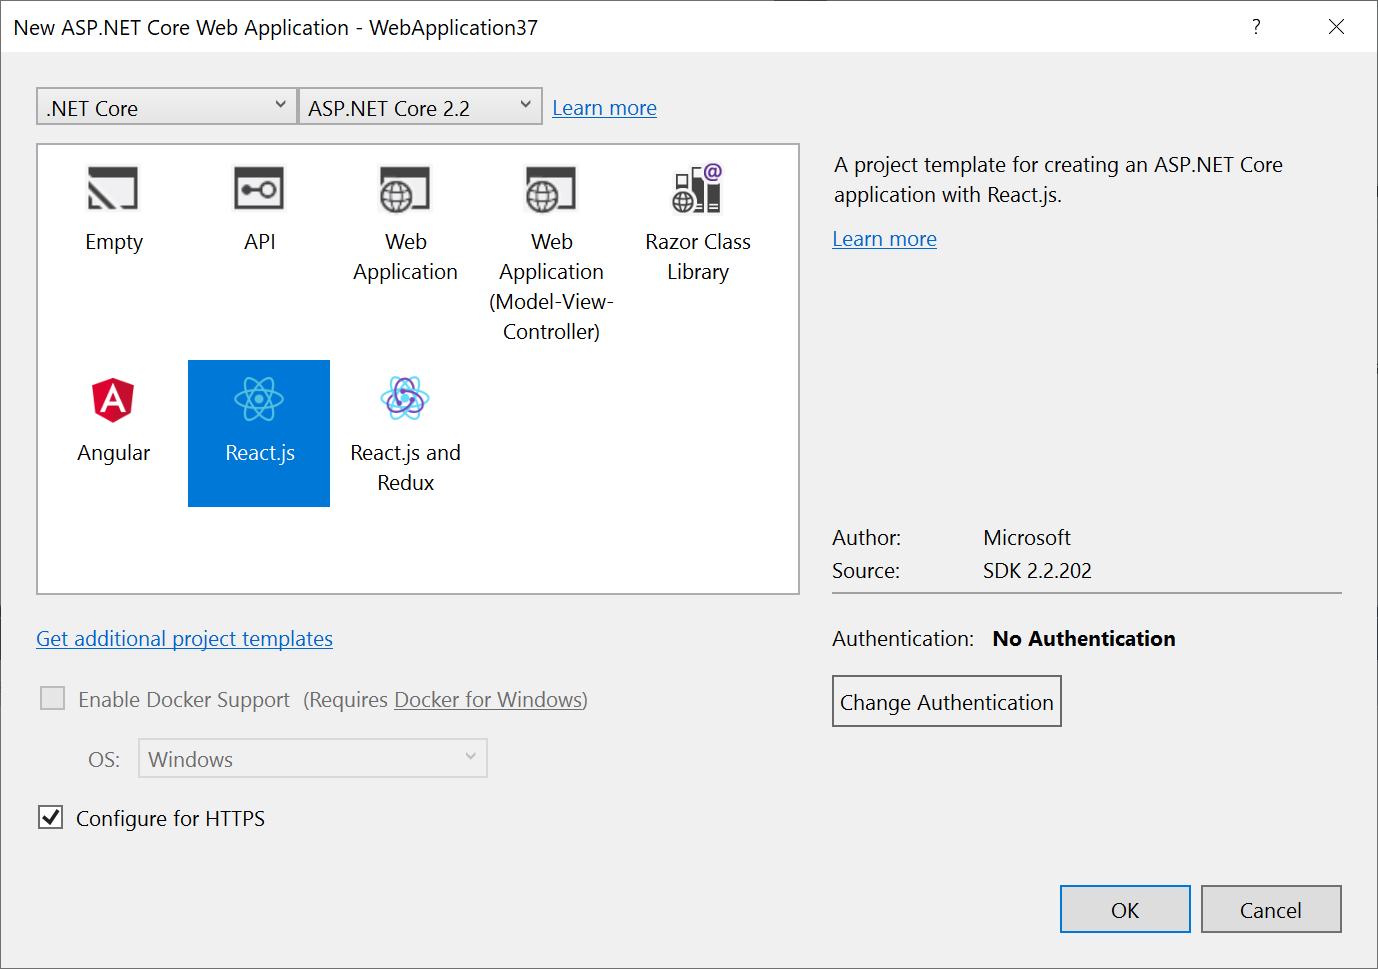
Create a new project using the ASP.NET Core Web Application template.
Select React.js. You can't select Enable Docker Support, but don't worry, you can add that support after you create the project.
Right-click on the project node, and choose Add > Docker Support to add a Dockerfile to your project.
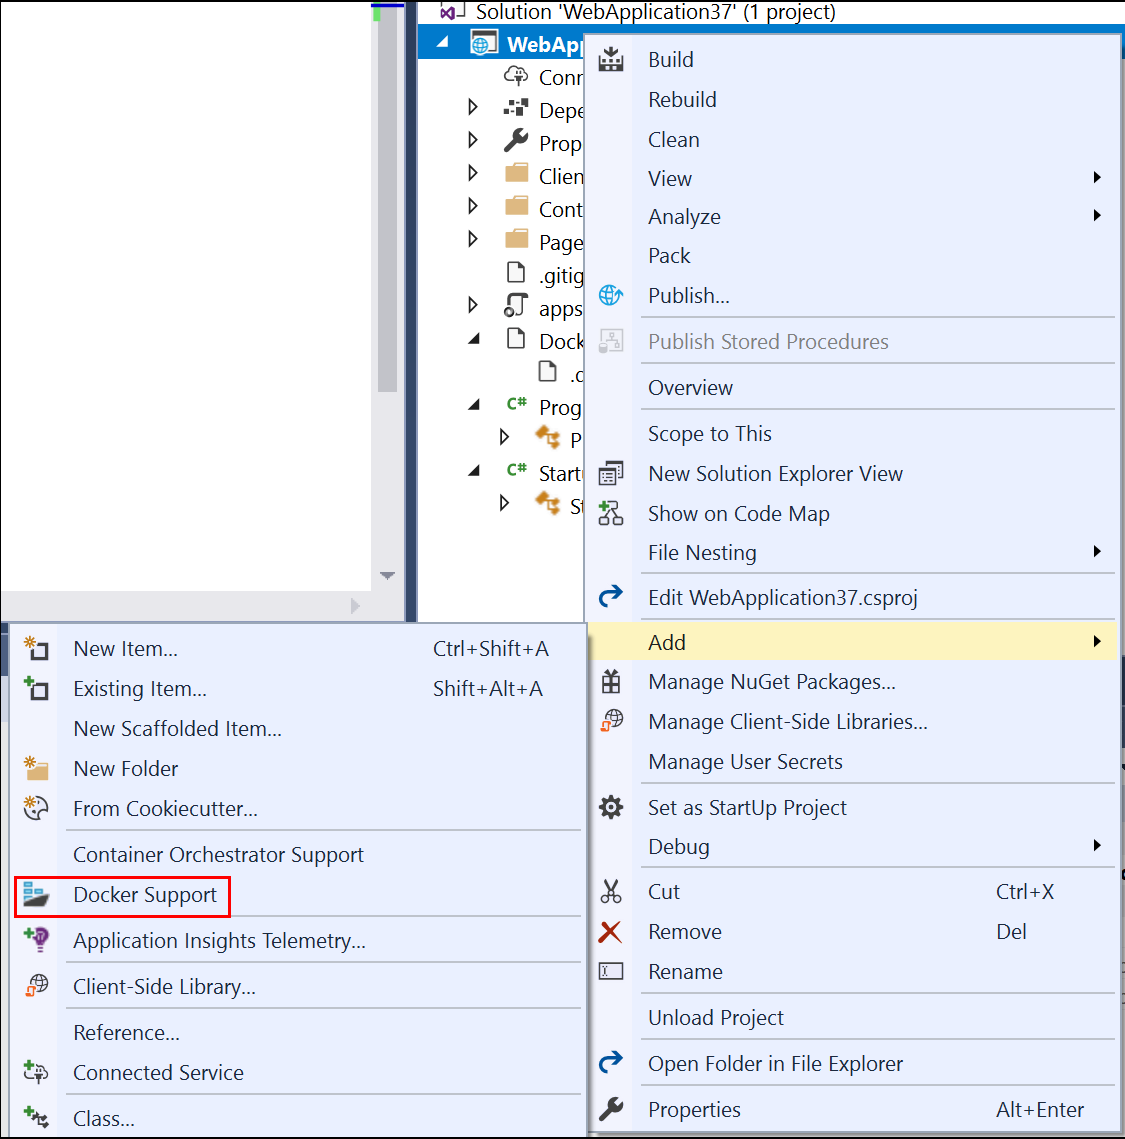
Select the container type, and click OK.
The next step is different depending on whether you're using Linux containers or Windows containers.
Modify the Dockerfile (Linux containers)
A Dockerfile, the recipe for creating a final Docker image, is created in the project. Refer to Dockerfile reference for an understanding of the commands within it.
Open the Dockerfile in the project, and add the following lines to install curl, Node.js 14.x, and certain required Node libraries in the container. Be sure to add these lines both in the first section, to add the installation of the Node package manager npm.exe to the base image, as well as in the build section.
RUN apt-get update
RUN apt-get install -y curl
RUN apt-get install -y libpng-dev libjpeg-dev curl libxi6 build-essential libgl1-mesa-glx
RUN curl -sL https://deb.nodesource.com/setup_lts.x | bash -
RUN apt-get install -y nodejs
The Dockerfile should now look something like this:
The preceding Dockerfile is based on the mcr.microsoft.com/dotnet/core/aspnet image, and includes instructions for modifying the base image by building your project and adding it to the container.
When the new project dialog's Configure for HTTPS check box is checked, the Dockerfile exposes two ports. One port is used for HTTP traffic; the other port is used for HTTPS. If the check box isn't checked, a single port (80) is exposed for HTTP traffic.
Modify the Dockerfile (Windows containers)
Open the project file by double-clicking on the project node, and update the project file (*.csproj) by adding the following property as a child of the <PropertyGroup> element:
<DockerfileFastModeStage>base</DockerfileFastModeStage>
Update the Dockerfile by adding the following lines. This will copy node and npm to the container.
Add
# escape=`to the first line of the DockerfileAdd the following lines before
FROM … baseFROM mcr.microsoft.com/powershell AS downloadnodejs ENV NODE_VERSION=14.16.0 SHELL ["pwsh", "-Command", "$ErrorActionPreference = 'Stop';$ProgressPreference='silentlyContinue';"] RUN Invoke-WebRequest -OutFile nodejs.zip -UseBasicParsing "https://nodejs.org/dist/v$($env:NODE_VERSION)/node-v$($env:NODE_VERSION)-win-x64.zip"; ` Expand-Archive nodejs.zip -DestinationPath C:\; ` Rename-Item "C:\node-v$($env:NODE_VERSION)-win-x64" c:\nodejsAdd the following line before and after
FROM … buildCOPY --from=downloadnodejs C:\nodejs\ C:\Windows\system32\The complete Dockerfile should now look something like this:
Update the .dockerignore file by removing the
**/bin.
Debug
Select Docker from the debug drop-down in the toolbar, and start debugging the app. You might see a message with a prompt about trusting a certificate; choose to trust the certificate to continue. The first time you build, docker downloads the base images, so it might take a bit longer.
The Container Tools option in the Output window shows what actions are taking place. You should see the installation steps associated with npm.exe.
The browser shows the app's home page.
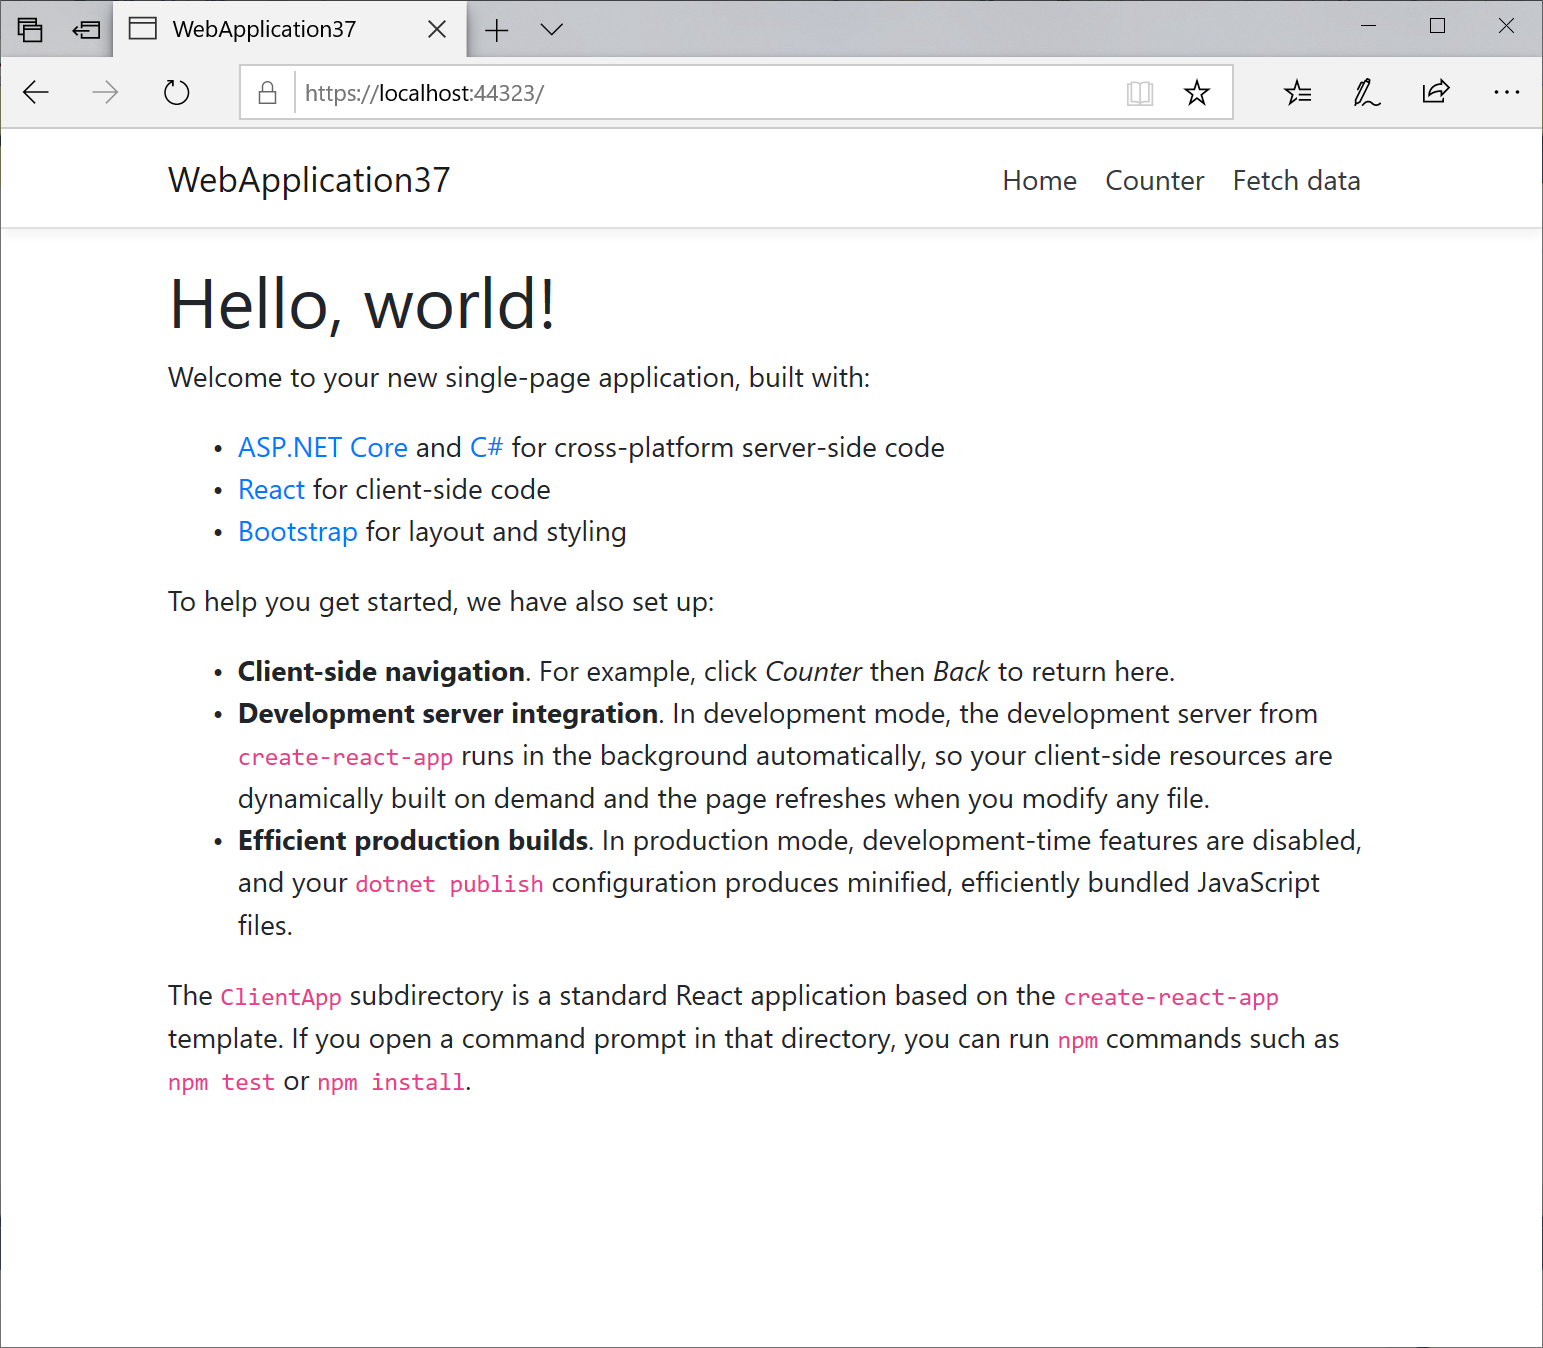
Try navigating to the Counter page and test the client-side code for the counter by clicking the Increment button.
Open the Package Manager Console (PMC) from the menu Tools> NuGet Package Manager, Package Manager Console.
The resulting Docker image of the app is tagged as dev. The image is based on the 3.1 tag of the dotnet/core/aspnet base image. Run the docker images command in the Package Manager Console (PMC) window. The images on the machine are displayed:
REPOSITORY                             TAG                 IMAGE ID            CREATED             SIZE
webapplicationreact1                   dev                 09be6ec2405d        2 hours ago         352MB
mcr.microsoft.com/dotnet/core/aspnet   3.1                 e3559b2d50bb        10 days ago         207MB
Note
The dev image does not contain the app binaries and other content, as Debug configurations use volume mounting to provide the iterative edit and debug experience. To create a production image containing all contents, use the Release configuration.
Run the docker ps command in PMC. Notice the app is running using the container:
CONTAINER ID        IMAGE                      COMMAND               CREATED             STATUS              PORTS                                           NAMES
56d1b1008c89        webapplicationreact1:dev   "tail -f /dev/null"   2 hours ago         Up 2 hours          0.0.0.0:32771->80/tcp, 0.0.0.0:32770->443/tcp   WebApplication-ReactSPA
Publish Docker images
Once the develop and debug cycle of the app is completed, you can create a production image of the app.
Change the configuration drop-down to Release and build the app.
Right-click your project in Solution Explorer and choose Publish.
On the publish target dialog, select Container Registry.
Choose Create New Azure Container Registry and click Publish.
Fill in your desired values in the Create a new Azure Container Registry.
Setting Suggested value Description DNS Prefix Globally unique name Name that uniquely identifies your container registry. Subscription Choose your subscription The Azure subscription to use. Resource Group myResourceGroup Name of the resource group in which to create your container registry. Choose New to create a new resource group. SKU Standard Service tier of the container registry Registry Location A location close to you Choose a Location in a region near you or near other services that will use your container registry. 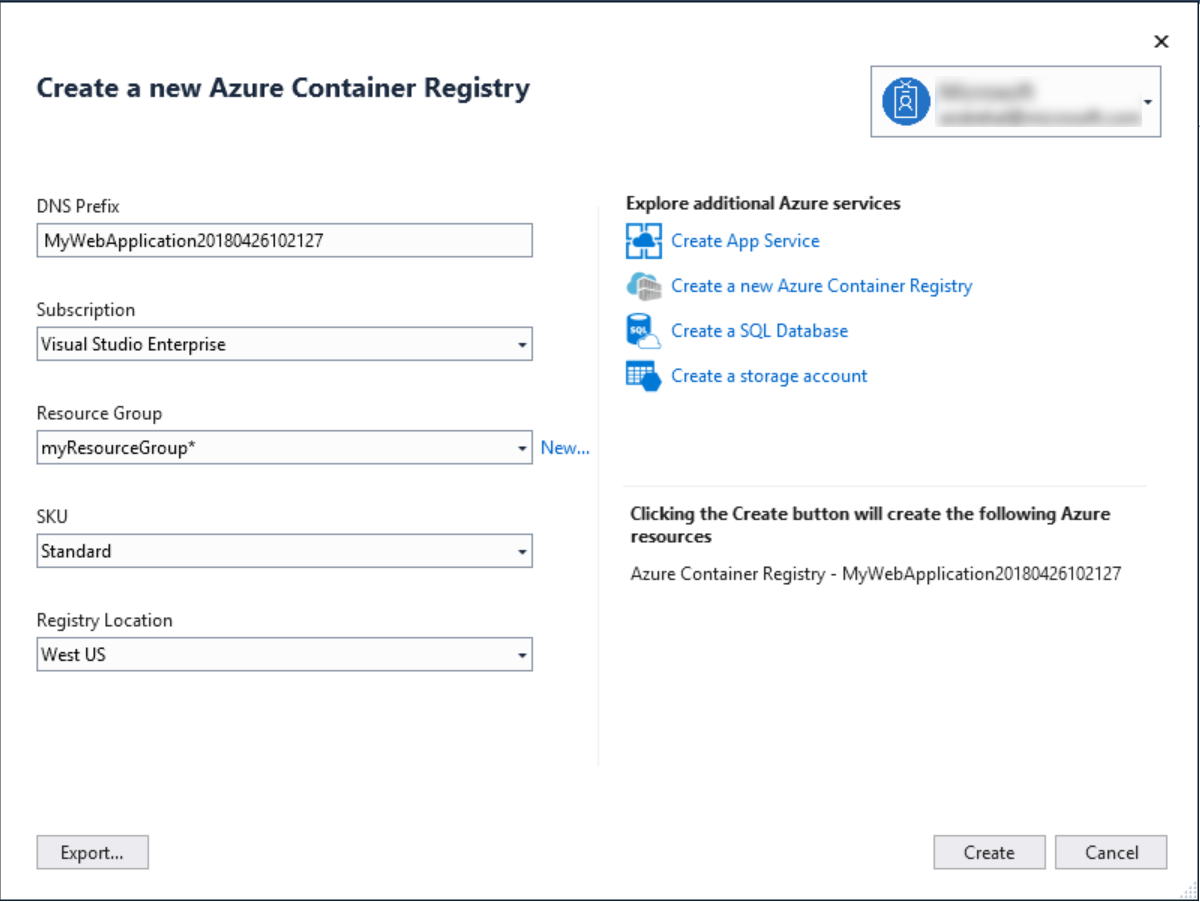
Select Create.
Next steps
You can now pull the container from the registry to any host capable of running Docker images, for example Azure Container Instances.