演習 - モデルをデプロイしてエンドポイントを使用する
このモデルのパフォーマンスは満足できるレベルなので、デプロイしましょう。
デプロイにはさまざまなオプションがあります。 どのオプションを選択するかは、機械学習モデルをどのように使用するかによって異なります。 エンドポイントにデプロイするか、モデルをエクスポートして別のプラットフォームにデプロイすることができます。
ここでは、エンドポイントにデプロイし、アプリからモデルを使用する方法について説明します。
エンドポイントにデプロイする
エンドポイントにデプロイするには、予測 URL を取得するか、Python アプリで API を使用します。
予測 URL を取得する
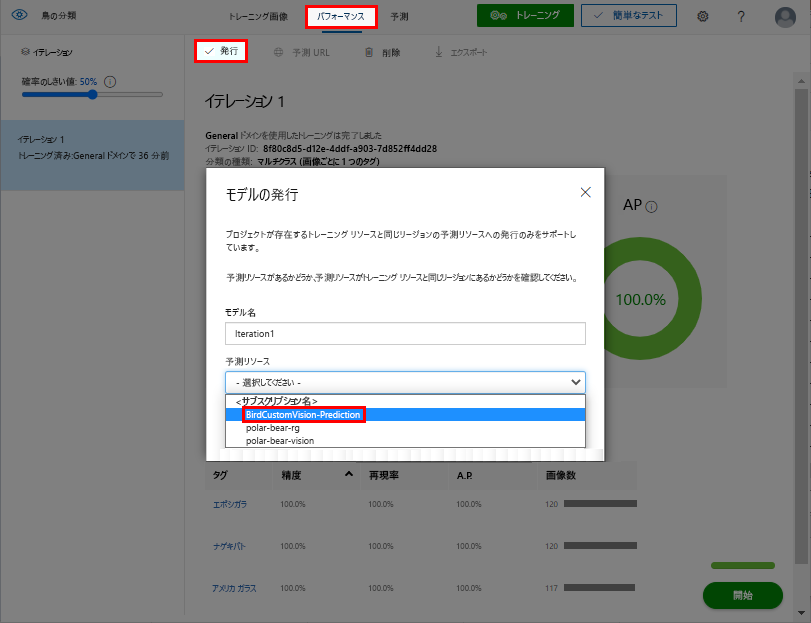
Custom Vision ポータルの上部のメニュー バーで、[パフォーマンス] を選択します。
[発行] を選択します。
[Publish Model](モデルの発行) で [予測リソース] を選択し、Custom Vision プロジェクトの予測の名前を選択します。 [発行] を選択します。
モデルが発行された後は、Custom Vision ポータルでモデルのアクションが変更されます。
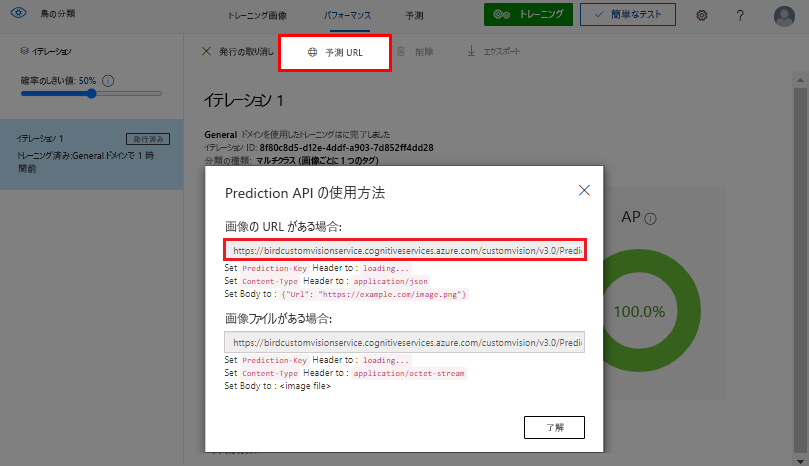
[Prediction URL] (予測 URL) タブを選択します。
[How to use the Prediction API](予測 API の使用方法) で、[If you have an image URL](画像の URL がある場合) の下のテキスト ボックスに値をコピーして保存し、[了解] を選択します。
Python アプリで API を使用する
モデルがトレーニングされ、パフォーマンスが十分な精度になったら、モデルはアプリで使用できる状態になります。
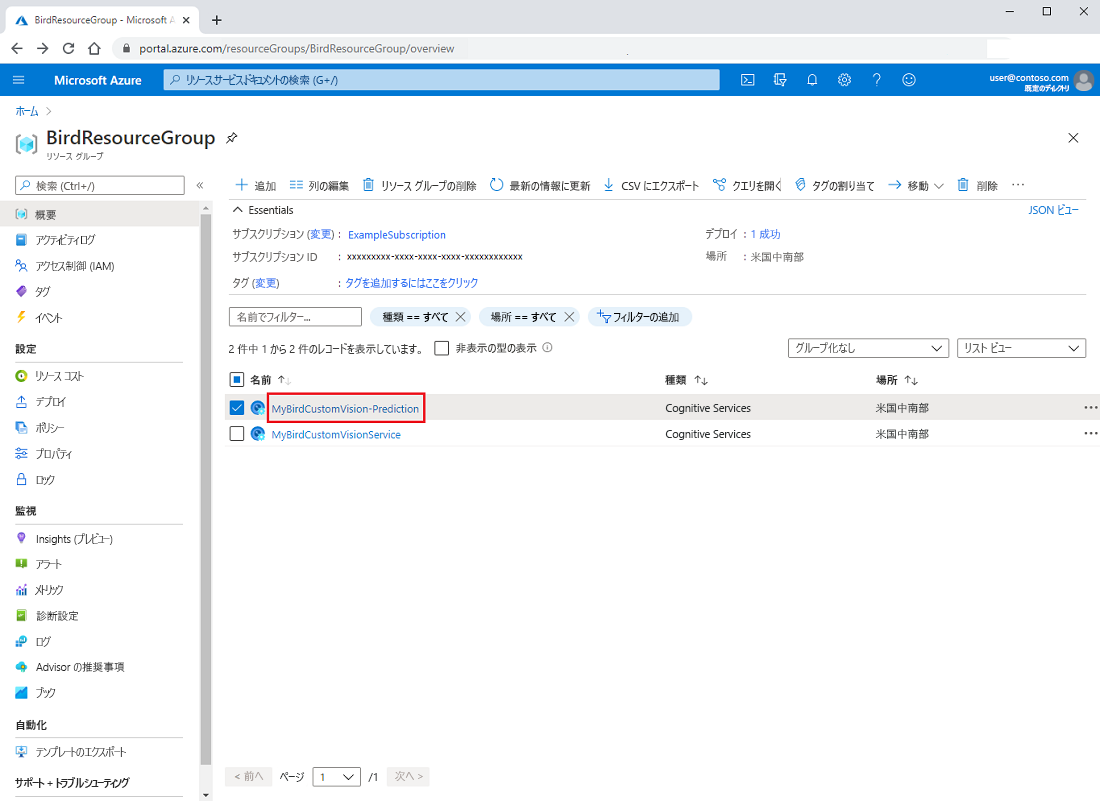
Azure portal で、Custom Vision リソースが含まれるリソース グループに移動します。 <YourCustomVisionResourceName>-Prediction という名前のリソースが、元のリソース グループで表示されます。
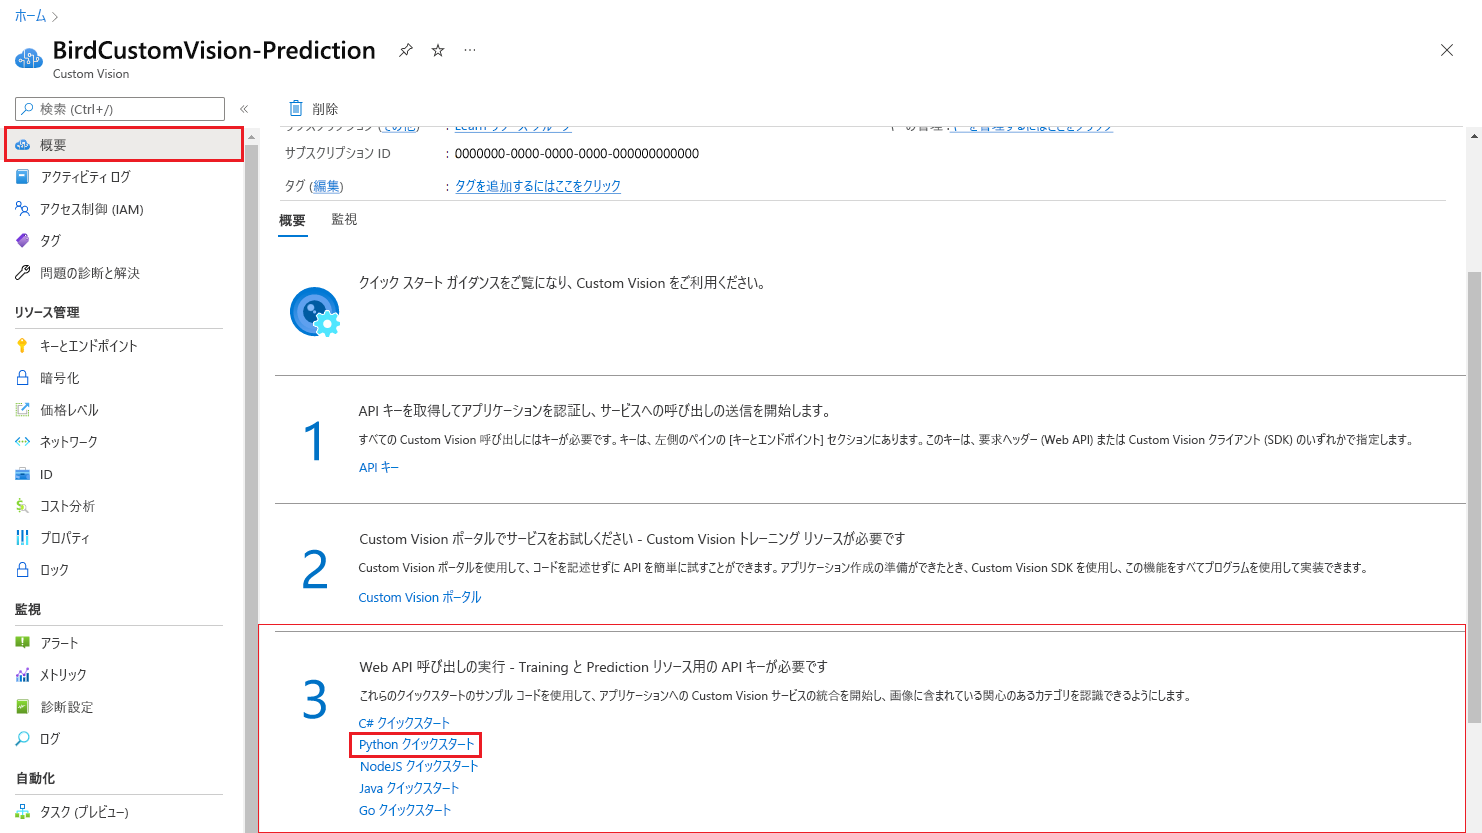
予測名を選んで [概要] ページを開きます。 このページには、API を呼び出してモデルから予測を取得する方法の詳細を学習できるリソースへのリンクがあります。
[作業の開始] のセクション 3 で、[Python クイックスタート] のリンクを選びます。 Python 用の Azure AI サービス画像分類クイックスタートが、Web ブラウザーで開きます。
Python で予測 API を呼び出すサンプル コードの例を次に示します。 完全なコードについては、クイックスタートを参照してください。
from azure.cognitiveservices.vision.customvision.prediction import CustomVisionPredictionClient

# Create variables for your resource; replace variables with valid values.
prediction_key = "<YourKey>"
endpoint = "<YourEndpoint>"
base_image_url = "<BasePathToImageFolder>"

# An example of a default iteration name is "Iteration1".
publish_iteration_name = "<PublishedIterationName>"

# You can find the project ID in the settings of the Custom Vision project in the portal.
project.id = "<CustomVisionProjectId>"

# Now, you have a trained endpoint that you can use to make a prediction.
prediction_credentials = ApiKeyCredentials(in_headers={"Prediction-key": prediction_key})

predictor = CustomVisionPredictionClient(endpoint, prediction_credentials)

with open(base_image_url + "images/Test/test_image.jpg", "rb") as image_contents:
    results = predictor.classify_image(
        project.id, publish_iteration_name, image_contents.read())

# Display the results.
for prediction in results.predictions:
    print("\t" + prediction.tag_name +
         ": {0:.2f}%".format(prediction.probability * 100))
公開されているエンドポイントに投稿すると、次の例のような結果が得られます。 Custom Vision モデルのトレーニングに使用された各タグの確率が、最高スコアから順に並べ替えられて表示されます。 このモデルでは、認識するようにトレーニングされた鳥種のみが認識されます。 投稿された鳥の画像が、モデルで認識するようにトレーニングされていない場合、モデルは、トレーニングされた鳥の種のいずれかの新しい鳥の種として予測します。
American Crow: 99.18%
Common Grackle: 25.34%
Red-tailed Hawk (Dark morph): 4.09%
Mourning Dove: 1.74%
American Robin (Adult): 0.92%
House Sparrow (Female): 0.40%
American Robin (Juvenile): 0.31%
Northern Cardinal (Adult Male): 0.24%
Tufted Titmouse: 0.04%
Blue Jay: 0.04%
House Sparrow (Male): 0.04%
Northern Cardinal (Female): 0.04%
Red-tailed Hawk (Light morph immature): 0.02%
American Goldfinch (Male): 0.02%
House Wren: 0.01%
American Goldfinch (Female): 0.01%
これで、作成した機械学習モデルを体験することができました。 新しいデータを分析し、鳥の習性をより適切に文書化することで、鳥の生息地を保護し、絶滅危惧種の鳥の個体群の増加に貢献できます。 すべて Azure AI Custom Vision を利用して実現できます!