演習 - リソースの変換と移行
重要
この演習を行うには、独自の Azure サブスクリプションが必要です。また、料金が発生することがあります。 Azure サブスクリプションをお持ちでない場合は、開始する前に無料アカウントを作成してください。
あなたの玩具会社は、人気のあるおもちゃのトラックを作っていた競合企業を買収しました。 そのおもちゃは、ファームウェアの更新情報を受信するために、Azure でホストされている仮想マシンに接続します。 仮想マシンのすべてのリソースは、Azure portal を使用して手動で作成されました。 このユニットでは、リソースを Bicep ファイルに移行するプロセスを開始します。
プロセスの間に、次のタスクを実行します。
- Azure portal を使用して新しい仮想マシンをデプロイします。
- 仮想マシンのリソースを JSON テンプレートにエクスポートします。
- JSON テンプレートを Bicep に逆コンパイルします。
- 新しい Bicep ファイルを作成し、逆コンパイルしたテンプレートからリソースを移動します。
この演習では、Visual Studio Code 用の Bicep 拡張機能を使用します。 この拡張機能を Visual Studio Code にインストールしてください。
Azure Portal を使用した仮想マシンの作成
この例のシナリオの状況をシミュレートするには、まず、Azure portal を使用して仮想マシンをデプロイします。
Azure portal にサインインします。
Azure ホーム ページの [Azure サービス] で、[リソースの作成] を選択します。
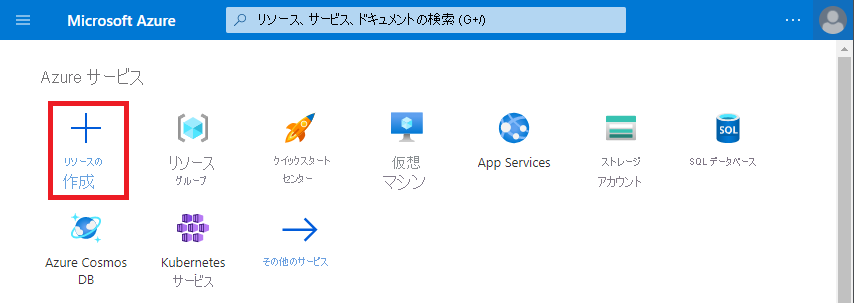
Azure Marketplace が [リソースの作成] ペインに表示されます。
[Ubuntu Server 20.04 LTS] で、[作成] を選択します。

重要
[Ubuntu Server 20.04 LTS] が表示されない場合は、Azure Marketplace で Ubuntu Server 20.04 LTS に直接移動します。
[基本] タブで、各設定に対して次の値を入力します。 他のすべての設定については、既定値を使用します。
設定 値 プロジェクトの詳細 リソース グループ [新規作成] を選択し、「ToyTruck」と入力します インスタンスの詳細 仮想マシン名 ToyTruckServer リージョン (米国) 米国西部 3 可用性のオプション インフラストラクチャ冗長は必要ありません Image Ubuntu Server 20.04 LTS - x64 Gen2 サイズ Standard_D2s_v3 管理者アカウント 認証の種類 パスワード ユーザー名 toytruckadmin Password [パスワード] を入力します 受信ポートの規則 パブリック受信ポート None [管理] タブで、[自動シャットダウンを有効にする] がオンになっていないことを確認します。
[確認および作成] を選択します。 Azure により設定が検証されます。 イメージの要件によっては、さらに情報を入力または選択することが必要な場合があります。
[作成] を選択して、VM をデプロイして作成します。
Azure portal に進行中のデプロイが表示されます。
デプロイが完了したら、リソース グループ名を選択してリソース グループを開きます。

これで、リソース グループに仮想マシンとその依存関係が含まれるようになります。

リソース グループの内容を JSON テンプレートにエクスポートする
左側のメニューの [オートメーション] で、[テンプレートのエクスポート] を選択します。

JSON テンプレートが生成されます。 プロセスが完了するまで、1 から 2 分かかる場合があります。
[ダウンロード] ボタンを選択します。

JSON テンプレートとパラメーター ファイルは、.zip ファイルとしてコンピューターにダウンロードされます。
デスクトップなど、簡単にアクセスできるフォルダーにファイルを解凍します。
Visual Studio Code を開きます。
ローカル環境を準備する
[ターミナル] メニューで、[新しいターミナル] を選択します。 通常、ターミナル ウィンドウは画面の下半分に表示されます。
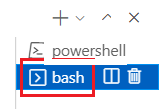
ターミナル ウィンドウの右側に表示されるシェルが Bash の場合、正しいシェルが開いているので、次のセクションに進むことができます。

Bash 以外のシェルが表示された場合は、シェルのドロップダウン矢印を選び、Git Bash を選択します。
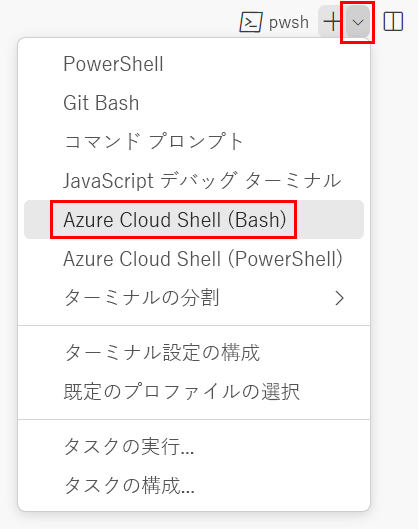
ターミナル シェルの一覧で、Bash を選択します。
ターミナルで、テンプレートを保存したディレクトリに移動します。 たとえば、それをテンプレート フォルダーに保存した場合、次のコマンドを使用します。
cd templates
Bicep をインストールする
次のコマンドを実行して、最新バージョンの Bicep がインストールされていることを確認します。
az bicep install && az bicep upgrade
[ターミナル] メニューで、[新しいターミナル] を選択します。 通常、ターミナル ウィンドウは画面の下半分に表示されます。
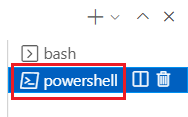
ターミナル ウィンドウの右側に表示されるシェルが powershell または pwsh の場合、正しいシェルが開いているので、次のセクションに進むことができます。

Powershell または pwsh 以外のシェルが表示される場合は、シェルのドロップダウン矢印を選択し、PowerShell を選択します。
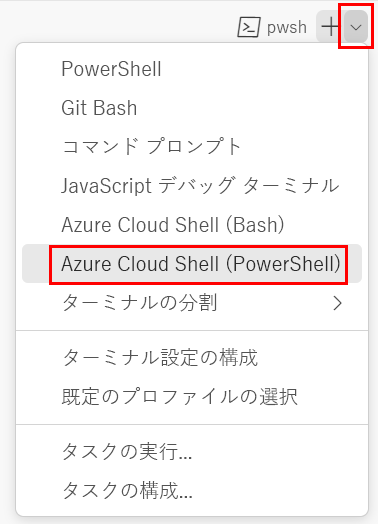
ターミナル シェルの一覧で、Powershell または pwsh を選択します。
ターミナルで、テンプレートを保存したディレクトリに移動します。 たとえば、それをテンプレート フォルダーに保存した場合、次のコマンドを使用します。
Set-Location -Path templates
Bicep CLI のインストール
Azure PowerShell で Bicep を使用するには、Bicep CLI をインストールします。
JSON テンプレートを Bicep に逆コンパイルする
decompile コマンドを使用して、テンプレートから Bicep ファイルを作成します。
az bicep decompile --file template.json
逆コンパイル操作により、次のような警告が生成されます。
WARNING: Decompilation is a best-effort process, as there is no guaranteed mapping from ARM JSON
 to Bicep.

You might need to fix warnings and errors in the generated bicep file(s), or decompilation might fail
 entirely if an accurate conversion is not possible.

If you would like to report any issues or inaccurate conversions,
please see https://github.com/Azure/bicep/issues.
decompile コマンドを使用して、テンプレートから Bicep ファイルを作成します。
bicep decompile template.json
逆コンパイル操作により、次のような警告が生成されます。
WARNING: Decompilation is a best-effort process, as there is no guaranteed mapping from ARM JSON
 to Bicep.

You might need to fix warnings and errors in the generated bicep file(s), or decompilation might fail
 entirely if an accurate conversion is not possible.

If you would like to report any issues or inaccurate conversions,
please see https://github.com/Azure/bicep/issues.
逆コンパイルされた Bicep ファイルを調べる
Visual Studio Code で template.bicep ファイルを開き、目を通します。 これは有効な Bicep ファイルですが、次のような問題がいくつかあることに注意してください。
- パラメーターとリソースに指定されたシンボリック名にアンダースコアが含まれていて、簡単に理解できません。
locationプロパティが、すべてのリソース定義でハードコーディングされています。- テンプレートにハードコーディングされた値が含まれていますが、それはパラメーターとするか、Azure によって自動的に設定される必要があります。
このモジュールの残りの部分でこれらの問題を解決します。
新しい Bicep ファイルを作成する
Visual Studio Code で、main.bicep という名前の新しいファイルを作成します。
Visual Studio Code によって Bicep ツールが読み込まれるように、空のファイルを保存します。
[ファイル]>[名前を付けて保存] を選択するか、Windows で Ctrl + S (macOS では ⌘+S) を選択できます。
エディターを分割し、両方のファイルを同時に表示できるようにします (左側のペインに template.bicep ファイル、右側のペインに main.bicep ファイル)。
- main.bicep のタブを選びます。
- [表示]>[エディター レイアウト]>[右に分割] を選んで、右側のペインに main.bicep のタブを開きます。
- 左側のペインで main.bicep のタブを閉じます。

各要素を新しい Bicep ファイルにコピーする
networkSecurityGroups_ToyTruckServer_nsg_name_resourceという名前のリソースを template.bicep ファイルから main.bicep ファイルにコピーします。コピーする際、
securityRulesプロパティが空であることに注目してください。 このモジュールの後半で、ファイルをリファクタリングして冗長プロパティを削除します。networkSecurityGroups_ToyTruckServer_nsg_nameパラメーターが見つからないため、Visual Studio Code でエラーが示されます。
そのパラメーターを main.bicep ファイルにコピーします。
次のリソースと関連パラメーターについて、このプロセスを繰り返します。
publicIPAddresses_ToyTruckServer_ip_name_resourcevirtualMachines_ToyTruckServer_name_resourcevirtualNetworks_ToyTruck_vnet_name_resourcevirtualNetworks_ToyTruck_vnet_name_defaultnetworkInterfaces_toytruckserver890_name_resource
Note
実際のデプロイでのリソースの名前は、この一覧で示されているリソースとは異なる場合があります。 これらの名前に近い名前のリソースを見つけてください。
各リソースをコピーするときに、プロパティを調べます。 このモジュールの後半で、Bicep のベスト プラクティスに準拠するように各リソースのプロパティと構成を更新します。
ヒント
独自のテンプレートを変換またはエクスポートするとき、ベスト プラクティスに従うように、リソースをコピーしながら更新することができます。 このモジュールでは、移行プロセスの各フェーズを理解しやすくするために、リソースの更新は個別に行います。
不足しているリソースを確認する
Azure portal で、ToyTruck リソース グループを開きます。
リソースの一覧を確認し、Bicep ファイル内のリソースの一覧と比較します。 Bicep ファイルで
resourceとして定義されていないディスク リソースがリソース グループに含まれていることに注意してください。
Bicep で仮想マシンを使用するときに、マネージド ディスク リソースを明示的に定義する必要はありません。 代わりに、仮想マシンのプロパティを定義すると、Azure によってマネージド ディスクが自動的に作成されます。 この例では、ディスク リソースが Bicep ファイルで定義されていないことを心配する必要はありません。
テンプレートを確認する
移行フェーズの終わりには、main.bicep ファイルは次の例のようになっているはずです。
param virtualNetworks_ToyTruck_vnet_name string = 'ToyTruck-vnet'
param virtualMachines_ToyTruckServer_name string = 'ToyTruckServer'
param networkInterfaces_toytruckserver154_name string = 'toytruckserver154'
param publicIPAddresses_ToyTruckServer_ip_name string = 'ToyTruckServer-ip'
param networkSecurityGroups_ToyTruckServer_nsg_name string = 'ToyTruckServer-nsg'

resource networkSecurityGroups_ToyTruckServer_nsg_name_resource 'Microsoft.Network/networkSecurityGroups@2022-05-01' = {
  name: networkSecurityGroups_ToyTruckServer_nsg_name
  location: 'westus3'
  properties: {
    securityRules: []
  }
}

resource publicIPAddresses_ToyTruckServer_ip_name_resource 'Microsoft.Network/publicIPAddresses@2022-05-01' = {
  name: publicIPAddresses_ToyTruckServer_ip_name
  location: 'westus3'
  sku: {
    name: 'Standard'
    tier: 'Regional'
  }
  properties: {
    ipAddress: '1.2.3.4'
    publicIPAddressVersion: 'IPv4'
    publicIPAllocationMethod: 'Static'
    idleTimeoutInMinutes: 4
    ipTags: []
  }
}

resource virtualMachines_ToyTruckServer_name_resource 'Microsoft.Compute/virtualMachines@2022-08-01' = {
  name: virtualMachines_ToyTruckServer_name
  location: 'westus3'
  properties: {
    hardwareProfile: {
      vmSize: 'Standard_D2s_v3'
    }
    storageProfile: {
      imageReference: {
        publisher: 'canonical'
        offer: '0001-com-ubuntu-server-focal'
        sku: '20_04-lts-gen2'
        version: 'latest'
      }
      osDisk: {
        osType: 'Linux'
        name: '${virtualMachines_ToyTruckServer_name}_disk1_23e6a144c4ea4049b3e2be24b78a9e81'
        createOption: 'FromImage'
        caching: 'ReadWrite'
        managedDisk: {
          storageAccountType: 'Premium_LRS'
          id: resourceId('Microsoft.Compute/disks', '${virtualMachines_ToyTruckServer_name}_disk1_23e6a144c4ea4049b3e2be24b78a9e81')
        }
        deleteOption: 'Delete'
        diskSizeGB: 30
      }
      dataDisks: []
    }
    osProfile: {
      computerName: virtualMachines_ToyTruckServer_name
      adminUsername: 'toytruckadmin'
      linuxConfiguration: {
        disablePasswordAuthentication: false
        provisionVMAgent: true
        patchSettings: {
          patchMode: 'ImageDefault'
          assessmentMode: 'ImageDefault'
        }
        enableVMAgentPlatformUpdates: false
      }
      secrets: []
      allowExtensionOperations: true
      requireGuestProvisionSignal: true
    }
    networkProfile: {
      networkInterfaces: [
        {
          id: networkInterfaces_toytruckserver154_name_resource.id
          properties: {
            deleteOption: 'Detach'
          }
        }
      ]
    }
    diagnosticsProfile: {
      bootDiagnostics: {
        enabled: true
      }
    }
  }
}

resource virtualNetworks_ToyTruck_vnet_name_resource 'Microsoft.Network/virtualNetworks@2022-05-01' = {
  name: virtualNetworks_ToyTruck_vnet_name
  location: 'westus3'
  properties: {
    addressSpace: {
      addressPrefixes: [
        '10.0.0.0/16'
      ]
    }
    subnets: [
      {
        name: 'default'
        id: virtualNetworks_ToyTruck_vnet_name_default.id
        properties: {
          addressPrefix: '10.0.0.0/24'
          delegations: []
          privateEndpointNetworkPolicies: 'Disabled'
          privateLinkServiceNetworkPolicies: 'Enabled'
        }
        type: 'Microsoft.Network/virtualNetworks/subnets'
      }
    ]
    virtualNetworkPeerings: []
    enableDdosProtection: false
  }
}

resource virtualNetworks_ToyTruck_vnet_name_default 'Microsoft.Network/virtualNetworks/subnets@2022-05-01' = {
  name: '${virtualNetworks_ToyTruck_vnet_name}/default'
  properties: {
    addressPrefix: '10.0.0.0/24'
    delegations: []
    privateEndpointNetworkPolicies: 'Disabled'
    privateLinkServiceNetworkPolicies: 'Enabled'
  }
  dependsOn: [
    virtualNetworks_ToyTruck_vnet_name_resource
  ]
}

resource networkInterfaces_toytruckserver154_name_resource 'Microsoft.Network/networkInterfaces@2022-05-01' = {
  name: networkInterfaces_toytruckserver154_name
  location: 'westus3'
  kind: 'Regular'
  properties: {
    ipConfigurations: [
      {
        name: 'ipconfig1'
        id: '${networkInterfaces_toytruckserver154_name_resource.id}/ipConfigurations/ipconfig1'
        etag: 'W/"6a38849d-bd59-4eae-856e-4909f7ac1fac"'
        type: 'Microsoft.Network/networkInterfaces/ipConfigurations'
        properties: {
          provisioningState: 'Succeeded'
          privateIPAddress: '10.0.0.4'
          privateIPAllocationMethod: 'Dynamic'
          publicIPAddress: {
            name: 'ToyTruckServer-ip'
            id: publicIPAddresses_ToyTruckServer_ip_name_resource.id
            properties: {
              provisioningState: 'Succeeded'
              resourceGuid: '07079685-0980-4ddf-acc3-3c8797c94b9a'
              publicIPAddressVersion: 'IPv4'
              publicIPAllocationMethod: 'Dynamic'
              idleTimeoutInMinutes: 4
              ipTags: []
              ipConfiguration: {
                id: '${networkInterfaces_toytruckserver154_name_resource.id}/ipConfigurations/ipconfig1'
              }
              deleteOption: 'Detach'
            }
            type: 'Microsoft.Network/publicIPAddresses'
            sku: {
              name: 'Basic'
              tier: 'Regional'
            }
          }
          subnet: {
            id: virtualNetworks_ToyTruck_vnet_name_default.id
          }
          primary: true
          privateIPAddressVersion: 'IPv4'
        }
      }
    ]
    dnsSettings: {
      dnsServers: []
    }
    enableAcceleratedNetworking: true
    enableIPForwarding: false
    disableTcpStateTracking: false
    networkSecurityGroup: {
      id: networkSecurityGroups_ToyTruckServer_nsg_name_resource.id
    }
    nicType: 'Standard'
  }
}
Note
一部のシンボリック名、API のバージョン、IP アドレスなど、実際のテンプレートではいくつかのことが異なる場合があります。 これは問題ありません。 これらの不一致のいくつかは、モジュールの後半で解決します。
リソースを表す最初の Bicep ファイルが作成されました。 この Bicep ファイルは適切に構造化されておらず、ベスト プラクティスに従っていません。 次のユニットでは、移行したテンプレートの品質を向上させる方法について説明します。
ヒント
Git のようなバージョン管理システムを使用している場合は、ここで作業をコミットすることをお勧めします。
main.bicep ファイルを確認したら、template.bicep ファイルを閉じます。