演習 - パイプラインにテスト ステージを追加する
あなたは、勤務先の玩具会社のセキュリティ チームから、あなたの Web サイトが HTTPS を使用した場合にのみアクセスできることを確認するように依頼されました。 この演習では、セキュリティ チームの要求を確認するスモーク テストを実行するようにパイプラインを構成します。
このプロセスでは、次のことを行います。
- テスト スクリプトをリポジトリに追加します。
- パイプラインの定義を更新して、テスト ステージを追加します。
- パイプラインを実行して、テストが失敗することを確認します。
- Bicep ファイルを修正し、パイプラインが正常に実行されることを確認します。
テスト スクリプトを追加する
ここでは、HTTPS を使用したときには Web サイトにアクセスできること、および安全ではない HTTP プロトコルを使用したときにはアクセスできないことを確認するテスト スクリプトを追加します。
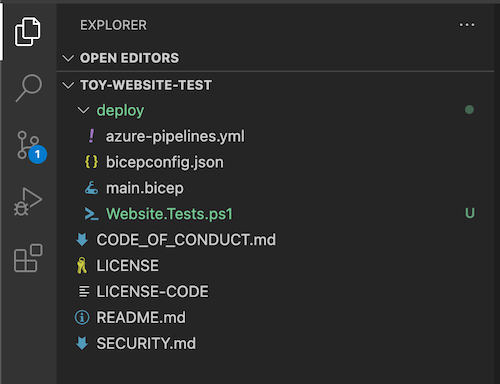
Visual Studio Code の deploy フォルダー内に Website.Tests.ps1 という名前の新しいファイルを作成します。
次のテスト コードをファイルに貼り付けます。
param(
  [Parameter(Mandatory)]
  [ValidateNotNullOrEmpty()]
  [string] $HostName
)

Describe 'Toy Website' {

    It 'Serves pages over HTTPS' {
      $request = [System.Net.WebRequest]::Create("https://$HostName/")
      $request.AllowAutoRedirect = $false
      $request.GetResponse().StatusCode |
        Should -Be 200 -Because "the website requires HTTPS"
    }

    It 'Does not serves pages over HTTP' {
      $request = [System.Net.WebRequest]::Create("http://$HostName/")
      $request.AllowAutoRedirect = $false
      $request.GetResponse().StatusCode |
        Should -BeGreaterOrEqual 300 -Because "HTTP is not secure"
    }

}
このコードは Pester のテスト ファイルです。 これには、
$HostNameというパラメーターが必要です。 ホスト名に対して 2 つのテストを実行します。- HTTPS 経由で Web サイトへの接続を試します。 サーバーから 200 から 299 の HTTP 応答状態コードが返される場合、接続の成功を示すので、テストは合格です。
- HTTP 経由で Web サイトへの接続を試します。 サーバーから 300 以上の HTTP 応答状態コードが返される場合、テストは合格です。
この演習では、テスト ファイルの詳細とそのしくみを理解することは重要ではありません。 関心をお持ちの場合は詳細を確認できるように、「まとめ」でリンクを提供します。
Bicep ファイルの出力をステージの出力変数として発行する
前のステップで作成したテスト スクリプトには、テストするホスト名が必要です。 Bicep ファイルには既に出力が含まれていますが、スモーク テストで使用する前に、ステージ出力変数として発行する必要があります。
Visual Studio Code で、deploy フォルダー内の azure-pipelines.yml ファイルを開きます。
デプロイ ステージで、デプロイ ステップを更新して、出力を変数に発行します。
- task: AzureResourceManagerTemplateDeployment@3
  name: DeployBicepFile
  displayName: Deploy Bicep file
  inputs:
    connectedServiceName: $(ServiceConnectionName)
    deploymentName: $(Build.BuildNumber)
    location: $(deploymentDefaultLocation)
    resourceGroupName: $(ResourceGroupName)
    csmFile: deploy/main.bicep
    overrideParameters: >
      -environmentType $(EnvironmentType)
    deploymentOutputs: deploymentOutputs
これで、デプロイ プロセスでは以前と同じタスクが引き続き使用されますが、デプロイからの出力は
deploymentOutputsという名前のパイプライン変数に格納されます。 出力変数は JSON として書式設定されます。JSON 形式の出力をパイプライン変数に変換するには、デプロイ手順の下の次のスクリプト ステップを追加します。
- bash: |
    echo "##vso[task.setvariable variable=appServiceAppHostName;isOutput=true]$(echo $DEPLOYMENT_OUTPUTS | jq -r '.appServiceAppHostName.value')"
  name: SaveDeploymentOutputs
  displayName: Save deployment outputs into variables
  env:
    DEPLOYMENT_OUTPUTS: $(deploymentOutputs)
デプロイが正常に完了すると、スクリプトは Bicep デプロイから各出力値にアクセスします。 このスクリプトでは、
jqツールを使用し、JSON 出力の関連部分にアクセスします。 次に、Bicep デプロイ出力と同じ名前のステージ出力変数に値が発行されます。注意
Microsoft がホストする Azure Pipelines のエージェントにプレインストールされています。 スクリプト ステップでそれらを使用するために特別な操作を行う必要はありません。
ファイルを保存します。
パイプラインにスモーク テスト ステージを追加する
これで、テストを実行するスモーク テスト ステージを追加できます。
ファイルの末尾に、SmokeTest ステージの次のモジュール定義を追加します。
- stage: SmokeTest
  jobs:
  - job: SmokeTest
    displayName: Smoke test
    variables:
      appServiceAppHostName: $[ stageDependencies.Deploy.DeployWebsite.outputs['DeployWebsite.SaveDeploymentOutputs.appServiceAppHostName'] ]
このコードではステージとジョブが定義されます。 また、
appServiceAppHostNameという名前のジョブに変数が作成されます。 この変数は、前のセクションで作成した出力変数から値を取得します。ファイルの末尾で、SmokeTest ステージに次のステップ定義を追加します。
steps:
  - task: PowerShell@2
    name: RunSmokeTests
    displayName: Run smoke tests
    inputs:
      targetType: inline
      script: |
        $container = New-PesterContainer `
          -Path 'deploy/Website.Tests.ps1' `
          -Data @{ HostName = '$(appServiceAppHostName)' }
        Invoke-Pester `
          -Container $container `
          -CI
このステップでは PowerShell スクリプトを実行し、Pester テスト ツールを使用して先ほど記述したテスト スクリプトを実行します。
ファイルの末尾で、SmokeTest ステージに次のステップ定義を追加します。
- task: PublishTestResults@2
  name: PublishTestResults
  displayName: Publish test results
  condition: always()
  inputs:
    testResultsFormat: NUnit
    testResultsFiles: 'testResults.xml'
このステップでは、Pester によって作成されるテスト結果ファイルを取得し、それをパイプライン テストの結果として発行します。 すぐに結果がどのように表示されるかが表示されます。
ステップ定義に
condition: always()が含まれていることに注目してください。 この状況では、前のステップが失敗した場合でも、常にテスト結果を発行する必要があることが Azure Pipelines に示されます。 テストに失敗するとテスト ステップが失敗し、通常は失敗したステップの後にパイプラインで実行が停止されるため、この条件は重要です。ファイルを保存します。
パイプライン定義を確認してコミットする
azure-pipelines.yml ファイルが次のコードのようになっていることを確認します。
trigger:
  batch: true
  branches:
    include:
    - main

pool:
  vmImage: ubuntu-latest

variables:
  - name: deploymentDefaultLocation
    value: westus3

stages:

- stage: Lint
  jobs:
  - job: LintCode
    displayName: Lint code
    steps:
      - script: |
          az bicep build --file deploy/main.bicep
        name: LintBicepCode
        displayName: Run Bicep linter

- stage: Validate
  jobs:
  - job: ValidateBicepCode
    displayName: Validate Bicep code
    steps:
      - task: AzureResourceManagerTemplateDeployment@3
        name: RunPreflightValidation
        displayName: Run preflight validation
        inputs:
          connectedServiceName: $(ServiceConnectionName)
          location: $(deploymentDefaultLocation)
          deploymentMode: Validation
          resourceGroupName: $(ResourceGroupName)
          csmFile: deploy/main.bicep
          overrideParameters: >
            -environmentType $(EnvironmentType)

- stage: Preview
  jobs:
  - job: PreviewAzureChanges
    displayName: Preview Azure changes
    steps:
      - task: AzureCLI@2
        name: RunWhatIf
        displayName: Run what-if
        inputs:
          azureSubscription: $(ServiceConnectionName)
          scriptType: 'bash'
          scriptLocation: 'inlineScript'
          inlineScript: |
            az deployment group what-if \
              --resource-group $(ResourceGroupName) \
              --template-file deploy/main.bicep \
              --parameters environmentType=$(EnvironmentType)

- stage: Deploy
  jobs:
  - deployment: DeployWebsite
    displayName: Deploy website
    environment: Website
    strategy:
      runOnce:
        deploy:
          steps:
            - checkout: self
            - task: AzureResourceManagerTemplateDeployment@3
              name: DeployBicepFile
              displayName: Deploy Bicep file
              inputs:
                connectedServiceName: $(ServiceConnectionName)
                deploymentName: $(Build.BuildNumber)
                location: $(deploymentDefaultLocation)
                resourceGroupName: $(ResourceGroupName)
                csmFile: deploy/main.bicep
                overrideParameters: >
                  -environmentType $(EnvironmentType)
                deploymentOutputs: deploymentOutputs

            - bash: |
                echo "##vso[task.setvariable variable=appServiceAppHostName;isOutput=true]$(echo $DEPLOYMENT_OUTPUTS | jq -r '.appServiceAppHostName.value')"
              name: SaveDeploymentOutputs
              displayName: Save deployment outputs into variables
              env:
                DEPLOYMENT_OUTPUTS: $(deploymentOutputs)

- stage: SmokeTest
  jobs:
  - job: SmokeTest
    displayName: Smoke test
    variables:
      appServiceAppHostName: $[ stageDependencies.Deploy.DeployWebsite.outputs['DeployWebsite.SaveDeploymentOutputs.appServiceAppHostName'] ]
    steps:
      - task: PowerShell@2
        name: RunSmokeTests
        displayName: Run smoke tests
        inputs:
          targetType: inline
          script: |
            $container = New-PesterContainer `
              -Path 'deploy/Website.Tests.ps1' `
              -Data @{ HostName = '$(appServiceAppHostName)' }
            Invoke-Pester `
              -Container $container `
              -CI

      - task: PublishTestResults@2
        name: PublishTestResults
        displayName: Publish test results
        condition: always()
        inputs:
          testResultsFormat: NUnit
          testResultsFiles: 'testResults.xml'
そうでない場合は、この例に一致するように更新してから保存してください。
Visual Studio Code ターミナルで次のコマンドを実行し、変更をコミットして Git リポジトリにプッシュします。
git add .
git commit -m "Add test stage"
git push
パイプラインを実行してテスト結果を確認する
ブラウザーでパイプラインに移動します。
パイプラインの最新の実行を選択します。
パイプラインでリント、検証、プレビューの各ステージが完了するまで待ちます。 Azure Pipelines によってページが最新の状態で自動的に更新されますが、ページを随時更新することをお勧めします。
[確認] ボタンを選択してから、[承認] を選びます。
パイプラインの実行が終了するまで待ちます。
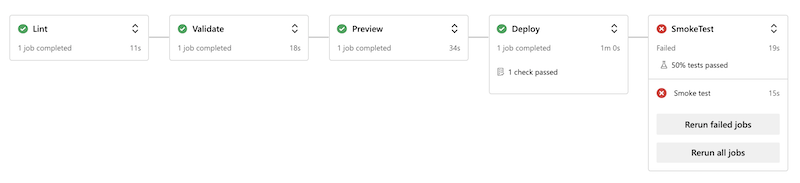
デプロイ ステージが正常に終了することに注目してください。 SmokeTest ステージはエラーで終了しています。
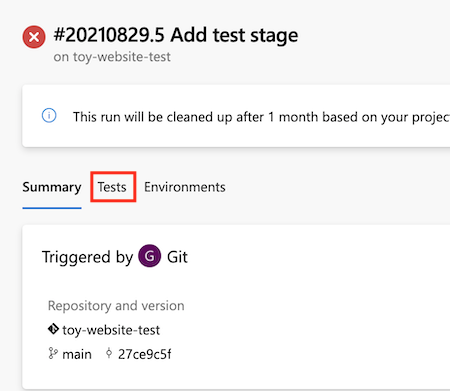
[テスト] タブを選択します。
テストの概要に、2 つのテストが実行されたことが示されている点に注目してください。 1 つは成功し、もう 1 つは失敗しています。 失敗したテストは、Toy Website.Does not serve pages over HTTP として一覧表示されています。
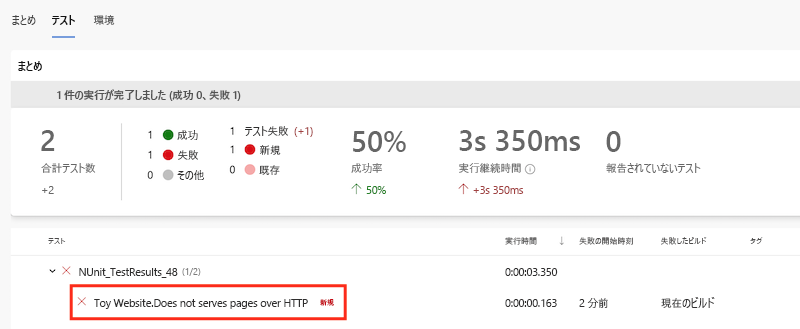
このテキストは、セキュリティ チームの要件を満たすために Web サイトが正しく構成されていないことを示しています。
Bicep ファイルを更新する
これで、Bicep 定義がセキュリティ チームの要件を満たしていないことがわかったので、それを修正します。
Visual Studio Code で、deploy フォルダーの main.bicep ファイルを開きます。
Azure App Service アプリの定義を見つけ、それを更新して、その
properties領域にhttpsOnlyプロパティが含まれるようにします。resource appServiceApp 'Microsoft.Web/sites@2022-03-01' = { name: appServiceAppName location: location properties: { serverFarmId: appServicePlan.id httpsOnly: true siteConfig: { appSettings: [ { name: 'APPINSIGHTS_INSTRUMENTATIONKEY' value: applicationInsights.properties.InstrumentationKey } { name: 'APPLICATIONINSIGHTS_CONNECTION_STRING' value: applicationInsights.properties.ConnectionString } ] } } }ファイルを保存します。
Visual Studio Code ターミナルで次のコマンドを実行し、変更をコミットして Git リポジトリにプッシュします。
git add .
git commit -m "Configure HTTPS on website"
git push
もう一度パイプラインを実行する
ブラウザーでパイプラインに移動します。
最新の実行を選択します。
パイプラインでリント、検証、プレビューの各ステージが完了するまで待ちます。 Azure Pipelines によってページが最新の状態で自動的に更新されますが、ページを随時更新することをお勧めします。
[プレビュー] ステージを選択し、もう一度 what-if の結果を確認します。
what-if コマンドによって、
httpsOnlyプロパティの値の変更が検出されていることに注目してください。Resource and property changes are indicated with these symbols: + Create ~ Modify = Nochange The deployment will update the following scope: Scope: /subscriptions/f0750bbe-ea75-4ae5-b24d-a92ca601da2c/resourceGroups/ToyWebsiteTest ~ Microsoft.Web/sites/toy-website-nbfnedv766snk [2021-01-15] + properties.siteConfig.localMySqlEnabled: false + properties.siteConfig.netFrameworkVersion: "v4.6" ~ properties.httpsOnly: false => true = Microsoft.Insights/components/toywebsite [2020-02-02] = Microsoft.Storage/storageAccounts/mystoragenbfnedv766snk [2021-04-01] = Microsoft.Web/serverfarms/toy-website [2021-01-15] Resource changes: 1 to modify, 3 no change.パイプラインの実行に戻ります。
[確認] ボタンを選択してから、[承認] を選びます。
パイプラインの実行が終了するまで待ちます。
SmokeTest ステージを含め、パイプライン全体が正常に終了していることに注目してください。 これは、両方のテストが成功したことを示します。

リソースのクリーンアップ
これで演習が完了したので、課金されないようにリソースを削除しましょう。
Visual Studio Code ターミナルで、次のコマンドを実行します。
az group delete --resource-group ToyWebsiteTest --yes --no-wait
バックグラウンドでリソース グループが削除されます。
Remove-AzResourceGroup -Name ToyWebsiteTest -Force