チュートリアル: コマンド ラインを使用して Visual Studio の拡張機能を公開する
このチュートリアルでは、コマンド ラインを使用して Visual Studio の拡張機能を Visual Studio Marketplace に公開する方法について説明します。 拡張機能を Marketplace に追加すると、開発者は [拡張機能と更新プログラム] ダイアログを使用して、新しい拡張機能と更新された拡張機能を参照できます。
VsixPublisher.exe は、Visual Studio の拡張機能を Marketplace に公開するためのコマンドライン ツールです。 これには、${VSInstallDir}\VSSDK\VisualStudioIntegration\Tools\Bin\VsixPublisher.exe からアクセスできます。 このツールで使用できるコマンドは publish、deletePublisher、deleteExtension、login、logout です。
コマンド
publish
拡張機能を Marketplace に公開します。 拡張機能には、vsix、exe/msi ファイル、またはリンクを指定できます。 同じバージョンの拡張機能が既に存在する場合は、拡張機能が上書きされます。 拡張機能がまだ存在しない場合は、新しい拡張機能が作成されます。
| コマンド オプション | 説明 |
|---|---|
| payload (必須) | 公開するペイロードへのパス、または "詳細 URL" として使用するリンク。 |
| publishManifest (必須) | 使用する公開マニフェスト ファイルへのパス。 |
| ignoreWarnings | 拡張機能を公開するときに無視する警告の一覧。 これらの警告は、拡張機能を公開するときにコマンド ライン メッセージとして表示されます。 たとえば、"VSIXValidatorWarning01, VSIXValidatorWarning02" などです。 |
| personalAccessToken | 公開元の認証に使用される個人用アクセス トークン (PAT)。 指定されていない場合、PAT はログインしているユーザーから取得されます。 |
VsixPublisher.exe publish -payload "{path to vsix}" -publishManifest "{path to vs-publish.json}" -ignoreWarnings "VSIXValidatorWarning01,VSIXValidatorWarning02"
deletePublisher
Marketplace で公開元を削除します。
| コマンド オプション | 説明 |
|---|---|
| publisherName (必須) | 公開元の名前 (識別子など)。 |
| personalAccessToken (必須) | 公開元の認証に使用される個人用アクセス トークン。 |
VsixPublisher.exe deletePublisher -publisherName "{Publisher Name}" -personalAccessToken "{Personal Access Token}"
deleteExtension
Marketplace から拡張機能を削除します。
| コマンド オプション | 説明 |
|---|---|
| extensionName (必須) | 削除する拡張機能の名前。 |
| publisherName (必須) | 公開元の名前 (識別子など)。 |
| personalAccessToken | 公開元の認証に使用される個人用アクセス トークン。 指定されていない場合、PAT はログインしているユーザーから取得されます。 |
VsixPublisher.exe deleteExtension -extensionName "{Extension Name}" -publisherName "{Publisher Name}"
ログイン (login)
公開元をコンピューターに記録します。
| コマンド オプション | 説明 |
|---|---|
| personalAccessToken (必須 | 公開元の認証に使用される個人用アクセス トークン。 |
| publisherName (必須) | 公開元の名前 (識別子など)。 |
| overwrite | 既存の公開元を新しい個人用アクセス トークンで上書きすることを指定します。 |
VsixPublisher.exe login -personalAccessToken "{Personal Access Token}" -publisherName "{Publisher Name}"
logout
公開元をコンピューターからログアウトさせます。
| コマンド オプション | 説明 |
|---|---|
| publisherName (必須) | 公開元の名前 (識別子など)。 |
| ignoreMissingPublisher | 指定された公開元がまだログインしていない場合に、ツールがエラーにならないように指定します。 |
VsixPublisher.exe logout -publisherName "{Publisher Name}"
createPublisher
注意
このコマンドは使用できなくなりました。 Visual Studio Marketplace に移動することで新しいパブリッシャーを作成できます。
publishManifest ファイル
publishManifest ファイルは、publish コマンドで使用されます。 これは、Marketplace で認識する必要がある、拡張機能に関するすべてのメタデータを表します。 アップロードする拡張機能が VSIX 拡張機能からのものである場合、"identity" プロパティには "internalName" のみを設定する必要があります。 これは、"identity" プロパティの残りの部分は、vsixmanifest ファイルから生成できるためです。 拡張機能が msi/exe またはリンク拡張機能の場合、ユーザーは "identity" プロパティに必須フィールドを指定する必要があります。 マニフェストの残りの部分には、Marketplace に固有の情報が含まれています (カテゴリ、Q&A が有効かどうかなど)。
VSIX 拡張機能の publishManifest ファイルのサンプル:
{
    "$schema": "http://json.schemastore.org/vsix-publish",
    "categories": [ "build", "coding" ],  // The categories of the extension. Between 1 and 3 categories are required.
    "identity": {
        "internalName": "MyVsixExtension" // If not specified, we try to generate the name from the display name of the extension in the vsixmanifest file.
                                            // Required if the display name is not the actual name of the extension.
    },
    "overview": "overview.md",            // Path to the "readme" file that gets uploaded to the Marketplace. Required.
    "priceCategory": "free",              // Either "free", "trial", or "paid". Defaults to "free".
    "publisher": "MyPublisherName",       // The name of the publisher. Required.
    "private": false,                     // Specifies whether or not the extension should be public when uploaded. Defaults to false.
    "qna": true,                          // Specifies whether or not the extension should have a Q&A section. Defaults to true.
    "repo": "https://github.com/MyPublisherName/MyVsixExtension" // Not required.
}
MSI/EXE またはリンクの publishManifest ファイルのサンプル:
{
    "$schema": "http://json.schemastore.org/vsix-publish",
    "categories": [ "build", "coding" ],
    "identity": {
        "description": "My extension.", // The description of the extension. Required for non-vsix extensions.
        "displayName": "My Extension",  // The display name of the extension. Required for non-vsix extensions.
        "icon": "\\path\\to\\icon.ico", // The path to an icon file (can be relative to the json file location). Required for non-vsix extensions.
        "installTargets": [             // The installation targets for the extension. Required for non-vsix extensions.
            {
                "sku": "Microsoft.VisualStudio.Community",
                "version": "[10.0, 16.0)"
            }
        ],
        "internalName": "MyExtension",
        "language": "en-US",            // The default language id of the extension. Can be in the "1033" or "en-US" format. Required for non-vsix extensions.
        "tags": [ "tag1", "tag2" ],     // The tags for the extension. Not required.
        "version": "3.7.0",             // The version of the extension. Required for non-vsix extensions.
        "vsixId": "MyExtension",        // The vsix id of the extension. Not required but useful for showing updates to installed extensions.
    },
    "overview": "overview.md",
    "priceCategory": "free",
    "publisher": "MyPublisherName",
    "private": false,
    "qna": true,
    "repo": "https://github.com/MyPublisherName/MyVsixExtension"
}
資産ファイル
画像などの要素を readme ファイル内に埋め込むための資産ファイルを指定できます。 たとえば、拡張機能に以下のような "概要" Markdown ドキュメントが含まれているとします。
TestExtension
...
This is test extension.

前の例の "images/testlogo.png" を解決するために、ユーザーは次に示すように公開マニフェストで "assetFiles" を指定できます。
{
    "assetFiles": [
        {
            "pathOnDisk": "\\path\\to\\logo.png",
            "targetPath": "images/logo.png"
        }
    ],
    // other required fields
}
公開のチュートリアル
前提条件
このチュートリアルを行うには、Visual Studio SDK をインストールする必要があります。 詳細については、「Visual Studio SDK のインストール」を参照してください。
Visual Studio の拡張機能を作成する
ここでは、既定の VSPackage 拡張機能を使用しますが、すべての種類の拡張機能において手順は同じです。
- メニュー コマンドを含む "TestPublish" という名前の VSPackage を C# で作成します。 詳細については、拡張機能 (Hello World) の初めての作成に関するページを参照してください。
拡張機能をパッケージ化する
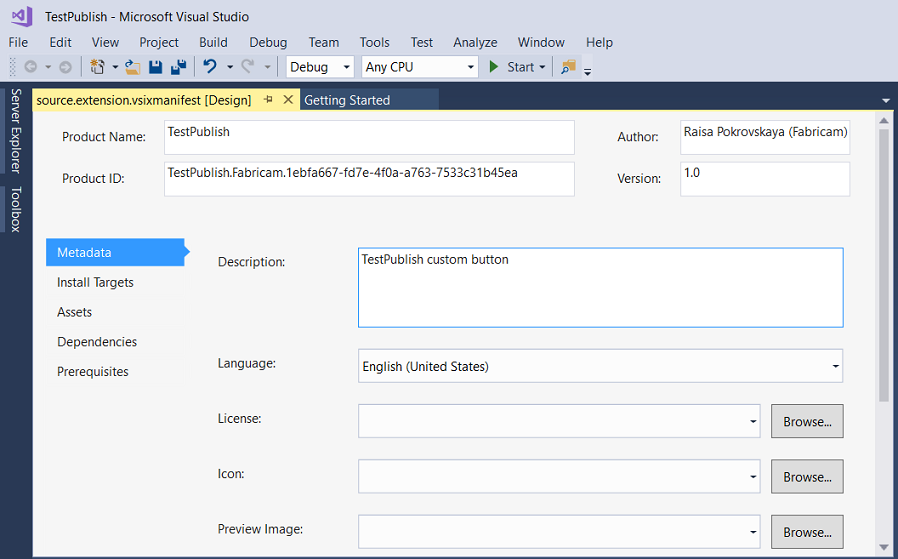
製品名、作成者、およびバージョンに関する正しい情報を使用して、拡張機能 vsixmanifest を更新します。
拡張機能をリリース モードでビルドします。 これで、拡張機能は \bin\Release フォルダーに VSIX としてパッケージ化されます。
VSIX をダブルクリックして、インストールを確認できます。
拡張のテスト
拡張機能を配布する前に、それをビルドしてテストし、Visual Studio の実験用インスタンスに正しくインストールされていることを確認します。
Visual Studio で、デバッグを開始します。 Visual Studio の実験用インスタンスが開きます。
実験用インスタンスで、[ツール] メニューに移動して、[拡張機能と更新プログラム] をクリックします。TestPublish 拡張機能が中央のウィンドウに表示され、有効になります。
[ツール] メニューに、[テスト] コマンドが表示されていることを確認します。
コマンド ラインを使用して拡張機能を Marketplace に公開する
リリース バージョンの拡張機能がビルドされていること、およびそれが最新の状態であることを確認します。
publishmanifest.json と overview.md の各ファイルが作成されていることを確認します。
コマンド ラインを開き、${VSInstallDir}\VSSDK\VisualStudioIntegration\Tools\Bin\ ディレクトリに移動します。
新しい拡張機能を公開するには、次のコマンドを使用します。
VsixPublisher.exe publish -payload "{Path to vsix file}" -publishManifest "{path to publishManifest file}" -personalAccessToken "{Personal Access Token that is used to authenticate the publisher. If not provided, the pat is acquired from the logged-in users.}"拡張機能が正常に公開されると、次のコマンド ライン メッセージが表示されます。
Uploaded 'MyVsixExtension' to the Marketplace.Visual Studio Marketplace に移動して、公開した新しい拡張機能を確認できます
Visual Studio Marketplace から拡張機能をインストールする
拡張機能が公開されたので、それを Visual Studio にインストールしてテストします。
Visual Studio の [ツール] メニューで、[拡張機能と更新プログラム] をクリックします。
[オンライン] をクリックして、TestPublish を検索します。
ダウンロードをクリックします。 これで、拡張機能がインストール対象としてスケジュールされます。
インストールを完了するには、Visual Studio のすべてのインスタンスを閉じます。
拡張機能を削除する
Visual Studio Marketplace およびコンピューターから拡張機能を削除できます。
コマンド ラインを使用して Marketplace から拡張機能を削除するには
拡張機能を削除する場合は、次のコマンドを使用します。
VsixPublisher.exe deleteExtension -publisherName "TestVSIXPublisher" -extensionName "MyVsixExtension"拡張機能が正常に削除されると、次のコマンド ライン メッセージが表示されます。
Removed 'MyVsixExtension' from the Marketplace.
コンピューターから拡張機能を削除するには
Visual Studio の [ツール] メニューで、[拡張機能と更新プログラム] をクリックします。
[MyVsixExtension] を選択し、[アンインストール] をクリックします。 これで、拡張機能がアンインストール対象としてスケジュールされます。
アンインストールを完了するには、Visual Studio のすべてのインスタンスを閉じます。