Hello, iOS マルチスクリーン – クイック スタート
警告
iOS Designer は、Visual Studio 2019 バージョン 16.8 および Visual Studio 2019 for Mac バージョン 8.8 で非推奨とされ、Visual Studio 2019 バージョン 16.9 および Visual Studio for Mac バージョン 8.9 から削除されています。 iOS のユーザー インターフェイスについては、Xcode の Interface Builder が実行されている Mac で直接ビルドすることをお勧めします。 詳細については、「Xcode を使用したユーザーインターフェイスの設計」を参照してください。
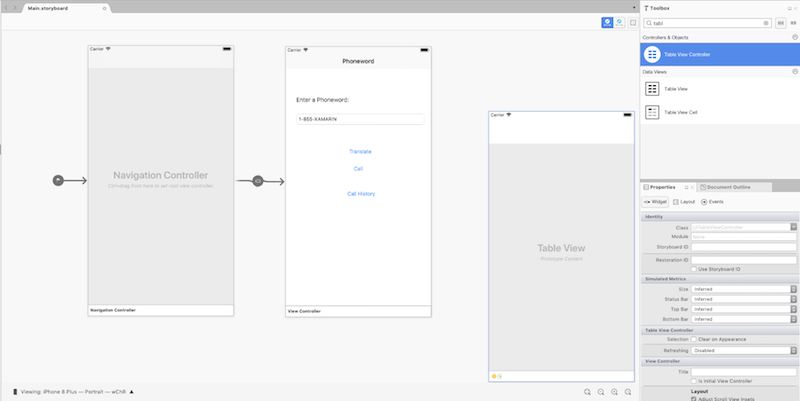
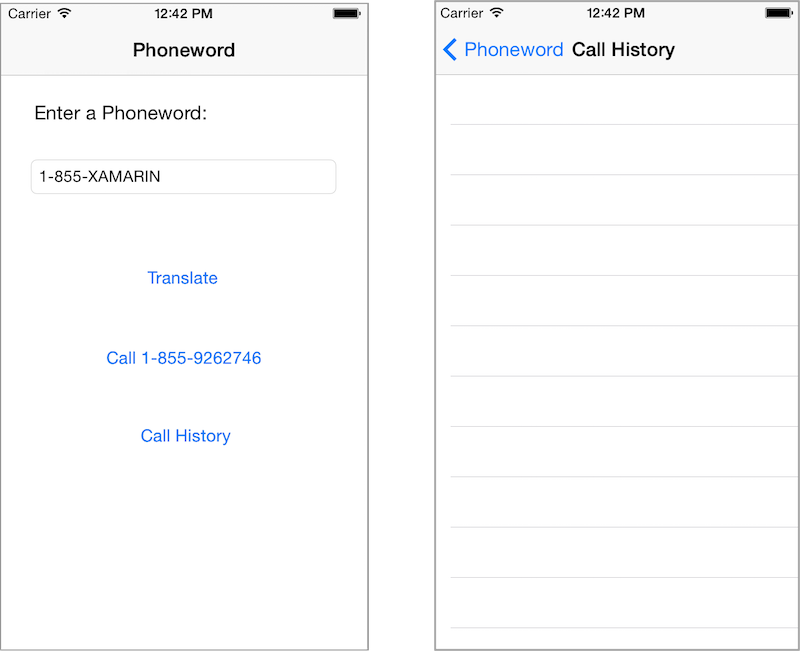
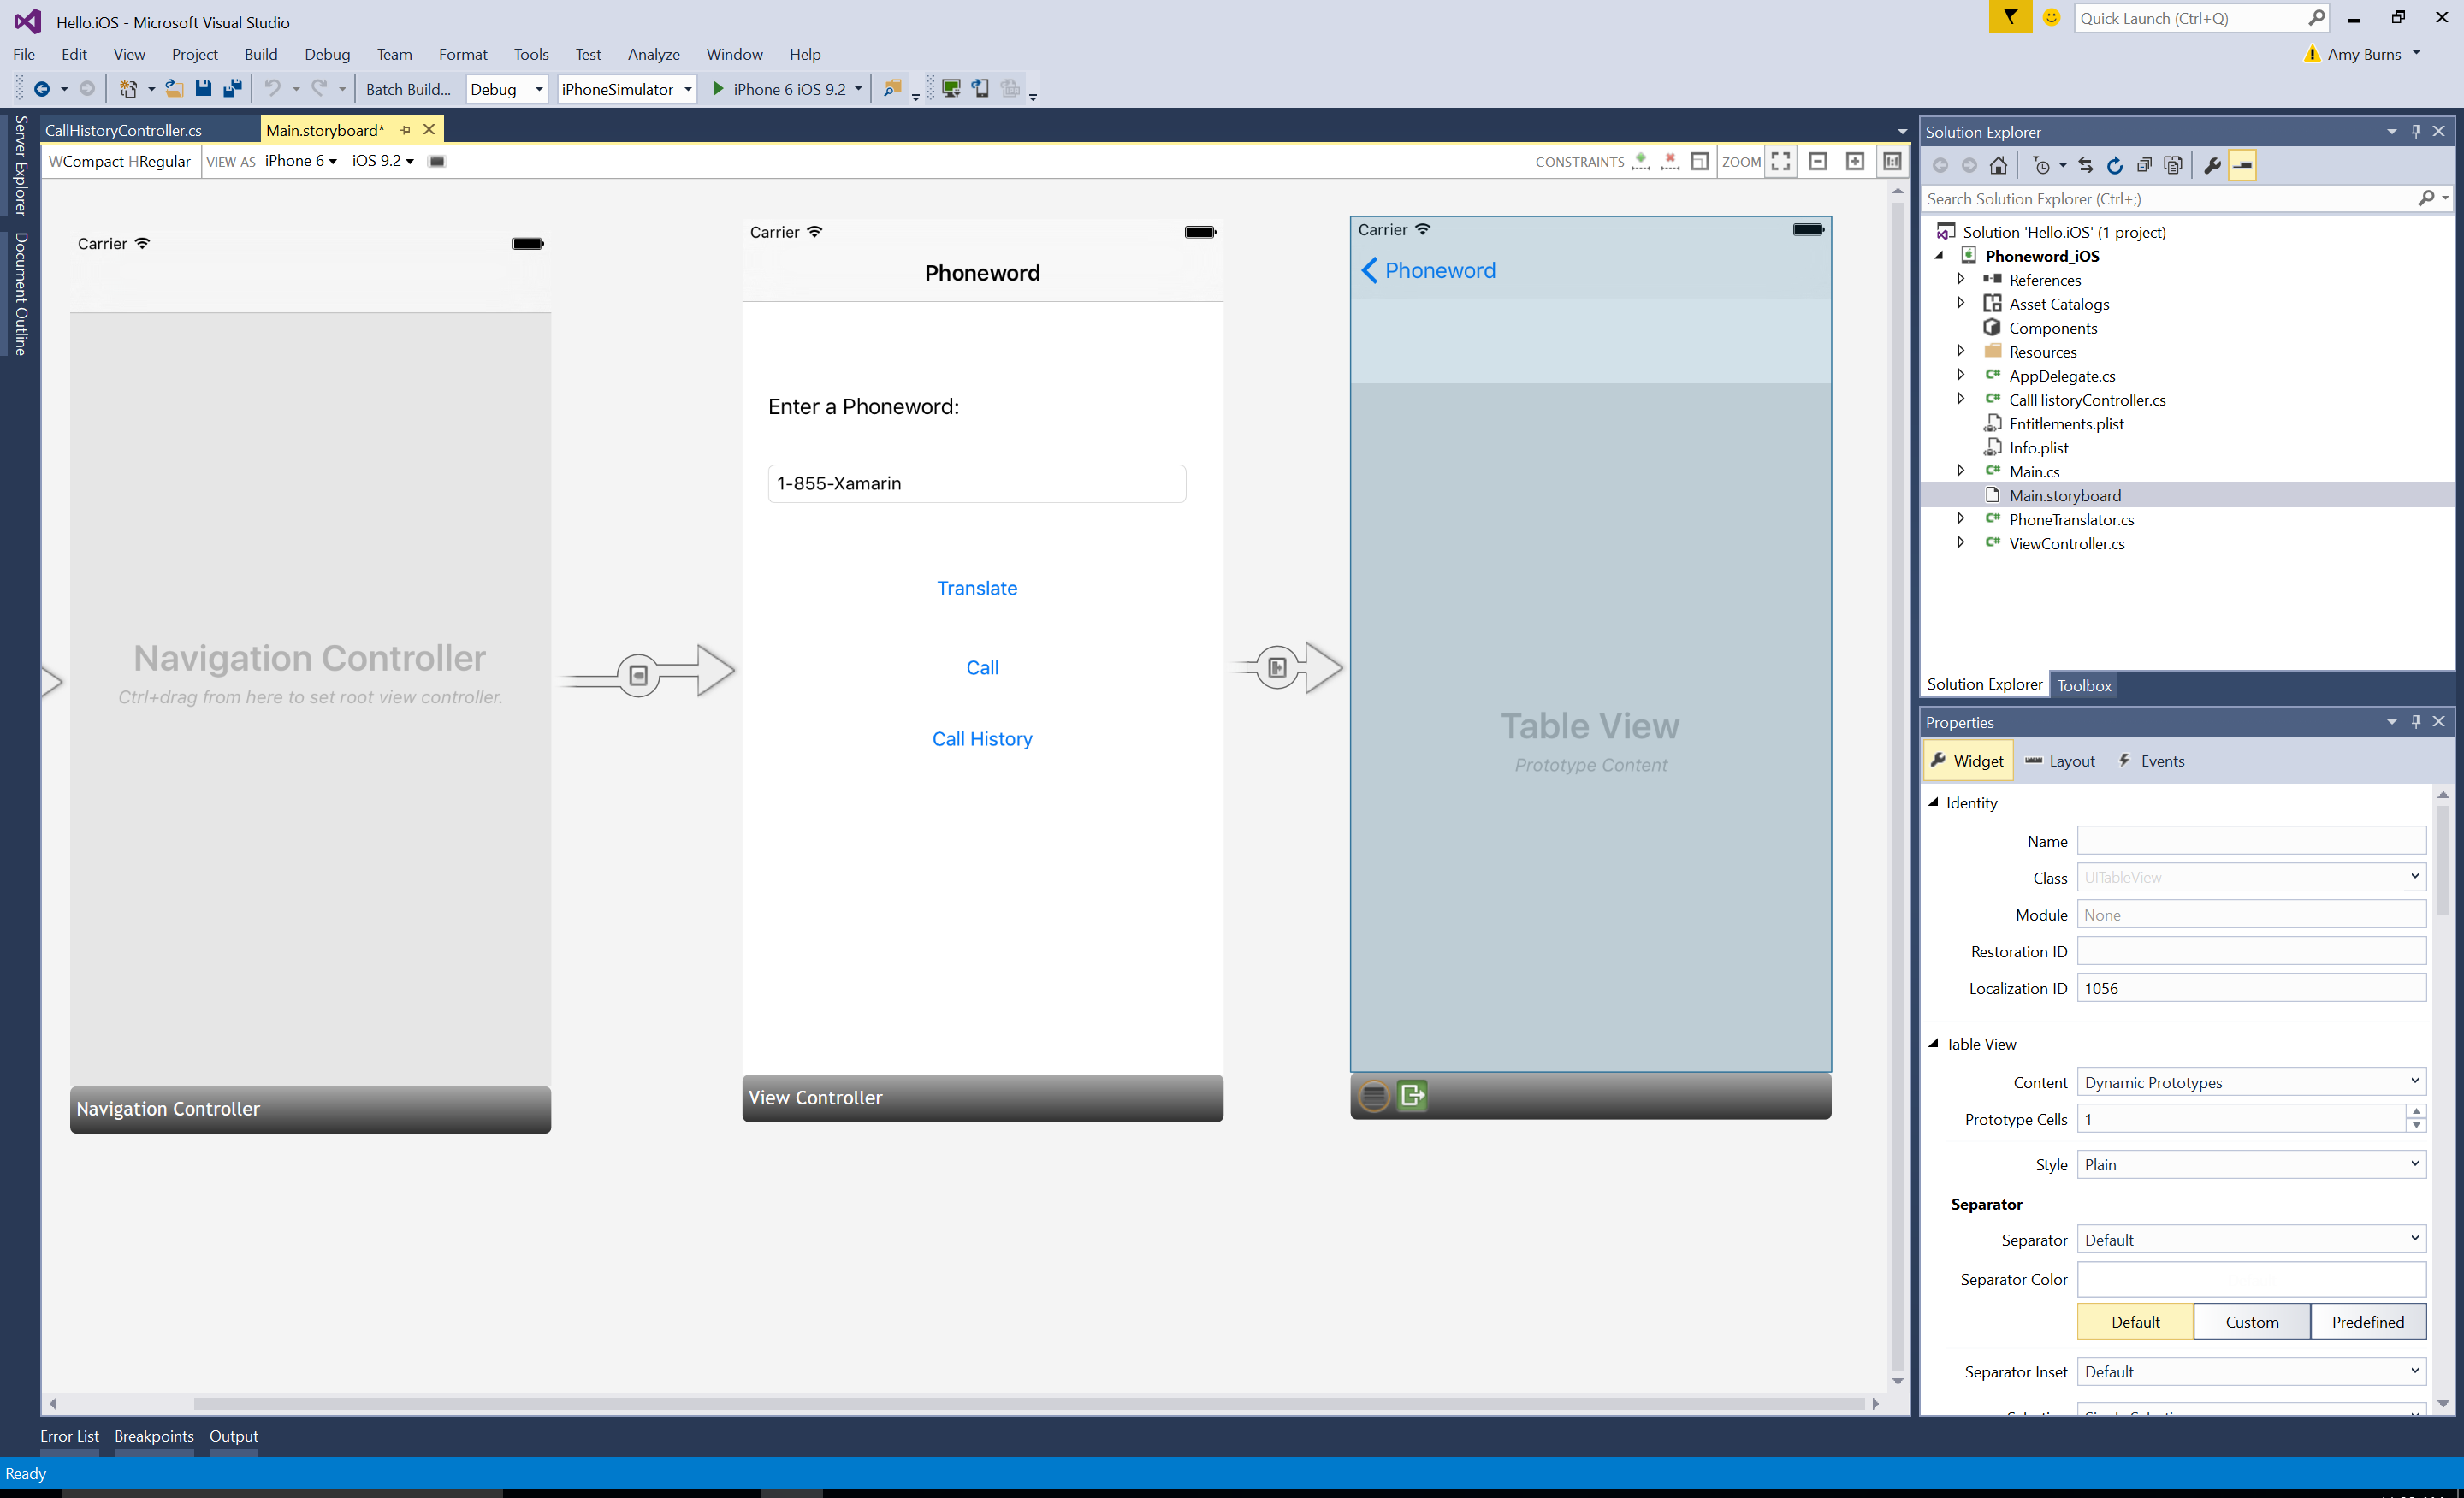
チュートリアルのこの部分では、アプリでかけた電話番号の履歴を表示する 2 つ目の画面を Phoneword アプリケーションに追加します。 最終的なアプリケーションには、以下のスクリーン ショットのように、通話履歴を表示する 2 つ目の画面が表示されます。

後半の詳細のページでは、ビルドしたアプリケーションを確認し、アーキテクチャ、ナビゲーション、およびその過程で遭遇したその他の新しい iOS の概念について説明します。
要件
このガイドは、「Hello, iOS」ドキュメントを中断した箇所から再開するため、「Hello, iOS クイック スタート」を完了する必要があります。 Phoneword アプリの完成版は、Hello, iOS のサンプル ページからダウンロードしてください。
MacOS でのチュートリアル
このチュートリアルでは、Phoneword アプリケーションに通話履歴画面を追加します。
Visual Studio for Mac で Phoneword アプリケーションを開きます。 必要に応じて、Hello, iOS チュートリアル ガイドで完成した Phoneword アプリケーションをここからダウンロードすることができます。
Solution Pad から Main.storyboard ファイルを開きます。
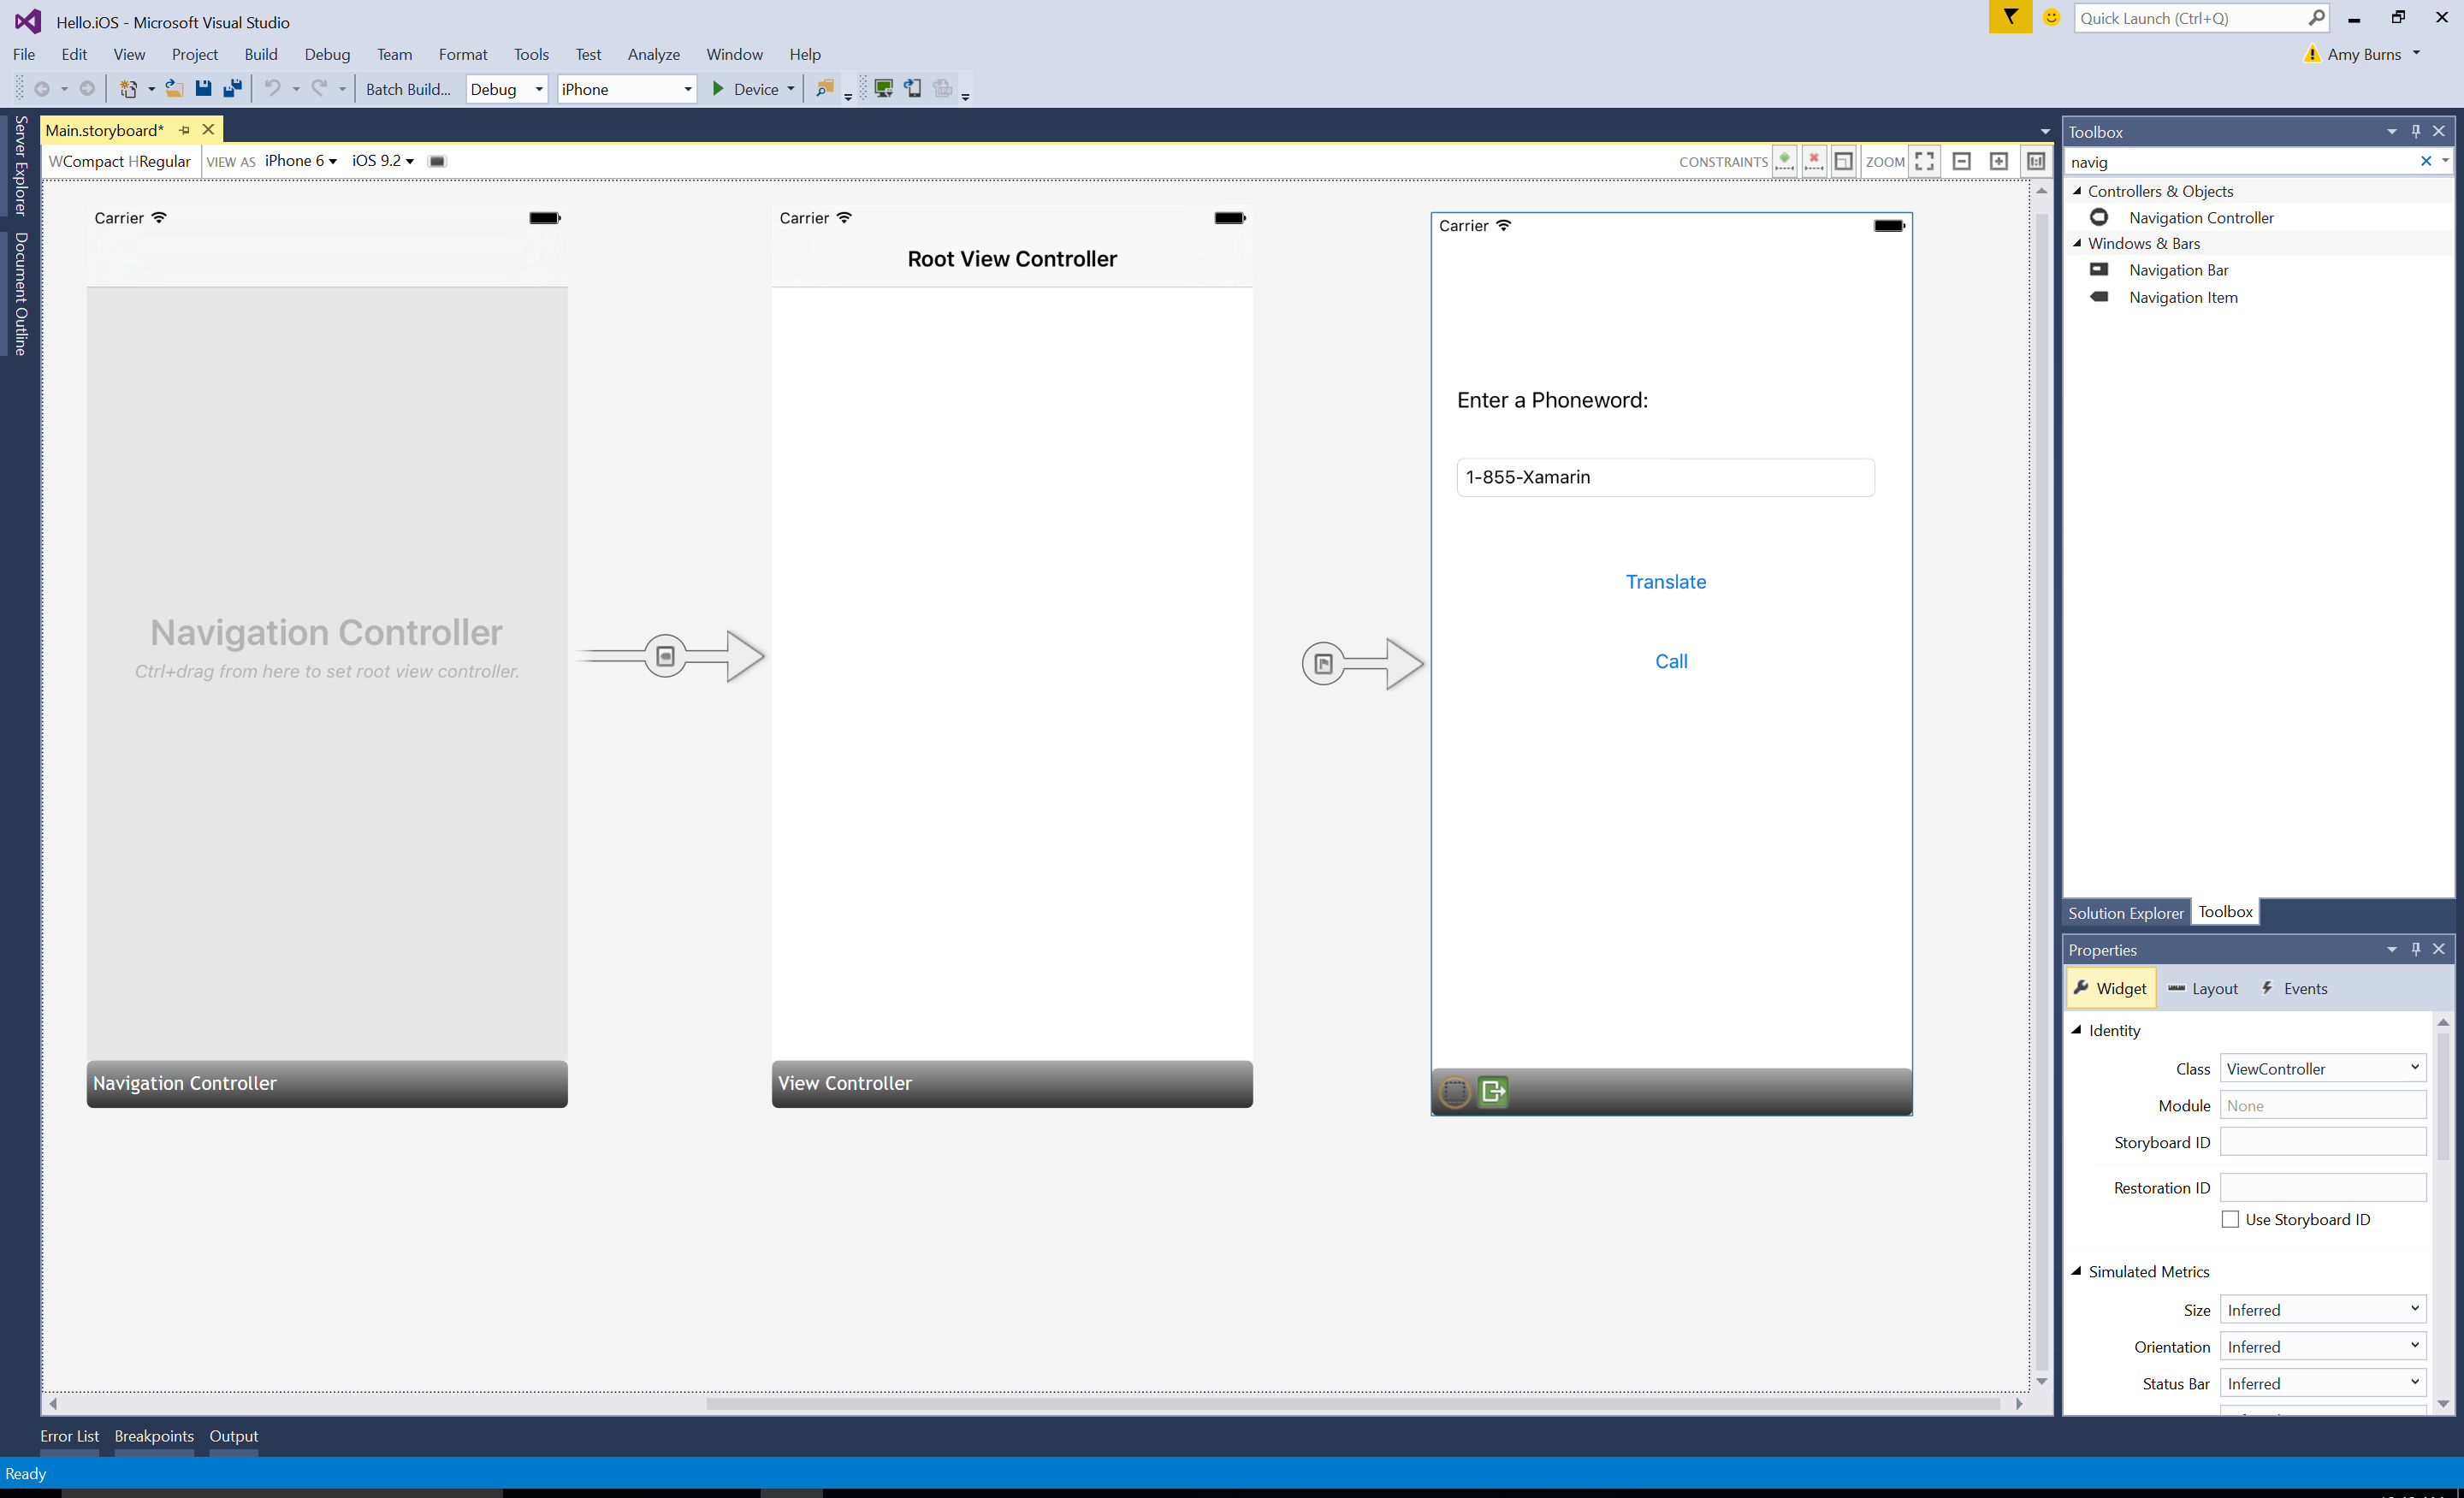
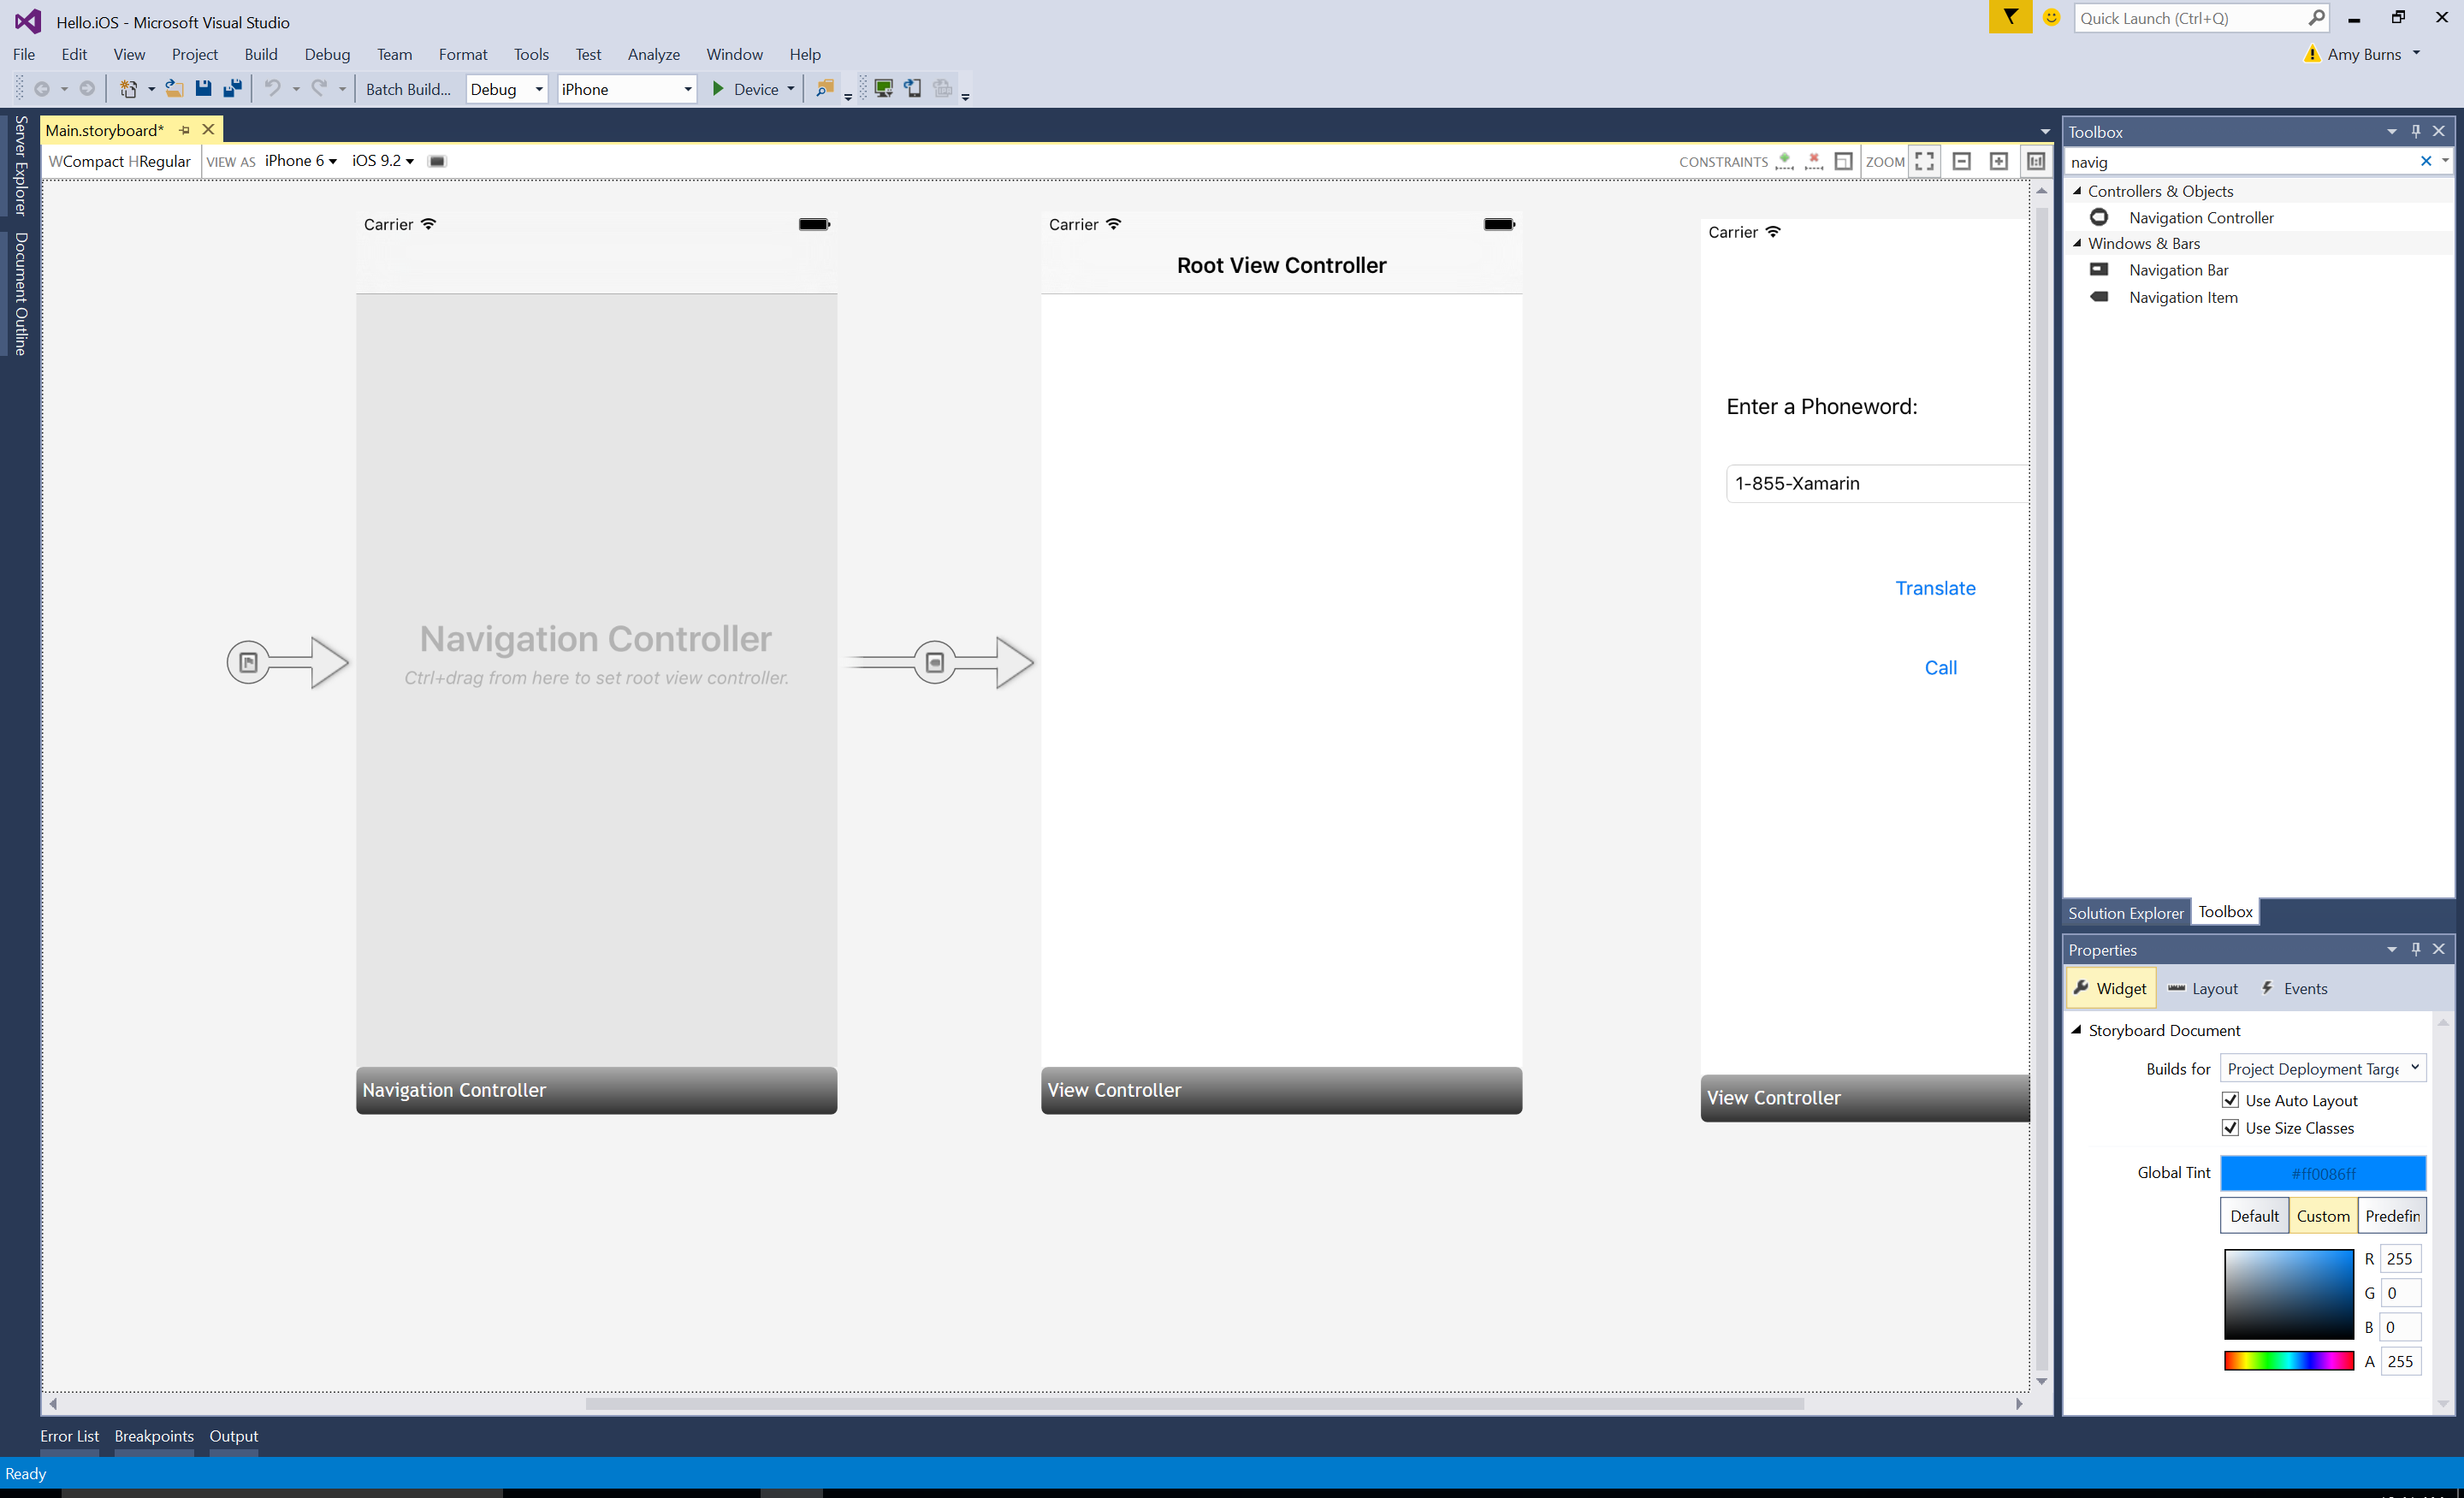
[ツールボックス] からデザイン サーフェイスにナビゲーション コントローラーをドラッグします (デザイン サーフェイスにこれらすべてが収まるように縮小する必要がある場合があります)。
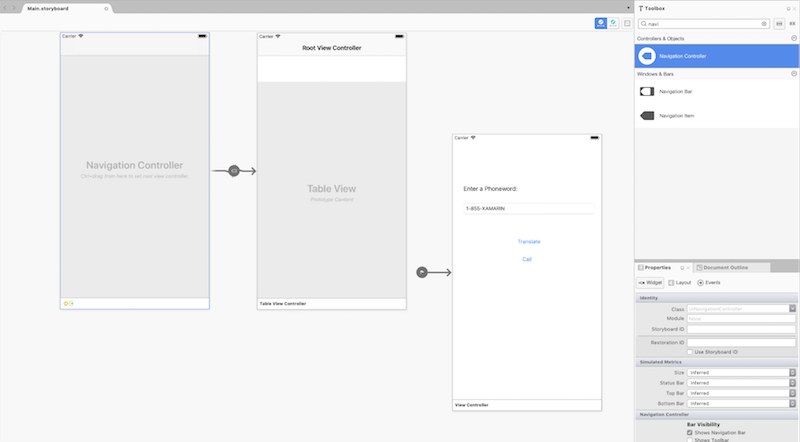
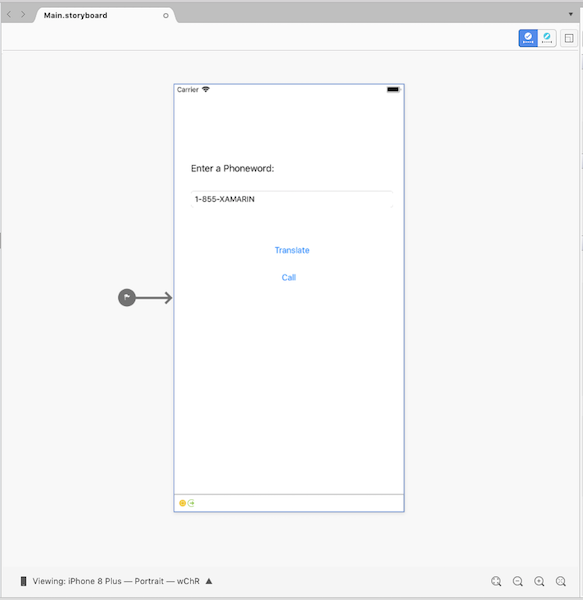
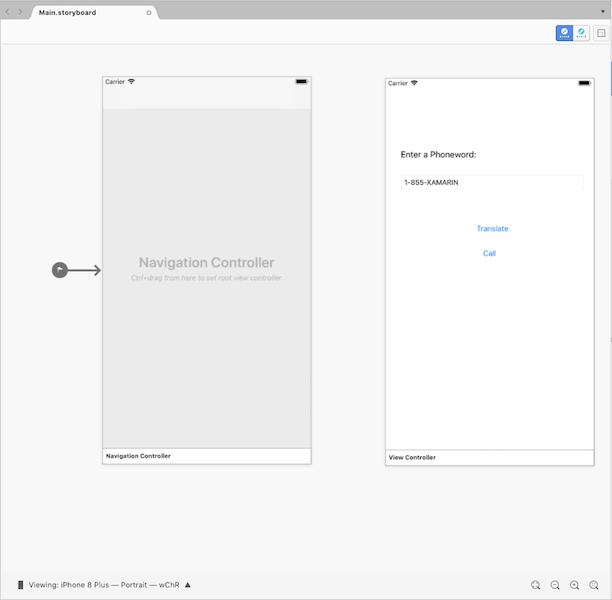
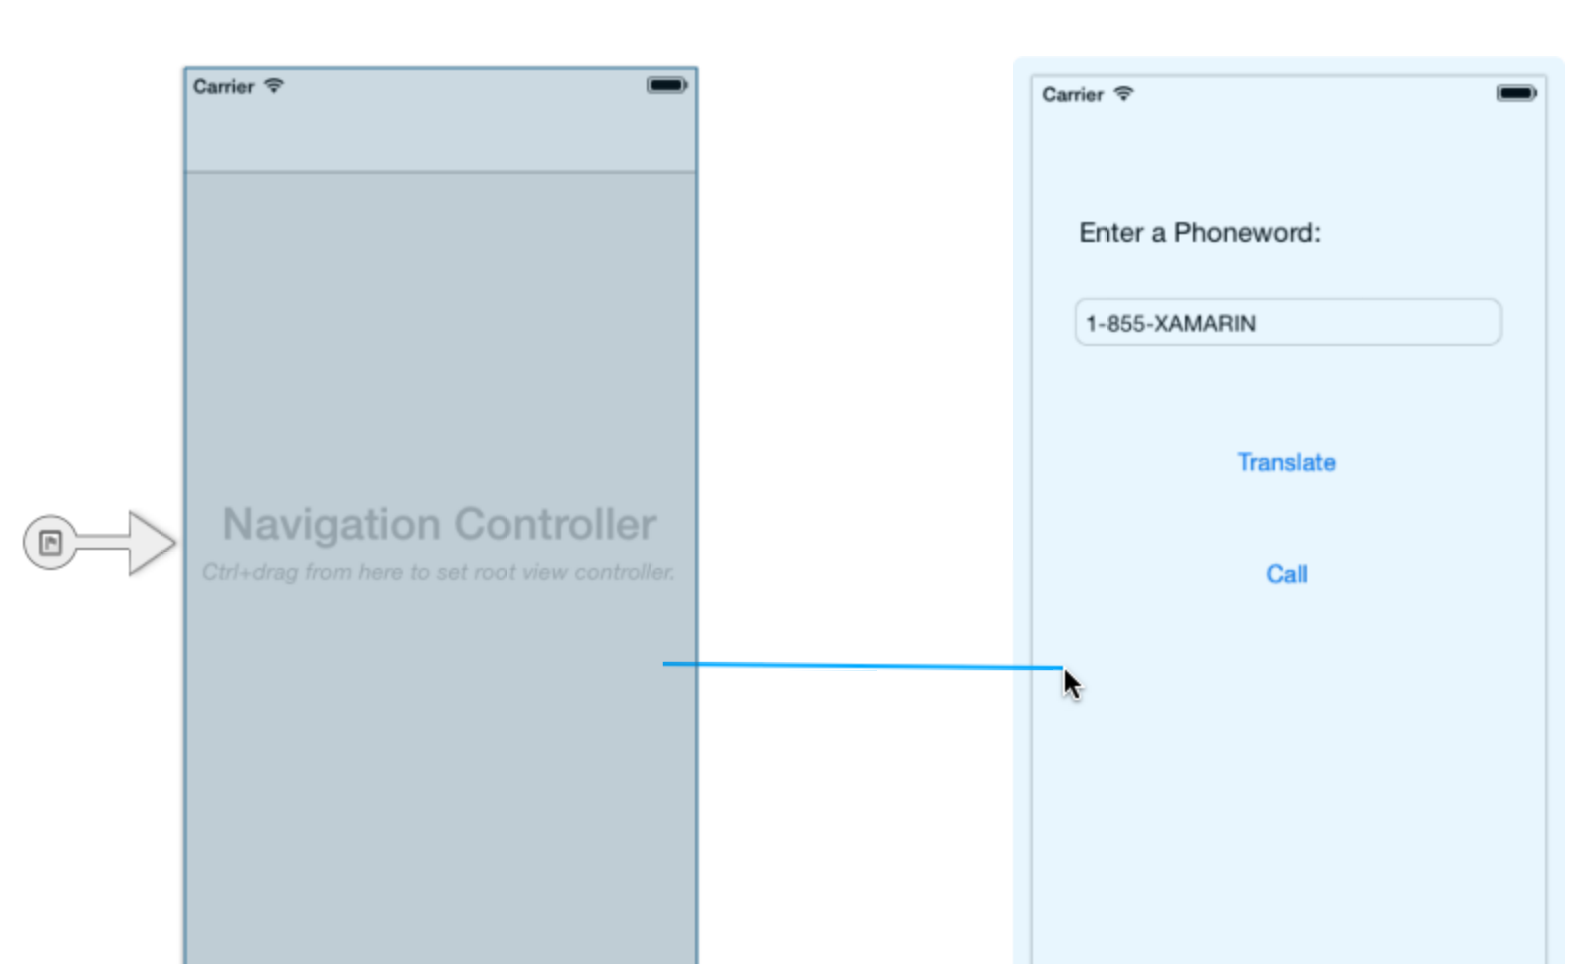
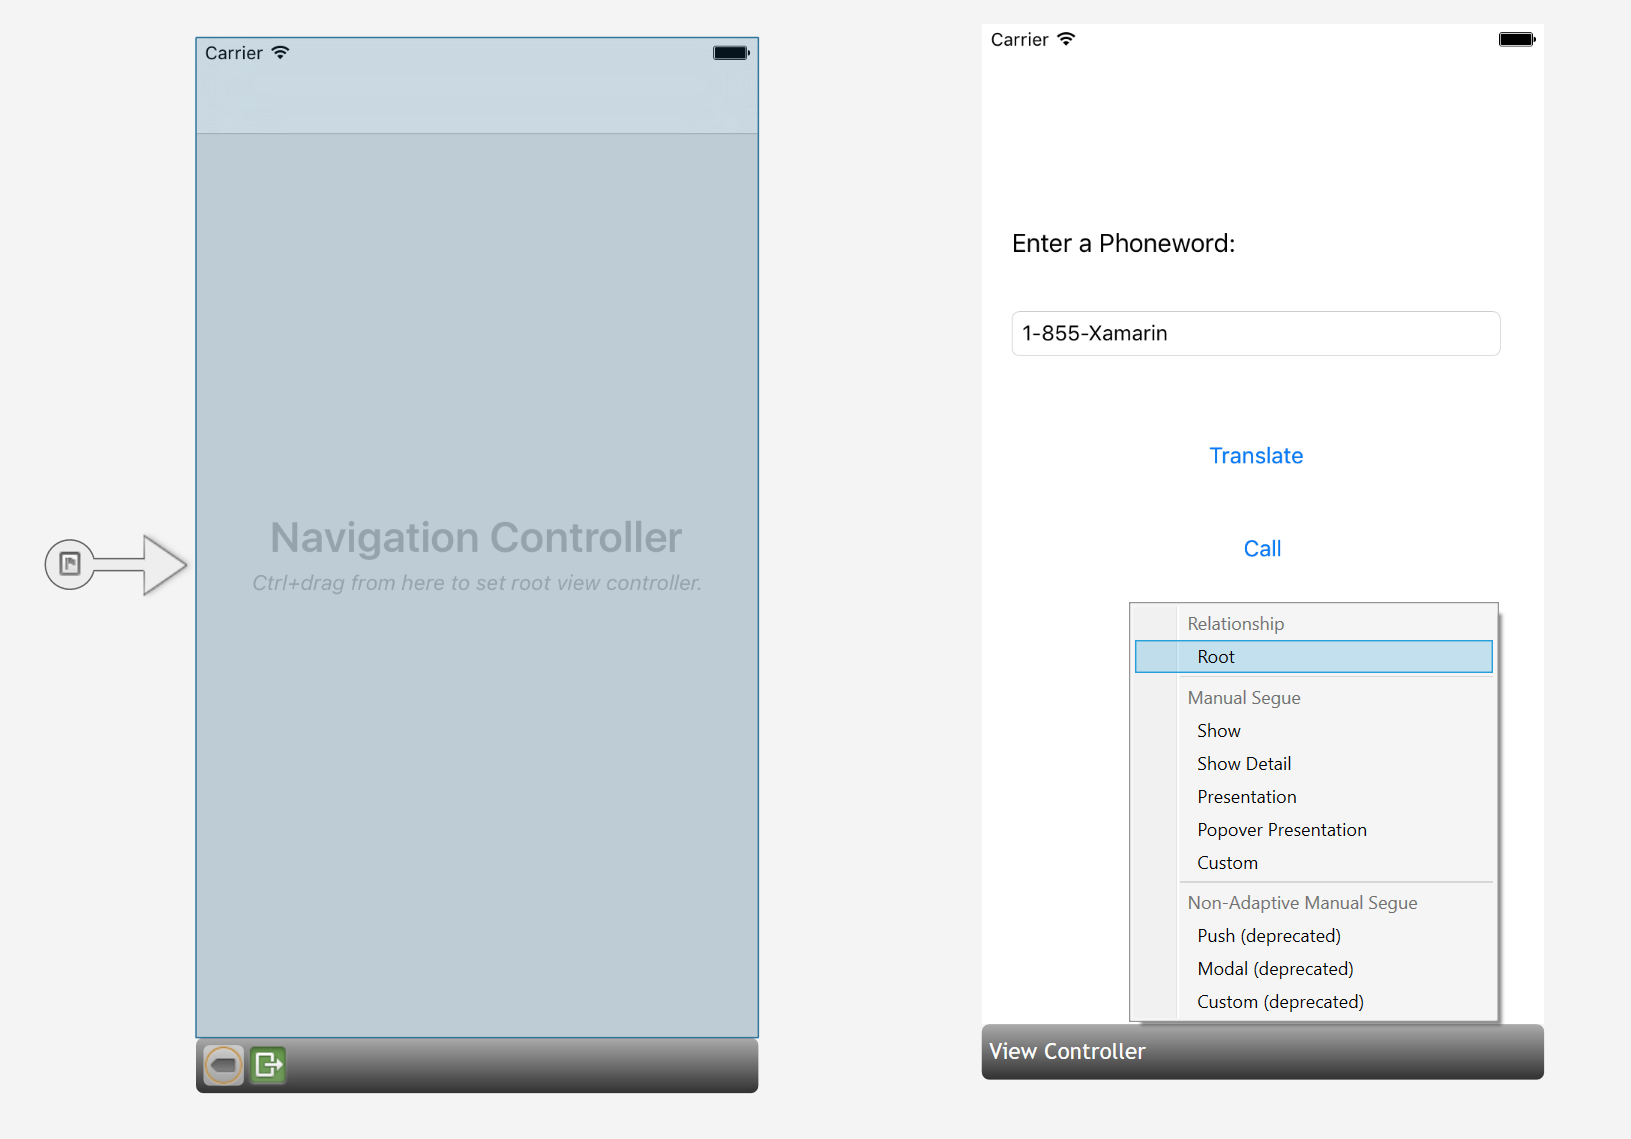
ソースレス セグエ (1 つのビュー コントローラーの左側にある灰色の矢印) をナビゲーション コントローラーにドラッグし、アプリケーションの開始点を変更します。
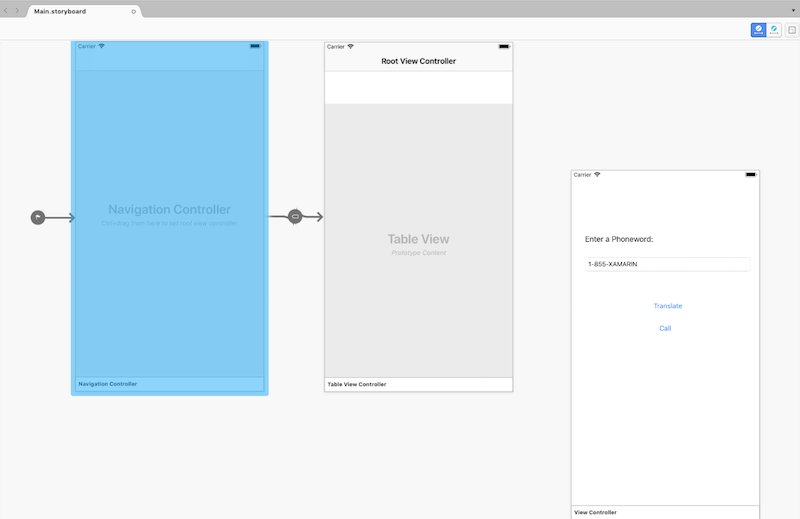
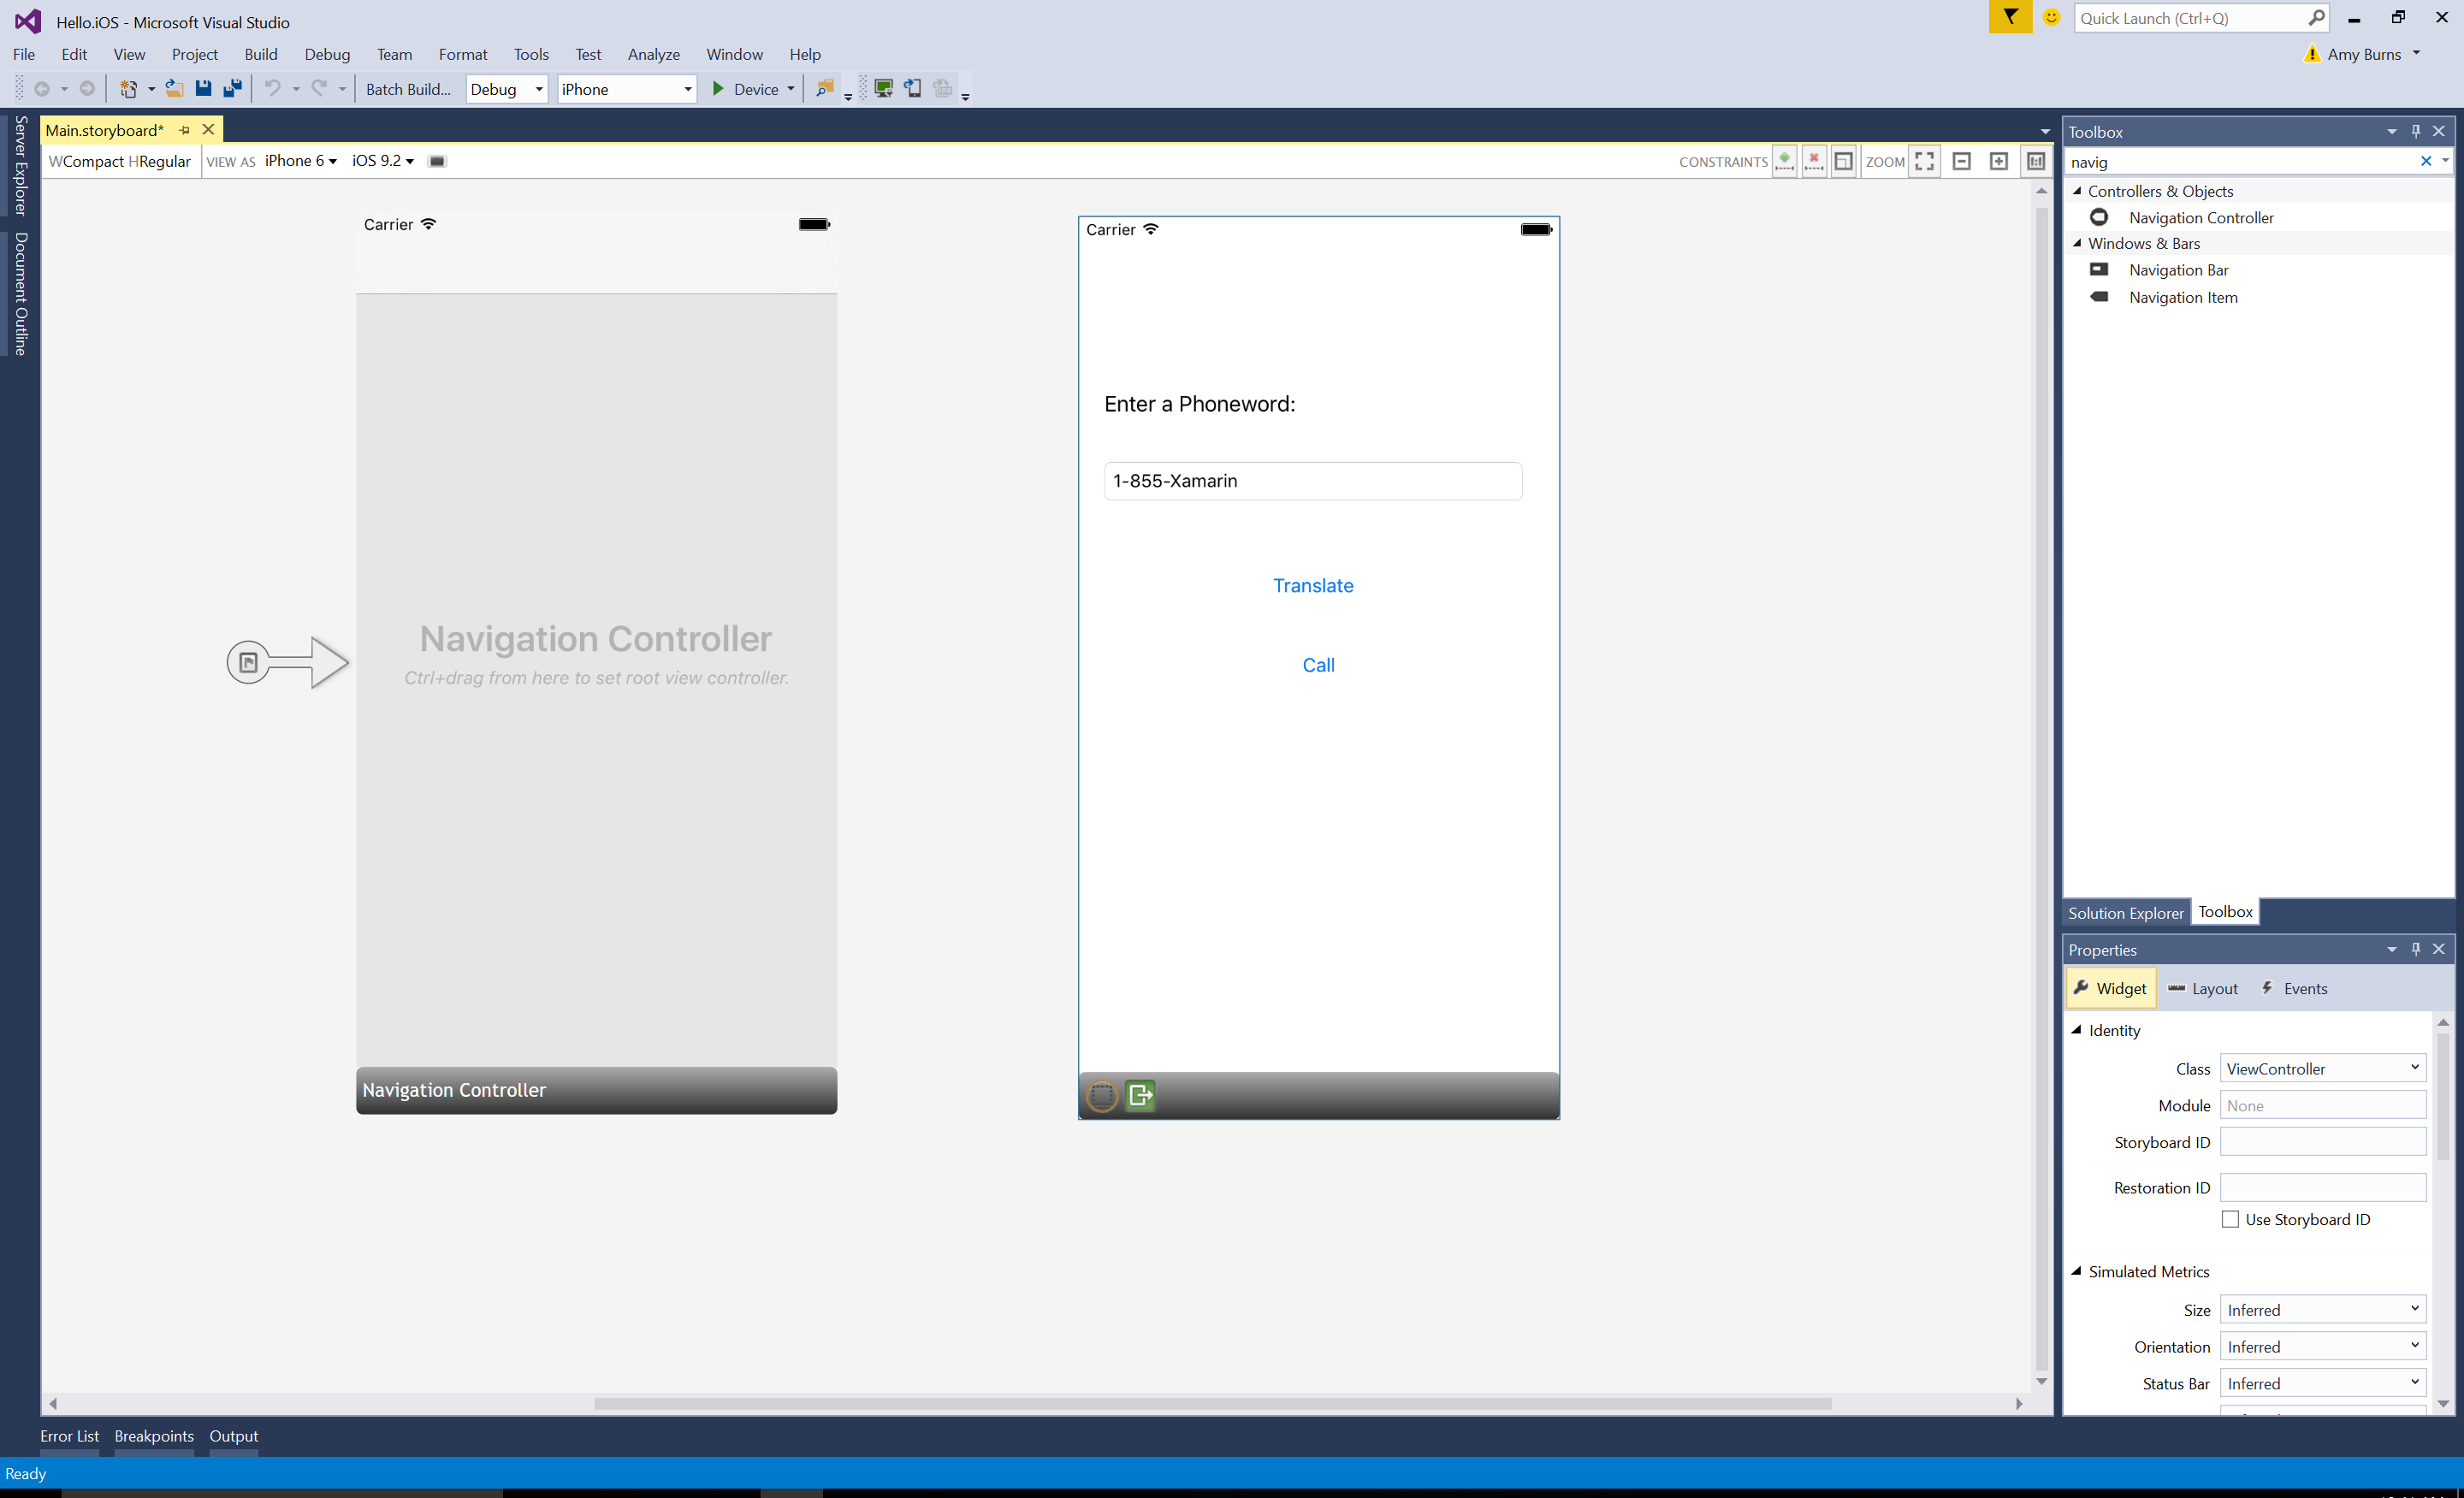
下部にあるバーをクリックして既存の [ルート ビュー コントローラー] を選択し、Delete キーを押してデザイン サーフェイスから削除します。 次に、ナビゲーション コントローラーの横に Phoneword シーンを移動します。
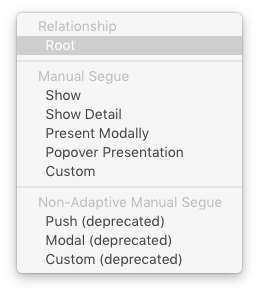
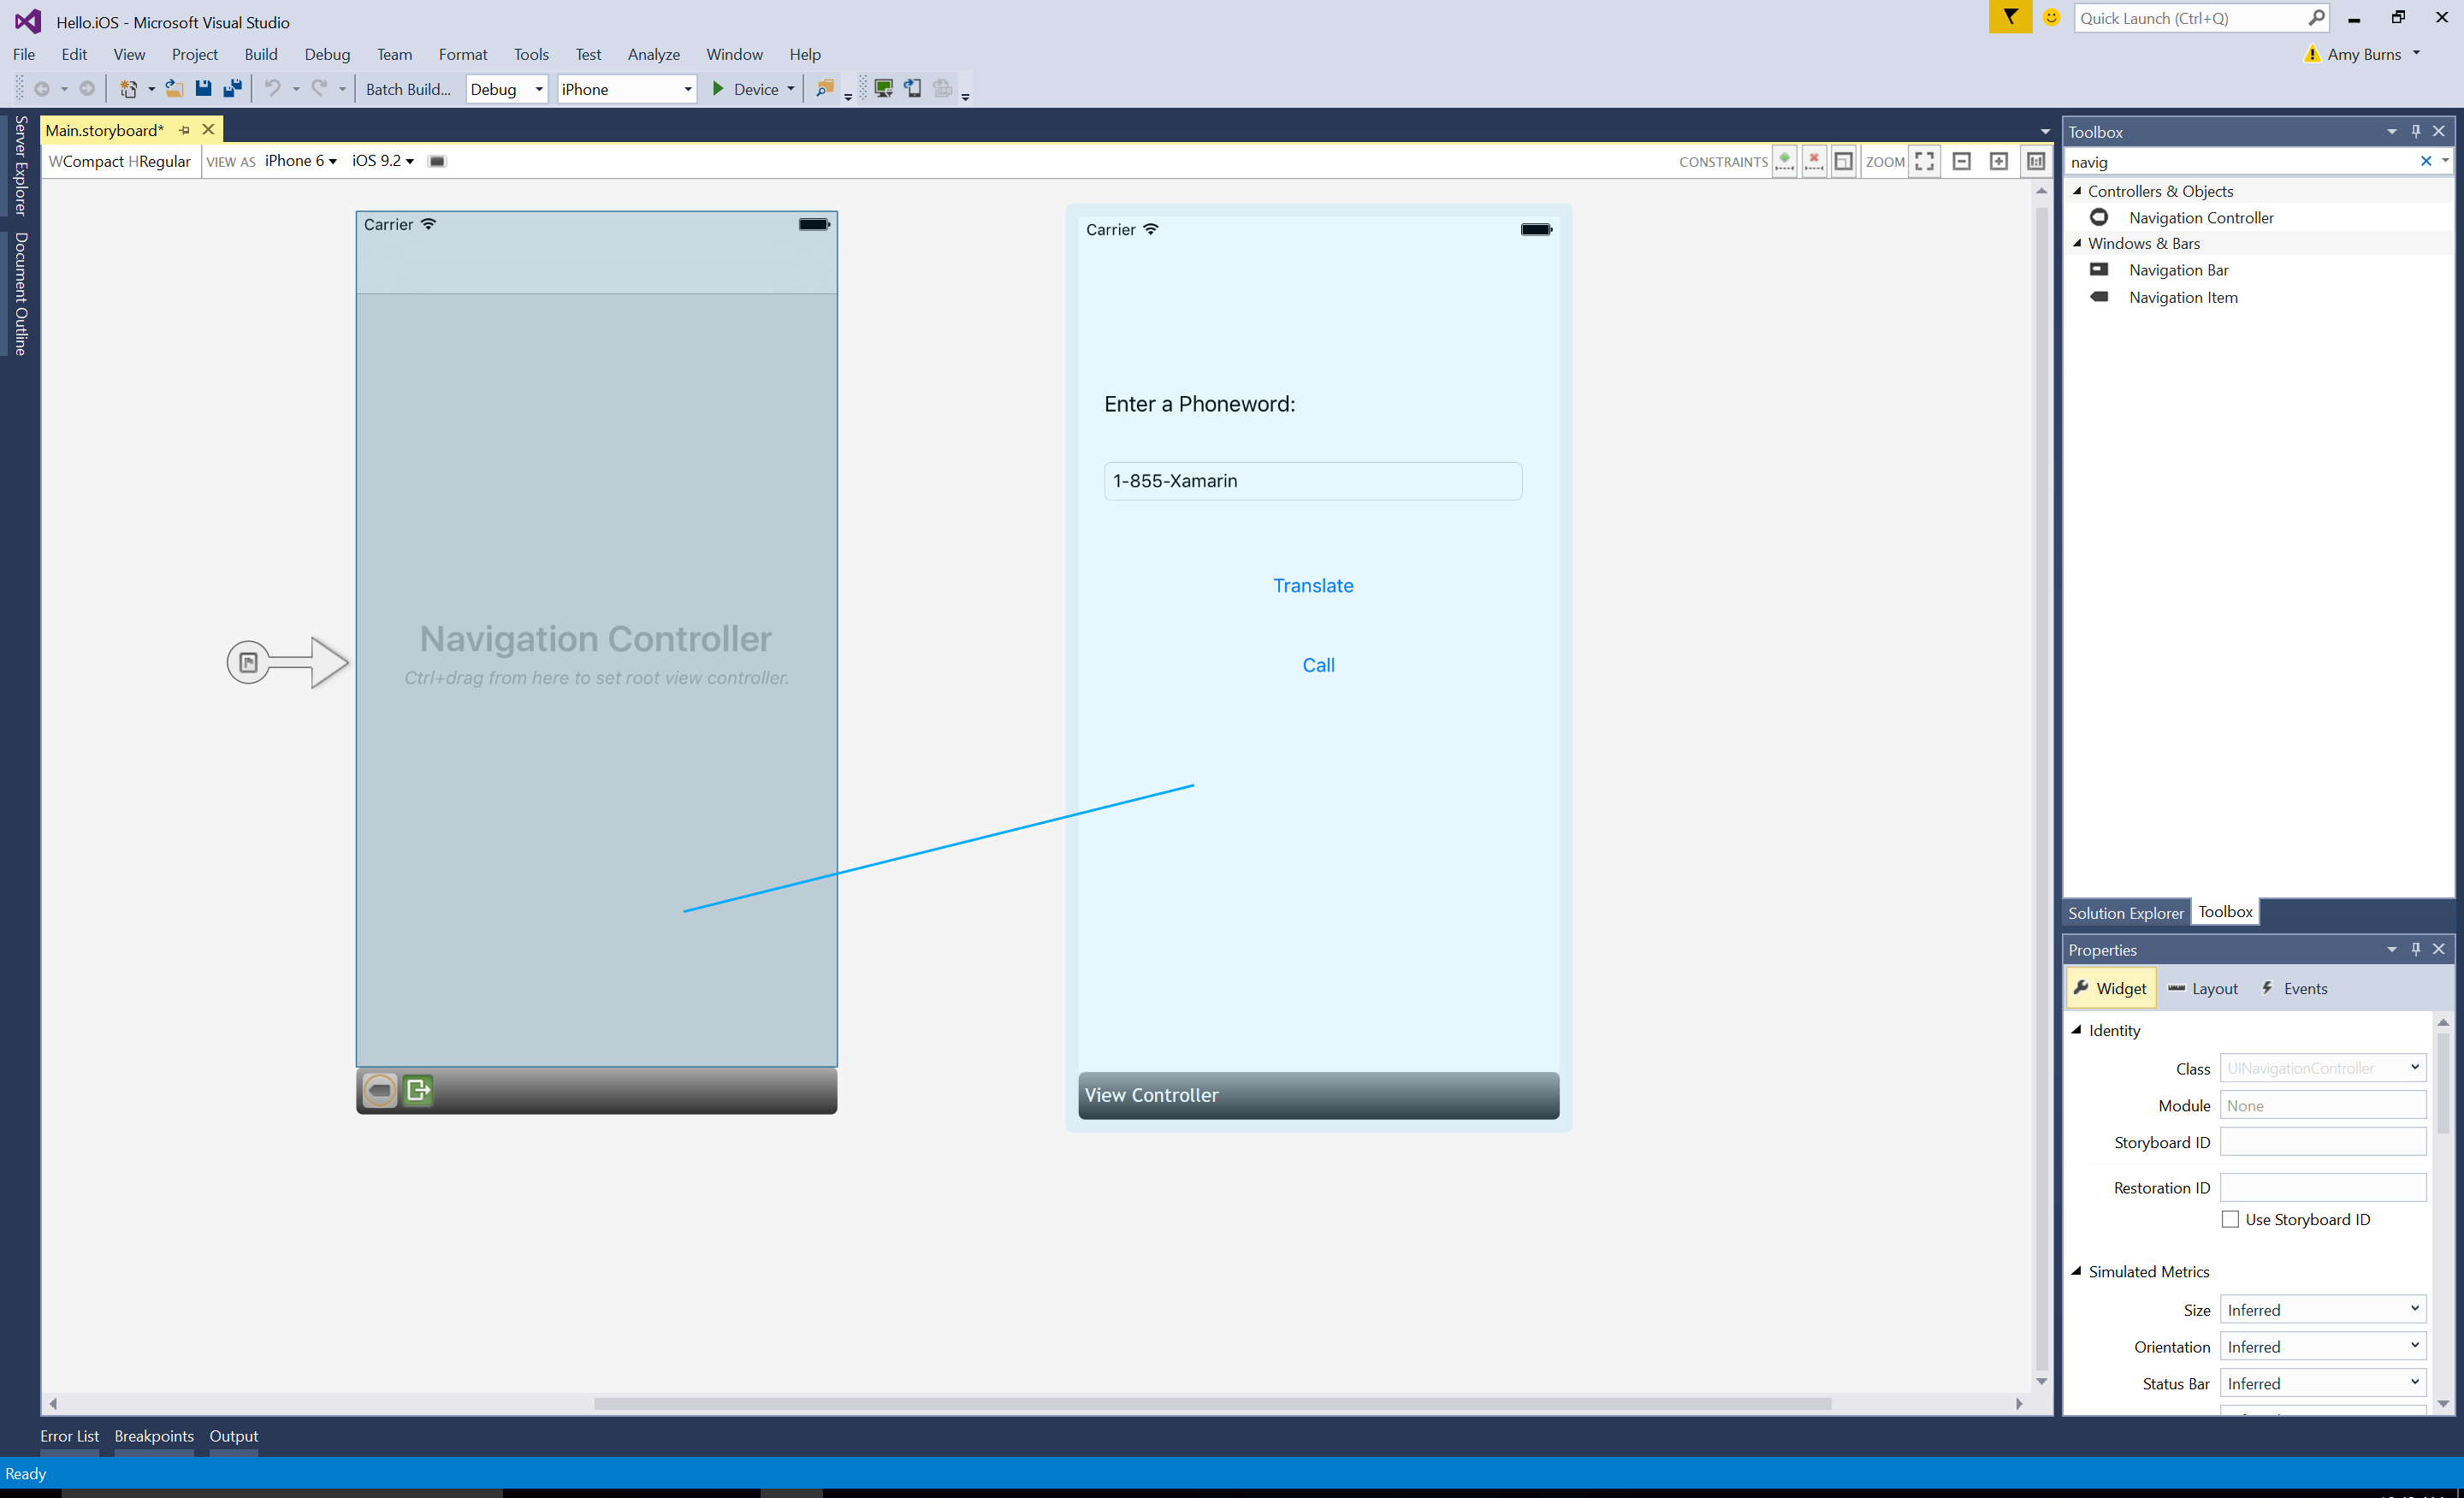
ナビゲーション コントローラーのルート ビュー コントローラーとして ViewController を設定します。 Ctrl キーを押したまま、ナビゲーション コントローラー内をクリックします。 青い線が表示されます。 次に、Ctrl キーを押したままの状態で、ナビゲーション コントローラーから Phoneword シーンまでドラッグして離します。 これを Ctrl-ドラッグといいます。
ポップオーバーから、関係を [ルート] に設定します。
これで、ViewController がナビゲーション コントローラーのルート ビュー コントローラーになりました。

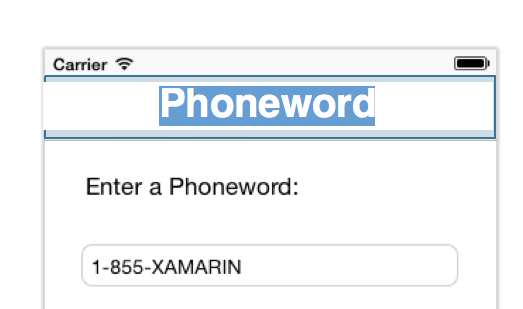
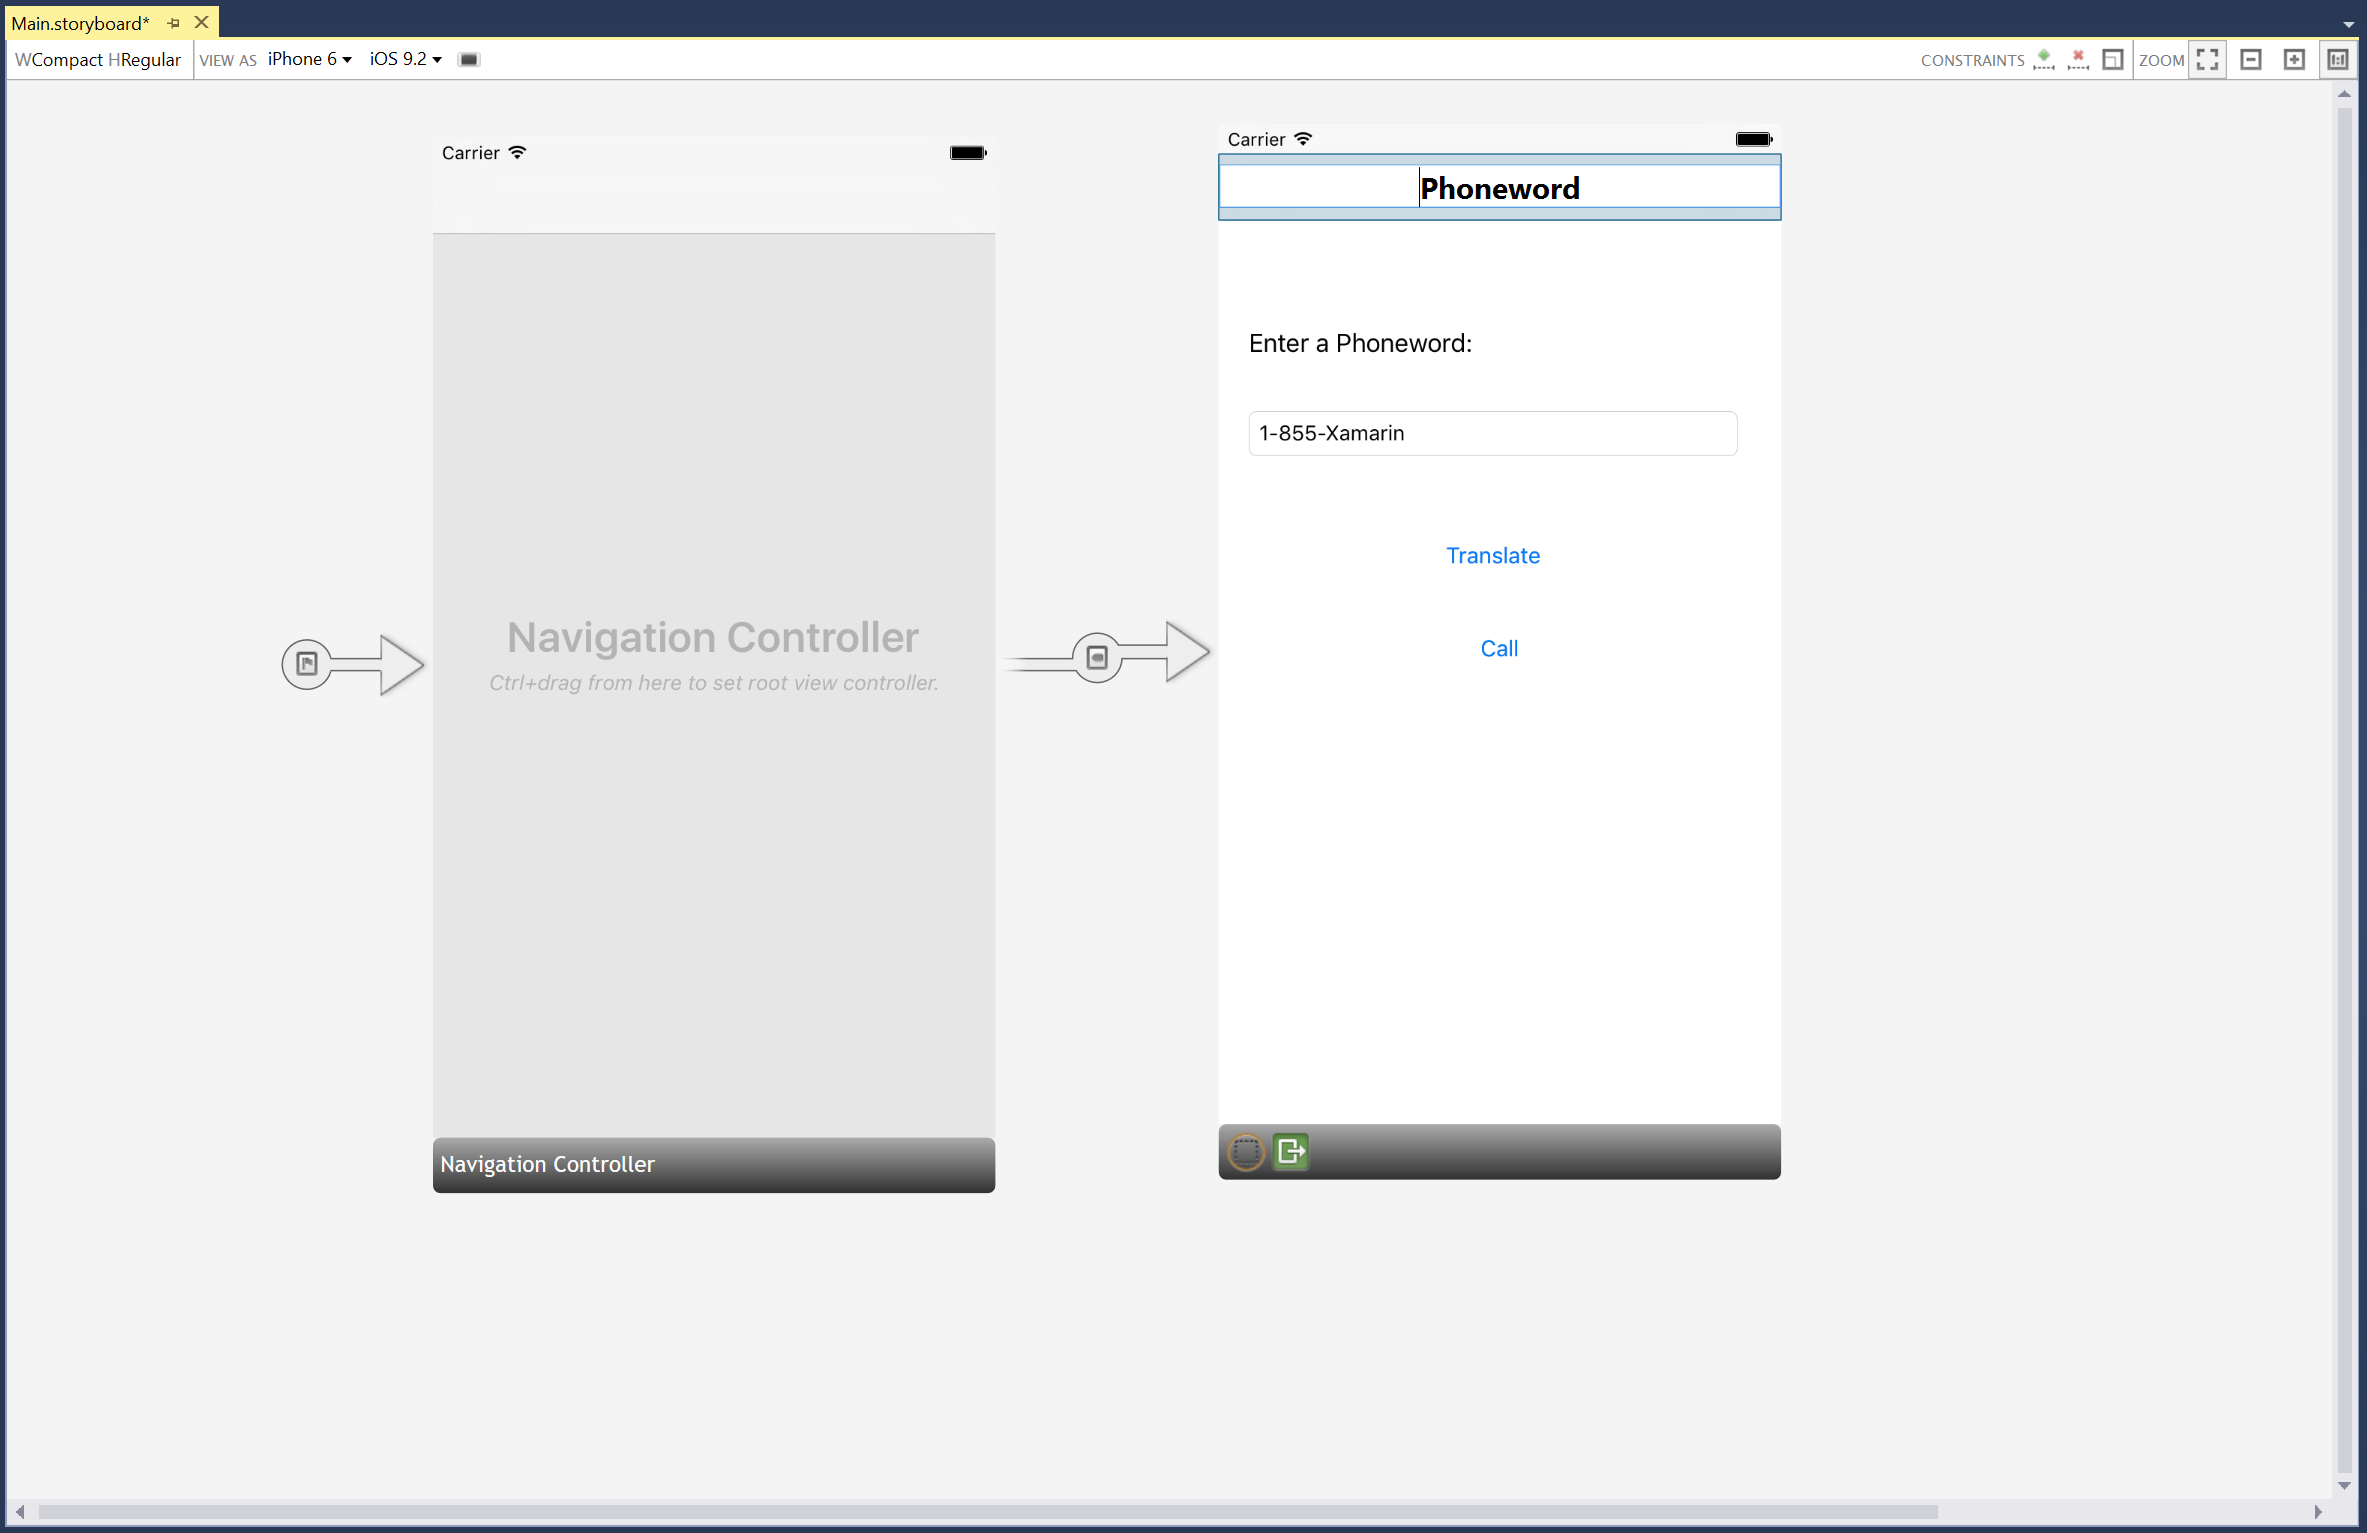
Phoneword 画面のタイトル バーをダブルクリックして、タイトルを Phoneword に変更します。
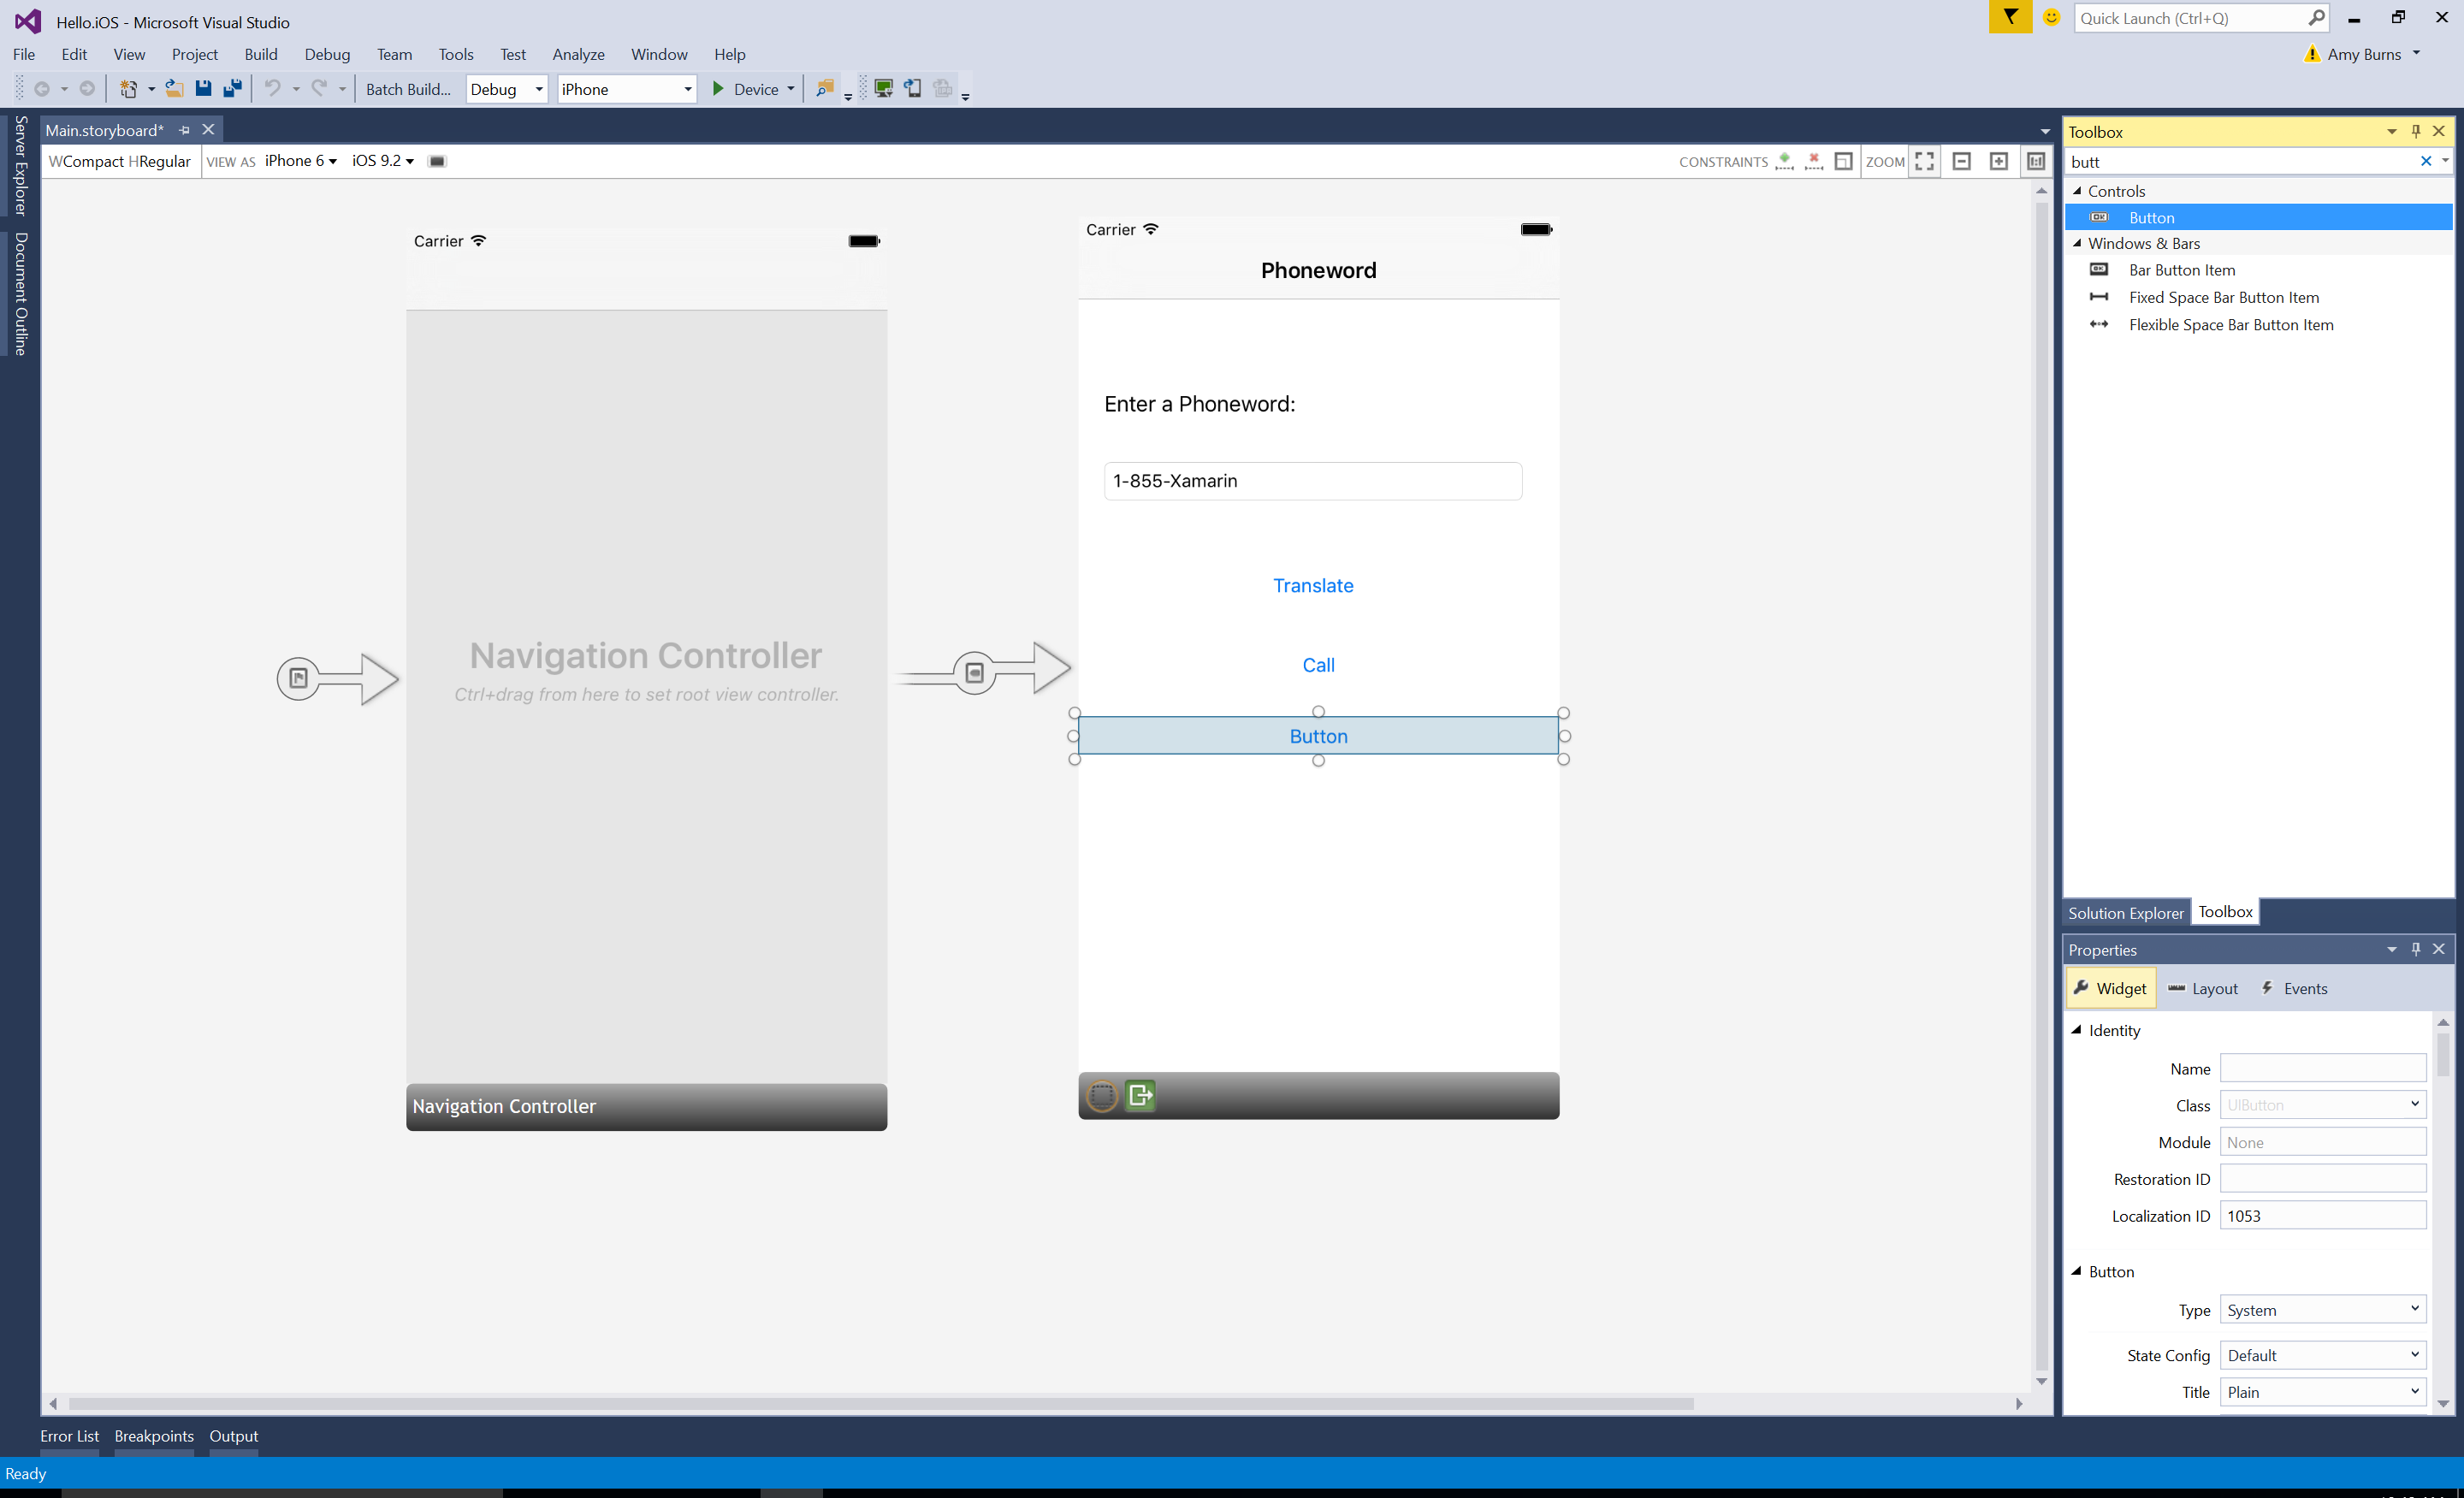
[ツールボックス] からボタンをドラッグして、通話ボタンの下に配置します。 ハンドルをドラッグして、新しいボタンを通話ボタンと同じ幅にします。
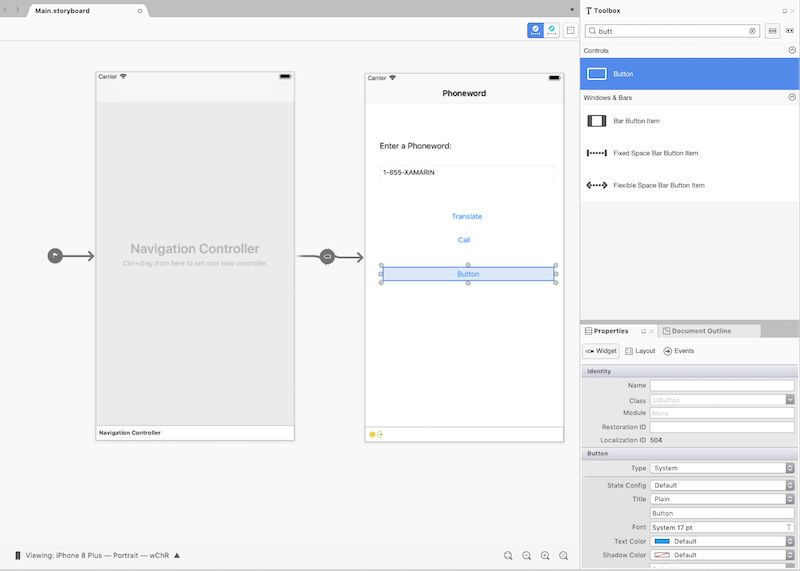
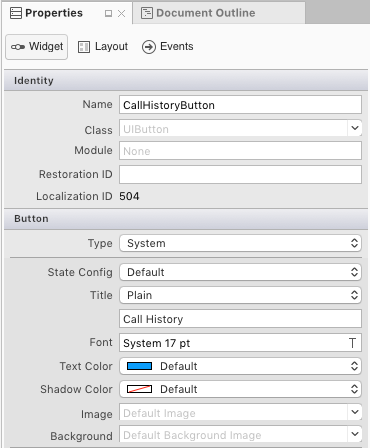
Properties Pad で、ボタンの [名前] を CallHistoryButton に変更し、[タイトル] を通話履歴に変更します。
通話履歴画面を作成します。 [ツールボックス]から、テーブル ビュー コントローラーをデザイン サーフェイスにドラッグします。
次に、シーンの下部にある黒いバーをクリックして、テーブル ビュー コントローラーを選択します。 Properties Pad で、テーブル ビュー コントローラーのクラスを
CallHistoryControllerに変更し、Enter キーを押します。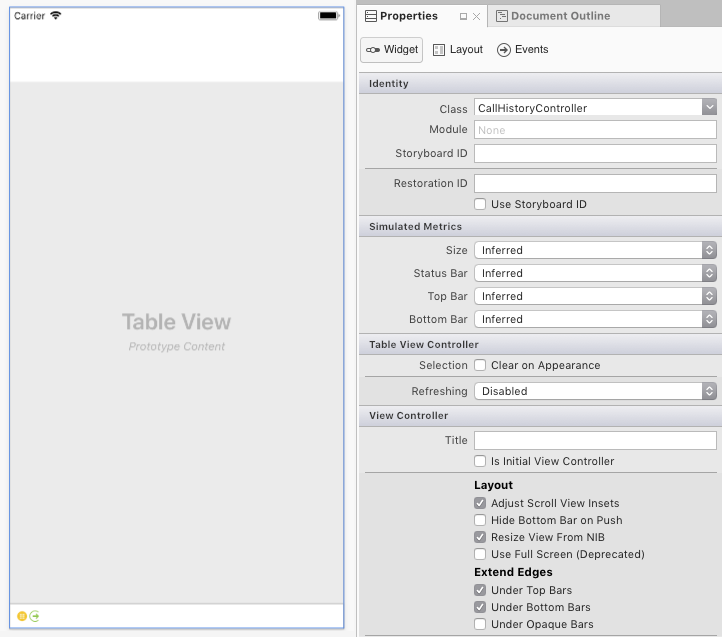
iOS Designer は、
CallHistoryControllerというカスタム バッキング クラスを生成して、この画面のコンテンツ ビュー階層を管理します。 CallHistoryController.cs ファイルが Solution Pad に表示されます。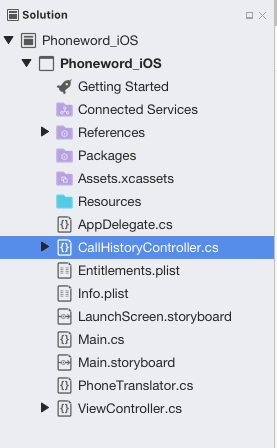
CallHistoryController.cs ファイルをダブルクリックして開き、その内容を以下のコードに置き換えます。
using System;
using Foundation;
using UIKit;
using System.Collections.Generic;

namespace Phoneword_iOS
{
    public partial class CallHistoryController : UITableViewController
    {
        public List<string> PhoneNumbers { get; set; }

        static NSString callHistoryCellId = new NSString ("CallHistoryCell");

        public CallHistoryController (IntPtr handle) : base (handle)
        {
            TableView.RegisterClassForCellReuse (typeof(UITableViewCell), callHistoryCellId);
            TableView.Source = new CallHistoryDataSource (this);
            PhoneNumbers = new List<string> ();
        }

        class CallHistoryDataSource : UITableViewSource
        {
            CallHistoryController controller;

            public CallHistoryDataSource (CallHistoryController controller)
            {
                this.controller = controller;
            }

            public override nint RowsInSection (UITableView tableView, nint section)
            {
                return controller.PhoneNumbers.Count;
            }

            public override UITableViewCell GetCell (UITableView tableView, NSIndexPath indexPath)
            {
                var cell = tableView.DequeueReusableCell (CallHistoryController.callHistoryCellId);

                int row = indexPath.Row;
                cell.TextLabel.Text = controller.PhoneNumbers [row];
                return cell;
            }
        }
    }
}
アプリケーションを保存し (⌘ + s キーを押し)、ビルドして (⌘ + b キーを押して) エラーがないことを確認します。
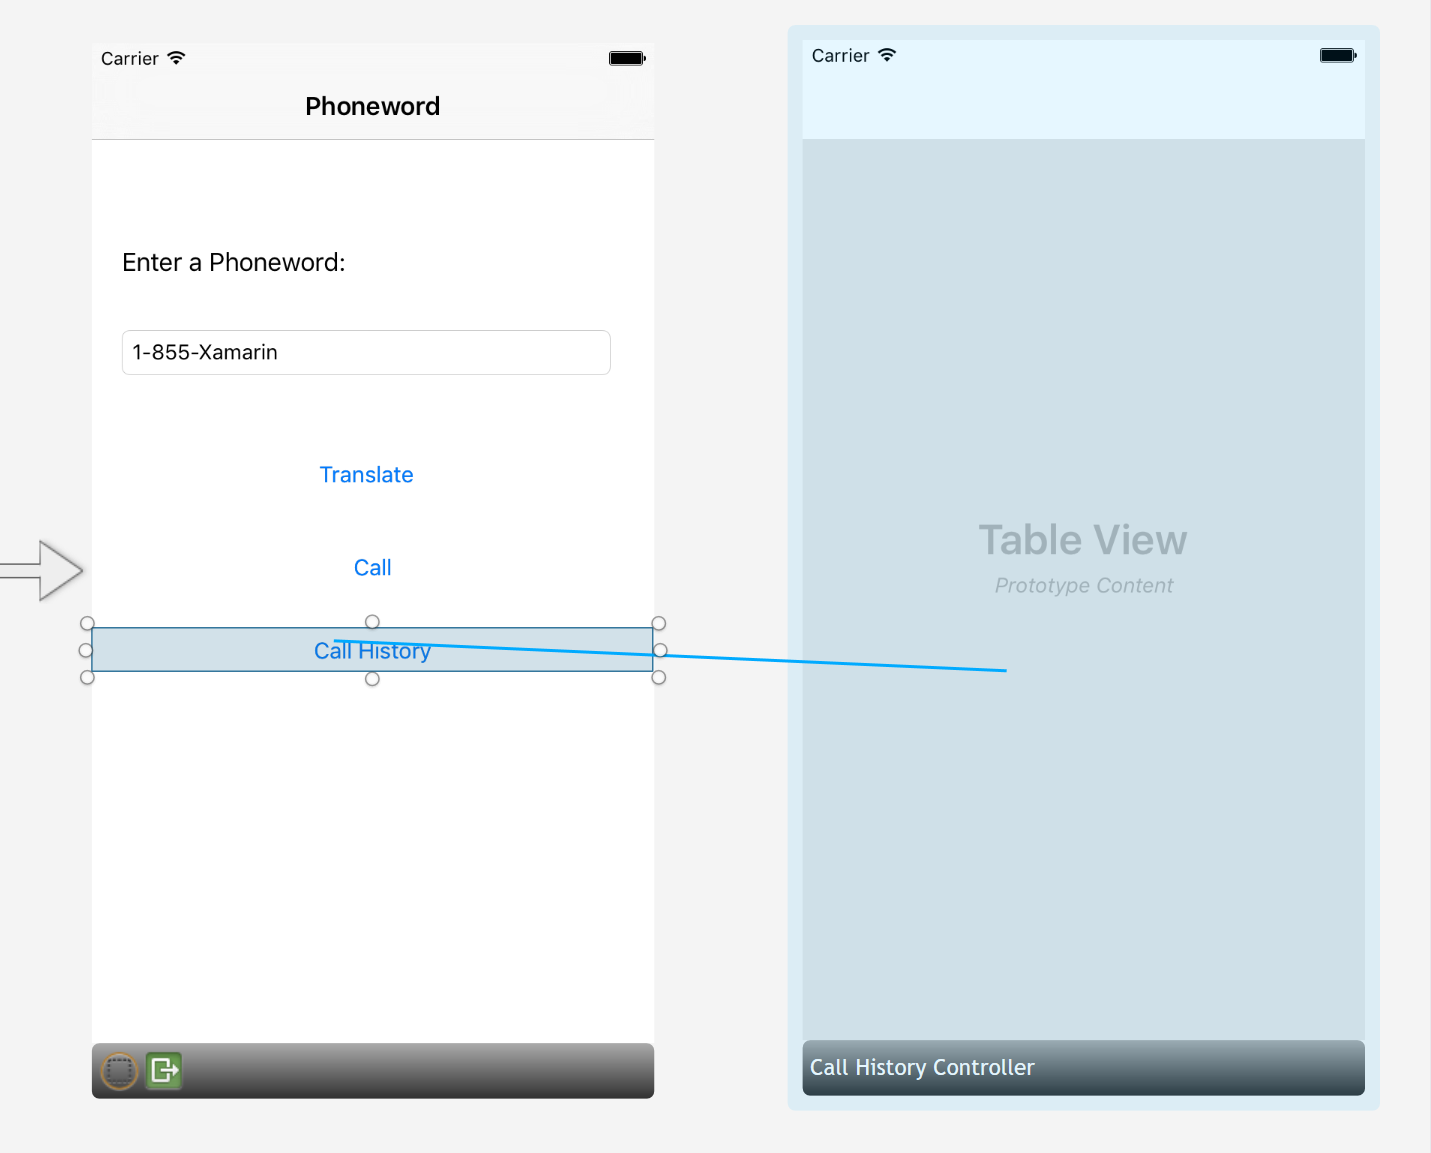
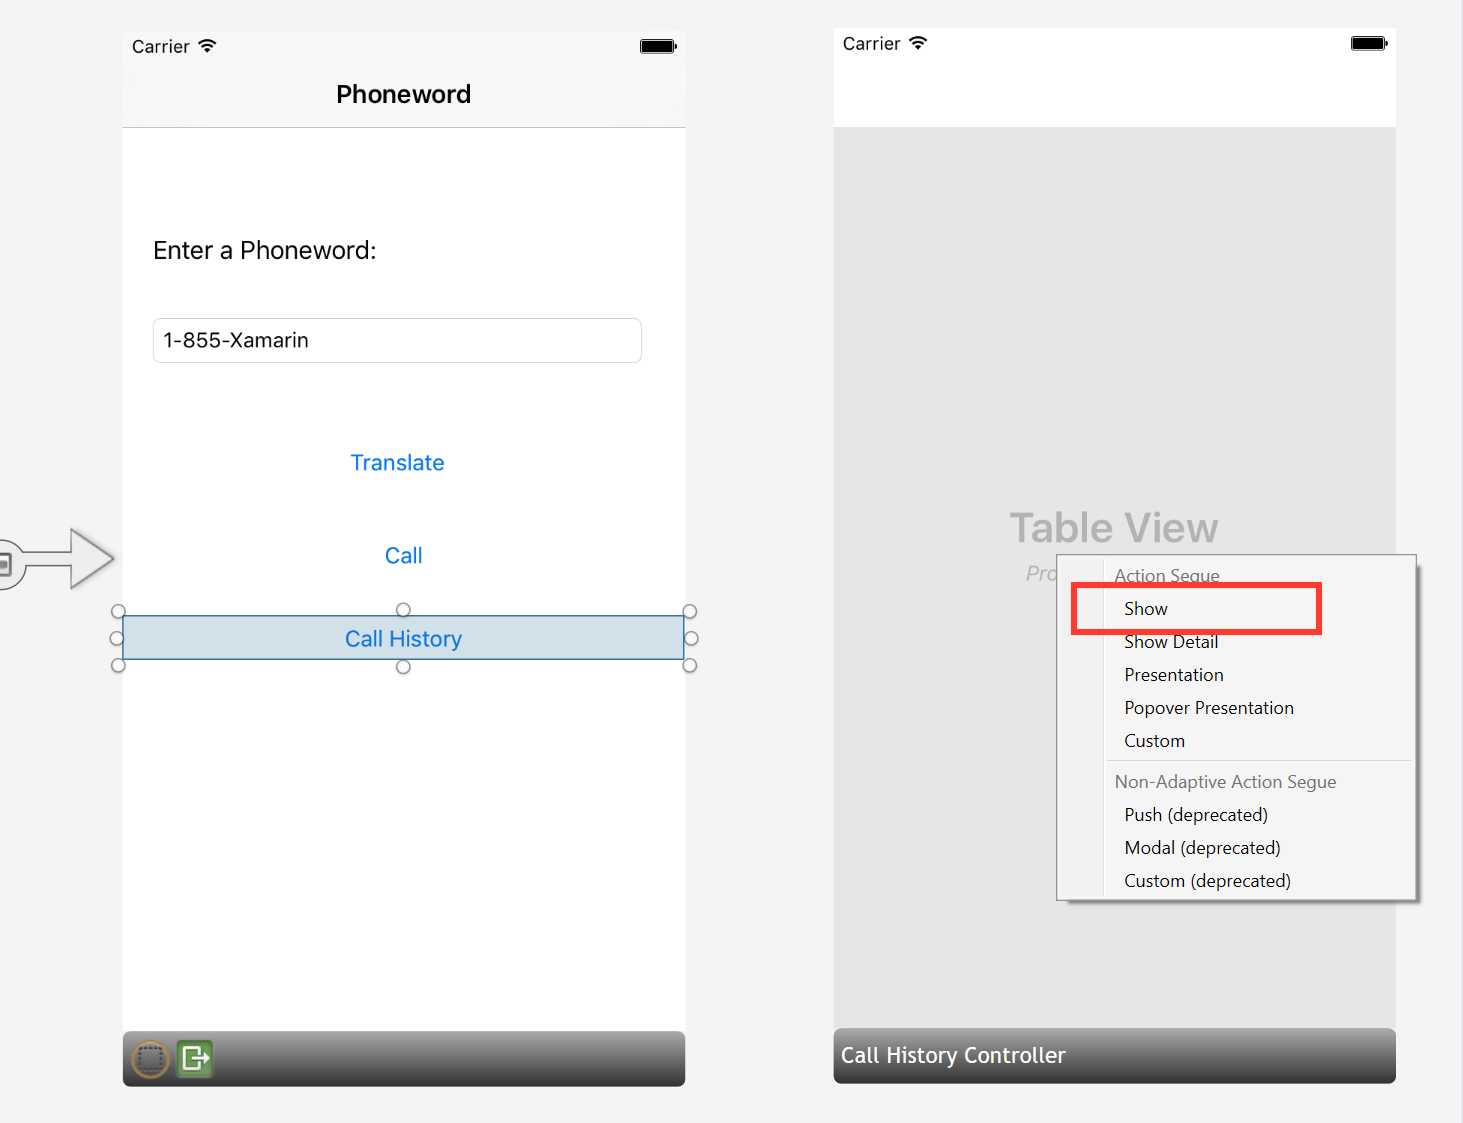
Phoneword シーンと通話履歴シーンの間にセグエ (切り替え) を作成します。 Phoneword シーンで、通話履歴ボタンを選択し、ボタンから通話履歴シーンに Ctrl キーを押しながらドラッグします。
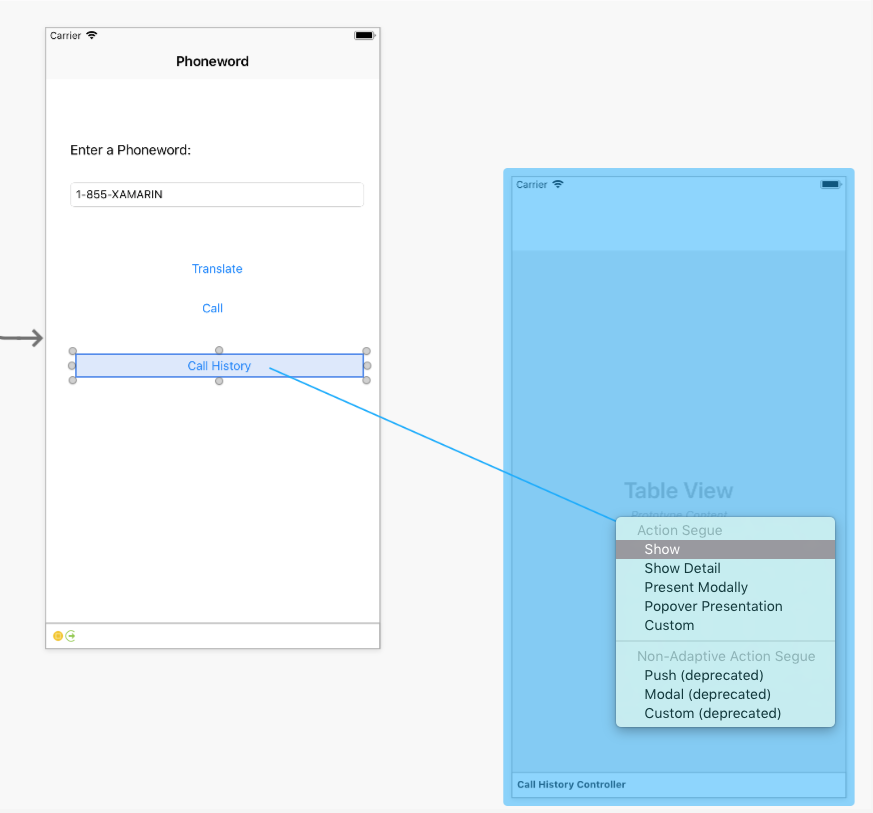
[Action Segue]\(アクション セグエ\) ポップオーバーから、[表示] を選択します
iOS Designer は次の 2 つのシーン間にセグエを追加します。

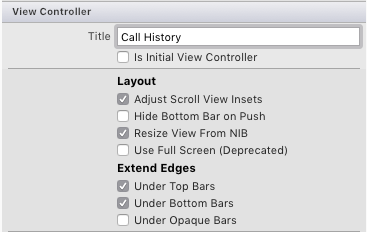
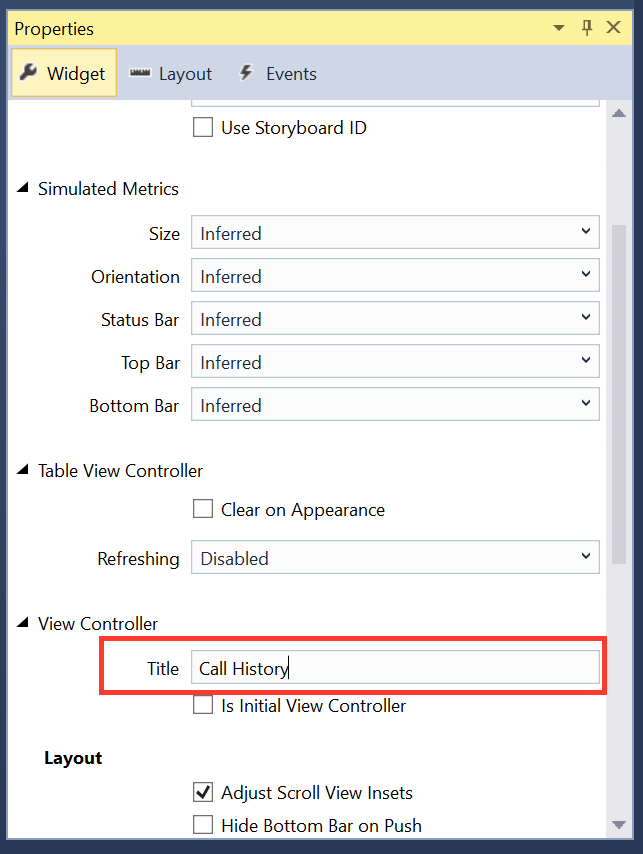
シーンの下部にある黒いバーを選択し、Properties Pad で ビュー コントローラーの [タイトル] を通話履歴に変更して、テーブル ビュー コントローラーにタイトルを追加します。
アプリケーションが実行されている場合は、通話履歴ボタンで通話履歴画面が開きますが、電話番号を追跡して表示するコードがないため、テーブル ビューは空になります。
このアプリでは、電話番号は文字列のリストとして格納されます。
ViewController の
using上部にディレクティブSystem.Collections.Genericを 追加します。using System.Collections.Generic;ViewControllerクラスを次のコードで変更します。using System; using System.Collections.Generic; using Foundation; using UIKit; namespace Phoneword_iOS { public partial class ViewController : UIViewController { string translatedNumber = ""; public List<string> PhoneNumbers { get; set; } protected ViewController(IntPtr handle) : base(handle) { //initialize list of phone numbers called for Call History screen PhoneNumbers = new List<string>(); } public override void ViewDidLoad() { base.ViewDidLoad(); // Perform any additional setup after loading the view, typically from a nib. TranslateButton.TouchUpInside += (object sender, EventArgs e) => { // Convert the phone number with text to a number // using PhoneTranslator.cs translatedNumber = PhoneTranslator.ToNumber( PhoneNumberText.Text); // Dismiss the keyboard if text field was tapped PhoneNumberText.ResignFirstResponder(); if (translatedNumber == "") { CallButton.SetTitle("Call ", UIControlState.Normal); CallButton.Enabled = false; } else { CallButton.SetTitle("Call " + translatedNumber, UIControlState.Normal); CallButton.Enabled = true; } }; CallButton.TouchUpInside += (object sender, EventArgs e) => { //Store the phone number that we're dialing in PhoneNumbers PhoneNumbers.Add(translatedNumber); // Use URL handler with tel: prefix to invoke Apple's Phone app... var url = new NSUrl("tel:" + translatedNumber); // otherwise show an alert dialog if (!UIApplication.SharedApplication.OpenUrl(url)) { var alert = UIAlertController.Create("Not supported", "Scheme 'tel:' is not supported on this device", UIAlertControllerStyle.Alert); alert.AddAction(UIAlertAction.Create("Ok", UIAlertActionStyle.Default, null)); PresentViewController(alert, true, null); } }; } public override void PrepareForSegue(UIStoryboardSegue segue, NSObject sender) { base.PrepareForSegue(segue, sender); // set the view controller that’s powering the screen we’re // transitioning to var callHistoryController = segue.DestinationViewController as CallHistoryController; //set the table view controller’s list of phone numbers to the // list of dialed phone numbers if (callHistoryController != null) { callHistoryController.PhoneNumbers = PhoneNumbers; } } } }ここではいくつかの処理が行われます。
- 変数
translatedNumberがViewDidLoadメソッドからクラス レベルの変数に移動されています。 PhoneNumbers.Add(translatedNumber)を呼び出して電話番号リストにダイヤル番号を追加するように CallButton コードが変更されています。PrepareForSegueメソッドが追加されています。
アプリケーションを保存してビルドし、エラーがないことを確認します。
- 変数
[開始] ボタンを押して、iOS シミュレーター内でアプリケーションを起動します。
おつかれさまでした。これで最初のマルチスクリーン Xamarin.iOS アプリケーションが完成しました。
Windows でのチュートリアル
このチュートリアルでは、Phoneword アプリケーションに通話履歴画面を追加します。
Visual Studio で Phoneword アプリケーションを開きます。 必要に応じて、Hello, iOS チュートリアル ガイドから完成した Phoneword アプリケーションをダウンロードします。 iOS Designer、および iOS シミュレーターを使用するには Mac に接続する必要があることを思い出してください。
ユーザー インターフェイスの編集を開始します。 [表示方法] が iPhone 6 に設定されていることを確認して、ソリューション エクスプローラーから Main.storyboard ファイルを開きます。
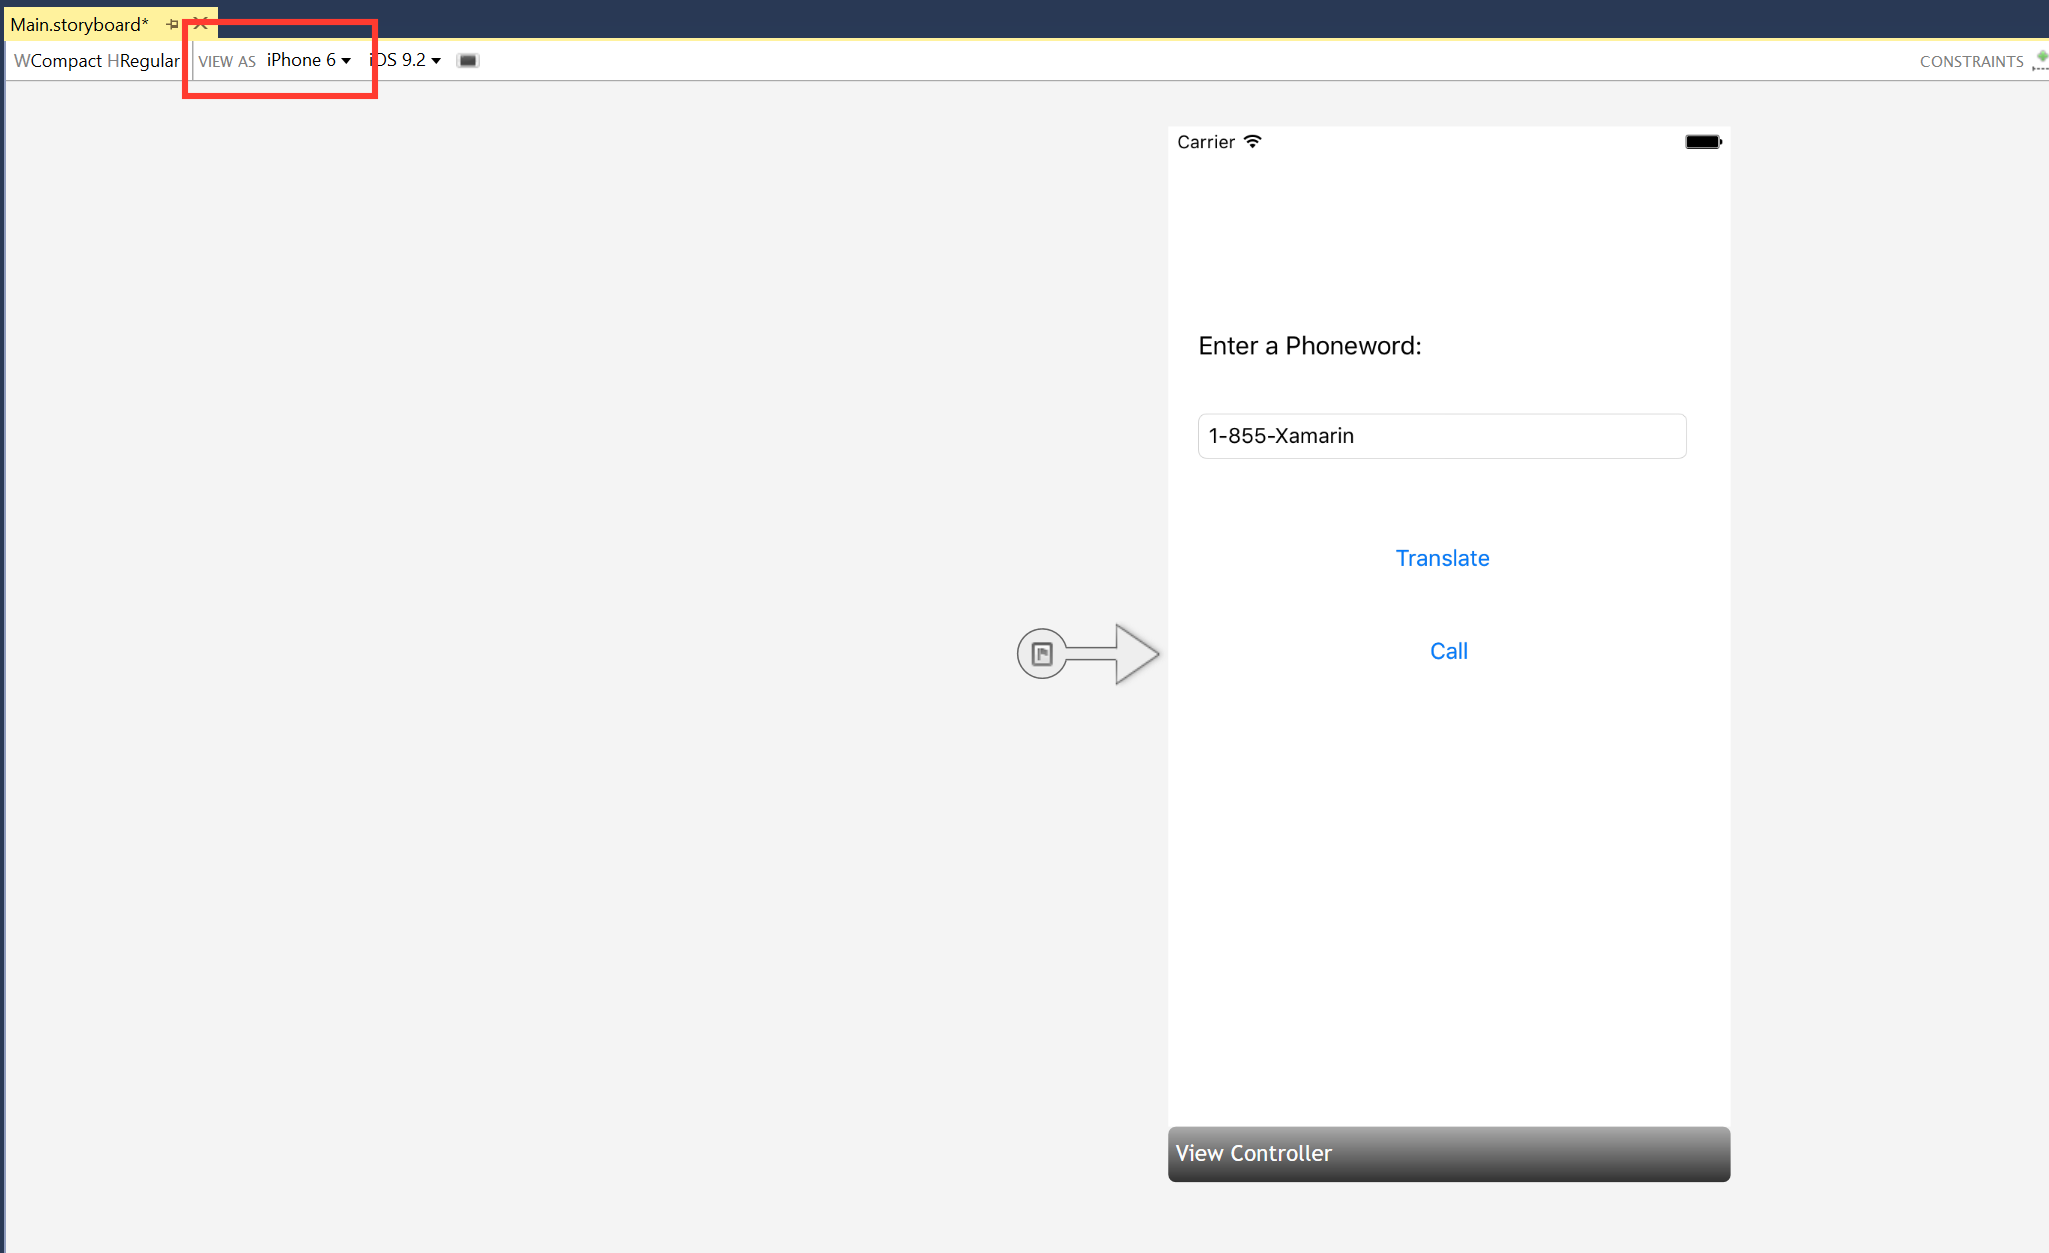
[ツールボックス] からデザイン サーフェイスにナビゲーション コントローラーをドラッグします。
Phoneword シーンからナビゲーション コントローラーにソースレス セグエ (Phoneword シーンの左側にある灰色の矢印) をドラッグし、アプリケーションの開始点を変更します。
黒いバーをクリックして [ルート ビュー コントローラー] を選択し、Delete キーを押してデザイン サーフェイスから削除します。 次に、ナビゲーション コントローラーの横に Phoneword シーンを移動します。
ナビゲーション コントローラーのルート ビュー コントローラーとして ViewController を設定します。 Ctrl キーを押し、ナビゲーション コントローラー内をクリックします。 青い線が表示されます。 次に、Ctrl キーを押したままの状態で、ナビゲーション コントローラーから Phoneword シーンまでドラッグして離します。 これを Ctrl-ドラッグといいます。
ポップオーバーから、関係を [ルート] に設定します。
これで、ViewController がナビゲーション コントローラーのルート ビュー コントローラーになりました。
Phoneword 画面のタイトル バーをダブルクリックして、タイトルを Phoneword に変更します。
[ツールボックス] からボタンをドラッグして、通話ボタンの下に配置します。 ハンドルをドラッグして、新しいボタンを通話ボタンと同じ幅にします。
プロパティ エクスプローラーで、ボタンの名前を
CallHistoryButtonに変更し、タイトルを通話履歴に変更します。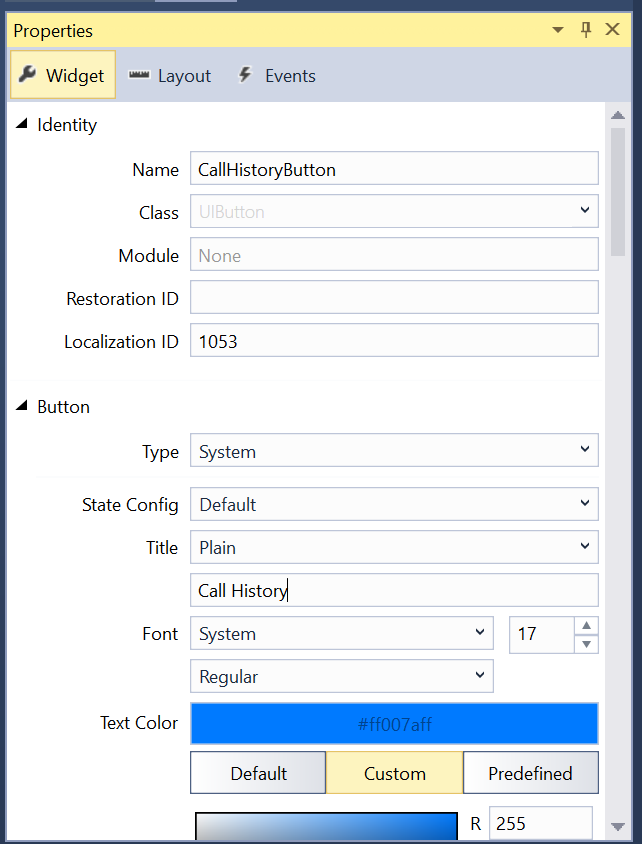
通話履歴画面を作成します。 [ツールボックス]から、テーブル ビュー コントローラーをデザイン サーフェイスにドラッグします。

シーンの下部にある黒いバーをクリックして、テーブル ビュー コントローラーを選択します。 プロパティ エクスプローラーで、テーブル ビュー コントローラーのクラスを
CallHistoryControllerに変更して Enter キーを押します。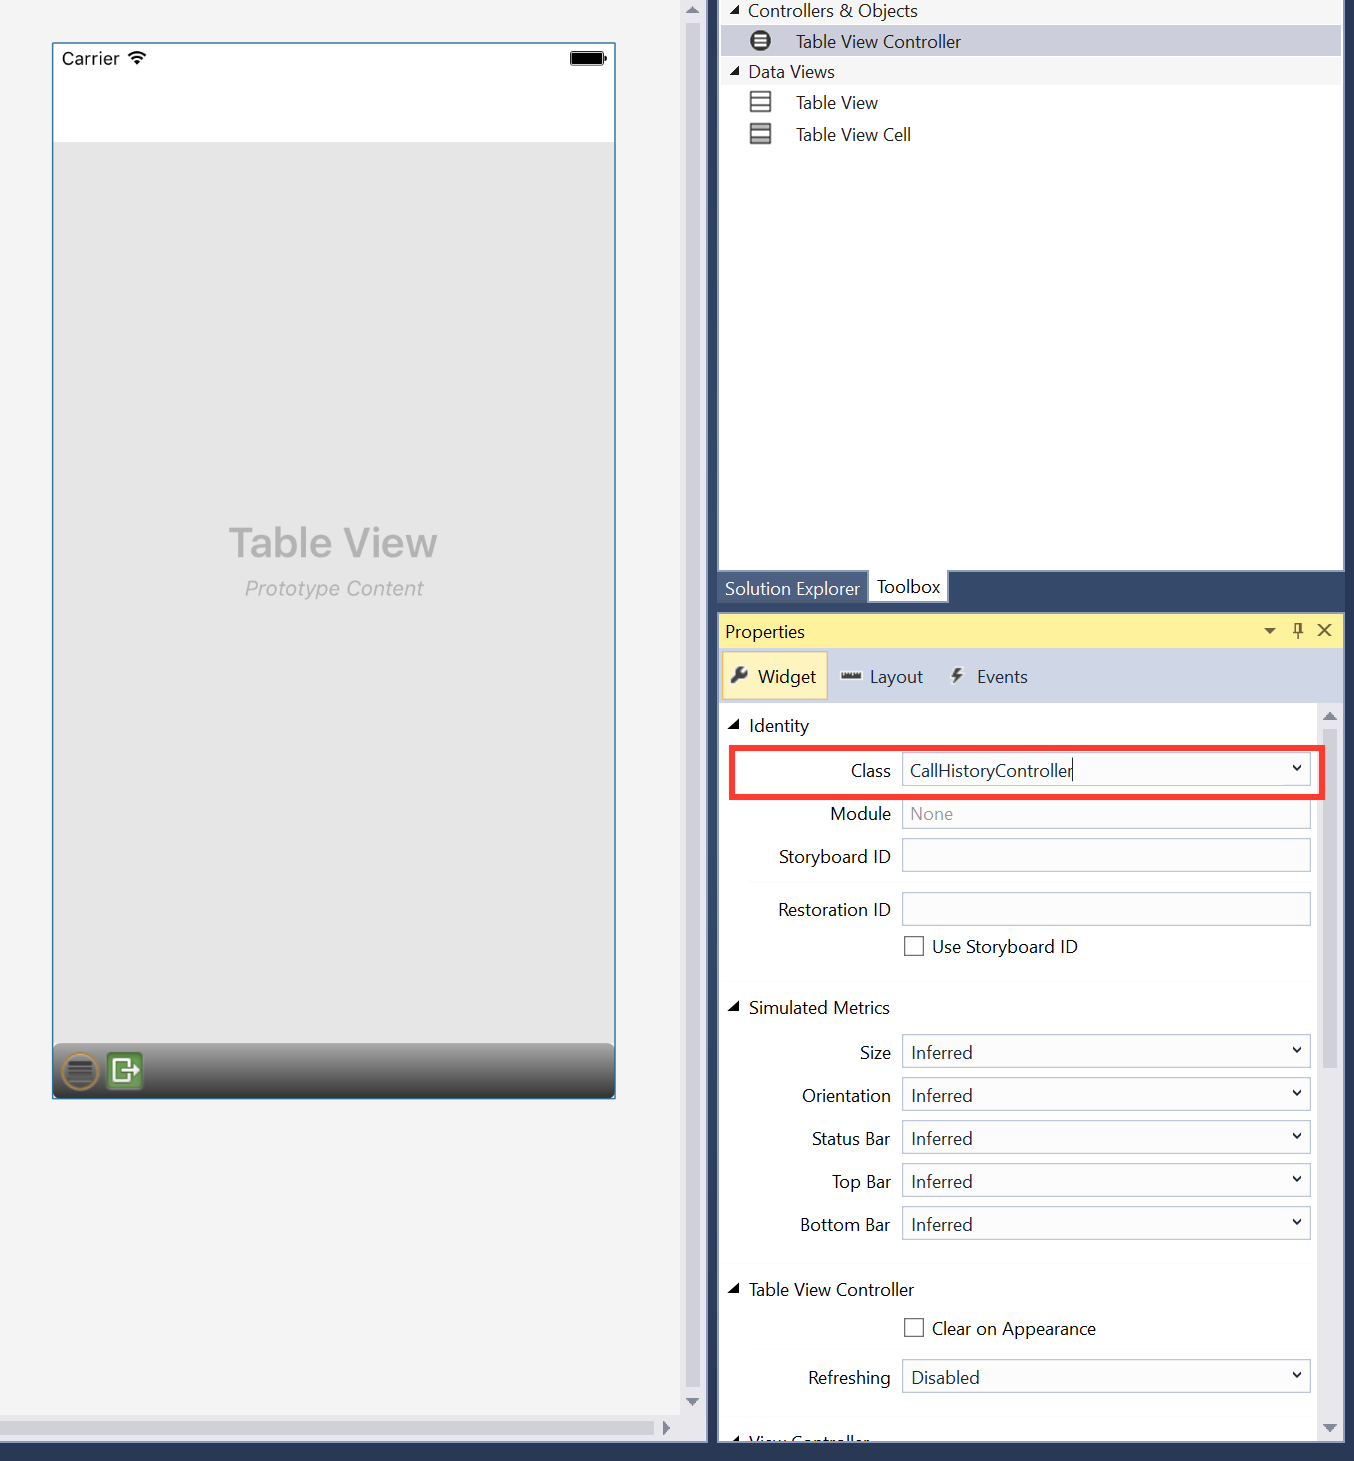
iOS Designer は、
CallHistoryControllerというカスタム バッキング クラスを生成して、この画面のコンテンツ ビュー階層を管理します。 CallHistoryController.cs ファイルがソリューション エクスプローラーに表示されます。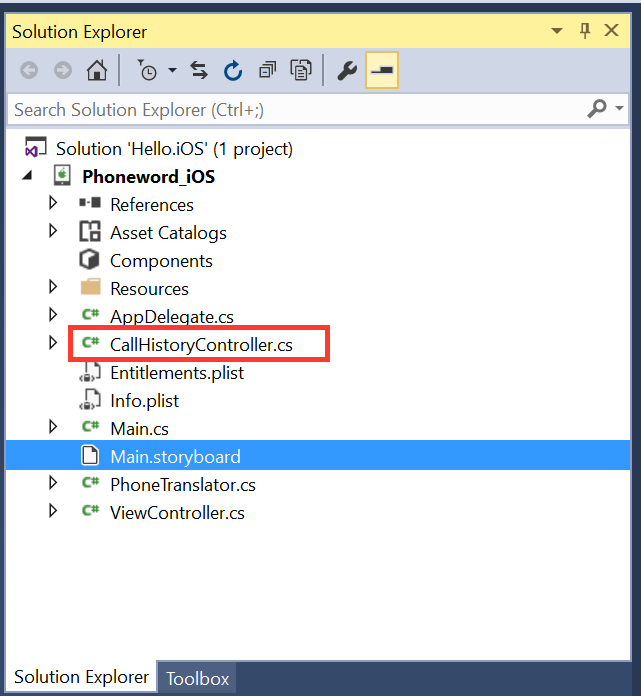
CallHistoryController.cs ファイルをダブルクリックして開き、その内容を以下のコードに置き換えます。
using System;
using Foundation;
using UIKit;
using System.Collections.Generic;

namespace Phoneword
{
    public partial class CallHistoryController : UITableViewController
    {
        public List<String> PhoneNumbers { get; set; }

        static NSString callHistoryCellId = new NSString ("CallHistoryCell");

        public CallHistoryController (IntPtr handle) : base (handle)
        {
            TableView.RegisterClassForCellReuse (typeof(UITableViewCell), callHistoryCellId);
            TableView.Source = new CallHistoryDataSource (this);
            PhoneNumbers = new List<string> ();
        }

        class CallHistoryDataSource : UITableViewSource
        {
            CallHistoryController controller;

            public CallHistoryDataSource (CallHistoryController controller)
            {
                this.controller = controller;
            }

            // Returns the number of rows in each section of the table
            public override nint RowsInSection (UITableView tableView, nint section)
            {
                return controller.PhoneNumbers.Count;
            }

            public override UITableViewCell GetCell (UITableView tableView, NSIndexPath indexPath)
            {
                var cell = tableView.DequeueReusableCell (CallHistoryController.callHistoryCellId);

                int row = indexPath.Row;
                cell.TextLabel.Text = controller.PhoneNumbers [row];
                return cell;
            }
        }
    }
}
アプリケーションを保存し、ビルドしてエラーがないことを確認します。 ここでは、ビルド警告を無視してもかまいません。
Phoneword シーンと通話履歴シーンの間にセグエ (切り替え) を作成します。 Phoneword シーンで、通話履歴ボタンを選択し、ボタンから通話履歴シーンに Ctrl キーを押しながらドラッグします。
[Action Segue]\(アクション セグエ\) ポップオーバーから、[表示] を選択します。
iOS Designer は次の 2 つのシーン間にセグエを追加します。
シーンの下部にある黒いバーを選択し、[プロパティ] エクスプローラーの [呼び出し履歴] にビュー コントローラーのタイトルを変更して、タイトルをテーブル ビュー コントローラー>に追加します。
アプリケーションが実行されている場合は、通話履歴ボタンで通話履歴画面が開きますが、電話番号を追跡して表示するコードがないため、テーブル ビューは空になります。
このアプリでは、電話番号は文字列のリストとして格納されます。
ViewController の
using上部にディレクティブSystem.Collections.Genericを 追加します。using System.Collections.Generic;ViewControllerクラスを次のコードで変更します。using System; using System.Collections.Generic; using Foundation; using UIKit; namespace Phoneword_iOS { public partial class ViewController : UIViewController { string translatedNumber = ""; public List<string> PhoneNumbers { get; set; } protected ViewController(IntPtr handle) : base(handle) { //initialize list of phone numbers called for Call History screen PhoneNumbers = new List<string>(); } public override void ViewDidLoad() { base.ViewDidLoad(); // Perform any additional setup after loading the view, typically from a nib. TranslateButton.TouchUpInside += (object sender, EventArgs e) => { // Convert the phone number with text to a number // using PhoneTranslator.cs translatedNumber = PhoneTranslator.ToNumber( PhoneNumberText.Text); // Dismiss the keyboard if text field was tapped PhoneNumberText.ResignFirstResponder(); if (translatedNumber == "") { CallButton.SetTitle("Call ", UIControlState.Normal); CallButton.Enabled = false; } else { CallButton.SetTitle("Call " + translatedNumber, UIControlState.Normal); CallButton.Enabled = true; } }; CallButton.TouchUpInside += (object sender, EventArgs e) => { //Store the phone number that we're dialing in PhoneNumbers PhoneNumbers.Add(translatedNumber); // Use URL handler with tel: prefix to invoke Apple's Phone app... var url = new NSUrl("tel:" + translatedNumber); // otherwise show an alert dialog if (!UIApplication.SharedApplication.OpenUrl(url)) { var alert = UIAlertController.Create("Not supported", "Scheme 'tel:' is not supported on this device", UIAlertControllerStyle.Alert); alert.AddAction(UIAlertAction.Create("Ok", UIAlertActionStyle.Default, null)); PresentViewController(alert, true, null); } }; } public override void PrepareForSegue(UIStoryboardSegue segue, NSObject sender) { base.PrepareForSegue(segue, sender); // set the view controller that’s powering the screen we’re // transitioning to var callHistoryController = segue.DestinationViewController as CallHistoryController; //set the table view controller’s list of phone numbers to the // list of dialed phone numbers if (callHistoryController != null) { callHistoryController.PhoneNumbers = PhoneNumbers; } } } }ここではいくつかの処理が行われます
- 変数
translatedNumberがViewDidLoadメソッドから "クラス レベルの変数" に移動されています。 PhoneNumbers.Add(translatedNumber)を呼び出して電話番号リストにダイヤル番号を追加するように CallButton コードが変更されていますPrepareForSegueメソッドが追加されています
アプリケーションを保存してビルドし、エラーがないことを確認します。
アプリケーションを保存してビルドし、エラーがないことを確認します。
- 変数
[開始] ボタンを押して、iOS シミュレーター内でアプリケーションを起動します。
おつかれさまでした。これで最初のマルチスクリーン Xamarin.iOS アプリケーションが完成しました。
これで、アプリでストーリーボード セグエとコードの両方を使用して、ナビゲーションを処理できるようになりました。 次は、「Hello, iOS マルチスクリーンの詳細」で学習したツールとスキルを詳しく分析します。