Xamarin.iOS での 3D Touch の概要
この記事では、新しい i電話 6s と i電話 6s Plus 3D Touch ジェスチャをアプリで使用する方法について説明します。

この記事では、新しい 3D Touch API を使って、新しい iPhone 6s および iPhone 6s Plus デバイス上で実行されている Xamarin.iOS アプリに感圧ジェスチャを追加する方法について説明します。
3D Touch を使用すると、i電話 アプリは、ユーザーがデバイスの画面に触れているだけでなく、ユーザーがどれだけの圧力を発揮しているかを検出し、さまざまな圧力レベルに応答できるようになりました。
3D Touch は、アプリに次の機能を提供します。
- 感圧性 - アプリは、ユーザーが画面に触れている強弱の程度を測定し、その情報を利用できるようになりました。 たとえば、ペイント アプリは、ユーザーが画面をタッチする強さに基づいて線を太くしたり、細くしたりできます。
- Peek と Pop - ユーザーが現在のコンテキストから移動しなくてもデータを操作できるようになりました。 画面を強く押すと、関心のある項目 (メッセージのプレビューなど) をピークできます。 より強く押すことで、アイテムに飛び込むことができます。
- クイック アクション - クイック アクションは、ユーザーがデスクトップ アプリで項目を右クリックしたときにポップアップされるコンテキスト メニューのようなものだと考えてください。 クイック アクションを使用すると、ホーム画面のアプリ アイコンから直接、アプリ内の関数にショートカットを追加できます。
- シミュレーター での 3D Touch のテスト - 正しい Mac ハードウェアを使用して、iOS シミュレーターで 3D Touch 対応アプリをテストできます。
圧力感度
前述のように、UITouch クラスの新しいプロパティを使用すると、ユーザーが iOS デバイスの画面に適用している負荷の量を測定し、ユーザー インターフェイスでこの情報を使用できます。 たとえば、圧力の量に基づいてブラシ ストロークをより半透明または不透明にします。

3D Touch の結果として、アプリが iOS 9 (またはそれ以上) で実行されていて、iOS デバイスが 3D Touch をサポートできる場合、負荷の変化によって TouchesMoved イベントが発生します。
たとえば、UIView のイベントをTouchesMoved監視するときに、次のコードを使用して、ユーザーが画面に適用している現在の負荷を取得できます。
public override void TouchesMoved (NSSet touches, UIEvent evt)
{
    base.TouchesMoved (touches, evt);
    UITouch touch = touches.AnyObject as UITouch;
    if (touch != null)
    {
        // Get the pressure
        var force = touch.Force;
        var maxForce = touch.MaximumPossibleForce;

        // Do something with the touch and the pressure
        ...
    }
}
このプロパティはMaximumPossibleForce、アプリが実行されている iOS デバイスに基づいて、UITouch のプロパティの可能な限り高い値Forceを返します。
重要
圧力が変化すると TouchesMoved 、X/Y 座標が変更されていない場合でも、イベントが発生します。 この動作の変更により、iOS アプリは、イベントをより頻繁に呼び出し、X/Y 座標が最後TouchesMovedの呼び出しと同じになる準備TouchesMovedをする必要があります。
詳細については、「Apple の TouchCanvas: UITouch を効率的かつ効果的に サンプル アプリと UITouch クラス リファレンスを使用する」を参照してください。
ピークとポップ
3D Touch は、ユーザーが現在の場所から移動することなく、アプリ内の情報をこれまで以上に迅速に操作するための新しい方法を提供します。
たとえば、アプリにメッセージのテーブルが表示されている場合、ユーザーはアイテムを強く押して、オーバーレイ ビュー (Apple は Peek と言います) でそのコンテンツをプレビューできます。

ユーザーが強く押すと、通常のメッセージ ビュー (ビューに Pop-ping と呼ばれます) に入ります。
3D タッチの可用性の確認
次のコードを使用して、 UIViewController アプリが実行されている iOS デバイスが 3D Touch をサポートしているかどうかを確認できます。
public override void TraitCollectionDidChange(UITraitCollection previousTraitCollection)
{
    //Important: call the base function
    base.TraitCollectionDidChange(previousTraitCollection);

    //See if the new TraitCollection value includes force touch
    if (TraitCollection.ForceTouchCapability == UIForceTouchCapability.Available) {
        //Do something with 3D touch, for instance...
        RegisterForPreviewingWithDelegate (this, View);
        ...
このメソッドは、前または後ViewDidLoad()に呼び出される場合があります。
ピークとポップの処理
3D Touch を処理できる iOS デバイスでは、クラスのUIViewControllerPreviewingDelegateインスタンスを使用して、ピークとポップの項目の詳細の表示を処理できます。 たとえば、テーブル ビュー コントローラーを呼び出MasterViewControllerした場合は、次のコードを使用してピークとポップをサポートできます。
using System;
using System.Collections.Generic;
using UIKit;
using Foundation;
using CoreGraphics;

namespace DTouch
{
    public class PreviewingDelegate : UIViewControllerPreviewingDelegate
    {
        #region Computed Properties
        public MasterViewController MasterController { get; set; }
        #endregion

        #region Constructors
        public PreviewingDelegate (MasterViewController masterController)
        {
            // Initialize
            this.MasterController = masterController;
        }

        public PreviewingDelegate (NSObjectFlag t) : base(t)
        {
        }

        public PreviewingDelegate (IntPtr handle) : base (handle)
        {
        }
        #endregion

        #region Override Methods
        /// Present the view controller for the "Pop" action.
        public override void CommitViewController (IUIViewControllerPreviewing previewingContext, UIViewController viewControllerToCommit)
        {
            // Reuse Peek view controller for details presentation
            MasterController.ShowViewController(viewControllerToCommit,this);
        }

        /// Create a previewing view controller to be shown at "Peek".
        public override UIViewController GetViewControllerForPreview (IUIViewControllerPreviewing previewingContext, CGPoint location)
        {
            // Grab the item to preview
            var indexPath = MasterController.TableView.IndexPathForRowAtPoint (location);
            var cell = MasterController.TableView.CellAt (indexPath);
            var item = MasterController.dataSource.Objects [indexPath.Row];

            // Grab a controller and set it to the default sizes
            var detailViewController = MasterController.Storyboard.InstantiateViewController ("DetailViewController") as DetailViewController;
            detailViewController.PreferredContentSize = new CGSize (0, 0);

            // Set the data for the display
            detailViewController.SetDetailItem (item);
            detailViewController.NavigationItem.LeftBarButtonItem = MasterController.SplitViewController.DisplayModeButtonItem;
            detailViewController.NavigationItem.LeftItemsSupplementBackButton = true;

            // Set the source rect to the cell frame, so everything else is blurred.
            previewingContext.SourceRect = cell.Frame;

            return detailViewController;
        }
        #endregion
    }
}
このGetViewControllerForPreviewメソッドは、Peek 操作を実行するために使用されます。 テーブル セルとバッキング データにアクセスし、現在の DetailViewController ストーリーボードから読み込みます。 (0,0) に設定 PreferredContentSize すると、既定 のピーク ビュー サイズが求められます。 最後に、表示するセル以外のすべてをぼかすと、表示 previewingContext.SourceRect = cell.Frame 用の新しいビューが返されます。
ユーザーCommitViewControllerが強く押したときに、Pop ビューのピークで作成したビューが再利用されます。
ピークとポップへの登録
ユーザー がアイテムをピーク および ポップ できるようにするビュー コントローラーから、このサービスに登録する必要があります。 上記のテーブル ビュー コントローラー (MasterViewController) の例では、次のコードを使用します。
public override void ViewDidLoad ()
{
    base.ViewDidLoad ();

    // Check to see if 3D Touch is available
    if (TraitCollection.ForceTouchCapability == UIForceTouchCapability.Available) {
        // Register for Peek and Pop
        RegisterForPreviewingWithDelegate(new PreviewingDelegate(this), View);
    }
    ...

}
ここでは、上記で作成した RegisterForPreviewingWithDelegate インスタンスを使用してメソッドを PreviewingDelegate 呼び出します。 3D Touch をサポートする iOS デバイスでは、ユーザーはアイテムを強く押してピークすることができます。 さらに強く押すと、アイテムは標準の表示ビューに表示されます。
詳細については、iOS 9 ApplicationShortcuts サンプルと Apple の ViewControllerPreviews: UIViewController プレビュー API サンプル アプリの使用、UIPreviewAction クラス リファレンス、UIPreviewActionGroup クラス リファレンス、UIPreviewActionItem プロトコル リファレンスを参照してください。
クイック アクション
3D Touch とクイック アクションを使用すると、iOS デバイスの [ホーム] 画面アイコンから、アプリ内の関数への一般的ですばやく簡単にアクセスできるショートカットを追加できます。
前述のように、クイック アクションは、ユーザーがデスクトップ アプリ内の項目を右クリックしたときにポップアップ表示されるコンテキスト メニューと同じように考えることができます。 クイック アクションを使用して、アプリの最も一般的な機能へのショートカットを提供する必要があります。

静的クイック アクションの定義
アプリに必要な 1 つ以上のクイック アクションが静的であり、変更する必要がない場合は、アプリの Info.plist ファイルで定義できます。 外部エディターでこのファイルを編集し、次のキーを追加します。
<key>UIApplicationShortcutItems</key>
<array>
    <dict>
        <key>UIApplicationShortcutItemIconType</key>
        <string>UIApplicationShortcutIconTypeSearch</string>
        <key>UIApplicationShortcutItemSubtitle</key>
        <string>Will search for an item</string>
        <key>UIApplicationShortcutItemTitle</key>
        <string>Search</string>
        <key>UIApplicationShortcutItemType</key>
        <string>com.company.appname.000</string>
    </dict>
    <dict>
        <key>UIApplicationShortcutItemIconType</key>
        <string>UIApplicationShortcutIconTypeShare</string>
        <key>UIApplicationShortcutItemSubtitle</key>
        <string>Will share an item</string>
        <key>UIApplicationShortcutItemTitle</key>
        <string>Share</string>
        <key>UIApplicationShortcutItemType</key>
        <string>com.company.appname.001</string>
    </dict>
</array>
ここでは、次のキーを使用して 2 つの静的なクイック アクション項目を定義します。
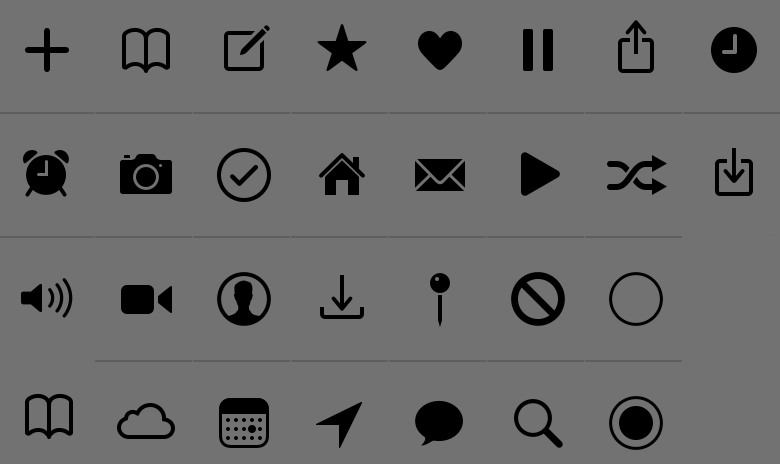
UIApplicationShortcutItemIconType- クイック アクション項目によって表示されるアイコンを、次のいずれかの値として定義します。UIApplicationShortcutIconTypeAddUIApplicationShortcutIconTypeAlarmUIApplicationShortcutIconTypeAudioUIApplicationShortcutIconTypeBookmarkUIApplicationShortcutIconTypeCapturePhotoUIApplicationShortcutIconTypeCaptureVideoUIApplicationShortcutIconTypeCloudUIApplicationShortcutIconTypeComposeUIApplicationShortcutIconTypeConfirmationUIApplicationShortcutIconTypeContactUIApplicationShortcutIconTypeDateUIApplicationShortcutIconTypeFavoriteUIApplicationShortcutIconTypeHomeUIApplicationShortcutIconTypeInvitationUIApplicationShortcutIconTypeLocationUIApplicationShortcutIconTypeLoveUIApplicationShortcutIconTypeMailUIApplicationShortcutIconTypeMarkLocationUIApplicationShortcutIconTypeMessageUIApplicationShortcutIconTypePauseUIApplicationShortcutIconTypePlayUIApplicationShortcutIconTypeProhibitUIApplicationShortcutIconTypeSearchUIApplicationShortcutIconTypeShareUIApplicationShortcutIconTypeShuffleUIApplicationShortcutIconTypeTaskUIApplicationShortcutIconTypeTaskCompletedUIApplicationShortcutIconTypeTimeUIApplicationShortcutIconTypeUpdate
UIApplicationShortcutItemSubtitle- アイテムのサブタイトルを定義します。UIApplicationShortcutItemTitle- アイテムのタイトルを定義します。UIApplicationShortcutItemType- アプリ内の項目を識別するために使用する文字列値です。 詳細については、次のセクションを参照してください。
重要
ファイルに設定されているクイック アクションの Info.plist ショートカット項目には、プロパティを使用して Application.ShortcutItems アクセスできません。 これらはイベント ハンドラーにのみ渡されます HandleShortcutItem 。
クイック アクション 項目の識別
前に説明したように、アプリ Info.plistでクイック アクション項目を定義すると、キーを識別するための文字列値が UIApplicationShortcutItemType 割り当てられます。
これらの識別子をコードで操作しやすくするには、アプリのプロジェクトに呼び出された ShortcutIdentifier クラスを追加し、次のようにします。
using System;

namespace AppSearch
{
    public static class ShortcutIdentifier
    {
        public const string First = "com.company.appname.000";
        public const string Second = "com.company.appname.001";
        public const string Third = "com.company.appname.002";
        public const string Fourth = "com.company.appname.003";
    }
}
クイック アクションの処理
次に、ホーム画面でアプリの AppDelegate.cs アイコンからクイック アクション項目を選択するユーザーを処理するように、アプリのファイルを変更する必要があります。
次の編集を行います。
using System;
...

public UIApplicationShortcutItem LaunchedShortcutItem { get; set; }

public bool HandleShortcutItem(UIApplicationShortcutItem shortcutItem) {
    var handled = false;

    // Anything to process?
    if (shortcutItem == null) return false;

    // Take action based on the shortcut type
    switch (shortcutItem.Type) {
    case ShortcutIdentifier.First:
        Console.WriteLine ("First shortcut selected");
        handled = true;
        break;
    case ShortcutIdentifier.Second:
        Console.WriteLine ("Second shortcut selected");
        handled = true;
        break;
    case ShortcutIdentifier.Third:
        Console.WriteLine ("Third shortcut selected");
        handled = true;
        break;
    case ShortcutIdentifier.Fourth:
        Console.WriteLine ("Forth shortcut selected");
        handled = true;
        break;
    }

    // Return results
    return handled;
}

public override bool FinishedLaunching (UIApplication application, NSDictionary launchOptions)
{
    var shouldPerformAdditionalDelegateHandling = true;

    // Get possible shortcut item
    if (launchOptions != null) {
        LaunchedShortcutItem = launchOptions [UIApplication.LaunchOptionsShortcutItemKey] as UIApplicationShortcutItem;
        shouldPerformAdditionalDelegateHandling = (LaunchedShortcutItem == null);
    }

    return shouldPerformAdditionalDelegateHandling;
}

public override void OnActivated (UIApplication application)
{
    // Handle any shortcut item being selected
    HandleShortcutItem(LaunchedShortcutItem);

    // Clear shortcut after it's been handled
    LaunchedShortcutItem = null;
}

public override void PerformActionForShortcutItem (UIApplication application, UIApplicationShortcutItem shortcutItem, UIOperationHandler completionHandler)
{
    // Perform action
    completionHandler(HandleShortcutItem(shortcutItem));
}
まず、ユーザーが最後に選択したクイック アクション項目を追跡するパブリック LaunchedShortcutItem プロパティを定義します。 次に、メソッドを FinishedLaunching オーバーライドし、渡されたかどうか launchOptions 、およびクイック アクション項目が含まれているかどうかを確認します。 その場合は、クイック アクションをプロパティに LaunchedShortcutItem 格納します。
次に、メソッドを OnActivated オーバーライドし、選択したサイド リンク バー項目を操作対象の HandleShortcutItem メソッドに渡します。 現在、コンソールにメッセージを書き込むだけです。 実際のアプリでは、必要なアクションを処理します。 アクションが実行されると、 LaunchedShortcutItem プロパティがクリアされます。
最後に、アプリが既に実行されている場合は、 PerformActionForShortcutItem クイック アクション項目を処理するためにメソッドが呼び出されるため、ここでメソッドをオーバーライドして呼び出す HandleShortcutItem 必要があります。
動的クイック アクション 項目の作成
アプリ Info.plist のファイルで静的なクイック アクション項目を定義するだけでなく、動的なクイック アクションを作成することもできます。 2 つの新しい動的クイック アクションを定義するには、ファイルをもう AppDelegate.cs 一度編集し、メソッドを FinishedLaunching 次のように変更します。
public override bool FinishedLaunching (UIApplication application, NSDictionary launchOptions)
{
    var shouldPerformAdditionalDelegateHandling = true;

    // Get possible shortcut item
    if (launchOptions != null) {
        LaunchedShortcutItem = launchOptions [UIApplication.LaunchOptionsShortcutItemKey] as UIApplicationShortcutItem;
        shouldPerformAdditionalDelegateHandling = (LaunchedShortcutItem == null);
    }

    // Add dynamic shortcut items
    if (application.ShortcutItems.Length == 0) {
        var shortcut3 = new UIMutableApplicationShortcutItem (ShortcutIdentifier.Third, "Play") {
            LocalizedSubtitle = "Will play an item",
            Icon = UIApplicationShortcutIcon.FromType(UIApplicationShortcutIconType.Play)
        };

        var shortcut4 = new UIMutableApplicationShortcutItem (ShortcutIdentifier.Fourth, "Pause") {
            LocalizedSubtitle = "Will pause an item",
            Icon = UIApplicationShortcutIcon.FromType(UIApplicationShortcutIconType.Pause)
        };

        // Update the application providing the initial 'dynamic' shortcut items.
        application.ShortcutItems = new UIApplicationShortcutItem[]{shortcut3, shortcut4};
    }

    return shouldPerformAdditionalDelegateHandling;
}
ここでは、動的に作成されたShortcutItems一連のオブジェクトが既に含まれているかどうかをapplication確認チェック。そうでない場合は、新しい項目を定義して配列に追加する 2 つの新しいUIMutableApplicationShortcutItemオブジェクトをShortcutItems作成します。
上記の「クイック アクションの処理」セクションで既に追加したコードは、静的なクイック アクションと同様に、これらの動的なクイック アクションを処理します。
静的なクイック アクション項目と動的クイック アクション項目の両方を組み合わせ作成できることに注意してください (ここで行っているとおり)。一方または他の項目に限定されるわけではありません。
詳細については、iOS 9 ViewControllerPreview サンプルを参照し、Apple の ApplicationShortcuts を参照してください。UIApplicationShortcutItem サンプル アプリの使用、UIApplicationShortcutItem クラス リファレンス、UIMutableApplicationShortcutItem クラス リファレンス、UIApplicationShortcutIcon クラス リファレンスを参照してください。
シミュレーターでの 3D タッチのテスト
互換性のある Mac で最新バージョンの Xcode と iOS シミュレーターを Force Touch 対応トラックパッドと共に使用する場合は、シミュレーターで 3D Touch 機能をテストできます。
この機能を有効にするには、3D Touch (i電話 6s 以上) をサポートするシミュレートされた i電話 ハードウェアでアプリを実行します。 次に、iOS シミュレーターで [ハードウェア] メニューを選択し、[3D タッチ] メニュー項目にトラックパッドフォースを使用します。

この機能をアクティブにすると、Macのトラックパッドを強く押して、実際のi電話ハードウェアと同じように3D Touchを有効にすることができます。
まとめ
この記事では、i電話 6s および i電話 6s Plus 用の iOS 9 で利用可能になった新しい 3D Touch API について説明しました。 アプリへの圧力感度の追加について説明しました。ピークとポップを使用して、ナビゲーションなしで現在のコンテキストからアプリ内情報をすばやく表示する。クイック アクションを使用して、アプリで最もよく使用される機能へのショートカットを提供します。