Xamarin.iOS で Core Graphics と Core Animation を使用する
このチュートリアルでは、タッチ入力に応答して Core Graphics を使用してパスを描画します。 次に、パスに沿ってアニメーション化するイメージを含む CALayer を追加します。
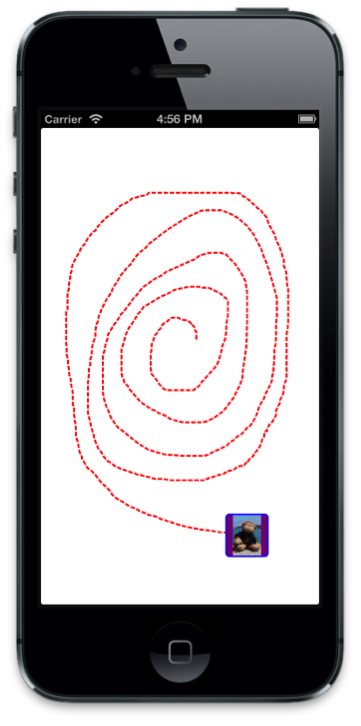
次に示すのは完成したアプリケーションのスクリーンショットです。
始める前に、このガイドに付属する GraphicsDemo サンプルをダウンロードしてください。 こちらからダウンロードできます。GraphicsWalkthrough ディレクトリの中にあります。GraphicsDemo_starter という名前のプロジェクトをダブルクリックして起動し、DemoView クラスを開きます。
パスの描画
DemoViewで、CGPath変数をクラスに追加し、コンストラクターでそれをインスタンス化します。 また、2 つのCGPoint変数 (initialPointとlatestPoint) を宣言します。これらはパスを構築するタッチ ポイントをキャプチャするために使用します。public class DemoView : UIView { CGPath path; CGPoint initialPoint; CGPoint latestPoint; public DemoView () { BackgroundColor = UIColor.White; path = new CGPath (); } }ディレクティブを使用して以下を追加します。
using CoreGraphics;
using CoreAnimation;
using Foundation;
次に、
TouchesBeganとTouchesMoved,をオーバーライドし、次の実装を追加して最初のタッチ ポイントと後続の各タッチ ポイントをそれぞれキャプチャします。public override void TouchesBegan (NSSet touches, UIEvent evt){ base.TouchesBegan (touches, evt); UITouch touch = touches.AnyObject as UITouch; if (touch != null) { initialPoint = touch.LocationInView (this); } } public override void TouchesMoved (NSSet touches, UIEvent evt){ base.TouchesMoved (touches, evt); UITouch touch = touches.AnyObject as UITouch; if (touch != null) { latestPoint = touch.LocationInView (this); SetNeedsDisplay (); } }SetNeedsDisplayは、次の実行ループ パスでDrawを呼び出すため、タッチが移動するたびに呼び出されます。Drawメソッドでパスに線を追加し、赤い破線を使用して描画します。 下のようなコードでDrawを実装します。public override void Draw (CGRect rect){ base.Draw (rect); if (!initialPoint.IsEmpty) { //get graphics context using(CGContext g = UIGraphics.GetCurrentContext ()){ //set up drawing attributes g.SetLineWidth (2); UIColor.Red.SetStroke (); //add lines to the touch points if (path.IsEmpty) { path.AddLines (new CGPoint[]{initialPoint, latestPoint}); } else { path.AddLineToPoint (latestPoint); } //use a dashed line g.SetLineDash (0, new nfloat[] { 5, 2 * (nfloat)Math.PI }); //add geometry to graphics context and draw it g.AddPath (path); g.DrawPath (CGPathDrawingMode.Stroke); } } }
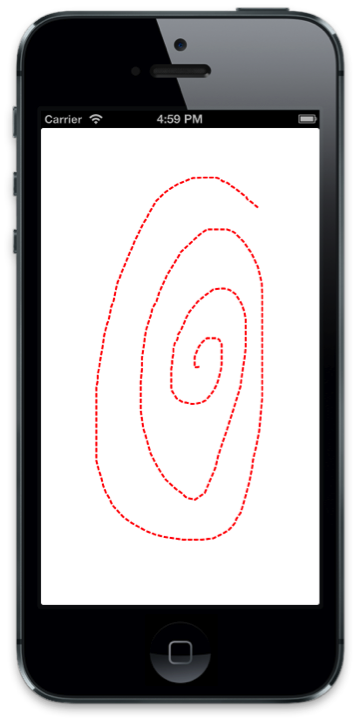
今、アプリケーションを実行する場合、次のスクリーンショットのように、画面をタッチして描画できます。
パスに沿ってアニメーション化する
ユーザーがパスを描画できるようにするコードを実装したので、そのコードを追加し、描画されたパスに沿ってレイヤーをアニメーション化しましょう。
まず、
CALayer変数をクラスに追加し、コンストラクターでそれをインスタンス化します。public class DemoView : UIView { … CALayer layer; public DemoView (){ … //create layer layer = new CALayer (); layer.Bounds = new CGRect (0, 0, 50, 50); layer.Position = new CGPoint (50, 50); layer.Contents = UIImage.FromFile ("monkey.png").CGImage; layer.ContentsGravity = CALayer.GravityResizeAspect; layer.BorderWidth = 1.5f; layer.CornerRadius = 5; layer.BorderColor = UIColor.Blue.CGColor; layer.BackgroundColor = UIColor.Purple.CGColor; }次に、ユーザーが画面から指を離したときの、ビューのレイヤーのサブレイヤーとしてレイヤーを追加します。 次に、パスを使用してキーフレーム アニメーションを作成し、レイヤーの
Positionをアニメーション化します。これを行うには、
TouchesEndedをオーバーライドし、次のコードを追加する必要があります。public override void TouchesEnded (NSSet touches, UIEvent evt) { base.TouchesEnded (touches, evt); //add layer with image and animate along path if (layer.SuperLayer == null) Layer.AddSublayer (layer); // create a keyframe animation for the position using the path layer.Position = latestPoint; CAKeyFrameAnimation animPosition = (CAKeyFrameAnimation)CAKeyFrameAnimation.FromKeyPath ("position"); animPosition.Path = path; animPosition.Duration = 3; layer.AddAnimation (animPosition, "position"); }アプリケーションを今すぐ実行すると、描画後、イメージを含むレイヤーが追加され、描画されたパスに沿って移動します。
まとめ
この記事では、グラフィックスとアニメーションの概念を結び付けた例を順を追って説明しました。 最初に、Core Graphics を使用し、ユーザーのタッチに応答して UIView でパスを描画する方法を示しました。 次に、Core Animation を使用し、そのパスに沿って画像を移動させる方法を示しました。