Xamarin.Mac でコピーして貼り付ける
この記事は、ペーストボードを操作して、Xamarin.Mac アプリケーションでコピーと貼り付けを行う方法について説明しています。 複数のアプリ間で共有できる標準データ型を操作する方法と、特定のアプリ内でカスタム データをサポートする方法を示します。
概要
Xamarin.Mac アプリケーションで C# と .NET を使用する場合、作業している開発者と同じ貼り付けボード (コピーと貼り付け) のサポートに Objective-C アクセスできます。
この記事では、Xamarin.Mac アプリでペーストボードを使用する 2 つのメイン方法について説明します。
- 標準データ型 - 通常、貼り付けボード操作は 2 つの関連のないアプリ間で実行されるため、どちらのアプリも、他のアプリがサポートするデータの種類を認識していません。 共有の可能性を最大限に高めるために、ペーストボードは特定のアイテムの複数の表現を保持できます (一般的なデータ型の標準セットを使用)。これにより、使用しているアプリは、そのニーズに最も適したバージョンを選択できます。
- カスタム データ - Xamarin.Mac 内の複雑なデータのコピーと貼り付けをサポートするために、貼り付けボードによって処理されるカスタム データ型を定義できます。 たとえば、ユーザーが複数のデータ型とポイントで構成される複雑な図形をコピーして貼り付けできるようにするベクター描画アプリです。
この記事では、Xamarin.Mac アプリケーションで貼り付けボードを操作してコピーと貼り付けの操作をサポートする基本について説明します。 この記事で使用する 主要な概念と手法については、まず Hello Mac の記事、特 に Xcode とインターフェイス ビルダー と アウトレットとアクション の概要に関するセクションを参照することを強くお勧めします。
Xamarin.Mac Internals ドキュメントの「C# クラス/メソッドを Xamarin.Mac Internals のセクションにObjective-C公開する」も参照してください。C# クラスObjective-Cをオブジェクトと UI 要素に結び付けるために使用される属性についてもExport説明Registerしています。
貼り付けボードの概要
ペーストボードは、特定のアプリケーション内またはアプリケーション間でデータを交換するための標準化されたメカニズムを提供します。 Xamarin.Mac アプリケーションでの貼り付けボードの一般的な用途は、コピー操作と貼り付け操作を処理することですが、その他の多くの操作 (ドラッグ アンド ドロップ、Application Services など) もサポートされています。
すぐに作業を開始するために、Xamarin.Mac アプリでペーストボードを使用する簡単で実用的な概要から始めます。 後で、ペーストボードのしくみと使用されるメソッドについて詳しく説明します。
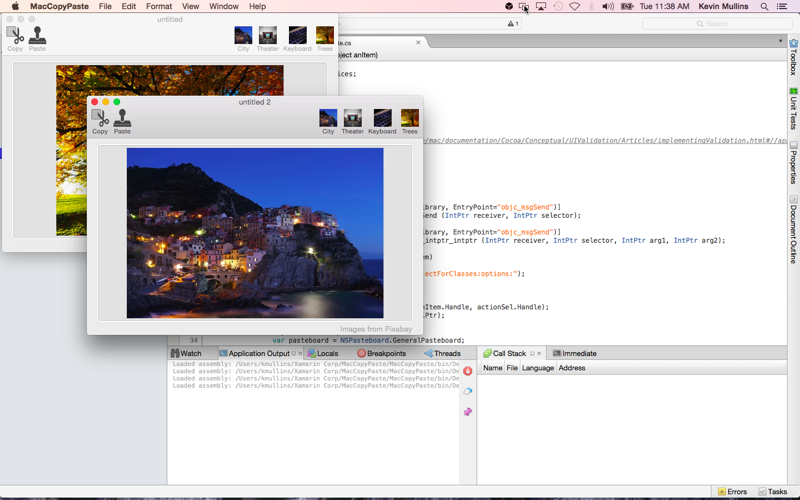
この例では、イメージ ビューを含むウィンドウを管理する単純なドキュメント ベースのアプリケーションを作成します。 ユーザーは、アプリ内のドキュメント間で、または同じアプリ内の他のアプリまたは複数のウィンドウとの間で画像をコピーして貼り付けることができます。
Xamarin プロジェクトの作成
まず、コピーと貼り付けのサポートを追加する新しいドキュメント ベースの Xamarin.Mac アプリを作成します。
次の操作を行います。
Visual Studio for Mac を起動し、[新しいプロジェクト]... リンクをクリックします。
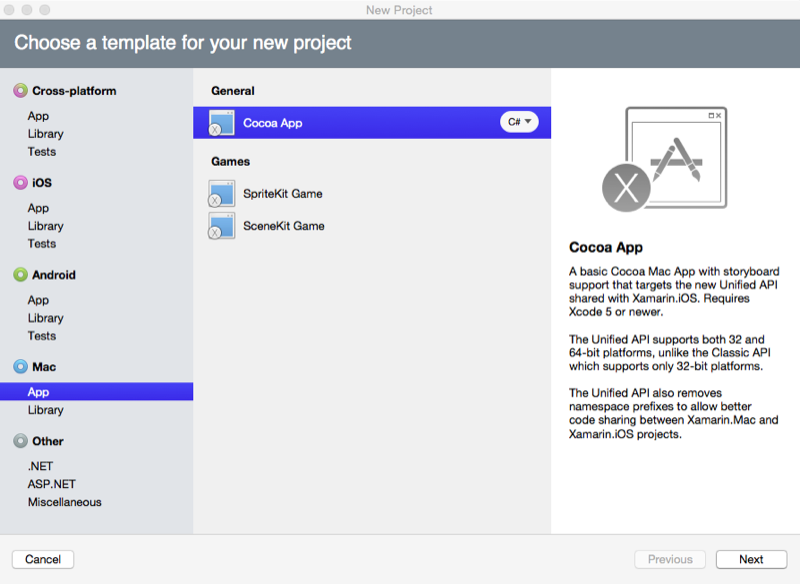
Mac>App>Cocoa App を選択し、[次へ] ボタンをクリックします。
プロジェクト名を入力
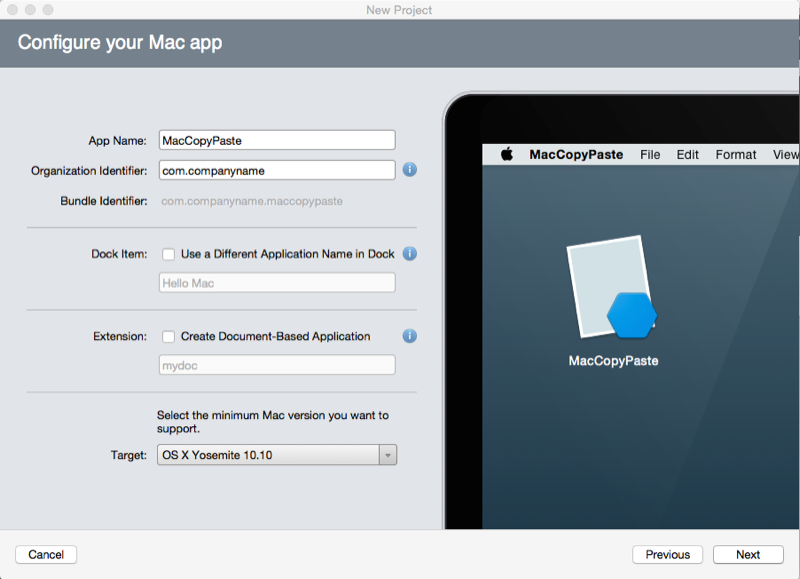
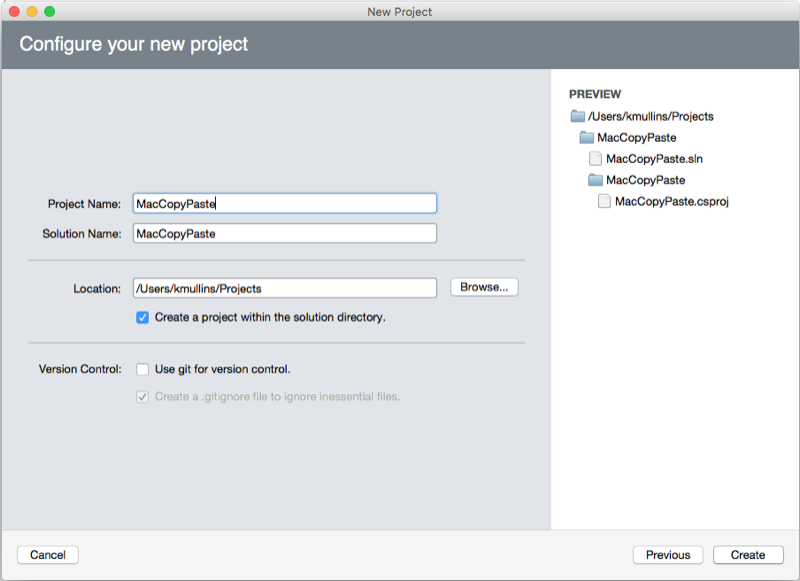
MacCopyPasteし、それ以外はすべて既定値のままにします。 [Next:[作成] ボタンをクリックします。
NSDocument の追加
次に、アプリケーションのユーザー インターフェイスのバックグラウンド ストレージとして機能するカスタム NSDocument クラスを追加します。 1 つのイメージ ビューが含まれており、ビューから既定の貼り付けボードにイメージをコピーする方法と、既定の貼り付けボードから画像を取得してイメージ ビューに表示する方法を知ることができます。
Solution Pad で Xamarin.Mac プロジェクトを右クリックし、[新しいファイルの追加]>を選択します。
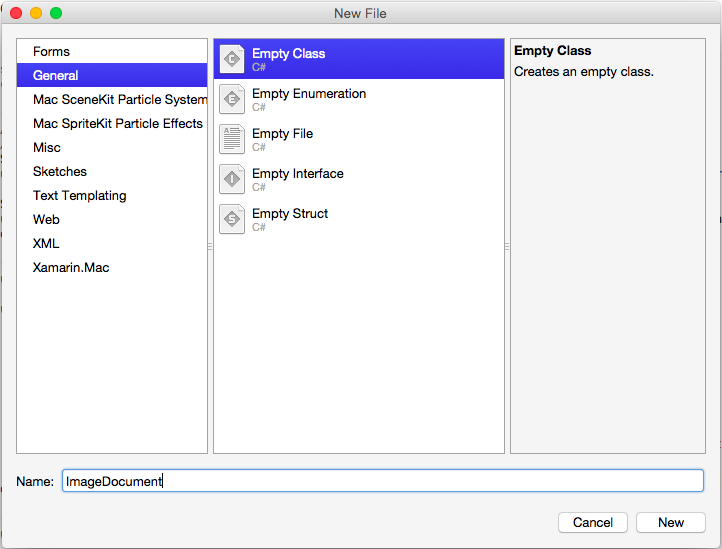
[名前] に「ImageDocument」と入力し、[新規] ボタンをクリックします。 ImageDocument.cs クラスを編集し、次のようにします。
using System;
using AppKit;
using Foundation;
using ObjCRuntime;

namespace MacCopyPaste
{
    [Register("ImageDocument")]
    public class ImageDocument : NSDocument
    {
        #region Computed Properties
        public NSImageView ImageView {get; set;}

        public ImageInfo Info { get; set; } = new ImageInfo();

        public bool ImageAvailableOnPasteboard {
            get {
                // Initialize the pasteboard
                NSPasteboard pasteboard = NSPasteboard.GeneralPasteboard;
                Class [] classArray  = { new Class ("NSImage") };

                // Check to see if an image is on the pasteboard
                return pasteboard.CanReadObjectForClasses (classArray, null);
            }
        }
        #endregion

        #region Constructor
        public ImageDocument ()
        {
        }
        #endregion

        #region Public Methods
        [Export("CopyImage:")]
        public void CopyImage(NSObject sender) {

            // Grab the current image
            var image = ImageView.Image;

            // Anything to process?
            if (image != null) {
                // Get the standard pasteboard
                var pasteboard = NSPasteboard.GeneralPasteboard;

                // Empty the current contents
                pasteboard.ClearContents();

                // Add the current image to the pasteboard
                pasteboard.WriteObjects (new NSImage[] {image});

                // Save the custom data class to the pastebaord
                pasteboard.WriteObjects (new ImageInfo[] { Info });

                // Using a Pasteboard Item
                NSPasteboardItem item = new NSPasteboardItem();
                string[] writableTypes = {"public.text"};

                // Add a data provier to the item
                ImageInfoDataProvider dataProvider = new ImageInfoDataProvider (Info.Name, Info.ImageType);
                var ok = item.SetDataProviderForTypes (dataProvider, writableTypes);

                // Save to pasteboard
                if (ok) {
                    pasteboard.WriteObjects (new NSPasteboardItem[] { item });
                }
            }

        }

        [Export("PasteImage:")]
        public void PasteImage(NSObject sender) {

            // Initialize the pasteboard
            NSPasteboard pasteboard = NSPasteboard.GeneralPasteboard;
            Class [] classArray  = { new Class ("NSImage") };

            bool ok = pasteboard.CanReadObjectForClasses (classArray, null);
            if (ok) {
                // Read the image off of the pasteboard
                NSObject [] objectsToPaste = pasteboard.ReadObjectsForClasses (classArray, null);
                NSImage image = (NSImage)objectsToPaste[0];

                // Display the new image
                ImageView.Image = image;
            }

            Class [] classArray2 = { new Class ("ImageInfo") };
            ok = pasteboard.CanReadObjectForClasses (classArray2, null);
            if (ok) {
                // Read the image off of the pasteboard
                NSObject [] objectsToPaste = pasteboard.ReadObjectsForClasses (classArray2, null);
                ImageInfo info = (ImageInfo)objectsToPaste[0];

            }

        }
        #endregion
    }
}
コードの一部を以下で詳しく見てみましょう。
次のコードは、イメージが使用可能 true な場合に、既定の貼り付けボードに画像データが存在するかどうかをテストするプロパティを提供します false。
public bool ImageAvailableOnPasteboard {
    get {
        // Initialize the pasteboard
        NSPasteboard pasteboard = NSPasteboard.GeneralPasteboard;
        Class [] classArray  = { new Class ("NSImage") };

        // Check to see if an image is on the pasteboard
        return pasteboard.CanReadObjectForClasses (classArray, null);
    }
}
次のコードは、添付されたイメージ ビューから既定の貼り付けボードにイメージをコピーします。
[Export("CopyImage:")]
public void CopyImage(NSObject sender) {

    // Grab the current image
    var image = ImageView.Image;

    // Anything to process?
    if (image != null) {
        // Get the standard pasteboard
        var pasteboard = NSPasteboard.GeneralPasteboard;

        // Empty the current contents
        pasteboard.ClearContents();

        // Add the current image to the pasteboard
        pasteboard.WriteObjects (new NSImage[] {image});

        // Save the custom data class to the pastebaord
        pasteboard.WriteObjects (new ImageInfo[] { Info });

        // Using a Pasteboard Item
        NSPasteboardItem item = new NSPasteboardItem();
        string[] writableTypes = {"public.text"};

        // Add a data provider to the item
        ImageInfoDataProvider dataProvider = new ImageInfoDataProvider (Info.Name, Info.ImageType);
        var ok = item.SetDataProviderForTypes (dataProvider, writableTypes);

        // Save to pasteboard
        if (ok) {
            pasteboard.WriteObjects (new NSPasteboardItem[] { item });
        }
    }

}
次のコードでは、既定の貼り付けボードから画像を貼り付け、添付されたイメージ ビューに表示します (貼り付けボードに有効な画像が含まれている場合)。
[Export("PasteImage:")]
public void PasteImage(NSObject sender) {

    // Initialize the pasteboard
    NSPasteboard pasteboard = NSPasteboard.GeneralPasteboard;
    Class [] classArray  = { new Class ("NSImage") };

    bool ok = pasteboard.CanReadObjectForClasses (classArray, null);
    if (ok) {
        // Read the image off of the pasteboard
        NSObject [] objectsToPaste = pasteboard.ReadObjectsForClasses (classArray, null);
        NSImage image = (NSImage)objectsToPaste[0];

        // Display the new image
        ImageView.Image = image;
    }

    Class [] classArray2 = { new Class ("ImageInfo") };
    ok = pasteboard.CanReadObjectForClasses (classArray2, null);
    if (ok) {
        // Read the image off of the pasteboard
        NSObject [] objectsToPaste = pasteboard.ReadObjectsForClasses (classArray2, null);
        ImageInfo info = (ImageInfo)objectsToPaste[0]
    }
}
このドキュメントを作成したら、Xamarin.Mac アプリのユーザー インターフェイスを作成します。
ユーザー インターフェイスの構築
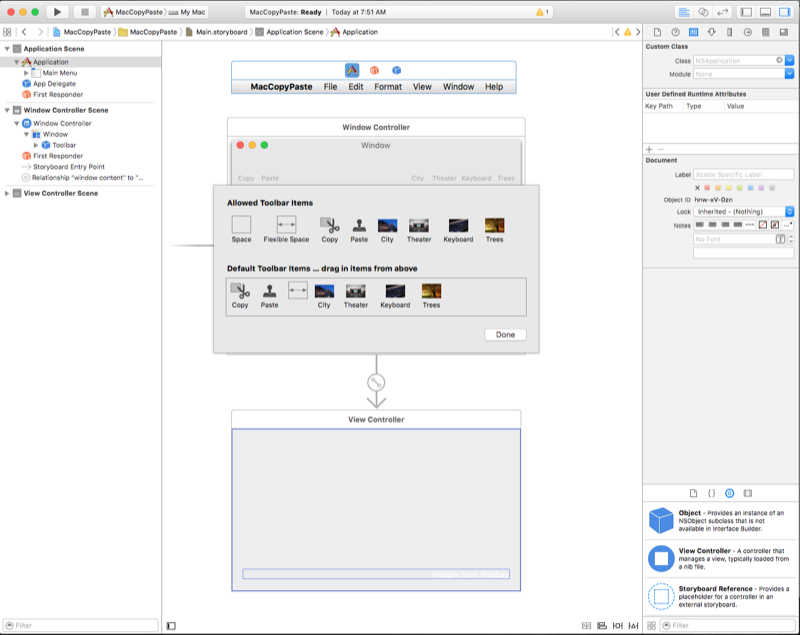
Main.storyboard ファイルをダブルクリックして Xcode で開きます。 次に、ツール バーとイメージウェルを追加し、次のように構成します。
コピーを追加し、ツールバーの左側にイメージ ツールバー項目を貼り付けます。 これらをショートカットとして使用して、[編集] メニューからコピーして貼り付けます。 次に、ツール バーの右側に 4 つの イメージ ツール バー項目 を追加します。 これらを使用して、いくつかの既定のイメージを画像に適切に設定します。
ツール バーの操作の詳細については、ツールバーのドキュメントを参照してください。
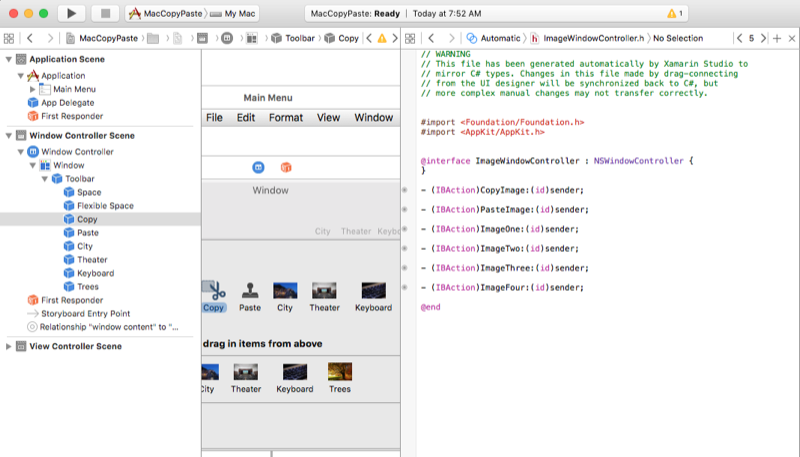
次に、ツール バー項目と画像に関する次のアウトレットとアクションを公開しましょう。
アウトレットとアクションの操作の詳細については、Hello, Mac ドキュメントの 「アウトレットとアクション」 セクションを 参照 してください。
ユーザー インターフェイスの有効化
Xcode で作成されたユーザー インターフェイスと、アウトレットとアクションを介して公開される UI 要素を使用して、UI を有効にするコードを追加する必要があります。 Solution Pad でImageWindow.cs ファイルをダブルクリックし、次のように表示します。
using System;
using Foundation;
using AppKit;

namespace MacCopyPaste
{
    public partial class ImageWindow : NSWindow
    {
        #region Private Variables
        ImageDocument document;
        #endregion

        #region Computed Properties
        [Export ("Document")]
        public ImageDocument Document {
            get {
                return document;
            }
            set {
                WillChangeValue ("Document");
                document = value;
                DidChangeValue ("Document");
            }
        }

        public ViewController ImageViewController {
            get { return ContentViewController as ViewController; }
        }

        public NSImage Image {
            get {
                return ImageViewController.Image;
            }
            set {
                ImageViewController.Image = value;
            }
        }
        #endregion

        #region Constructor
        public ImageWindow (IntPtr handle) : base (handle)
        {
        }
        #endregion

        #region Override Methods
        public override void AwakeFromNib ()
        {
            base.AwakeFromNib ();

            // Create a new document instance
            Document = new ImageDocument ();

            // Attach to image view
            Document.ImageView = ImageViewController.ContentView;
        }
        #endregion

        #region Public Methods
        public void CopyImage (NSObject sender)
        {
            Document.CopyImage (sender);
        }

        public void PasteImage (NSObject sender)
        {
            Document.PasteImage (sender);
        }

        public void ImageOne (NSObject sender)
        {
            // Load image
            Image = NSImage.ImageNamed ("Image01.jpg");

            // Set image info
            Document.Info.Name = "city";
            Document.Info.ImageType = "jpg";
        }

        public void ImageTwo (NSObject sender)
        {
            // Load image
            Image = NSImage.ImageNamed ("Image02.jpg");

            // Set image info
            Document.Info.Name = "theater";
            Document.Info.ImageType = "jpg";
        }

        public void ImageThree (NSObject sender)
        {
            // Load image
            Image = NSImage.ImageNamed ("Image03.jpg");

            // Set image info
            Document.Info.Name = "keyboard";
            Document.Info.ImageType = "jpg";
        }

        public void ImageFour (NSObject sender)
        {
            // Load image
            Image = NSImage.ImageNamed ("Image04.jpg");

            // Set image info
            Document.Info.Name = "trees";
            Document.Info.ImageType = "jpg";
        }
        #endregion
    }
}
このコードを以下で詳しく見てみましょう。
まず、上で作成したクラスの ImageDocument インスタンスを公開します。
private ImageDocument _document;
...

[Export ("Document")]
public ImageDocument Document {
    get { return _document; }
    set {
        WillChangeValue ("Document");
        _document = value;
        DidChangeValue ("Document");
    }
}
を WillChangeValueDidChangeValue使用Exportして、Xcode でキー値のコーディングとデータ バインディングを許可するようにプロパティを設定Documentしました。
また、次のプロパティを使用して Xcode の UI に追加したイメージからイメージを公開します。
public ViewController ImageViewController {
    get { return ContentViewController as ViewController; }
}

public NSImage Image {
    get {
        return ImageViewController.Image;
    }
    set {
        ImageViewController.Image = value;
    }
}
メイン ウィンドウが読み込まれて表示されたら、クラスのインスタンスを作成し、次の ImageDocument コードを使用して UI のイメージを適切にアタッチします。
public override void AwakeFromNib ()
{
    base.AwakeFromNib ();

    // Create a new document instance
    Document = new ImageDocument ();

    // Attach to image view
    Document.ImageView = ImageViewController.ContentView;
}
最後に、ユーザーがツール バー項目のコピーと貼り付けをクリックした場合に応答して、クラスのインスタンスを ImageDocument 呼び出して実際の作業を行います。
partial void CopyImage (NSObject sender) {
    Document.CopyImage(sender);
}

partial void PasteImage (Foundation.NSObject sender) {
    Document.PasteImage(sender);
}
[ファイル] メニューと [編集] メニューの有効化
最後に行う必要があるのは、[ファイル] メニューから [新しい] メニュー項目を有効にすること (メイン ウィンドウの新しいインスタンスを作成するため) と、[編集] メニューから [切り取り、コピー、貼り付け] メニュー項目を有効にすることです。
[新規] メニュー項目を有効にするには、AppDelegate.cs ファイルを編集し、次のコードを追加します。
public int UntitledWindowCount { get; set;} =1;
...

[Export ("newDocument:")]
void NewDocument (NSObject sender) {
    // Get new window
    var storyboard = NSStoryboard.FromName ("Main", null);
    var controller = storyboard.InstantiateControllerWithIdentifier ("MainWindow") as NSWindowController;

    // Display
    controller.ShowWindow(this);

    // Set the title
    controller.Window.Title = (++UntitledWindowCount == 1) ? "untitled" : string.Format ("untitled {0}", UntitledWindowCount);
}
詳細については、Windows ドキュメントの 「複数の Windows の使用」セクションを 参照 してください。
[切り取り]、[コピー]、[貼り付け] メニュー項目を有効にするには、AppDelegate.cs ファイルを編集し、次のコードを追加します。
[Export("copy:")]
void CopyImage (NSObject sender)
{
    // Get the main window
    var window = NSApplication.SharedApplication.KeyWindow as ImageWindow;

    // Anything to do?
    if (window == null)
        return;

    // Copy the image to the clipboard
    window.Document.CopyImage (sender);
}

[Export("cut:")]
void CutImage (NSObject sender)
{
    // Get the main window
    var window = NSApplication.SharedApplication.KeyWindow as ImageWindow;

    // Anything to do?
    if (window == null)
        return;

    // Copy the image to the clipboard
    window.Document.CopyImage (sender);

    // Clear the existing image
    window.Image = null;
}

[Export("paste:")]
void PasteImage (NSObject sender)
{
    // Get the main window
    var window = NSApplication.SharedApplication.KeyWindow as ImageWindow;

    // Anything to do?
    if (window == null)
        return;

    // Paste the image from the clipboard
    window.Document.PasteImage (sender);
}
メニュー項目ごとに、現在の最上位のキー ウィンドウを取得し、クラスに ImageWindow キャストします。
var window = NSApplication.SharedApplication.KeyWindow as ImageWindow;
そこから、そのウィンドウのクラス インスタンスを ImageDocument 呼び出して、コピーと貼り付けのアクションを処理します。 次に例を示します。
window.Document.CopyImage (sender);
[切り取り]、[コピー]、[貼り付け] メニュー項目にアクセスできるのは、既定の貼り付けボードまたは現在アクティブなウィンドウの画像ウェルに画像データがある場合のみです。
Xamarin.Mac プロジェクトにEditMenuDelegate.cs ファイルを追加し、次のようにしましょう。
using System;
using AppKit;

namespace MacCopyPaste
{
    public class EditMenuDelegate : NSMenuDelegate
    {
        #region Override Methods
        public override void MenuWillHighlightItem (NSMenu menu, NSMenuItem item)
        {
        }

        public override void NeedsUpdate (NSMenu menu)
        {
            // Get list of menu items
            NSMenuItem[] Items = menu.ItemArray ();

            // Get the key window and determine if the required images are available
            var window = NSApplication.SharedApplication.KeyWindow as ImageWindow;
            var hasImage = (window != null) && (window.Image != null);
            var hasImageOnPasteboard = (window != null) && window.Document.ImageAvailableOnPasteboard;

            // Process every item in the menu
            foreach(NSMenuItem item in Items) {
                // Take action based on the menu title
                switch (item.Title) {
                case "Cut":
                case "Copy":
                case "Delete":
                    // Only enable if there is an image in the view
                    item.Enabled = hasImage;
                    break;
                case "Paste":
                    // Only enable if there is an image on the pasteboard
                    item.Enabled = hasImageOnPasteboard;
                    break;
                default:
                    // Only enable the item if it has a sub menu
                    item.Enabled = item.HasSubmenu;
                    break;
                }
            }
        }
        #endregion
    }
}
ここでも、現在の一番上のウィンドウを取得し、その ImageDocument クラス インスタンスを使用して、必要なイメージ データが存在するかどうかを確認します。 次に、このメソッドを MenuWillHighlightItem 使用して、この状態に基づいて各項目を有効または無効にします。
AppDelegate.cs ファイルを編集し、メソッドをDidFinishLaunching次のようにします。
public override void DidFinishLaunching (NSNotification notification)
{
    // Disable automatic item enabling on the Edit menu
    EditMenu.AutoEnablesItems = false;
    EditMenu.Delegate = new EditMenuDelegate ();
}
まず、[編集] メニューのメニュー項目の自動有効化と無効化を無効にします。 次に、上で作成したクラスの EditMenuDelegate インスタンスをアタッチします。
アプリのテスト
すべてが整ったので、アプリケーションをテストする準備ができました。 アプリをビルドして実行すると、メイン インターフェイスが表示されます。
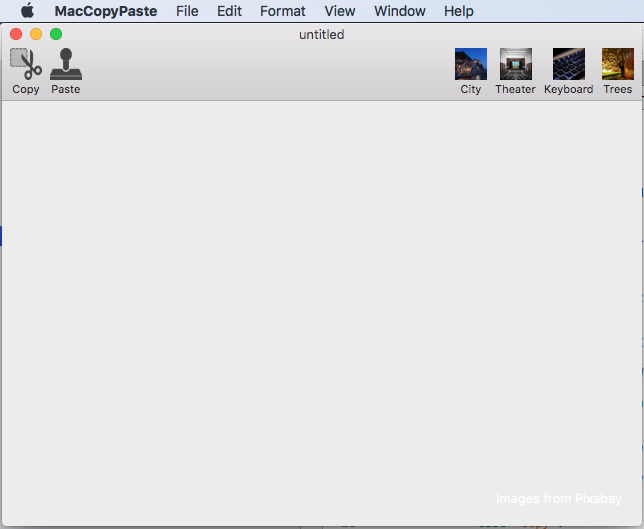
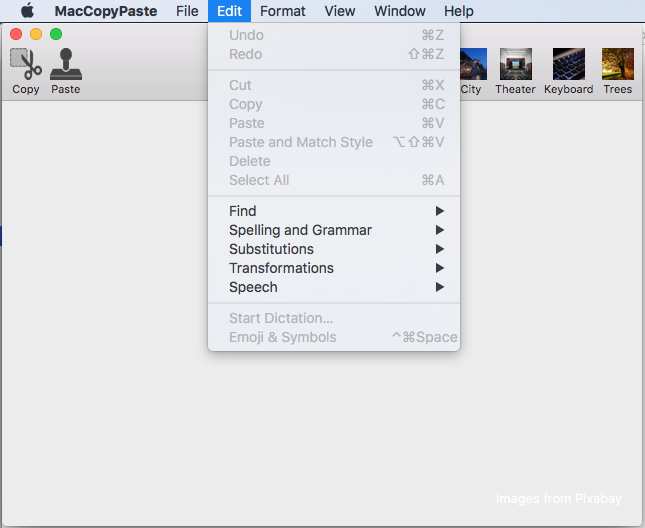
[編集] メニューを開くと、画像ウェルまたは既定の貼り付けボードに画像がないため、切り取り、コピー、貼り付けが無効になっていることに注意してください。
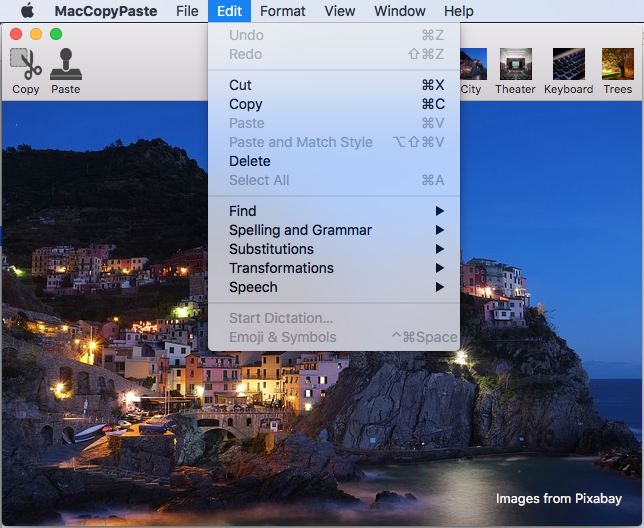
画像を画像ウェルに追加し、[編集] メニューをもう一度開くと、項目が有効になります。
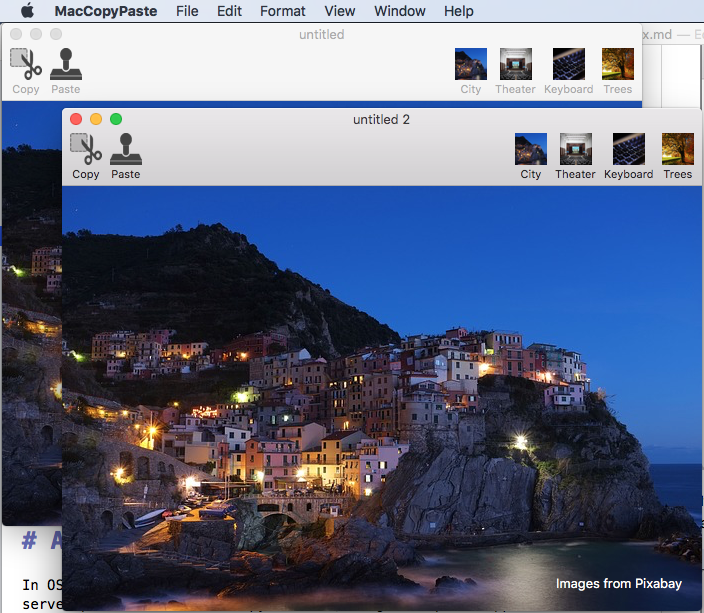
イメージをコピーし、ファイル メニューから [新規] を選択すると、そのイメージを新しいウィンドウに貼り付けることができます。
以降のセクションでは、Xamarin.Mac アプリケーションでの貼り付けボードの操作について詳しく説明します。
貼り付けボードについて
macOS (旧称 OS X) では、貼り付けボード (NSPasteboard) は、コピーと貼り付け、ドラッグ アンド ドロップ、Application Services などの複数のサーバー プロセスをサポートします。 以降のセクションでは、いくつかの主要な貼り付けボードの概念について詳しく説明します。
貼り付け板とは
このクラスは NSPasteboard 、アプリケーション間または特定のアプリ内で情報を交換するための標準化されたメカニズムを提供します。 貼り付けボードのメイン関数は、コピー操作と貼り付け操作を処理することです。
- ユーザーがアプリ内の項目を選択し、[切り取り] または [コピー] メニュー項目を使用すると、選択した項目の 1 つ以上の表現が貼り付けボードに配置されます。
- ユーザーが (同じアプリ内または別のアプリ内で) [貼り付け] メニュー項目を使用すると、処理できるデータのバージョンが貼り付けボードからコピーされ、アプリに追加されます。
見つけにくい貼り付けボードの使用には、検索、ドラッグ、ドラッグ アンド ドロップ、アプリケーション サービスの操作が含まれます。
- ユーザーがドラッグ操作を開始すると、ドラッグ データが貼り付けボードにコピーされます。 ドラッグ操作が別のアプリへのドロップで終了すると、そのアプリは貼り付けボードからデータをコピーします。
- 翻訳サービスの場合、翻訳するデータは、要求元のアプリによって貼り付け板にコピーされます。 アプリケーション サービスは、貼り付けボードからデータを取得し、翻訳を行い、そのデータを貼り付けボードに貼り付けます。
最も単純な形式では、貼り付けボードを使用して、特定のアプリ内またはアプリ間でデータを移動します。そのため、アプリのプロセス外の特別なグローバル メモリ領域に存在します。 ペーストボードの概念は簡単に把握できますが、考慮する必要があるより複雑な詳細がいくつかあります。 これらは以下で詳しく説明します。
名前付きペーストボード
貼り付け板はパブリックまたはプライベートにすることができ、アプリケーション内または複数のアプリ間でさまざまな目的で使用できます。 macOS には、いくつかの標準的な貼り付け板が用意されており、それぞれに特定の明確に定義された使用法があります。
NSGeneralPboard- 切り取り、コピー、貼り付けの操作の既定の貼り付け板。NSRulerPboard- ルーラーでの切り取り、コピー、貼り付けの操作をサポートします。NSFontPboard- オブジェクトに対する切り取り、コピー、貼り付けの操作をNSFontサポートします。NSFindPboard- 検索テキストを共有できるアプリケーション固有の検索パネルをサポートします。NSDragPboard- ドラッグ アンド ドロップ操作をサポートします。
ほとんどの場合、システム定義の貼り付け板のいずれかを使用します。 ただし、独自の貼り付け板を作成する必要がある場合があります。 このような状況では、クラスのメソッドを FromName (string name) 使用して、指定された NSPasteboard 名前のカスタム 貼り付け板を作成できます。
必要に応じて、クラスのメソッドをCreateWithUniqueNameNSPasteboard呼び出して、一意の名前の貼り付けボードを作成できます。
貼り付けボードの項目
アプリケーションが貼り付けボードに書き込む各データは、貼り付けボード項目と見なされ、貼り付けボードは複数のアイテムを同時に保持できます。 これにより、アプリは、貼り付けボードにコピーされるデータの複数のバージョン (プレーン テキストや書式設定されたテキストなど) を書き込み、取得アプリは処理できるデータ (プレーン テキストのみなど) のみを読み取ることができます。
データ表現と uniform 型識別子
通常、貼り付けボード操作は、相互に関する知識がない 2 つ (またはそれ以上) のアプリケーションまたは各アプリケーションが処理できるデータの種類の間で行われます。 上記のセクションで説明したように、情報を共有する可能性を最大限に高めるために、貼り付けボードには、コピーおよび貼り付けるデータの複数の表現を保持できます。
各表現は、表示される日付の種類を一意に識別する単純な文字列に過ぎない統一型識別子 (UTI) を使用して識別されます (詳細については、Apple の Uniform Type Identifiers Overview ドキュメントを参照してください)。
カスタム データ型 (ベクター描画アプリの描画オブジェクトなど) を作成する場合は、独自の UTI を作成して、コピーおよび貼り付け操作で一意に識別できます。
アプリは、貼り付けボードからコピーしたデータを貼り付ける準備をするときに、その機能に最適な表現 (存在する場合) を見つける必要があります。 通常、これは、使用可能な最も豊富な型 (ワープロ アプリの書式設定されたテキストなど) であり、必要に応じて使用できる最も単純な形式 (単純なテキスト エディターの場合はプレーン テキスト) にフォールバックします。
約束されたデータ
一般に、アプリ間の共有を最大化するには、コピーされるデータの表現をできるだけ多く指定する必要があります。 ただし、時間やメモリの制約のため、各データ型を実際に貼り付けボードに書き込むのは実用的ではない可能性があります。
このような状況では、最初のデータ表現を貼り付けボードに配置し、受信側のアプリは、貼り付け操作の直前にすぐに生成できる別の表現を要求できます。
最初の項目を貼り付けボードに配置する場合は、インターフェイスに準拠 NSPasteboardItemDataProvider するオブジェクトによって、使用可能な他の表現の 1 つ以上が提供されるように指定します。 これらのオブジェクトは、受信アプリから要求された追加の表現をオンデマンドで提供します。
変更数
各ペーストボードメイン新しい所有者が宣言されるたびにインクリメントされる変更カウントが含まれます。 アプリは、変更カウントの値をチェックすることで、前回の検証以降に貼り付けボードの内容が変更されたかどうかを判断できます。
クラスの ChangeCount メソッドを ClearContents 使用して、特定の NSPasteboard 貼り付けボードの Change Count を変更します。
貼り付け板にデータをコピーする
コピー操作を実行するには、最初に貼り付けボードにアクセスし、既存の内容をクリアし、必要な数のデータ表現を貼り付けボードに書き込みます。
次に例を示します。
// Get the standard pasteboard
var pasteboard = NSPasteboard.GeneralPasteboard;

// Empty the current contents
pasteboard.ClearContents();

// Add the current image to the pasteboard
pasteboard.WriteObjects (new NSImage[] {image});
通常は、上記の例で行ったとおり、一般的な貼り付け板に書き込むだけです。 メソッドに送信するすべてのオブジェクトはWriteObjects、インターフェイスに準拠しているINSPasteboardWriting必要があります。 いくつかの組み込みクラス ( NSString、、 NSImage、、 NSURL、 NSColor、 NSAttributedString、 NSPasteboardItemなど) は、このインターフェイスに自動的に準拠します。
カスタム データ クラスを貼り付けボードに書き込む場合は、インターフェイスにINSPasteboardWriting準拠するか、クラスのインスタンスにラップする必要があります (後述のNSPasteboardItem「カスタム データ型」セクションを参照)。
貼り付けボードからデータを読み取る
前述のように、アプリ間でデータを共有する可能性を最大限に高めるために、コピーしたデータの複数の表現を貼り付けボードに書き込む場合があります。 機能に対して可能な限り豊富なバージョン (存在する場合) を選択するのは、受信側のアプリにかかっています。
簡単な貼り付け操作
メソッドを使用して、貼り付けボードからデータを ReadObjectsForClasses 読み取る。 次の 2 つのパラメーターが必要です。
- 貼り付けボードから読み取るベース クラス型の配列
NSObject。 これは、最初に最も必要なデータ型で並べ替え、優先順位を下げるために再メインする型を指定する必要があります。 - 追加の制約 (特定の URL コンテンツ タイプへの制限など) を含むディクショナリ、または追加の制約が不要な場合は空のディクショナリ。
このメソッドは、渡された条件を満たす項目の配列を返します。したがって、要求されたデータ型の数が最大でも同じになります。 また、要求された型が存在しない可能性があり、空の配列が返されます。
たとえば、次のコードチェック、一般的なNSImage貼り付けボードに存在するかどうかを確認し、存在する場合は画像に表示します。
[Export("PasteImage:")]
public void PasteImage(NSObject sender) {

    // Initialize the pasteboard
    NSPasteboard pasteboard = NSPasteboard.GeneralPasteboard;
    Class [] classArray  = { new Class ("NSImage") };

    bool ok = pasteboard.CanReadObjectForClasses (classArray, null);
    if (ok) {
        // Read the image off of the pasteboard
        NSObject [] objectsToPaste = pasteboard.ReadObjectsForClasses (classArray, null);
        NSImage image = (NSImage)objectsToPaste[0];

        // Display the new image
        ImageView.Image = image;
    }

    Class [] classArray2 = { new Class ("ImageInfo") };
    ok = pasteboard.CanReadObjectForClasses (classArray2, null);
    if (ok) {
        // Read the image off of the pasteboard
        NSObject [] objectsToPaste = pasteboard.ReadObjectsForClasses (classArray2, null);
        ImageInfo info = (ImageInfo)objectsToPaste[0];
            }
}
複数のデータ型の要求
作成される Xamarin.Mac アプリケーションの種類に基づいて、貼り付けるデータの複数の表現を処理できる場合があります。 この状況では、貼り付けボードからデータを取得するための 2 つのシナリオがあります。
- メソッドを
ReadObjectsForClasses1 回呼び出し、必要なすべての表現の配列を指定します (優先順序)。 - 毎回異なる型の
ReadObjectsForClasses配列を要求するメソッドを複数回呼び出します。
貼り付けボードからデータを 取得する方法の詳細については、上記の「簡単な貼り付け操作 」セクションを参照してください。
既存のデータ型の確認
貼り付けボードに特定のデータ表現が含まれている場合に、貼り付けボードからデータを実際に読み取らずにチェックすることがあります (有効なデータが存在する場合にのみ [貼り付け] メニュー項目を有効にする場合など)。
ペーストボードの CanReadObjectForClasses メソッドを呼び出して、指定された型が含まれているかどうかを確認します。
たとえば、次のコードは、一般的なペーストボードにインスタンスが NSImage 含まれているかどうかを判断します。
public bool ImageAvailableOnPasteboard {
    get {
        // Initialize the pasteboard
        NSPasteboard pasteboard = NSPasteboard.GeneralPasteboard;
        Class [] classArray  = { new Class ("NSImage") };

        // Check to see if an image is on the pasteboard
        return pasteboard.CanReadObjectForClasses (classArray, null);
    }
}
貼り付けボードからの URL の読み取り
特定の Xamarin.Mac アプリの機能に基づいて、貼り付けボードから URL を読み取る必要がある場合がありますが、特定の条件セット (特定のデータ型のファイルや URL を指すなど) を満たしている場合に限ります。 このような場合は、メソッドの ReadObjectsForClasses 2 番目のパラメーターを使用して、追加の検索条件をCanReadObjectForClasses指定できます。
カスタム データ型
Xamarin.Mac アプリから独自のカスタム型を貼り付けボードに保存する必要がある場合があります。 たとえば、ユーザーが描画オブジェクトをコピーして貼り付けできるようにするベクター描画アプリです。
この状況では、データ カスタム クラスを継承NSObjectし、INSPasteboardWritingいくつかのインターフェイス (INSCodingおよびINSPasteboardReading) に準拠するようにデータ カスタム クラスを設計する必要があります。 必要に応じて、コピーまたは貼り付けるデータをカプセル化するために a NSPasteboardItem を使用できます。
これらのオプションの両方について、以下で詳しく説明します。
カスタム クラスの使用
このセクションでは、このドキュメントの冒頭で作成した簡単なサンプル アプリを展開し、ウィンドウ間でコピーして貼り付ける画像に関する情報を追跡するカスタム クラスを追加します。
プロジェクトに新しいクラスを追加し、ImageInfo.cs呼び出します。 ファイルを編集し、次のようにします。
using System;
using AppKit;
using Foundation;

namespace MacCopyPaste
{
    [Register("ImageInfo")]
    public class ImageInfo : NSObject, INSCoding, INSPasteboardWriting, INSPasteboardReading
    {
        #region Computed Properties
        [Export("name")]
        public string Name { get; set; }

        [Export("imageType")]
        public string ImageType { get; set; }
        #endregion

        #region Constructors
        [Export ("init")]
        public ImageInfo ()
        {
        }

        public ImageInfo (IntPtr p) : base (p)
        {
        }

        [Export ("initWithCoder:")]
        public ImageInfo(NSCoder decoder) {

            // Decode data
            NSString name = decoder.DecodeObject("name") as NSString;
            NSString type = decoder.DecodeObject("imageType") as NSString;

            // Save data
            Name = name.ToString();
            ImageType = type.ToString ();
        }
        #endregion

        #region Public Methods
        [Export ("encodeWithCoder:")]
        public void EncodeTo (NSCoder encoder) {

            // Encode data
            encoder.Encode(new NSString(Name),"name");
            encoder.Encode(new NSString(ImageType),"imageType");
        }

        [Export ("writableTypesForPasteboard:")]
        public virtual string[] GetWritableTypesForPasteboard (NSPasteboard pasteboard) {
            string[] writableTypes = {"com.xamarin.image-info", "public.text"};
            return writableTypes;
        }

        [Export ("pasteboardPropertyListForType:")]
        public virtual NSObject GetPasteboardPropertyListForType (string type) {

            // Take action based on the requested type
            switch (type) {
            case "com.xamarin.image-info":
                return NSKeyedArchiver.ArchivedDataWithRootObject(this);
            case "public.text":
                return new NSString(string.Format("{0}.{1}", Name, ImageType));
            }

            // Failure, return null
            return null;
        }

        [Export ("readableTypesForPasteboard:")]
        public static string[] GetReadableTypesForPasteboard (NSPasteboard pasteboard){
            string[] readableTypes = {"com.xamarin.image-info", "public.text"};
            return readableTypes;
        }

        [Export ("readingOptionsForType:pasteboard:")]
        public static NSPasteboardReadingOptions GetReadingOptionsForType (string type, NSPasteboard pasteboard) {

            // Take action based on the requested type
            switch (type) {
            case "com.xamarin.image-info":
                return NSPasteboardReadingOptions.AsKeyedArchive;
            case "public.text":
                return NSPasteboardReadingOptions.AsString;
            }

            // Default to property list
            return NSPasteboardReadingOptions.AsPropertyList;
        }

        [Export ("initWithPasteboardPropertyList:ofType:")]
        public NSObject InitWithPasteboardPropertyList (NSObject propertyList, string type) {

            // Take action based on the requested type
            switch (type) {
            case "com.xamarin.image-info":
                return new ImageInfo();
            case "public.text":
                return new ImageInfo();
            }

            // Failure, return null
            return null;
        }
        #endregion
    }
}
以降のセクションでは、このクラスについて詳しく説明します。
継承とインターフェイス
カスタム データ クラスを貼り付けボードに書き込んだり、貼り付け先から読み取ったりするには、その前に、そのクラスがインターフェイスにINSPasteboardReading準拠しているINSPastebaordWriting必要があります。 さらに、インターフェイスを NSObject 継承し、インターフェイスに準拠する INSCoding 必要があります。
[Register("ImageInfo")]
public class ImageInfo : NSObject, INSCoding, INSPasteboardWriting, INSPasteboardReading
...
クラスはディレクティブの使用RegisterにもObjective-C公開する必要があり、必要なプロパティまたはメソッドをExport公開する必要があります。 次に例を示します。
[Export("name")]
public string Name { get; set; }

[Export("imageType")]
public string ImageType { get; set; }
このクラスに含まれるデータの 2 つのフィールド (画像の名前とその型 (jpg、png など) を公開しています。
詳細については、Xamarin.Mac Internals ドキュメントの「C# クラス/メソッドObjective-Cの公開」セクションを参照してください。C# クラスObjective-Cをオブジェクトと UI 要素に接続するために使用される属性とExport属性について説明Registerしています。
コンストラクター
貼り付けボードから読み取ることができるように、カスタム データ クラスには 2 つのコンストラクター (適切に公開) Objective-Cが必要です。
[Export ("init")]
public ImageInfo ()
{
}

[Export ("initWithCoder:")]
public ImageInfo(NSCoder decoder) {

    // Decode data
    NSString name = decoder.DecodeObject("name") as NSString;
    NSString type = decoder.DecodeObject("imageType") as NSString;

    // Save data
    Name = name.ToString();
    ImageType = type.ToString ();
}
まず、既定Objective-Cのメソッドの下で空のinitコンストラクターを公開します。
次に、エクスポートされた名前initWithCoderの下に貼り付けるときに、貼り付けボードからオブジェクトの新しいインスタンスを作成するために使用される準拠コンストラクターを公開NSCodingします。
このコンストラクターは、(貼り付けボードに書き込まれるときに a NSKeyedArchiver によって作成された) を受け取NSCoderり、キーと値のペアのデータを抽出し、データ クラスのプロパティ フィールドに保存します。
貼り付けボードへの書き込み
インターフェイスに INSPasteboardWriting 準拠することで、クラスをペーストボードに書き込むことができるように、2 つのメソッドと必要に応じて 3 つ目のメソッドを公開する必要があります。
まず、カスタム クラスの書き込み先となるデータ型表現をペーストボードに伝える必要があります。
[Export ("writableTypesForPasteboard:")]
public virtual string[] GetWritableTypesForPasteboard (NSPasteboard pasteboard) {
    string[] writableTypes = {"com.xamarin.image-info", "public.text"};
    return writableTypes;
}
各表現は、表示されるデータの種類を一意に識別する単純な文字列に過ぎない Uniform Type Identifier (UTI) を使用して識別されます (詳細については、Apple の Uniform Type Identifiers Overview のドキュメントを参照してください)。
カスタム形式では、独自の UTI "com.xamarin.image-info" を作成しています (アプリ識別子と同じように逆の表記になっていることに注意してください)。 このクラスでは、標準の文字列を貼り付け板 (public.text) に書き込むこともできます。
次に、実際にペーストボードに書き込まれる要求された形式でオブジェクトを作成する必要があります。
[Export ("pasteboardPropertyListForType:")]
public virtual NSObject GetPasteboardPropertyListForType (string type) {

    // Take action based on the requested type
    switch (type) {
    case "com.xamarin.image-info":
        return NSKeyedArchiver.ArchivedDataWithRootObject(this);
    case "public.text":
        return new NSString(string.Format("{0}.{1}", Name, ImageType));
    }

    // Failure, return null
    return null;
}
この型では public.text 、単純な書式設定されたオブジェクトが返されます NSString 。 カスタム com.xamarin.image-info 型では、a NSKeyedArchiver とインターフェイスを NSCoder 使用して、カスタム データ クラスをキーと値のペアのアーカイブにエンコードします。 エンコードを実際に処理するには、次のメソッドを実装する必要があります。
[Export ("encodeWithCoder:")]
public void EncodeTo (NSCoder encoder) {

    // Encode data
    encoder.Encode(new NSString(Name),"name");
    encoder.Encode(new NSString(ImageType),"imageType");
}
個々のキーと値のペアはエンコーダーに書き込まれ、上記で追加した 2 番目のコンストラクターを使用してデコードされます。
必要に応じて、次のメソッドを含め、貼り付けボードにデータを書き込むときにオプションを定義できます。
[Export ("writingOptionsForType:pasteboard:"), CompilerGenerated]
public virtual NSPasteboardWritingOptions GetWritingOptionsForType (string type, NSPasteboard pasteboard) {
    return NSPasteboardWritingOptions.WritingPromised;
}
現在、 WritingPromised オプションのみが使用でき、特定の型が約束されているだけで、実際には貼り付け板に書き込まれていない場合に使用する必要があります。 詳細については、上記の「約束されたデータ」セクションを参照してください。
これらのメソッドを配置すると、次のコードを使用して、カスタム クラスを貼り付けボードに書き込むことができます。
// Get the standard pasteboard
var pasteboard = NSPasteboard.GeneralPasteboard;

// Empty the current contents
pasteboard.ClearContents();

// Add info to the pasteboard
pasteboard.WriteObjects (new ImageInfo[] { Info });
貼り付けボードからの読み取り
インターフェイスに INSPasteboardReading 準拠することで、カスタム データ クラスをペーストボードから読み取ることができるように、3 つのメソッドを公開する必要があります。
まず、カスタム クラスがクリップボードから読み取ることができるデータ型表現をペーストボードに伝える必要があります。
[Export ("readableTypesForPasteboard:")]
public static string[] GetReadableTypesForPasteboard (NSPasteboard pasteboard){
    string[] readableTypes = {"com.xamarin.image-info", "public.text"};
    return readableTypes;
}
ここでも、これらは単純な UTI として定義されており、上記の「Pasteboard への書き込み」セクションで定義したものと同じ型です。
次に、次のメソッドを使用して、各 UTI 型の読み取り方法をペーストボードに指示する必要があります。
[Export ("readingOptionsForType:pasteboard:")]
public static NSPasteboardReadingOptions GetReadingOptionsForType (string type, NSPasteboard pasteboard) {

    // Take action based on the requested type
    switch (type) {
    case "com.xamarin.image-info":
        return NSPasteboardReadingOptions.AsKeyedArchive;
    case "public.text":
        return NSPasteboardReadingOptions.AsString;
    }

    // Default to property list
    return NSPasteboardReadingOptions.AsPropertyList;
}
com.xamarin.image-infoこの型では、クラスに追加したコンストラクターを呼び出initWithCoder:して、クラスを貼り付けボードに書き込むときに作成NSKeyedArchiverしたキーと値のペアをデコードするように貼り付けボードに指示します。
最後に、貼り付けボードから他の UTI データ表現を読み取るために、次のメソッドを追加する必要があります。
[Export ("initWithPasteboardPropertyList:ofType:")]
public NSObject InitWithPasteboardPropertyList (NSObject propertyList, string type) {

    // Take action based on the requested type
    switch (type) {
    case "public.text":
        return new ImageInfo();
    }

    // Failure, return null
    return null;
}
これらすべてのメソッドを配置すると、次のコードを使用して、カスタム データ クラスを貼り付けボードから読み取ることができます。
// Initialize the pasteboard
NSPasteboard pasteboard = NSPasteboard.GeneralPasteboard;
var classArrayPtrs = new [] { Class.GetHandle (typeof(ImageInfo)) };
NSArray classArray = NSArray.FromIntPtrs (classArrayPtrs);

// NOTE: Sending messages directly to the base Objective-C API because of this defect:
// https://bugzilla.xamarin.com/show_bug.cgi?id=31760
// Check to see if image info is on the pasteboard
ok = bool_objc_msgSend_IntPtr_IntPtr (pasteboard.Handle, Selector.GetHandle ("canReadObjectForClasses:options:"), classArray.Handle, IntPtr.Zero);

if (ok) {
    // Read the image off of the pasteboard
    NSObject [] objectsToPaste = NSArray.ArrayFromHandle<Foundation.NSObject>(IntPtr_objc_msgSend_IntPtr_IntPtr (pasteboard.Handle, Selector.GetHandle ("readObjectsForClasses:options:"), classArray.Handle, IntPtr.Zero));
    ImageInfo info = (ImageInfo)objectsToPaste[0];
}
NSPasteboardItem の使用
カスタム クラスの作成を保証しないカスタム項目を貼り付けボードに書き込む必要がある場合や、必要に応じてのみ共通の形式でデータを提供したい場合があります。 このような状況では、.NSPasteboardItem
A NSPasteboardItem は、貼り付けボードに書き込まれ、一時的なアクセス用に設計されたデータをきめ細かく制御できます。貼り付けボードに書き込まれた後に破棄する必要があります。
データの書き込み
カスタム データをユーザー設定に NSPasteboardItem 書き込むには、カスタム NSPasteboardItemDataProviderデータを指定する必要があります。 新しいクラスをプロジェクトに追加し、ImageInfoDataProvider.cs呼び出します。 ファイルを編集し、次のようにします。
using System;
using AppKit;
using Foundation;

namespace MacCopyPaste
{
    [Register("ImageInfoDataProvider")]
    public class ImageInfoDataProvider : NSPasteboardItemDataProvider
    {
        #region Computed Properties
        public string Name { get; set;}
        public string ImageType { get; set;}
        #endregion

        #region Constructors
        [Export ("init")]
        public ImageInfoDataProvider ()
        {
        }

        public ImageInfoDataProvider (string name, string imageType)
        {
            // Initialize
            this.Name = name;
            this.ImageType = imageType;
        }

        protected ImageInfoDataProvider (NSObjectFlag t){
        }

        protected internal ImageInfoDataProvider (IntPtr handle){

        }
        #endregion

        #region Override Methods
        [Export ("pasteboardFinishedWithDataProvider:")]
        public override void FinishedWithDataProvider (NSPasteboard pasteboard)
        {

        }

        [Export ("pasteboard:item:provideDataForType:")]
        public override void ProvideDataForType (NSPasteboard pasteboard, NSPasteboardItem item, string type)
        {

            // Take action based on the type
            switch (type) {
            case "public.text":
                // Encode the data to string
                item.SetStringForType(string.Format("{0}.{1}", Name, ImageType),type);
                break;
            }

        }
        #endregion
    }
}
カスタム データ クラスと同様に、and Export ディレクティブを使用Registerして公開するObjective-C必要があります。 クラスは継承NSPasteboardItemDataProviderする必要があり、メソッドをFinishedWithDataProviderProvideDataForType実装する必要があります。
メソッドを ProvideDataForType 使用して、次のようにラップされるデータを NSPasteboardItem 指定します。
[Export ("pasteboard:item:provideDataForType:")]
public override void ProvideDataForType (NSPasteboard pasteboard, NSPasteboardItem item, string type)
{

    // Take action based on the type
    switch (type) {
    case "public.text":
        // Encode the data to string
        item.SetStringForType(string.Format("{0}.{1}", Name, ImageType),type);
        break;
    }

}
この場合、画像 (Name と ImageType) に関する 2 つの情報を格納し、それらを単純な文字列 (public.text) に書き込みます。
貼り付けボードにデータを書き込む場合は、次のコードを使用します。
// Get the standard pasteboard
var pasteboard = NSPasteboard.GeneralPasteboard;

// Using a Pasteboard Item
NSPasteboardItem item = new NSPasteboardItem();
string[] writableTypes = {"public.text"};

// Add a data provider to the item
ImageInfoDataProvider dataProvider = new ImageInfoDataProvider (Info.Name, Info.ImageType);
var ok = item.SetDataProviderForTypes (dataProvider, writableTypes);

// Save to pasteboard
if (ok) {
    pasteboard.WriteObjects (new NSPasteboardItem[] { item });
}
データの読み取り
貼り付けボードからデータを読み取り戻すには、次のコードを使用します。
// Initialize the pasteboard
NSPasteboard pasteboard = NSPasteboard.GeneralPasteboard;
Class [] classArray  = { new Class ("NSImage") };

bool ok = pasteboard.CanReadObjectForClasses (classArray, null);
if (ok) {
    // Read the image off of the pasteboard
    NSObject [] objectsToPaste = pasteboard.ReadObjectsForClasses (classArray, null);
    NSImage image = (NSImage)objectsToPaste[0];

    // Do something with data
    ...
}

Class [] classArray2 = { new Class ("ImageInfo") };
ok = pasteboard.CanReadObjectForClasses (classArray2, null);
if (ok) {
    // Read the image off of the pasteboard
    NSObject [] objectsToPaste = pasteboard.ReadObjectsForClasses (classArray2, null);

    // Do something with data
    ...
}
まとめ
この記事では、Xamarin.Mac アプリケーションで貼り付けボードを操作して、コピーと貼り付けの操作をサポートする方法について詳しく説明しました。 最初に、標準の貼り付けボード操作を理解するための簡単な例を紹介しました。 次に、貼り付けボードと、そこからデータを読み書きする方法について詳しく説明しました。 最後に、カスタム データ型を使用して、アプリ内の複合データ型のコピーと貼り付けをサポートすることを確認しました。
