Getting started with Lab Management – VS2010 RC (Part 2)
Configure the TFS VM:
In our setup, we will configure TFS server, the build controller, build agent to do the build process, test controller which will manage test execution and also as the dev box where we will write the code. This can be a VM in the same host if you can spare 2GB of RAM on the host.
- SCVMM admin console
- TFS
- Build Controller
- Test Controller
- VS
Install SCVMM Admin Console:
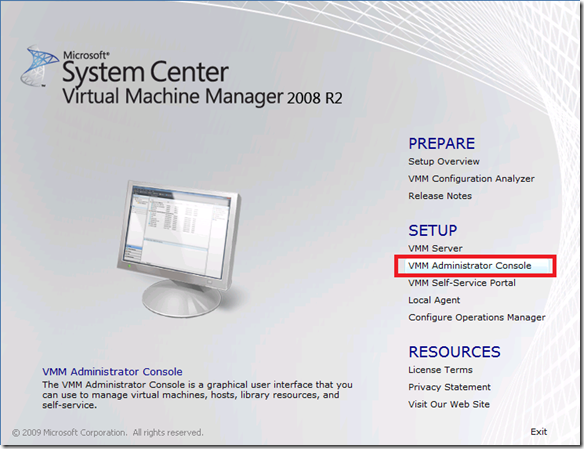
Start the SCVMM install on the TFS server, and select the administrator console option. Select the default set of steps, and let it complete. The lab management service that will run on TFS needs the SDK installed by the admin console to communicate to the TFS server.
Install Team Foundation Server:
In my configuration, I am setting up TFS, the build controller, test controller and Visual Studio all in the same box (a 64bit Win28R2 VM with 2GB RAM).
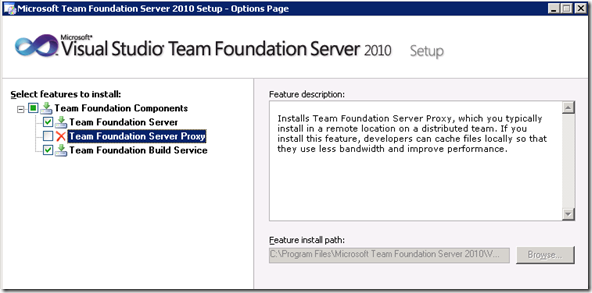
After launching TFS install, select both TFS server and the build controller to install
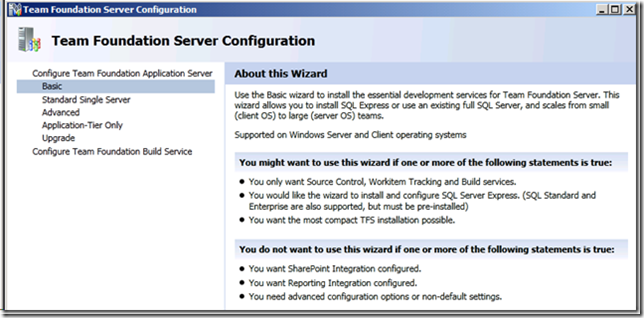
On the configuration screen, select Basic
Let TFS install complete with the default selections.
Once the TFS configuration is complete, next step is to configure the build service. Launch the “Build Service Configuration Wizard” and associate it with the DefaultCollection created by the TFS install.
Use the default settings for the rest and go ahead with the configuration.
Install and configure Test Controller:
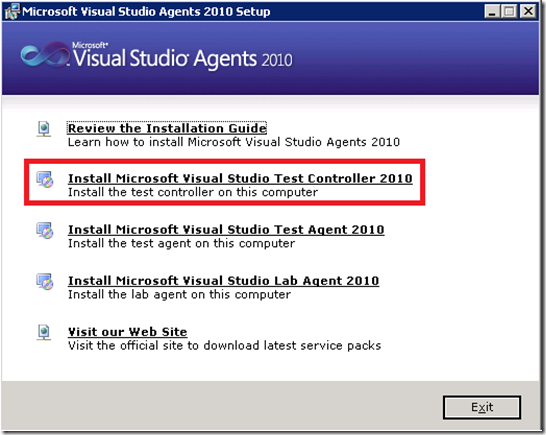
Launch the Team agents setup (the agents iso file – in your another DVD drive), and select “Install Visual Studio Team Test Controller 2010”.
Select defaults and let the install complete. Register the test controller against the project collection that was created.
Configure Lab at the Application Tier:
Launch the TFS Administration Console and start configuring Lab Management.
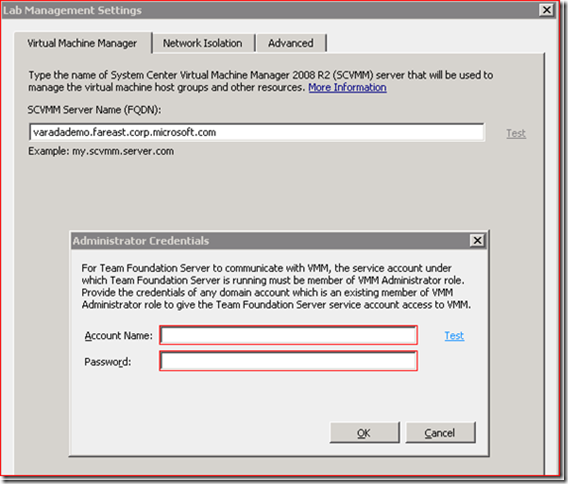
Click on Test
Provide the admin credential for the SCVMM host. This will ensure that TFS can ask SCVMM to do operations like “Create VM” and such. Press OK to finish the configuration of lab in the Application Tier. So for most of the installation sequence, the only input that is needed is the SCVMM name. The defaults for the other two tabs are good for 90%+ of the scenarios.
Configure Lab for Project Collection:
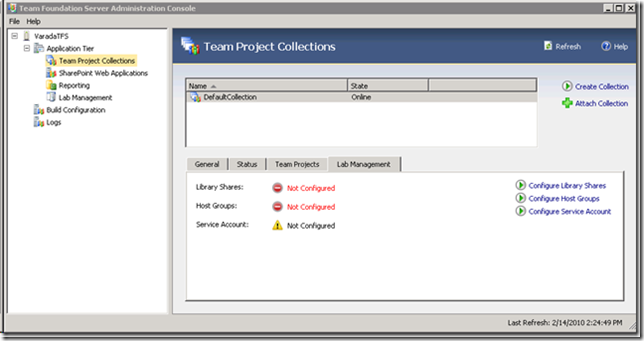
Continuing in the TFS admin console, select the lab management tab in the default collection.
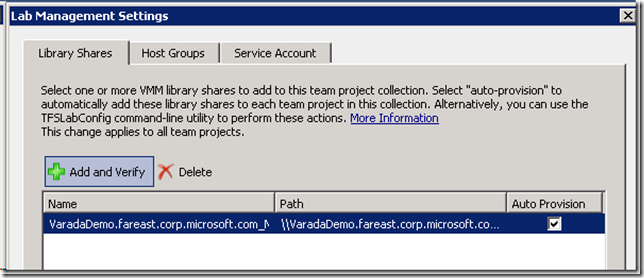
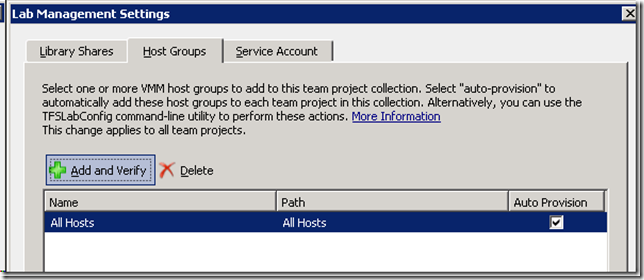
Select Configure Library shares – this allows individual project collections to have their specific library shares and host groups. For our purposes, we just work with all the resources we have.
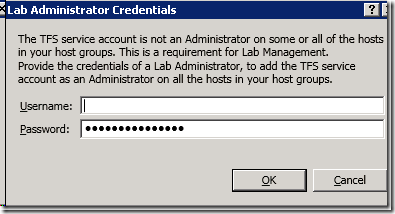
this experience will ask for credentials which are administrator on all the hosts.
Provide an administrator credential that works on all the hosts (1 in my case, but can be n), and press OK. This information is used to configure TFS account as administrator on all the hosts. This enables the TFS service to be able to communicate with the VMs in each of the host.
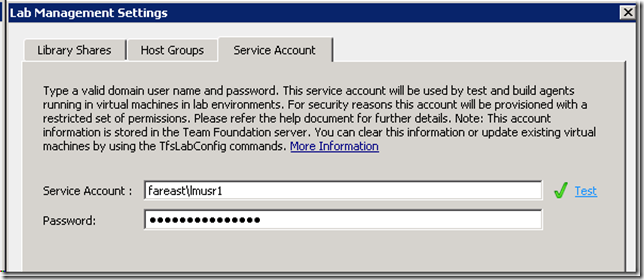
And finally, the Service Account tab. This is new for RC. The service account is a credential that the lab service pushes to all the VMs. From inside the virtual machine when
- The test agent talks to the test controller
- The build agent talks to TFS
- The end to end deployment workflow (that we will talk about in part 4) accesses the build drop location
the processes uses this credential to communicate to the server. Having this enables us to work across system under tests which have different trust relationship with the TFS server.
Note that I have used a different account. This is a service account, and is not a highly privileged account. Part of selecting this account will provide it the minimal TFS privileges needed to work in the lab setting.
This completes the lab configuration at the Project Collection level.
Install VS2010
Install VS2010 ultimate with the default configuration.
In the next blog post, we will create the system under test and start actually seeing lab in action.
