Lab Management walkthrough using Visual Studio 11 Developer Preview Virtual Machine
Brian Keller has published a Virtual Machine with Visual Studio 11 Developer Preview bits and described 6 hands-on-labs that can be tried in that virtual machine. In this blog post, I will show how you can use the same virtual machine in order to try out an additional walkthrough for Lab Management.
In this walkthrough, we will:
- Install additional software necessary for our scenario. In particular, we will install a Test Controller in the virtual machine, and then configure the Build Controller and Build Agent.
- Create a Standard Environment from Microsoft Test Manager. We will use the same virtual machine as the test machine for the standard environment.
- Create a Build-Deploy-Test definition in Visual Studio, and run it on top of the environment.
Before going through this walkthrough, ensure that you have:
- Downloaded and setup the virtual machine as per the instructions in Brian Keller's blog post on a Hyper-V host with an internal network. We will refer to this VM as VSALM machine in the following description.
- Login to the VSALM machine as Administrator to perform the following steps.
Install additional software and create additional assets
- Install and Configure the Test Controller.
- Download the Visual Studio Agents 11 Developer Preview ISO to the host machine.
- Mount the ISO into the VSALM machine using Hyper-V console.

- From the VSALM machine, browse the DVD, and launch TestController\vstf_testcontroller.exe. Reboot if you are prompted to do so.
- After the installation, launch Visual Studio Test Controller Developer Preview Configuration Tool. Configure using default settings and select the DefaultCollection from TFS. Wait for all the configuration steps to finish
- Create a test case in TFS using one of the MSTest unit tests.
- Open Visual Studio. open the solution for FabrikamFiber.CallCenter. Compile the solution. Open Unit test explorer, and run the unit test 'CreateInsertsCustomerAndSaves'. Using unit test explorer is covered in one of Brian's hands-on-labs.
- In Visual Studio, open Team Explorer, and create a new Test Case work item. In the associated automation tab, select the FabrikamFiber.Web.Tests.CustomersControllerTest.CreateInsertsCustomerAndSaves test.

- Save the test case.
- Configure the Build Controller and Build Agent in the virtual machine.
- Open Team Foundation Server Administration Console, and select Configure Team Foundation Build Service.

- Go through the wizard. For the account to run the build service, choose .\Administrator. This is required for the build agent to be able to access the drop location.
- At the end of this configuration, you should have one controller and one agent configured for builds.
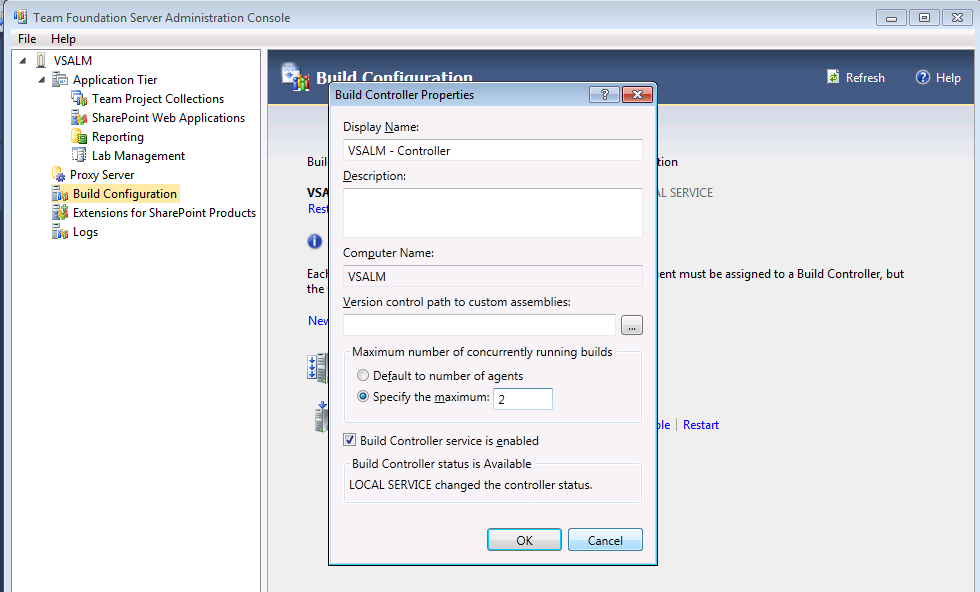
- Click on 'Properties' of the VSALM - Controller, and change the number of workflows that the controller can execute in parallel to "2". This required so that you can run the Build-Deploy-Test automation workflow, which in turn spawns the build workflow.

- Open Team Foundation Server Administration Console, and select Configure Team Foundation Build Service.
- Create a Build definition in TFS to compile the FabrikamFiber solution.
- From Visual Studio, select Team Explorer, and then Builds.
- Create a new build definition. On the "General" tab, type in a name for the build definition - say, Fabrikam Build. On the "Build Defaults" tab, select a share where the builds should be generated. For instance, type \\vsalm\c$\drops. Ensure that you have created a folder called C:\drops, and have given "Everyone" (or atleast .\Administrator) read-write permissions to this folder. In the "Process" tab, select the Default Template. Save the build definition.
- To verify that the build definition is correctly setup, queue a build, and verify that the solution compiles, and that the build output is generated in C:\drops folder. If you get a permission error, ensure that the build service hold is running under .\Administration account, and that you have given the permission to this account to access the build share.
- Create an automated test plan in Microsoft Test Manager.
Create a standard environment
- Open Microsof Test Manager with elevated permissions (Shift-right-click Microsoft Test Manager in Start Menu and select Run as Administrator). Go to Lab Center.
- Select "New" under Environments.
- On the "Type and Name" tab, type in a name for the environment - say, Fabrikam BDT.
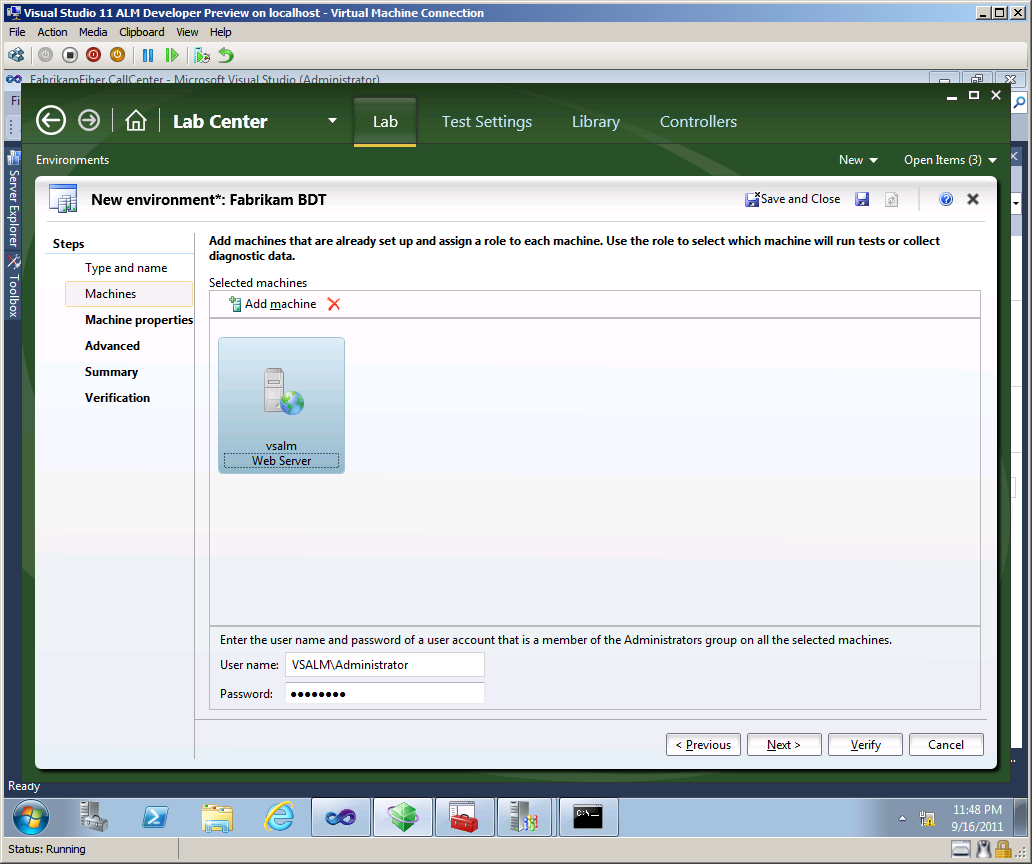
- On the "Machines" tab, add a machine and type "vsalm" for the name of the machine. Select "Web Server" as the role of the machine.

- Select "Verify". If the verification fails, ensure that you have launched MTM with elevated privileges.
- Once the verifications pass, select "Finish".
- The creation of standard environment takes a few minutes. During this time, the agent is automatically downloaded and installed on the machines of the environment (in this case, the vsalm machine itself). At the end of the process, you should see that the environment goes into "Ready" state.

Create and run a Build-Deploy-Test definition
- Create a Test settings.
- From Microsoft Test Manager, go to Lab Center, and to Test Settings.
- Create a new automated test settings. On the "General" tab, type in the name of the test settings - for e.g., Fabrikam BDT Test Settings. Select "Automated". On the rest of the tabs, choose the defaults, and save the test settings.

- Create a Build-Deploy-Test definition.
- In Visual Studio, go to Team Explorer, and open Builds. Select "New Build Definition".
- On the "General" tab, type in a name for the definition - say, BDT.
- On the "Build Defaults" tab, uncheck "This build copies output files to a drop folder".
- On the "Process" tab, select LabDefaultTemplate.11.xaml as the build process template.

- Click "..." next to the Lab Process Settings, and enter the following settings:
- Environment: "Fabrikam BDT" or the name that you gave to your environment
- Build: Set the build definition to "Fabrikam Build" or the name you gave to the compilation build
- Deploy: Check the option to Deploy, and Add a row in the grid. For the Machine role, select "Web Server". For the Deployment script, type "cmd /c dir". We are not really doing a deployment in this walkthrough since the application is already deployed in the virtual machine.
- Test: Select the automated test plan and the test settings that you created.
- Save the build-deploy-test definition,
- Queue an instance of the Build-Deploy-Test definition.
- Select the build definition that you just saved, and queue it. This should trigger a compilation, followed by deployment, and then the exeuction of the test cases.
What next?
In this walkthrough, you have seen how easy it was to create a standard environment. The process of installing agents onto the machines of the standard environment is automated. You also saw how you can run a build-deploy-test workflow using a standard environment. These are some of the enhancements in Visual Studio 11.
In the walkthrough, you have used the same machine for creating the standard environment. In a more realistic scenario, you would typically have test machines that you would compose into an environment. Accomplishing that using the VSALM machine can be done as follows:
- Create another virtual machine with Windows 2008 R2 operating system, joined to workgroup, and present on the same Internal Network on the same Hyper-V host. We will call this virtual machine as "Test Machine" in the following description.
- When you setup this machine, ensure that the Administrator's password is the same P2ssw0rd.
- On the Test Machine, edit the C:\windows\system32\drivers\etc\hosts file. Add an entry <IP address of VSALM Machine> www.fabrikam.com to the hosts file . This is required for the test machine to be able to find www.fabrikam.com.

- Ensure that the Network and File Sharing exception is enabled in the Firewall settings for the Test Machine.
- The project that comes with the VM is an MVC project. In order to run MVC tests on the Test Machine, you need to install additional software on it. (E.g., Visual Studio with MVC3. Or, if you are like me, and are ok with the test run failing, then skip this step :). You can always do it later.).
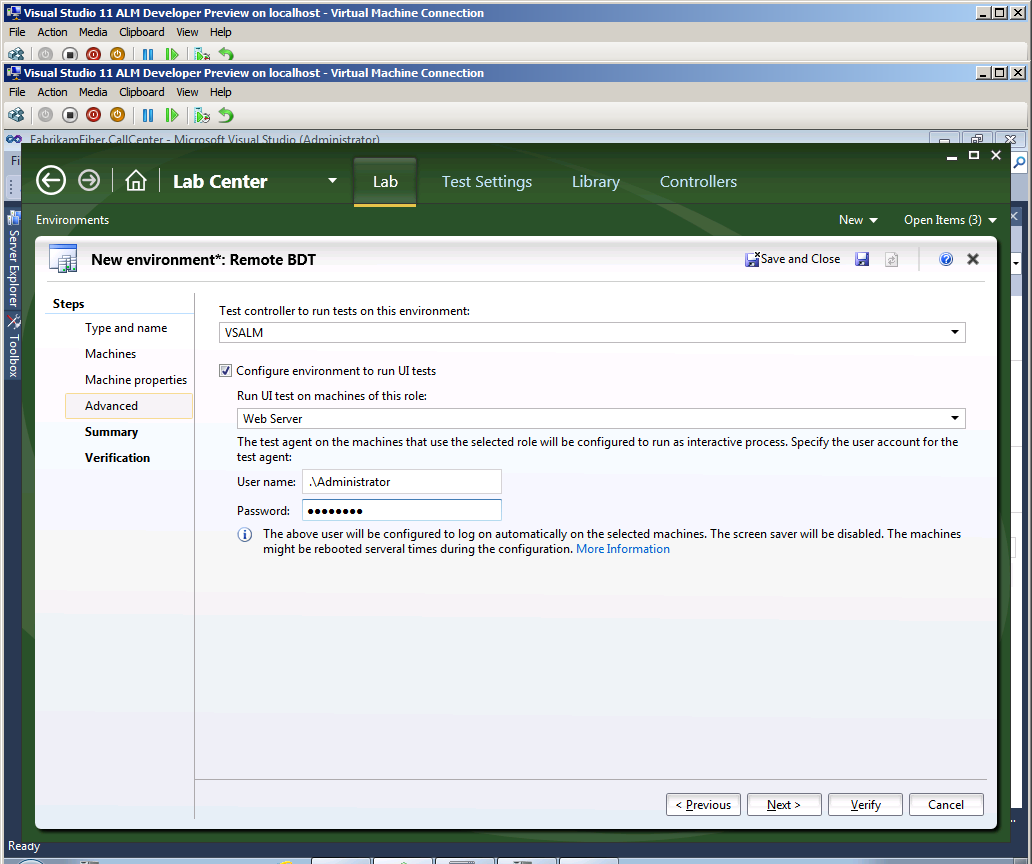
- From Microsoft Test Manager, create a new Standard environment. This time, provide the computer name of the Test Machine. In the wizard, select the 'Advanced' tab, then select the option to run Coded UI Tests. This will cause the test agent to be run using the provided account and authenticate succesfully with the test controller.

- Once the environment becomes Ready, queue the same Build-Deploy-Test definition on this environment.
