How to create a private cloud step by step with System Center part 5: Setting up Networking
Go to the Settings tab, to have more options for our networking a quick tip is to avoid the automatic creation of logical networks when you add a host:
- Go to your SCVMM server and open the console.
- Under Generaldouble click Network Settings and uncheck the Create logical networks automatically option., click ok.
Now let’s create a logical Network:
- In the SCVMM Console go to the Fabric tab.
- Under Networking, right click in Logical Networks and select Create Logical Network.
- Define a descriptive name, such as Lab or Prod.
- Here is where the magic happens, and I am not going to get really deep into this because it’s a topic I prefer to show in a dedicated post.
- For an easy startup just select the check for Create a VM network with the same name to allow virtual machines to access this logical network directly, and click next.
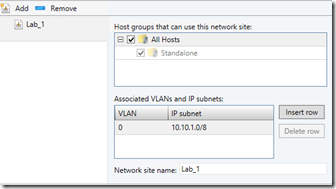
- Click add and select your All Hosts Group.
- I will create 1 subnets and VLAN 0 because I’m not using VLANS right now, click next.
- And finish.
Now our Port Profile:
- Right click in Port Profiles and Create Hyper-V Port profile.
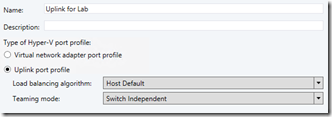
- Put a descriptive name such as Uplink for Lab.
- Select Uplink port profile and click next.
- Select your Logical network and click next.
- Finish.
And to finish create a logical switch:
- Right click on in Logical Switches and Create Logical Switch.
- Next.
- Descriptive name like Lab Logical Switch, click next.
- Defaults and Next.
- Select No Uplink Team, because we will not be teaming in this example.
- Click add and select your Uplink previously created, click next.
- Click Next.
- And Finish.
Next post
Comments
- Anonymous
September 01, 2014
In this fourth part of the series we will install, configure, and integrate WDS to SCVMM. Use a copy - Anonymous
September 02, 2014
I’m adding an index post so it’s easier for you to browse through this series of posts. How to create

