Shape Recognition with WPF and InkAnalysis
Did you know that the Windows Vista SDK contains a shape recognition engine? It's part of the InkAnalysis framework that provides APIs for handwriting recognition, ink parsing and shape recognition. This framework enables some really cool scenarios, especially when combined with WPF. And it's very easy to program against it from a WPF app due to its strongly-typed, WPF-friendly wrapper assembly (iawinfx.dll). Today I want to focus on shapes, I'll work on a seperate post for handwriting recognition (for an overview of InkAnalysis take a look at this MSDN topic).
The sample that comes with this post in the attachment lets the user draw a shape (triangle, ellipse, rectangle, polygon) using the mouse (or stylus if available). The shape reco engine then kicks in and returns the corresponding WPF shape element. Once the shape elements are in the WPF tree, you can use the CheckBoxes to animate or move them around.
One of the key lines in the code is where we tell the InkAnalyzer that our ink stroke should be considered as 'Drawing' (as opposed to handwriting).
inkAnalyzer.SetStrokesType(e.Added, StrokeType.Drawing);
Then, when we get the result nodes from the InkAnalyzer, it will return the actual WPF shape objects, like this:
InkDrawingNode drawingNode = resultNode as InkDrawingNode;
if (drawingNode != null && drawingNode.GetShapeName() != "Other")
{
Shape shapeToAdd = drawingNode.GetShape();
...
}
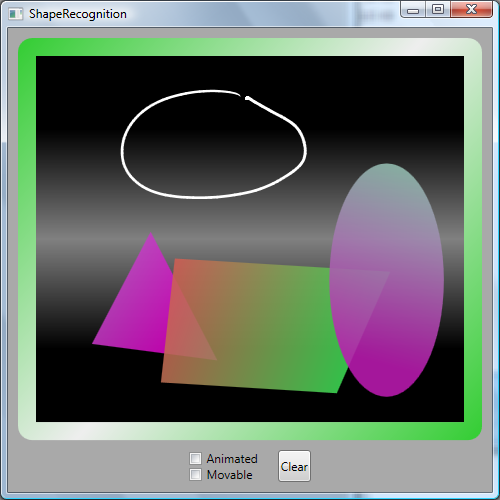
Here is a screenshot of the sample just before completing the ink stroke:

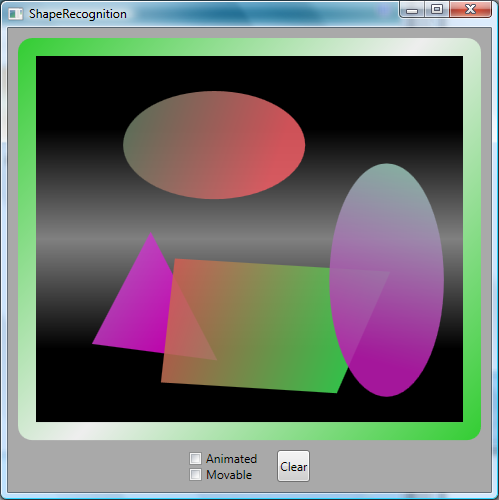
After MouseUp (or StylusUp), shape recognition kicks in and the WPF shape element gets added to the Canvas.

Now that your handwritten stroke has been converted to a WPF shape, you can utilize the full power of WPF and do fancy things with them. For example: render them with semi-transparent gradients, animate smoothly or move them around - as demonstrated in my sample. The full sample project is attached to this post.
Comments
Anonymous
November 01, 2007
PingBack from http://msdnrss.thecoderblogs.com/2007/11/01/shape-recognition-with-wpf-and-inkanalysis/Anonymous
November 02, 2007
An integral part of Windows Vista is the new Windows Presentation Foundation (WPF). One of the featuresAnonymous
October 20, 2008
oprah county scandal school <a href= http://www.videocodezone.com/users/icholas7076 >oprah school scandal girls</a> [url=http://www.videocodezone.com/users/icholas7076]oprah school scandal girls[/url]Anonymous
November 23, 2008
hi,, where should i write inkAnalyzer.SetStrokesType(e.Added, StrokeType.Drawing); ??? please let me know i get node as null in result. so no shape is created. hmahida@slscorp.comAnonymous
November 25, 2008
The full source code is attached to this post.