Step-By-Step: Azure Application Proxy with Single Sign On
Most of you might have heard about the Azure Application Proxy already and might have tried it as well. If you have not done so already , you can learn about it here :
https://msdn.microsoft.com/en-us/library/azure/dn768214.aspx
https://msdn.microsoft.com/en-us/library/azure/dn768219.aspx
Now, in this article i will outline the steps involved in Publishing an application through Azure Application Proxy using custom Domain and Single Sign On. Before we move further, You will need the following:
1. Active Directory On Premise
2. Custom Domain and Access to create DNS records ( Mainly TXT Records and Host A Records)
3. AAD Sync Tool ( Can be downloaded from :https://go.microsoft.com/fwlink/?LinkID=278924)
4. ADFS Server ( On Premise)
Adding a Custom Domain to Azure
- Here, we will add a custom domain in the Azure.
- you would typically need a Global Admin account to make any changes.
- Login to Azure Portal -->Active Directory-->Click on the desired Directory
- Click on Domains

- Click on ADD button at the bottom

- Add the Domain Name that you have planned to implement ( you will need to be cautious here, as this will be the suffix you are going to use for your SSO Later and hence planning is needed)

- Also, Enable Single Sign On option

- Click on Add and you would see a confirmation as below.

- This does not really mean you can use it for Single Sign on yet
- Click on the Next( Right Arrow Indication) and you will be taken to below screen from where you can go to Directory Integration Page.

Setting Up Directory Sync
- Before You install the AAD Sync Tool and Configure it on Premise, you will need to enable Directory Integration in the Azure Portal.
- Go to Azure portal Select the Directory, Click on Directory Integration and ensure that Directory Sync is Activated as below, if not activate it and save.

- Download the AAD Sync Tool from https://go.microsoft.com/fwlink/?LinkID=278924
- install the same on a Domain Joined Computer ( Ensure that this computer is not disabled in your AD)
- Once the Installation is complete, you will need to configure the Tool.
- First Provide the Credentials for your Azure AD( should have Administrative Privileges)


- Next, you will need to provide the Enterprise Admin credential for the On Premise AD

- Enable Hybrid Deployment, if you need one.

- Enable Password Sync

- Click Next to configure the AAD Sync Tool. Once configured you can click Finish.
Set up a trust between AD FS and Azure AD
- Now that you have added the customer domain and enabled Directory Sync, we will enable the trust between ADFS( On Premise) and Azure AD
- So before we proceed further, I assume that you have already setup an ADFS Server on Premise and is published to the outside world for the connectivity( you can use Web Application Proxy to publish ADFS 2012 r2 on Premise. Also please note that you do not have to separately publish the ADFS Link on WAP, just configuring Web Application Proxy would suffice.)
You will need to download the Microsoft Azure Active Directory Module which can be downloaded here: https://go.microsoft.com/fwlink/p/?linkid=236297
Before you Install the Microsoft Azure Active Directory Module, ensure that you have installed "Microsoft Online Services Sign-In Assistant for IT Professionals RTW" and if you have not, you can download it from here:https://www.microsoft.com/en-us/download/details.aspx?id=41950
Once you have installed the above components, it is time to configure Trust.
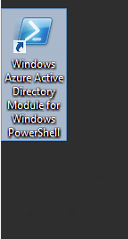
Login to ADFS Server, if you have not already, Click on the Microsoft Azure Active Directory Module for powershell on your Desktop( ADFS Server).
- Follow the article https://msdn.microsoft.com/library/azure/jj205461.aspx\#BKMK\_ConvertDomain to add the domain
- Once you add the new domain, you will be given a unique TXT Record
- Go to your Managed DNS Service/Server
- Add a TXT Record Provided while adding the Domain above.
- Go back to the Aure AD PowerShell Module and run the command Run
New-MsolFederatedDomain –DomainName <domain>, where <domain> is the domain to be added and enabled for single sign-on.
- If we are able to resolve to the DNS you have added above, you should get a message stating Command completed successfully else, you will receive an error and will be asked to add the TXT Record. Please note that it may take 15 minutes to 48 hours for this record to be active.
Publishing through Azure Application Proxy
There are two parts in this section:
- Download and Install the connector on a domain Joined computer On Premise.
- Configure and Publish the Application through Application on your Azure Portal.
Download and Install APP Proxy Connector
- You will first need to download and Install the connector On premise to connect to Azure.
- The easiest way to download the Connector is by going to your Azure Portal-->Active Directory-->Domain-->Configure


- The Installation is pretty straight Forward, Click on the downloaded file


- Provide the credentials when asked ( Usually, a Global Admin Credential on Azure AD)

- If everything goes well, you will see this:

- you can verify the same by going to services.msc and ensure that the following services are running.

Configure and Publish the Application through Application on your Azure Portal
- Go to the Applications under your Azure Portal

- Click on Add

- In the next window Select, Publish an application that will be accessible from Outside your Network

- Provide the details as desired:

- You will be taken to properties of the rule/Application automatically and you would see something like this.

- Since we plan to use Single Sign on, we will use Pre-Authentication Method as Azure Active Directory and also use the Internal Authentication Method as Integrated Windows Authentication.
- Please note that when you make the above selection, you will need to configure the On Premise Application to work with Kerberos Constrained Delegation. I am going to cover it in separate Article as it is out of scope of this article.
NOTE:
- You will need to be cautious about the changes you are making , it needs a planning before you enable Single Sign On for the Custom Domain.
- Once you configure the ADFS, you have to ensure that the Federation Service Name is Accessible to the outside world through a Reverse Proxy mechanism, if you are using ADFS on 2012 R2, It is a good idea to use Web Application Proxy on Windows 2012 R2( ADFS Proxy).
- With Single Sign on Enabled, you will typical Access the site published on Azure Application Proxy that will redirect you to On Premise ADFS to Authenticate and then, you will be redirected back to Azure Application Proxy once Authenticated and If for any reason, your On Premise ADFS is not setup, you will fail to access the Application. So, it is very important to ensure that the ADFS on Premise is accessible and you have the correct DNS records for the same.
- If you are using the Pre-authetication on the Azure Application Proxy and have selected Integrated Windows Authentication , you must Configure the Application to work with KCD and ensure that the computer running the APP Connector has the Proper Delegations set on its Computer Object in AD along with the SPNs.
I hope, the above information helps.
Shashanka Haritsa
Technical Lead
CSS Security