Un-provisioned Users
Exchange Hosted Archive (EHA) uses the Admin Center as its user directory – see figure below. If a user is not listed in the Admin Center then it is an un-provisioned user. Un-provisioned users will not have their messages migrated to the advanced archive of Office 365.
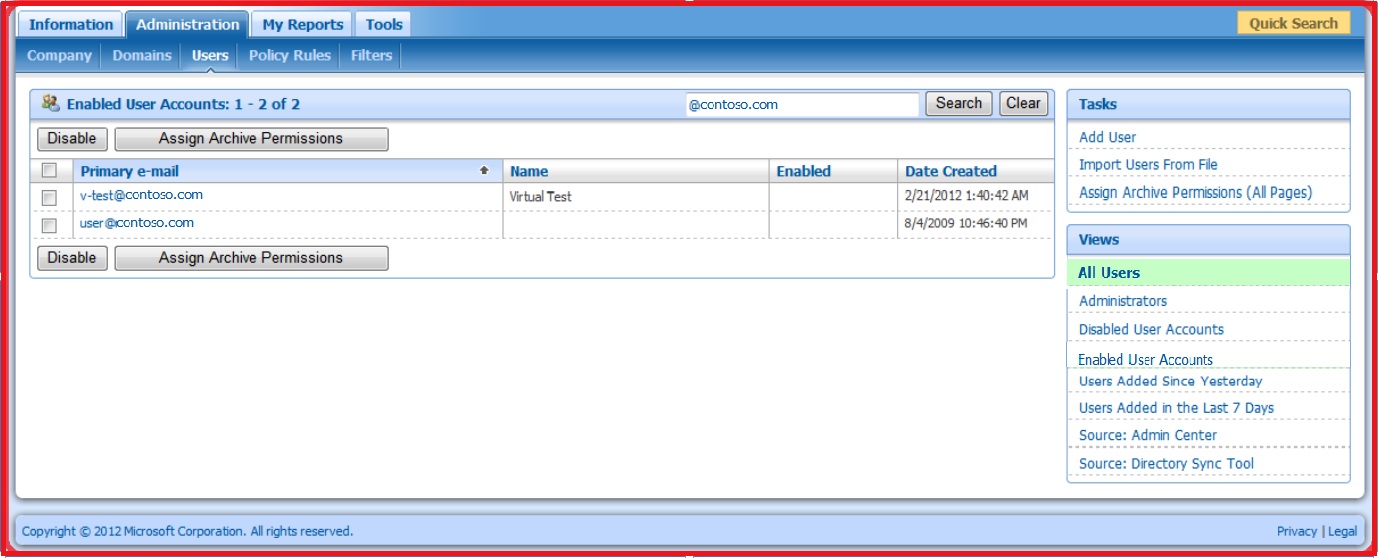
Figure 1 Admin Center Users List (https://admin.messaging.microsoft.com)
Office 365 does not support un-provisioned users. If you want data for un-provisioned users to migrate to Office 365 you must provision the users in EHA before your migration begins. You can request a list of un-provisioned users from Microsoft. The list will show you all recipients for messages in the Archive that are not listed in the Admin Center. Because the un-provisioned users list contains personal information only your authorized company contacts, meaning those listed in the Admin Center, may request the list. To request the un-provisioned users list send e-mail to EHASUP@Microsoft.com or open a support ticket using the Get Help Now link found in the FOPE/EHA Admin Center or call EHA Support at
1-866-291-7726
How to Provision Users in the EHA Admin Center
After reviewing the un-provisined users list you can use the instructions that follow to provision users you may find missing from the Admin Center:
Steps to provision users
Customers can provision users in EHA either individually, or in bulk.
Provision individual users
- In the Administration Center, click the Administration tab, and then click the Users tab.
- Click Add User in the Task pane.
- Enter the primary email address for the user in the Primary e-mail address field.
- Click Save.
Provision users in bulk
You can provision several users at one time by creating a list of users in a CSV file
- Open Microsoft Office Excel.
- Enter the following user information as separate column values, with each user's information in a single row
Primary email address (required)
First name
Last name
Secondary email addresses
Alternate email addresses
Example: The following example shows a user file with two users, both have a primary address (required) in column A; a first and last name (required, even if left blank by using a space character) in colunmn B and C repectively; a secondary address in column D; and then the first user has an additional secondary address and the second user has an alternate address in colunn E repectively. Alternate addresses are external, non-company, addresses that can be used for communications such as a password reset. You can add more secondary and alternate addresses by specifying them one per column F, G.....and so on.
pilar.ackerman@contoso.com
|
Pilar
|
Ackerman
|
packerman@contoso.com
|
pilarack@contoso.com
|
jim.hance@contoso.com
|
Jim
|
Hance
|
jhance@constoso.com
|
alt:jim@hotmail.com
|
- Save the file in CSV format. You are now ready to import the users into EHA.
- In the Administration Center, click the Administration tab, and then click the Users tab.
- In the Tasks pane, click Import Users from File.
- In the Send status notifications to the following email box, type the email address to send upload status information to.
- Next to the Specify the user list file box, click Browse. Browse to and select the CSV file that you created.
- Click Save to begin the import process.
- Wait approximately five minutes, plus one minute for every 30 users (300 users will take 15 minutes) for the changes to appear in the Admin Center.
During the upload process, EHA sends status notifications to the administrator email address that you specified, if changes do not take affect this status message will contain helpful error information.
If the new user accounts are not added to your services, the process did not complete successfully. This issue can be the result of an improperly formatted CSV file. Recheck the formatting of your file and try again (did you specify the same address twice? Illegal characters? Etc.).