Analyzing Twitter Movie Data with Hive in HDInsight
In this tutorial you will query, explore, and analyze data from twitter using Apache™ Hadoop™-based Services for Windows Azure and a Hive query in Excel. Social web sites are one of the major driving forces for Big Data adoption. Public APIs provided by sites like Twitter are a useful source of data for analyzing and understanding popular trends.
 |
Important! This wiki topic may be obsolete. The wiki topics on Windows Azure HDInsight Service are no longer updated by Microsoft. We moved the content to windowsazure.com where we keep it current. This topic can be found at Tutorial: Analyzing Twitter Data with Hive. |
This tutorial is composed of the following segments:
- Search for, download, install, and use Microsoft Analytics for Twitter.
- Get Twitter Feed using cURL and Twitter Streaming API.
- Request and configure a new Hadoop on a Windows Azure cluster.
- Process Twitter data using Hive on the Hadoop on a Windows cluster.
- Set up Hive ODBC and the Hive panel in Excel to retrieve the Hive data.
Search for, download, install, and use Microsoft Analytics for Twitter

Microsoft Analytics for Twitter can be downloaded at http://www.microsoft.com/download/en/details.aspx?id=26213. Open Analytics for Twitter.xlsx file.
This requires Excel 2010 and PowerPivot (the latter of which can be downloaded at http://www.microsoft.com/download/en/details.aspx?id=29074).

Open Microsoft Analytics for Twitter and paste the following movie tags and accounts into the query window:
#moneyball, @MoneyballMovie, @helpmovie, @BridesmaidsSay, @CONTAGION_movie
Click on the  button and follow the directions.
NOTE: This part has nothing to do with Hadoop but is an example of using the Twitter Search API and self-service Business Intelligence (BI) in Excel and PowerPivot.
Get Twitter Feed using cURL and Twitter Streaming API
This step requires curl.exe. Download the appropriate curl file for your OS (such as the Win64 binary SSL) from http://curl.haxx.se/download.html

and unzip curl.exe to the appropriate location (such as C:\twitterdata)
Copy the two files get_twitter_stream.cmd and twitter_params.txt from the Step2GetTwitterFeedUsingCURLAndTwitterStreamingAPI folder and paste them into the same folder as curl.exe, as follows:

Edit the twitter_params.txt file to track your tweets as follows:
track=moneyball,MoneyballMovie,helpmovie,BridesmaidsSay,CONTAGION_movie
Edit the get_twitter_stream.cmd window command script, adding your twitter username in place of USER and password in place of PASSWORD on the following line:
curl -d @twitter_params.txt -k https://stream.twitter.com/1/statuses/filter.json -uUSER:PASSWORD >>twitter_stream_seq.txt
Execute the get_twitter_stream.cmd script from a command prompt as follows:

You should see something like this:

You can stop the job by pressing Ctrl+C. You can then rename the file and then restart the script.
Request and configure a new Hadoop on a Windows Azure Cluster
This step requires access to the CTP for Apache Hadoop-based Service for Windows Azure. Go to https://www.hadooponazure.com/ and click on the invitation link. If you already have access, click the Sign in button.

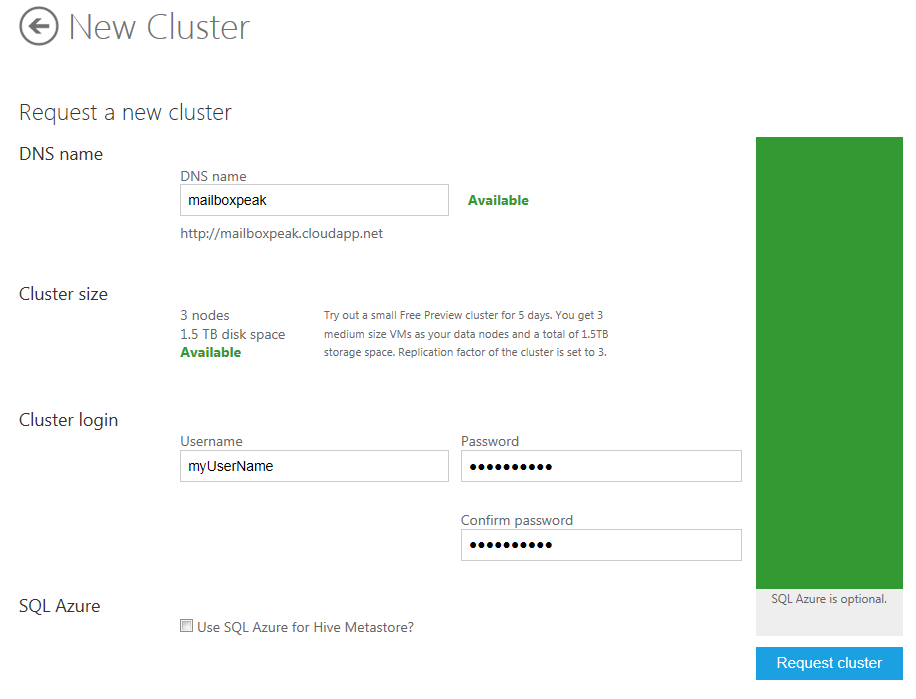
Request a new cluster. Below is an example of a 3 node cluster called “mailboxpeak.” Enter a username and password and click the Request cluster button. If you have questions, refer to the “Apache Hadoop-based Service for Windows Azure How-To and FAQ.”
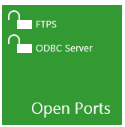
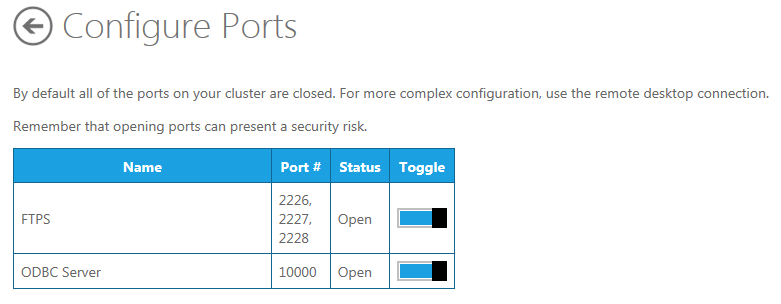
Open the FTPS and ODBC Ports so you can access the server.
Click on the Interactive Console icon.

Create a directory for the Twitter text file on HDFS using the following Javascript command:
js> #mkdir /example/data
To upload small sample text files, run the following:
js> #put
Source:   C:\hadoop\example\data\Sample.txt
Destination:  /examples/data
To upload larger text files (other than compressed files) directly to HDFS, you will need curl.exe. If you do not already have it, download it as described at the beginning of Step 2, and unzip it to your file's location (such as C:\hadoop\example\data). Then open PowerShell (navigate to C:\hadoop\example\data) and cut and paste the following PowerShell Script to FTPS the SampleData text file (SampleData.txt):
C:\hadoop\example\data>
#----- begin curl ftps to hadoop on azure powershell example ----
#------ Replace XXXXXXX with the appropriate servername / username / password
$serverName = "XXX.cloudapp.net"; $userName = "XXXX";
$password = "XXXXXXXX";
$fileToUpload = "SampleData.txt"; $destination = "/example/data/";
$Md5Hasher = [System.Security.Cryptography.MD5]::Create();
$hashBytes = $Md5Hasher.ComputeHash($([Char[]]$password))
foreach ($byte in $hashBytes) { $passwordHash += "{0:x2}" -f $byte }
$curlCmd = ".\curl -k --ftp-create-dirs -T $fileToUpload -u $userName"
$curlCmd += ":$passwordHash ftps://$serverName" + ":2226$destination"
invoke-expression $curlCmd
#----- end curl ftps to hadoop on azure powershell example ----

To upload even larger files, you may need to compress them. A compressed file, with extensions such as .gz, can be uploaded to your Windows Azure storage account. Programs like CloudXplorer (http://clumsyleaf.com/products/cloudxplorer) can be used to upload the file as follows:
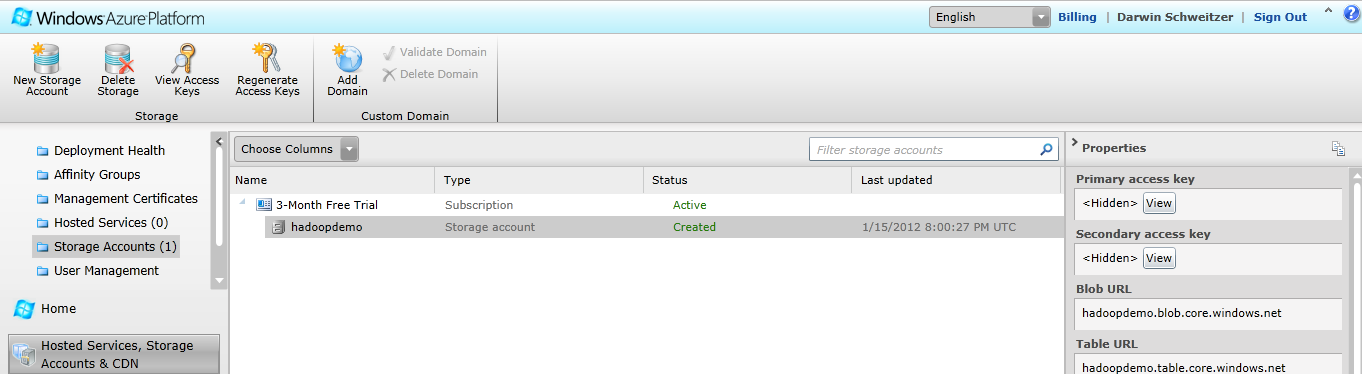
After setting up your Windows Azure storage account and installing CloudXplorer, go to the Windows Azure portal and find and copy your storage account's primary access key by clicking the View button in the right-hand column.

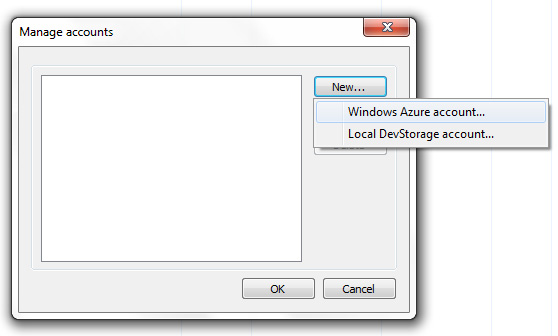
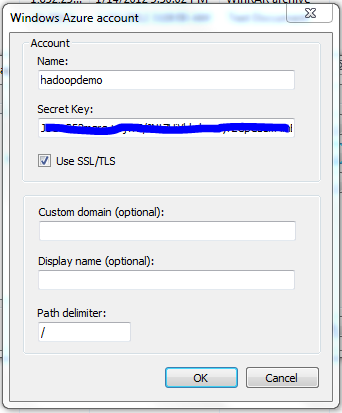
Then open CloudXplorer and click File -> Manage Accounts. This brings up a new dialog box. From here click New and select Windows Azure account.
In the next dialog box, insert the storage account name (the one you defined when setting up the storage account, such as hadoopdemo) and that storage account's primary access key.
When you are inside the new storage account, create a new container (in Windows Azure directories are called containers).
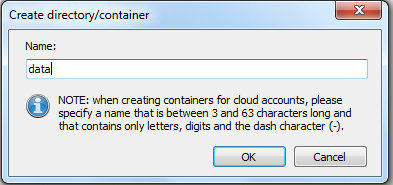
Upload (copy) the zip file into the container (in this case, the container is called data).

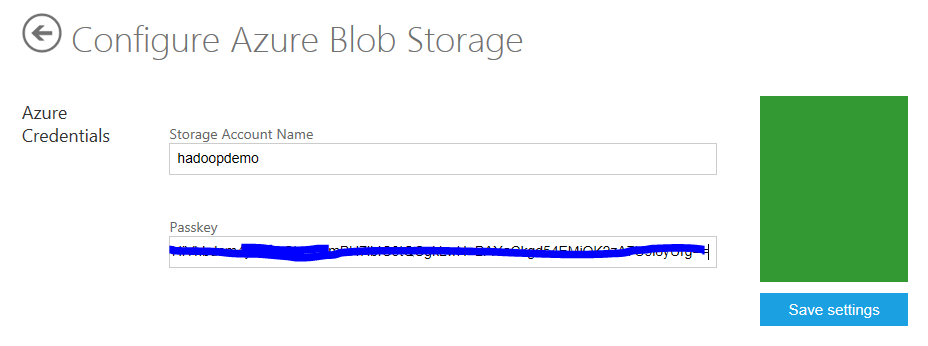
Configure your Window Azure Blob Storage Account by clicking on the Manage Data icon,
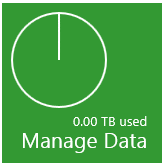
followed by Set up ASV.
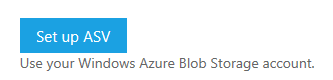
You are going to need your value for the Windows Azure Storage Account Name (in this case hadoopdemo) and its primary access key.
Enter your Windows Azure storage account name and primary access key and click Save settings.
Process Twitter data using Hive on the Hadoop on a Windows Azure head node
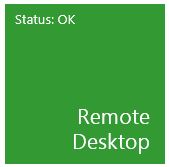
Go to https://www.hadooponazure.com/. Connect to the Hadoop head node by clicking on Remote Desktop.
Click the Open button.

Log on to the remote server with the name and password you used to create the cluster in Step 3.
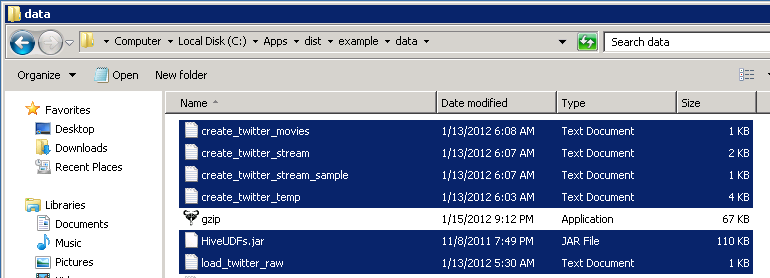
Create a directory (for instance, c:\Apps\dist\example\data) on the Remote Hadoop head node server (on the NTFS side) using Windows Explorer or a command line and change to that directory.
Copy the entire contents of the CopyToHeadnode folder into that new directory. This includes HiveUDFs.jar (User Defined Functions use by Hive queries), gzip, and the Hive query txt files. You may also want to copy the All steps to run from the Hadoop Command Shell.txt file over to make the last half of this step easier.
RDP supports copying and pasting between the host desktop and the remote desktop. There is a chance that Hadoop may unzip the gzip file as you copy it to HDFS.
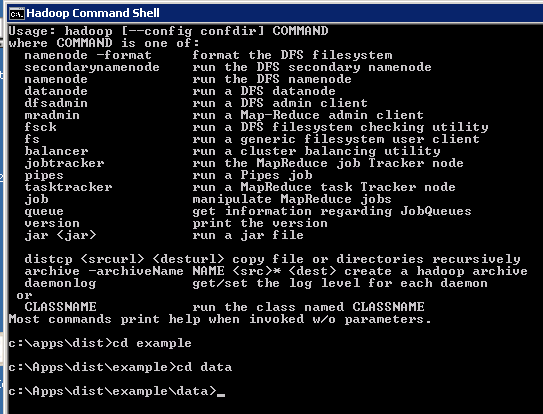
Open the Hadoop Command Shell on the Remote Desktop.
Navigate to the c:\Apps\dist\example\data directory.
Copy the twitter_stream_seq8.gz file from Windows Azure storage to c:\Apps\dist\example\data (on the NTFS side). The location of the file in your storage account depends on the Windows Azure storage mapping you conducted back in Step 3. In our case, the container is called data, and appears in the line below after asv://:
c:\Apps\dist\example\data>hadoop fs -copyToLocal asv://data/twitter_stream_seq8.txt.gz twitter_stream_seq8.txt.gz
Unzip the contents of twitter_stream_seq8.gz to c:\Apps\dist\example\data as follows (you will need gzip.exe, which you can download from http://www.gzip.org/, present in the directory from which you run the command):
c:\Apps\dist\example\data> gzip -d -N twitter_stream_seq8.txt.gz
Note: You may be able to combine these last two actions if Hadoop unzips the file as it copies to HDFS. This may however only work with a .bz2 (bzip2) compressed file http://bzip.org/:
hadoop fs -copyFromLocal twitter_stream_seq8.txt.gz /example/data/twitter_stream_seq8.txt
Copy twitter_stream_seq8.txt from c:\Apps\dist\example\data to HDFS as follows:
c:\Apps\dist\example\data>
hadoop fs -copyFromLocal twitter_stream_seq8.txt /example/data/twitter_stream_seq8.txt
- Check to see that the file has been updated to HDFS by opening
 and navigating to /example/data.

The next few actions can also be found in the “All steps to run from the Hadoop Command Shell.txt” file that you copied to the headnode.
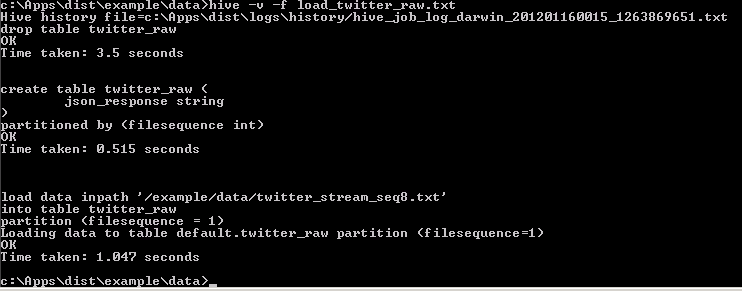
Create and load twitter_raw by running the following command:
c:\apps\dist\example\data>hive -v -f load_twitter_raw.txt
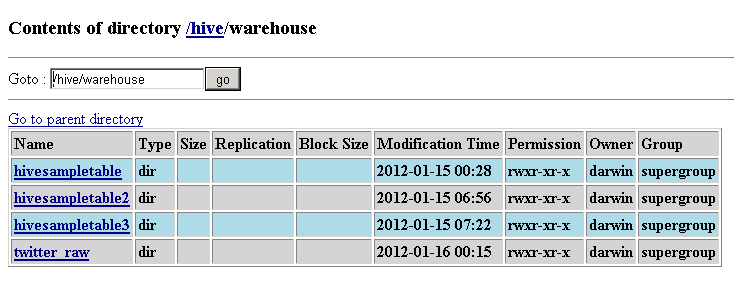
The table should be created in the /hive/warehouse directory on the HTFS side:
You can also check it from Hive by typing in c:\Apps\dist\example\data>hive and then Hive>show tables; as follows:
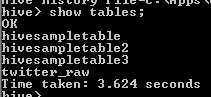
You can then type hive>quit; to get out of Hive.
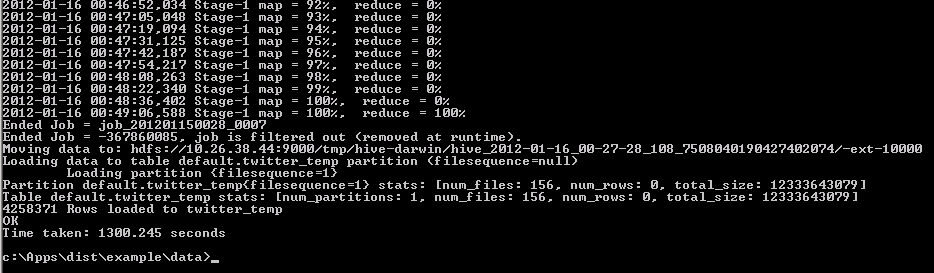
Create and load twitter_temp using:
c:\apps\dist\example\data>hive -v -f create_twitter_temp.txt
This should take over 20 minutes with 4 nodes, and 8 minutes and 55 seconds with 8 nodes.
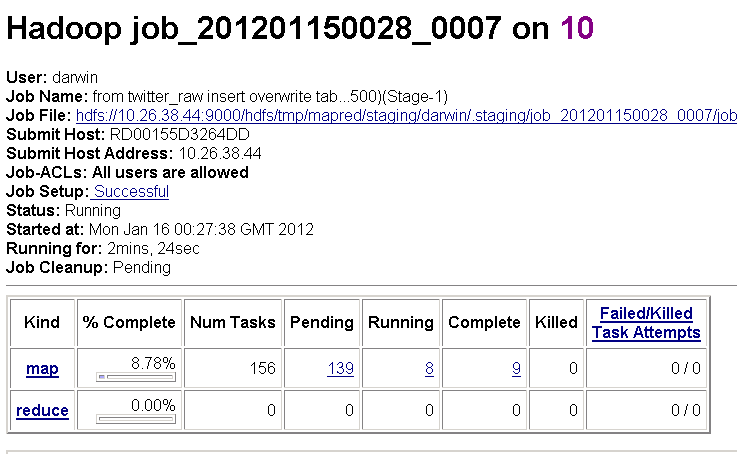
Check the job on the following screen:
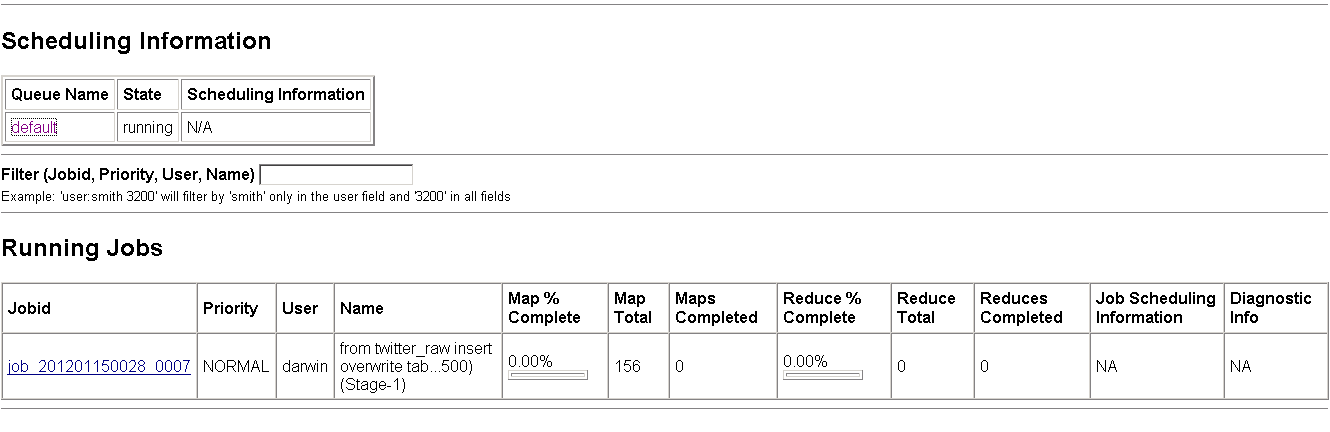
Click on the job to get its details and monitor its progress. It may take over 20 minutes to complete.
You can also monitor the job in the Hadoop Command Shell:
You can also check its progress from Hive by typing in c:\Apps\dist\example\data>hive and then Hive>show tables:

Create and load twitter_stream using:
c:\apps\dist\example\data>hive -v -f create_twitter_stream.txt
It may take over 60 minutes to complete with 4 nodes, and 31 minutes and 54 seconds with 8 nodes.
Monitor the job's progress as above.
Create and load twitter_stream_sample using:
c:\apps\dist\example\data>hive -v -f create_twitter_stream_sample.txt
Monitor the job's progress as above.
Create and load twitter_movies using:
c:\apps\dist\example\data>hive -v -f create_twitter_movies.txt
Monitor the job's progress as above.
Create and load twitter_movies_vw using:
c:\apps\dist\example\data>hive -v -f create_twitter_movies_vw.txt
Monitor the job's progress as above.
Set Up Hive ODBC and the Hive Panel in Excel to Retrieve the Hive Data
This section is copied from the Apache Hadoop-based Service for Windows Azure How-To and FAQ, which can be found by clicking the Downloads tile

at the Hadoop on Windows Azure portal.
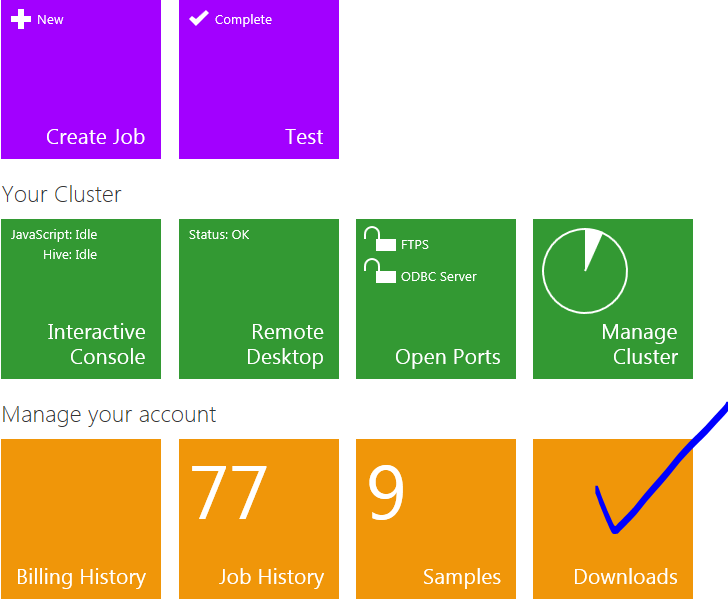
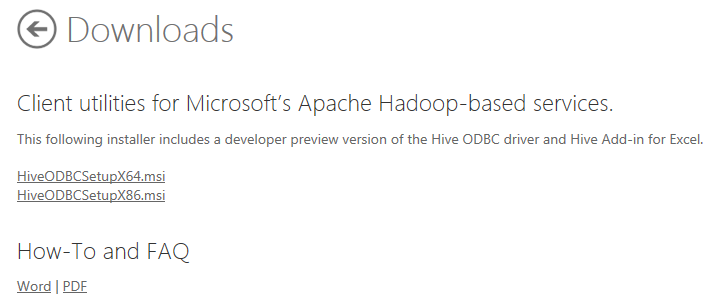
This is also where you can download HiveODBCSetup for 64-bit or 32-bit Excel.
How to connect the Excel Hive Add-In to Hadoop on Windows Azure via HiveODBC
One key feature of the Microsoft Big Data Solution is the solid integration of Apache Hadoop with the Microsoft Business Intelligence (BI) components. A good example of Apache Hadoop integration with Microsoft BI components is the ability of Excel to connect to the Hive data warehouse framework in the Hadoop cluster. This section walks you through using Excel via the Hive ODBC driver.
Installing the Hive ODBC Driver
In order to run the installation, you must download the 64-bit Hive ODBC driver MSI file from the Hadoop on Windows Azure portal.
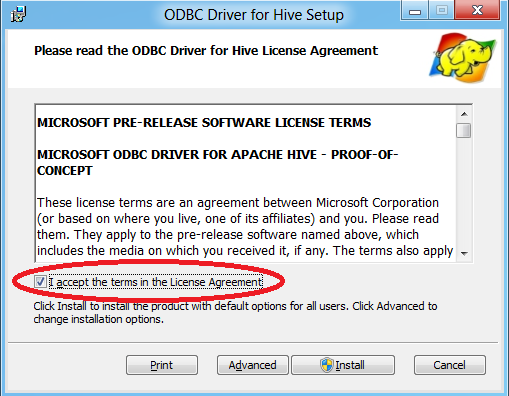
Double-click HiveODBCSetupx64.msi to start the installation.
Read the license agreement. If you agree to the license agreement, click I accept followed by Install.
Once the installation has completed, click Finish to exit the ODBC Driver for Hive Setup wizard.
Installing the Excel Hive Add-In
To install this add-in, you must have previously installed the 64-bit Hive ODBC driver, as well as a copy of Excel 2010 64-bit.
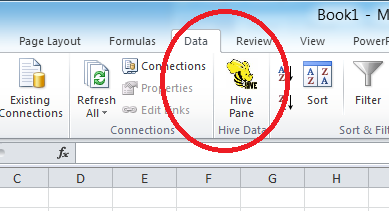
Start Excel 2010 64-bit. You will be asked to install the HiveExcel add-in. Click Install.
Once the add-in has been installed, click the Data tab in Microsoft Excel 2010. You should see the Hive Panel, as shown in the following screenshot:
Creating a Hive ODBC Data Source to Use with Excel
Click Start->Control Panel to launch the Control Panel for Microsoft Windows.
In the Control Panel, Click System and Security->Administrative Tools->Data Sources (ODBC). This will launch the ODBC Data Source Administrator dialog.
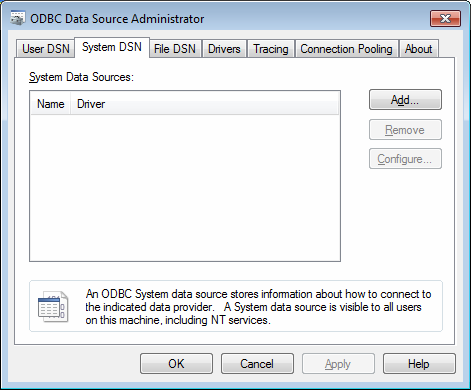
In the ODBC Data Source Administrator dialog, click the System DSN tab.
Click Add to add a new data source.
Click the HIVE driver in the ODBC driver list.
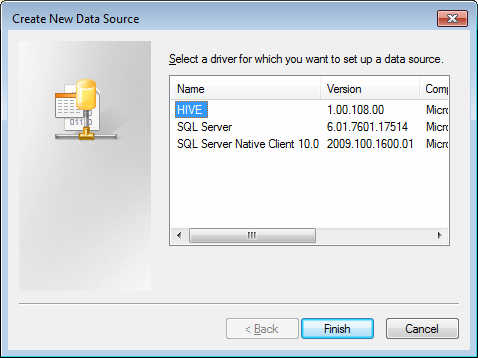
Click Finish. This will launch the ODBC Hive Setup dialog, as shown in the following screenshot:
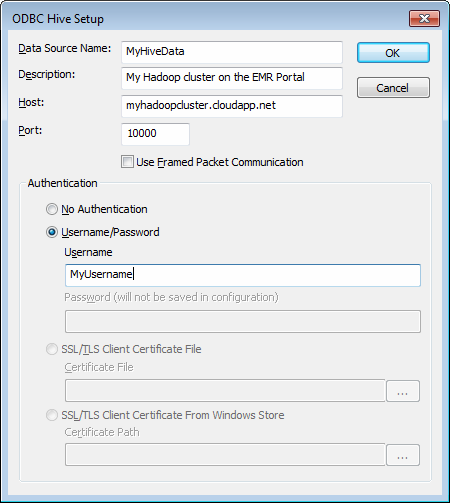
Enter a name in the Data Source Name box. For example, MyHiveData.
In the Host box, enter the host name of the cluster you created on the portal. For example, myhadoopcluster.cloudapp.net.
Enter the username you used to authenticate on the portal.
Click OK to save the new Hive data source.
Click OK to close the ODBC Data Source Administrator dialog.
Retrieving Hive Data in Excel
Open Excel 2010 64-bit. Once it is open, click the Data tab.
Click on Hive Panel to open the Hive panel in Excel.
In the drop-down list labeled Select or Enter Hive Connection, select the data source name you previously created.
You will be asked to enter the password to authenticate with the cluster on the portal. Enter the password for the username.
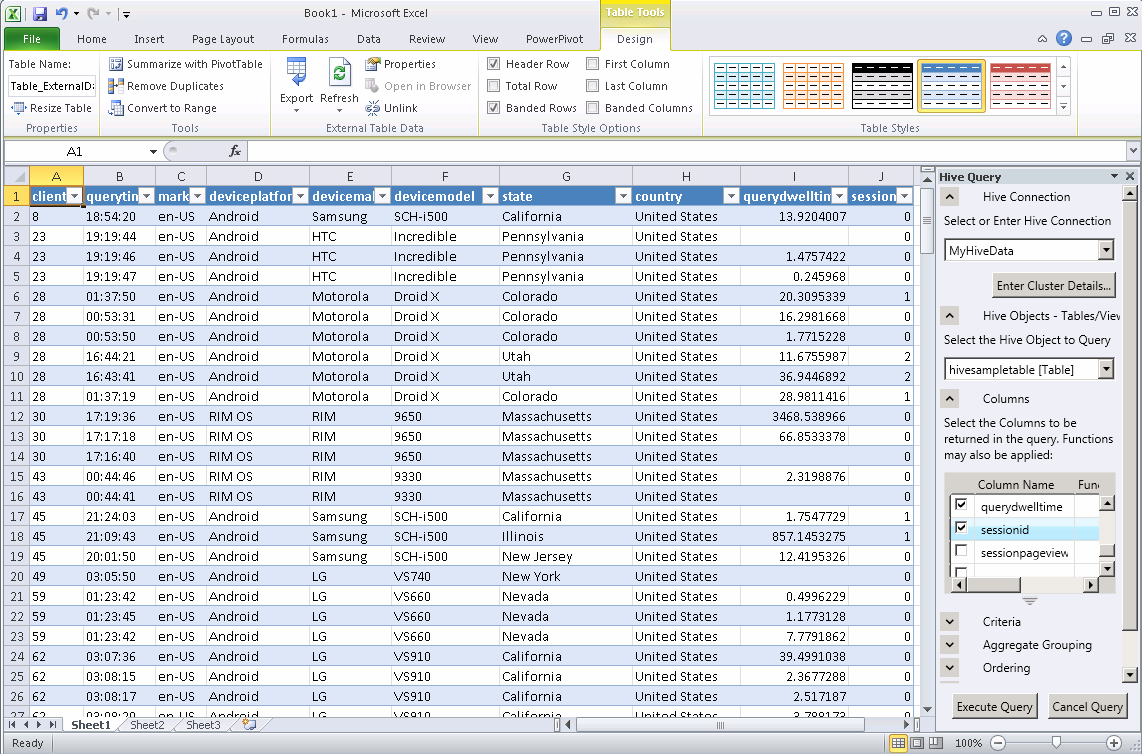
In the drop-down list labeled Select the Hive Object to Query, select hivesampletable [Table].
Select the checkbox for each of the columns in the table. The Hive Query panel should look similar to the following image:
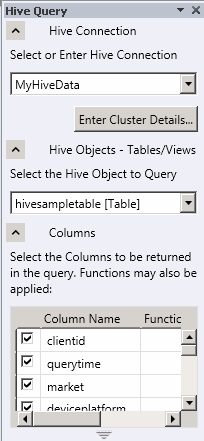
Click Execute Query.
For the data processed in this tutorial, you would execute a query like:
Select * from twitter_movies_vw limit 20
Summary
In this tutorial we have seen how to query, explore, and analyze data from Twitter using Hadoop on Windows Azure and a Hive query in Excel.