ADMT 3.2: Interforest Migration - Part 3
Configuring the Contoso.com and Wiki.com Domains for sIDHistory Migration
Another requirement for ADMT to migrating sIDHistory is the “Audit Account Management” and "Audit directory service access" setting on both source and target domain domain controllers. You can manually configure the source (Contoso.com) and target (Wiki.com) domains to migrate the security identifier (SID) history before you begin an interforest migration, or you can allow the Active Directory Migration Tool (ADMT) to configure the domains automatically the first time that it runs.
Here is manually steps:
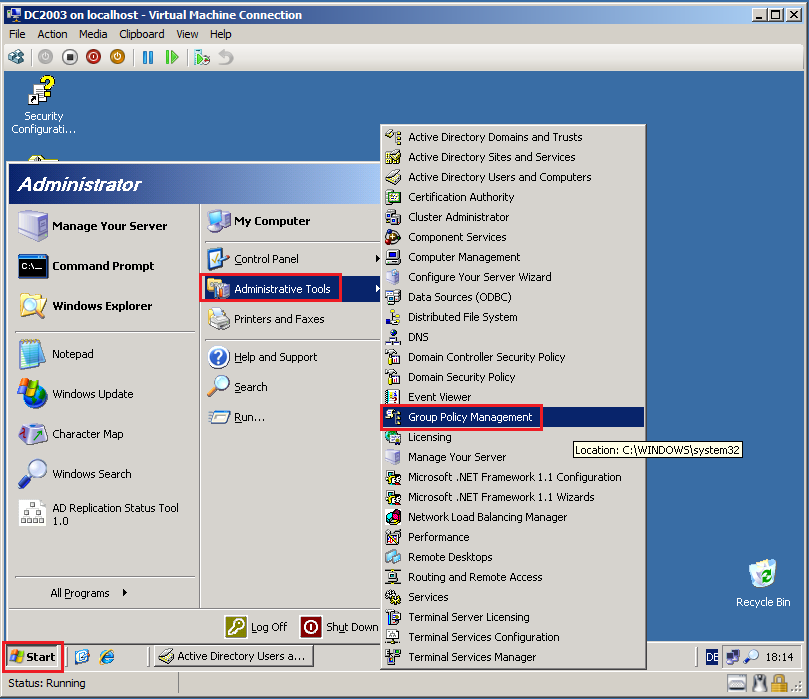
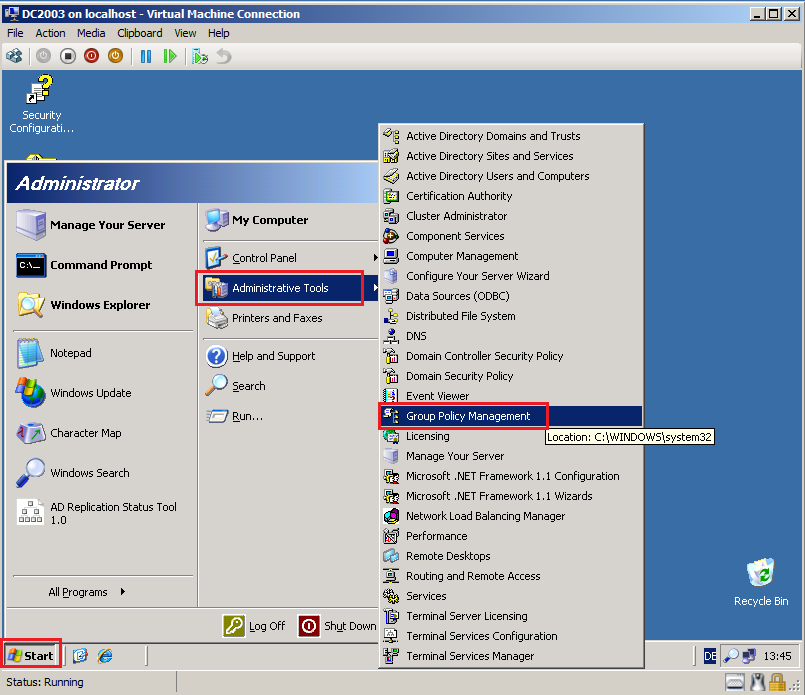
On DC2003 domain controller in Contoso.com, click Start, Administrative Tools, then click Group Policy Management.
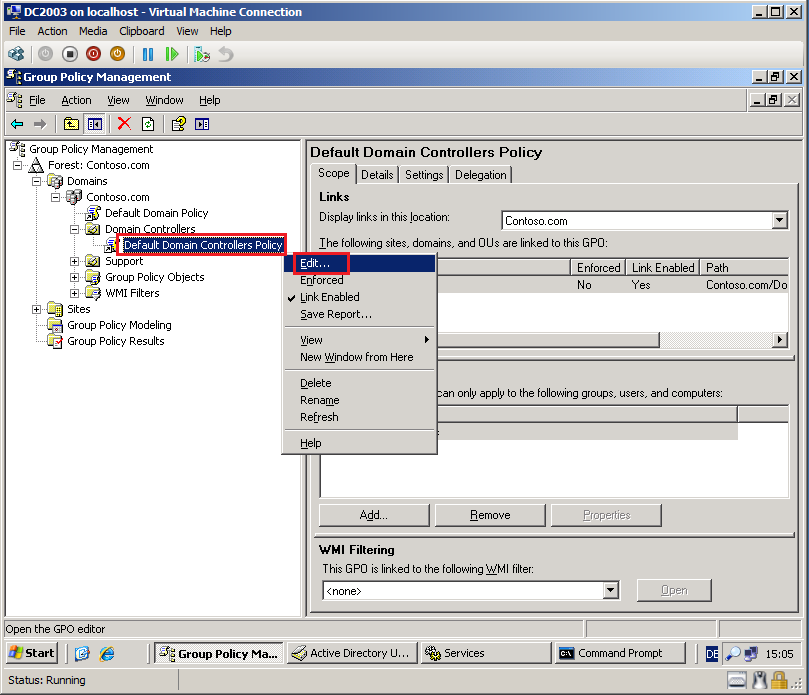
Right click on Default Domain Controllers Policy, then click Edit.
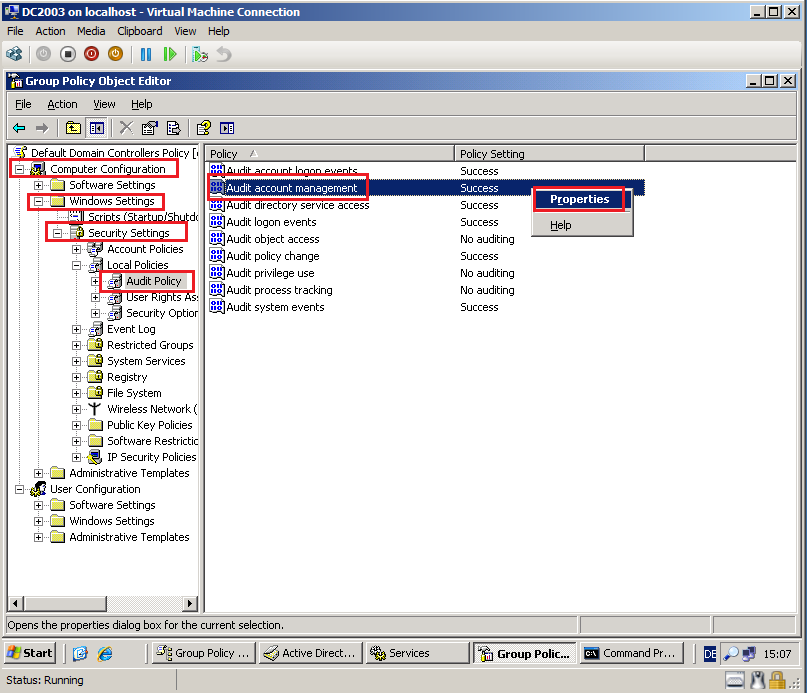
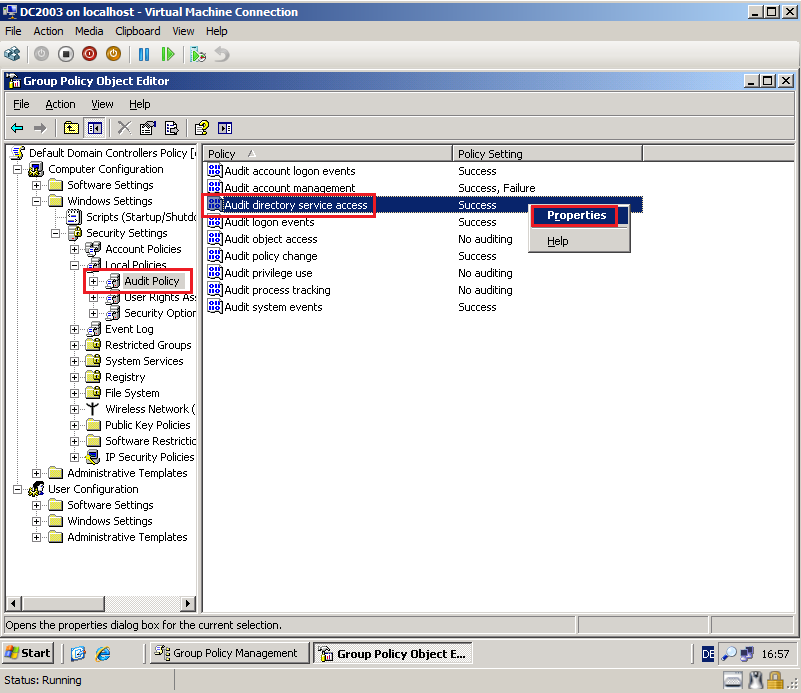
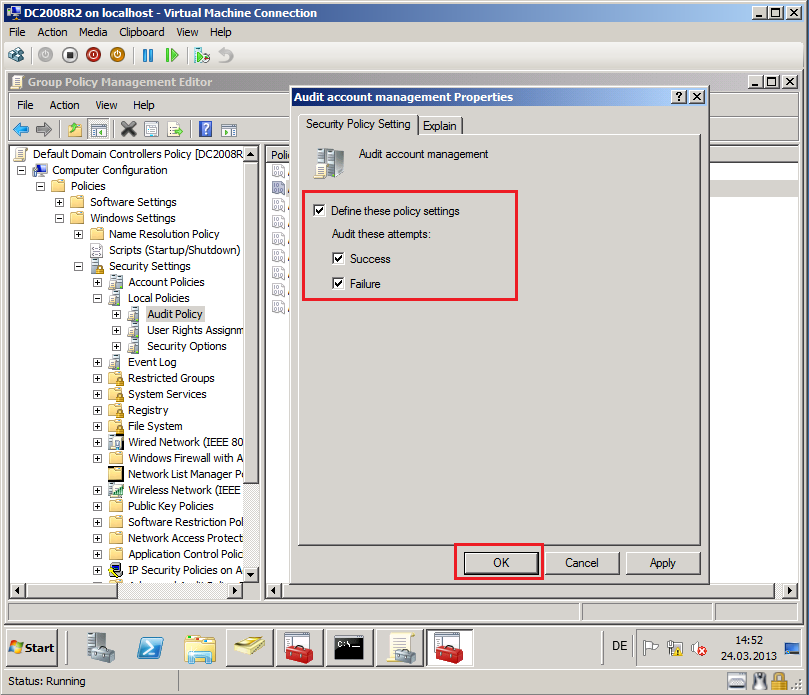
Go to Computer Configuration\Windows Settings\Security Settings\Local Policies\Audit Policy, right click on Audit account management, then select Properties.
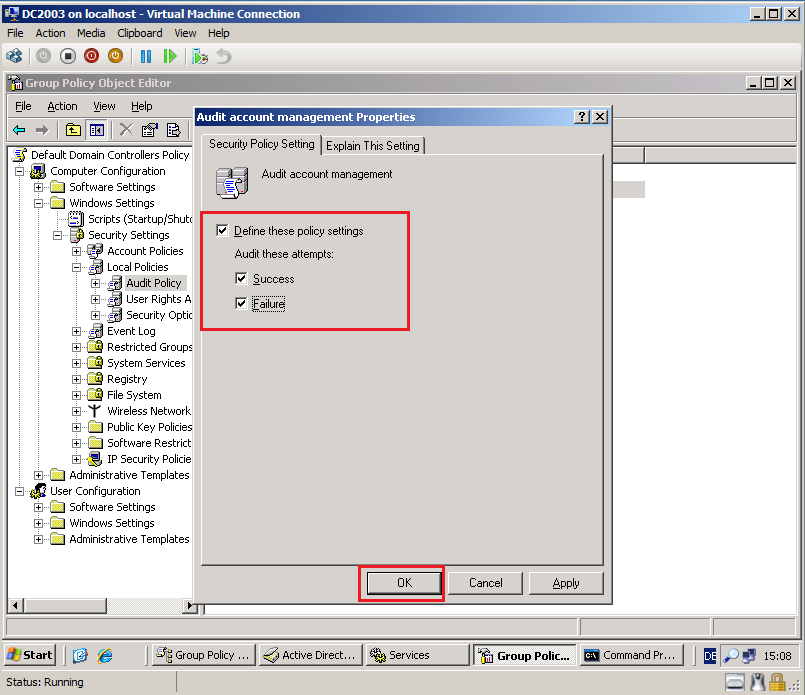
Select Define these policy settings box, then select both Success and Failure. Click OK.
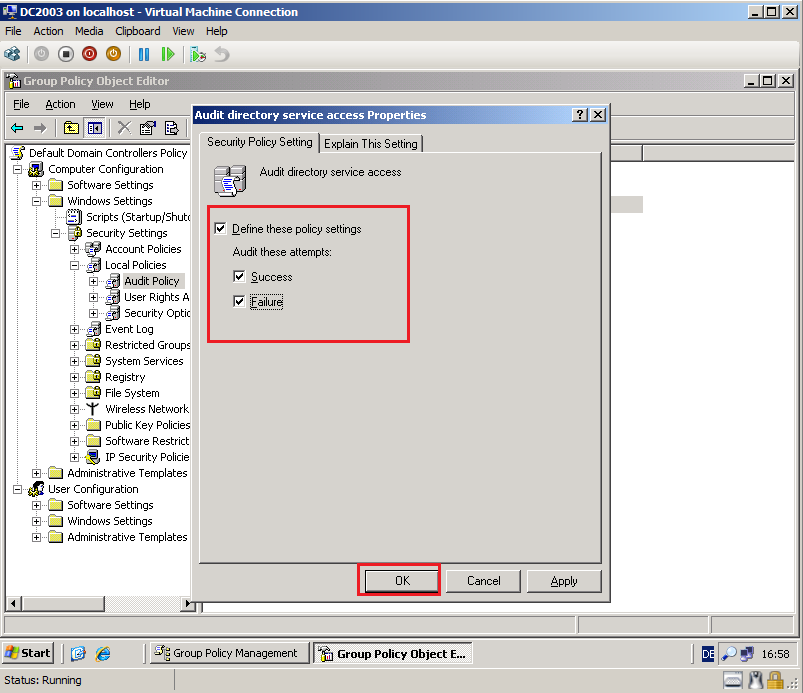
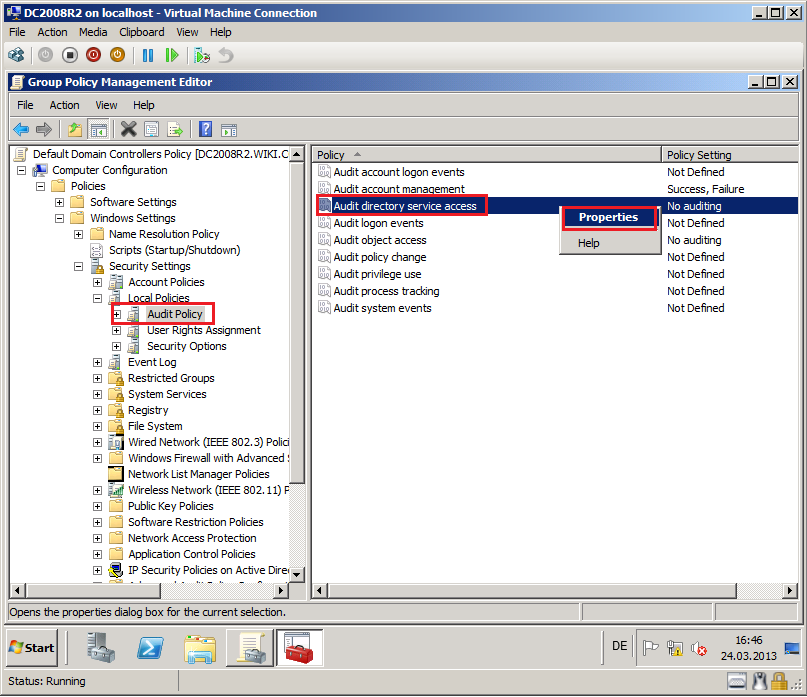
Go to Computer Configuration\Windows Settings\Security Settings\Local Policies\Audit Policy, right click on Audit directory service access, then select Properties.
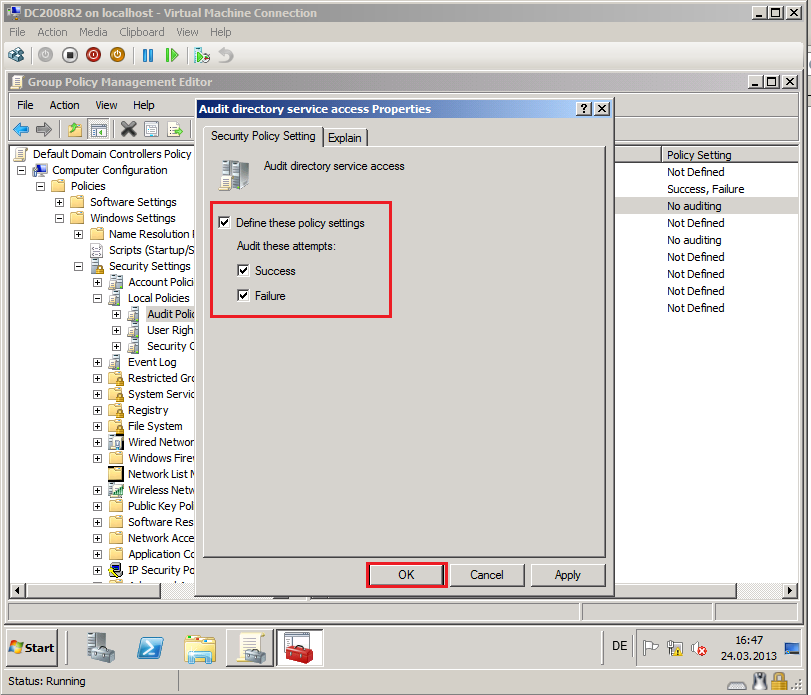
Select Define these policy settings box, then select both Success and Failure. Click OK.
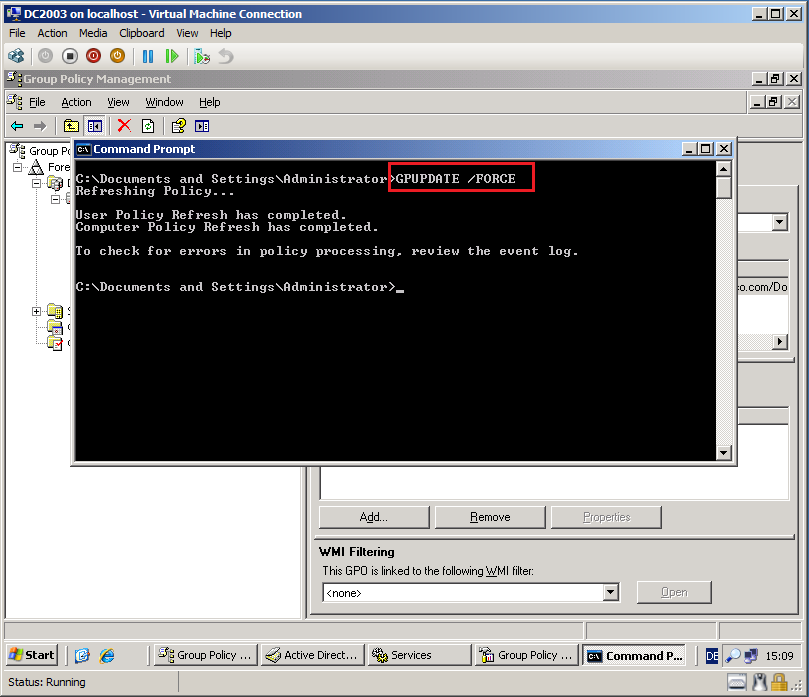
Close all, open Command prompt and run GPUPDATE /FORCE command.
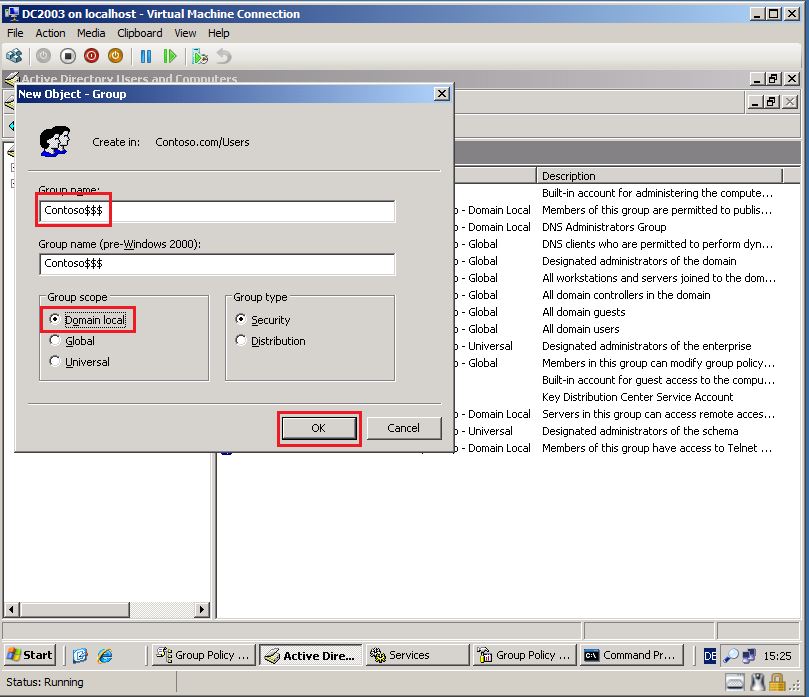
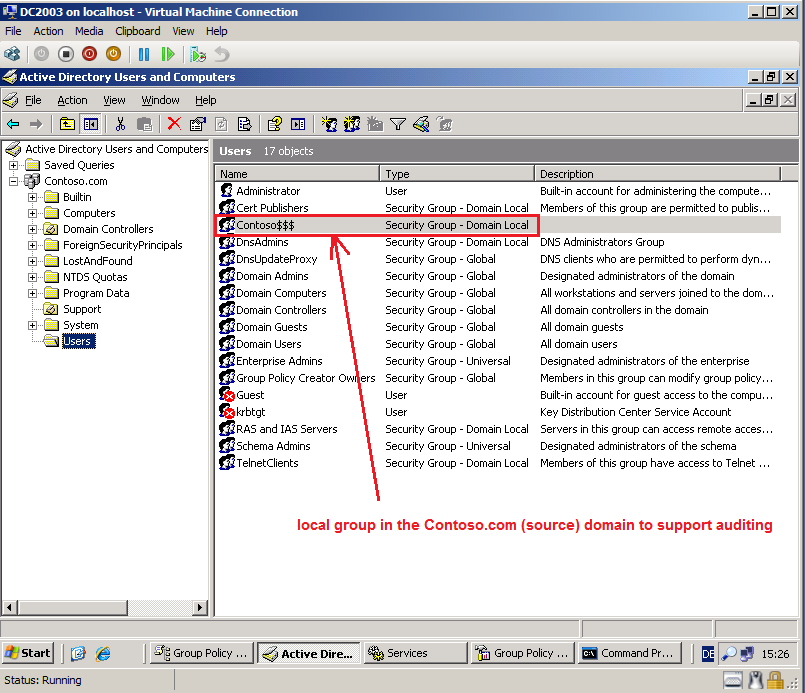
In the source domain, create a local group called SourceDomain$$$, where SourceDomain is the NetBIOS name of your source domain. Do NOT add members to this group; if you do, sIDHistory migration will fail.
On DC2003, open Active Directory Users and Computers console, right click on Users container, select New then click Group.
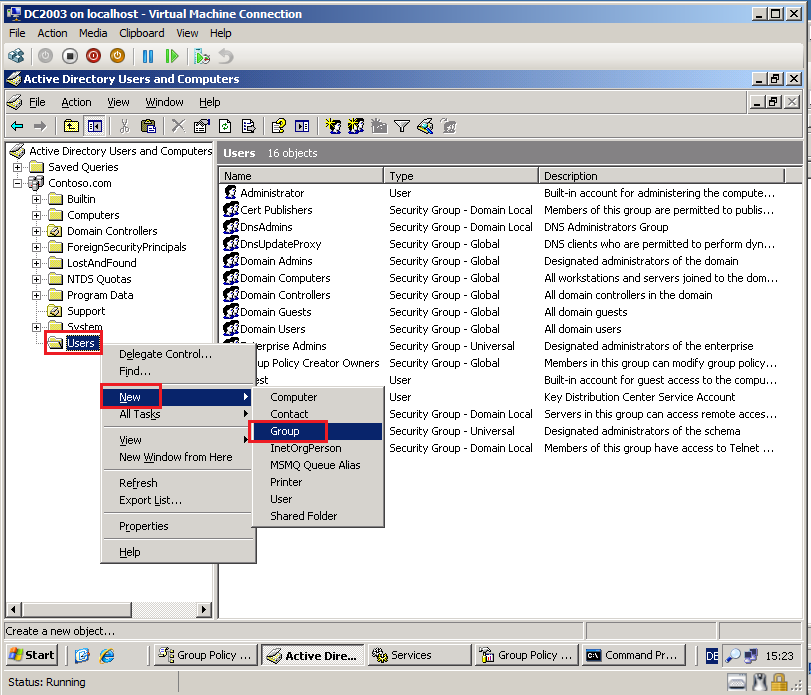
Because NetBIOS name of my source domain is Contoso, Group name is Contoso$$$, select Domain local in Group scope, select Security in Group type, then click OK.
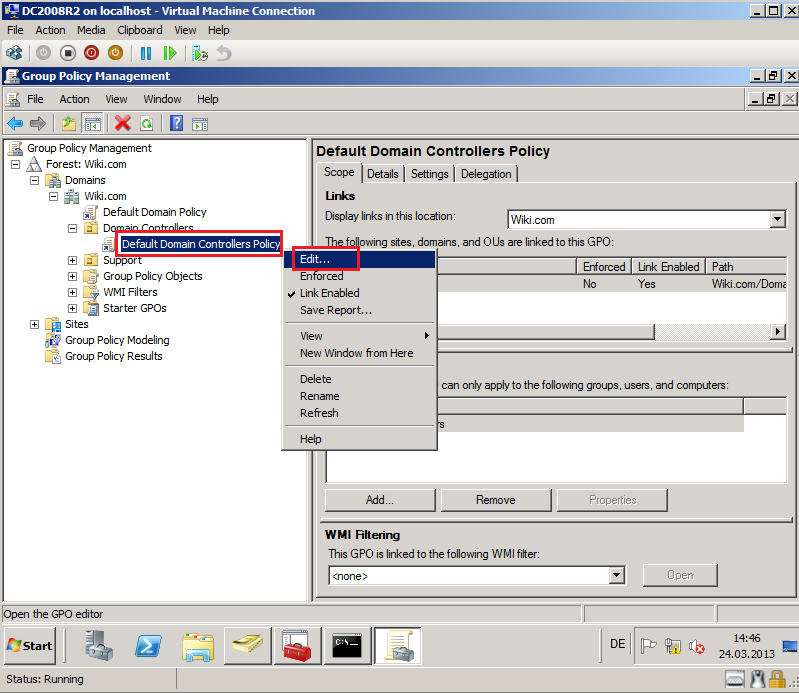
On DC2008R2 domain controller in Wiki.com, click Start, Administrative Tools, then click Group Policy Management.

Right click on Default Domain Controllers Policy, then click Edit.
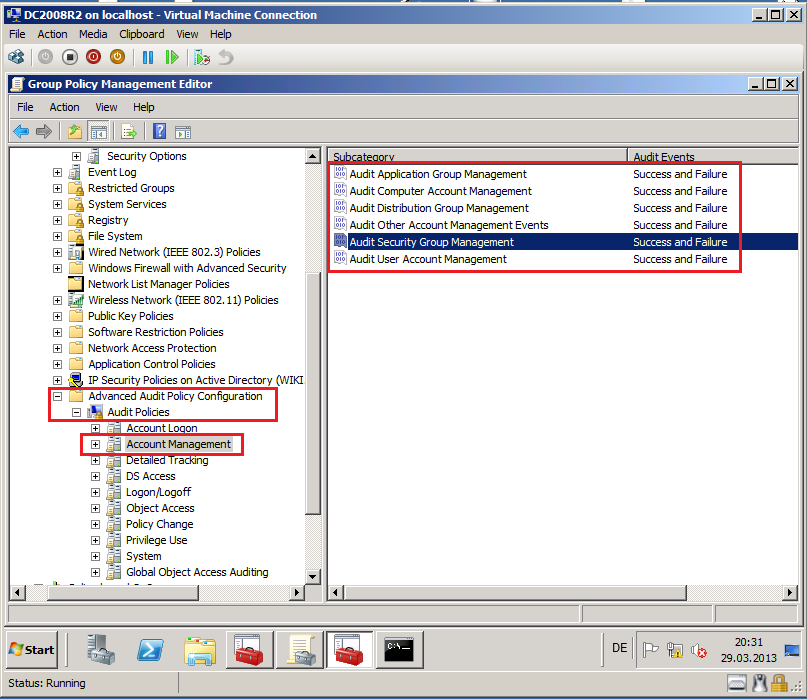
Go to Computer Configuration\Policies\Windows Settings\Security Settings\Local Policies\Audit Policy, right click on Audit account management, then select Properties.
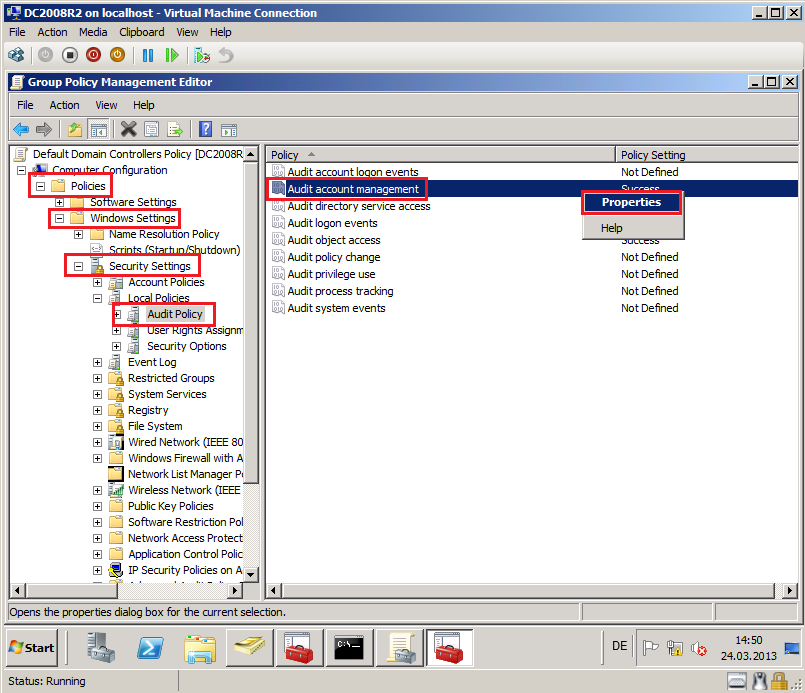
Select Define these policy settings box, then select both Success and Failure. Click OK.
Go to Computer Configuration\Policies\Windows Settings\Security Settings\Local Policies\Audit Policy, right click on Audit directory service access, then select Properties.
Select Define these policy settings box, then select both Success and Failure. Click OK.
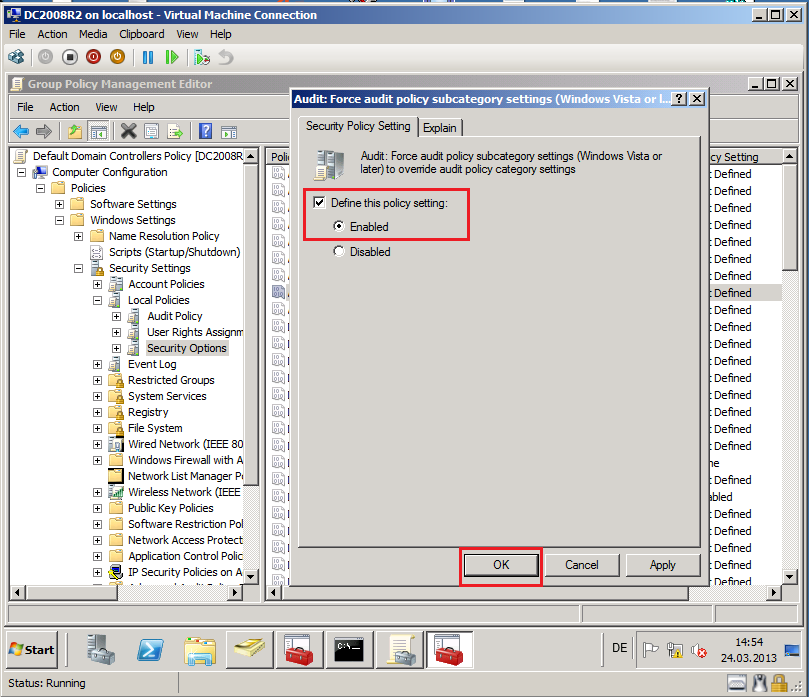
Go to Computer Configuration\Policies\Windows Settings\Security Settings\Local Policies\Security Options, right click on Force audit policy subcategory settings (Windows Vista or later) to override audit policy category settings , then select Properties.
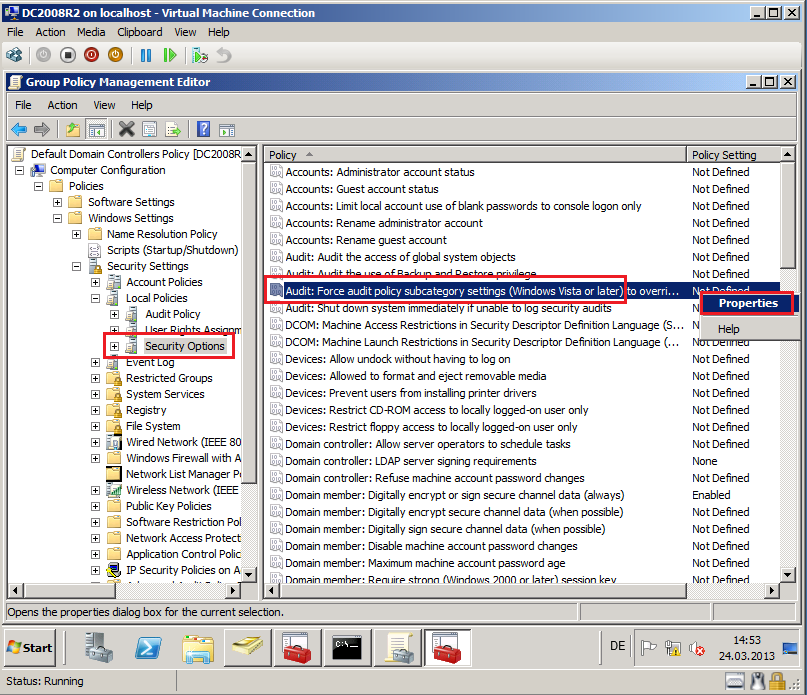
Select Define these policy settings box, then select both Enabled. Click OK.
Close all, open Command prompt and run this command:
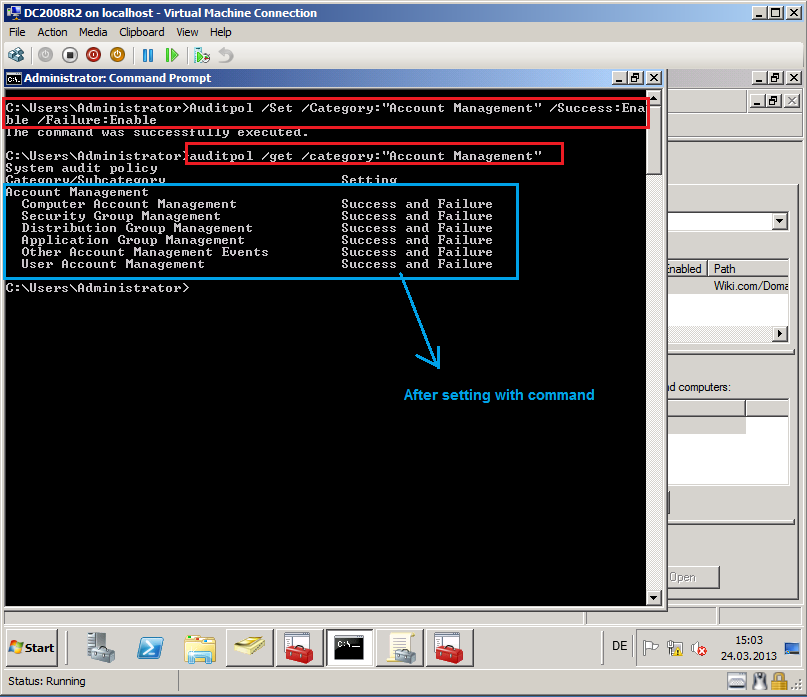
Auditpol /Get /Category:"Account Management"

You can see, just Success is enabled. You can use this command and enable both Success & Failure:
Auditpol /Set /Category:”Account Management” /Success:Enable /Failure:Enable
Note:
If you are migrating from a domain with domain controllers that run Windows Server 2003 or later to another domain with domain controllers that run Windows Server 2003 or later, the TcpipClientSupport registry entry does not have to be modified. More information:
Configuring the Source and Target Domains for SID History Migration
Disabling Firewall
In many migration scenarios, when firewall (windows firewall or 3rd-party firewall) is enable, can prevent computer account migration from source domain to target domain. You can disable firewall through group policy, after migration completed, you can enable again.
But, if you need information about firewall port exceptions to support ADMT-related traffic on your network, the ADMT console uses Lightweight Directory Access Protocol (LDAP) port 389 to communicate with domain controllers and Remote Procedure Call (RPC) to communicate with ADMT agents. For RPC communication, any available RPC port in the range between 1024 and 5000 might be used. For more information, see KB836429. If Windows Firewall is in use on workstation or member server computers that you are planning to migrate, enable the File and Printer Sharing exception. For more information, see this link. If the following error messages ERR3:7075, ERR2:7625, ERR2:7014, ERR2:7014, WRN1:7372 and ERR2:7228 are logged in the ADMT migration log, see KB929493.
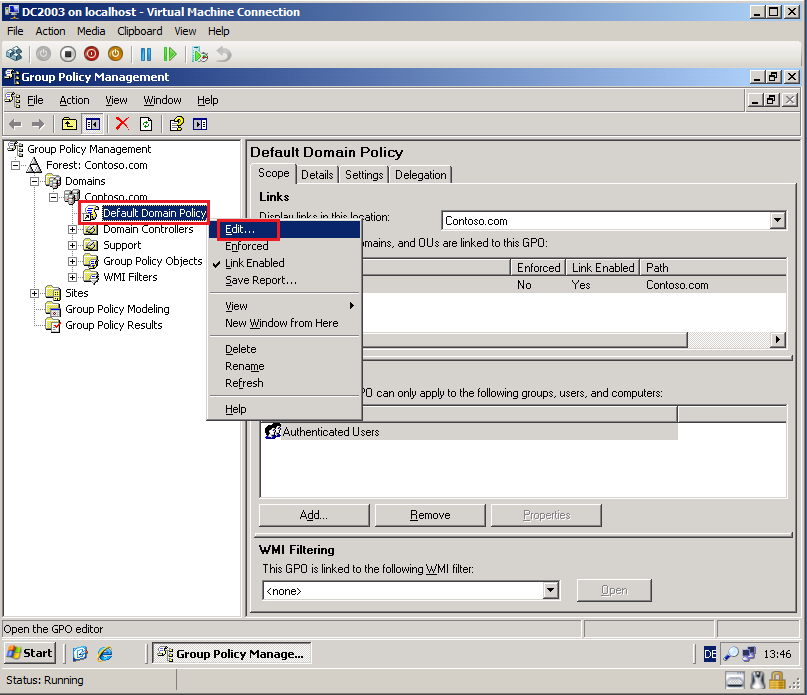
On DC2003 domain controller in Contosoi.com, click Start, Administrative Tools, then click Group Policy Management.
Because I used TestLAB, I use Default Domain Policy. Please, for Real Scenario, create new GPO.
Right click on Default Domain Policy, then click Edit.
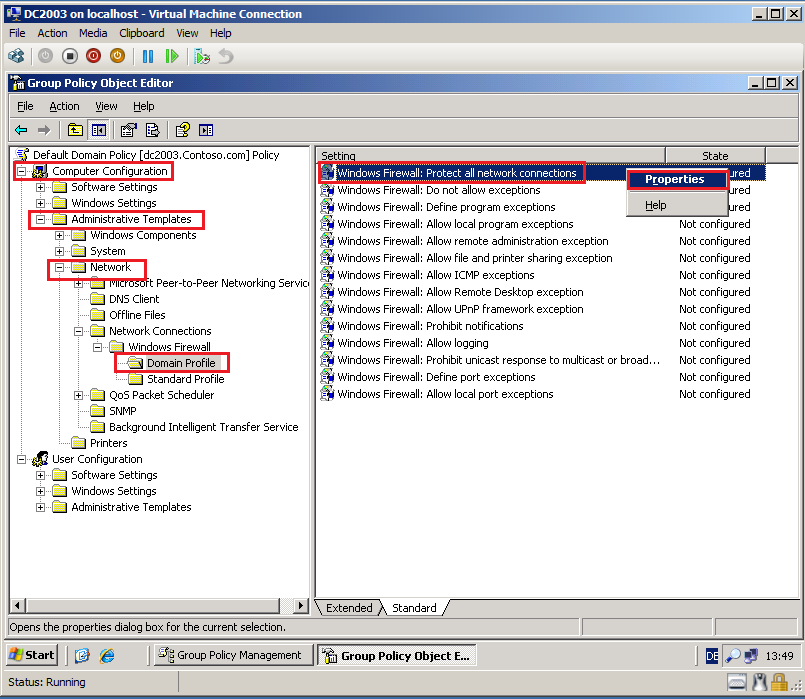
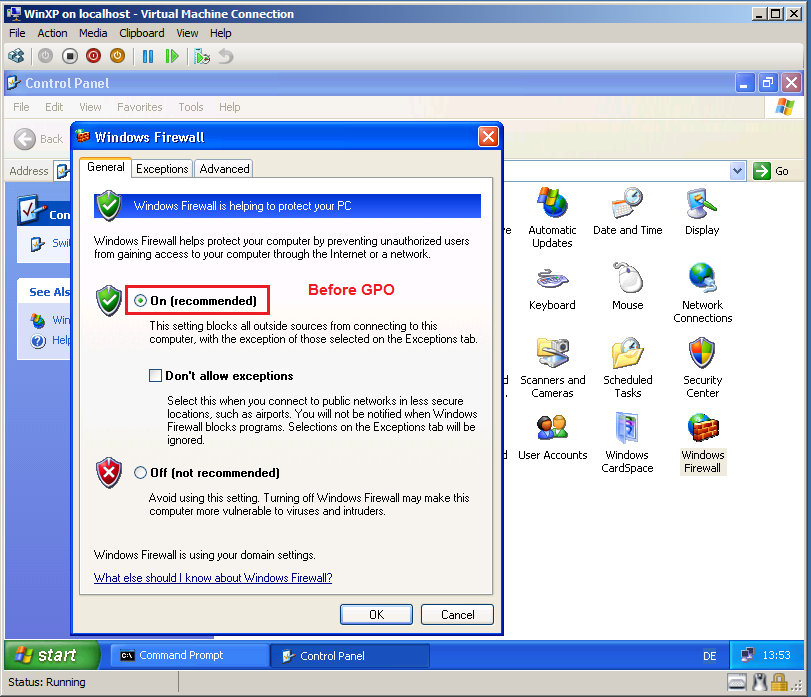
In Group Policy Management Editor, go to Computer Configuration\Administrative Templates\Network\Network Connections\Windows Firewall\Domain Profile. Right click Windows Firewall: Protect all network connections, and then click Properties.
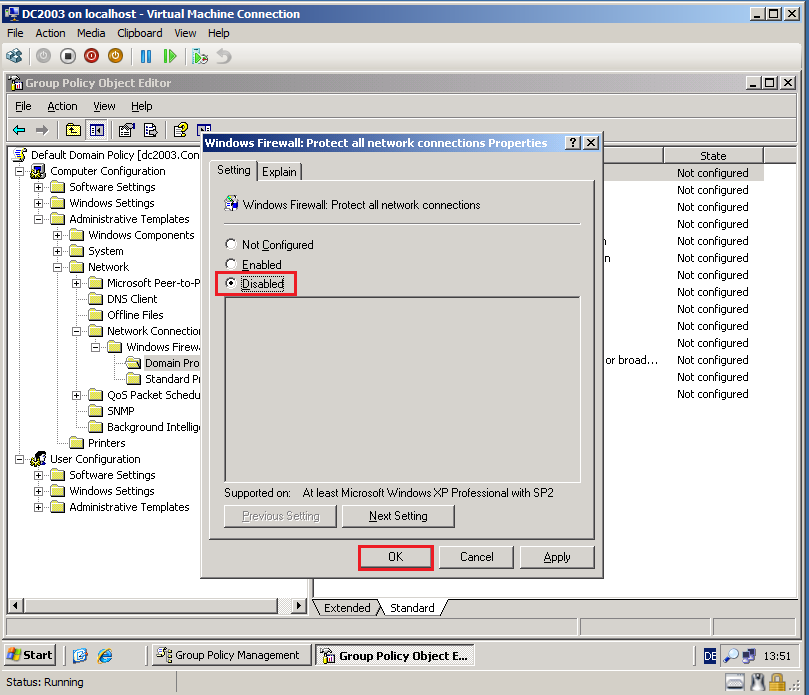
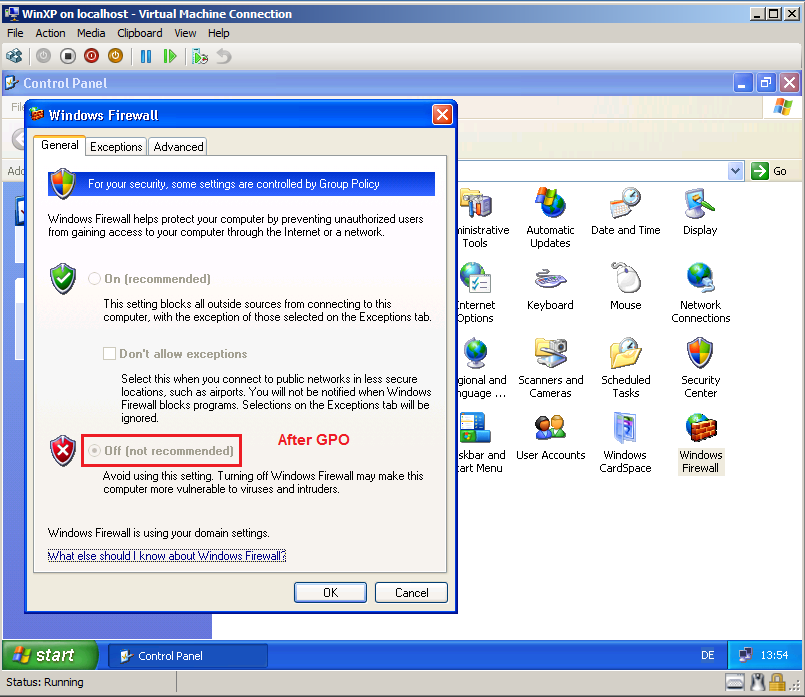
On the Windows Firewall: Protect all network connections Properties page, select Disabled, then click OK.
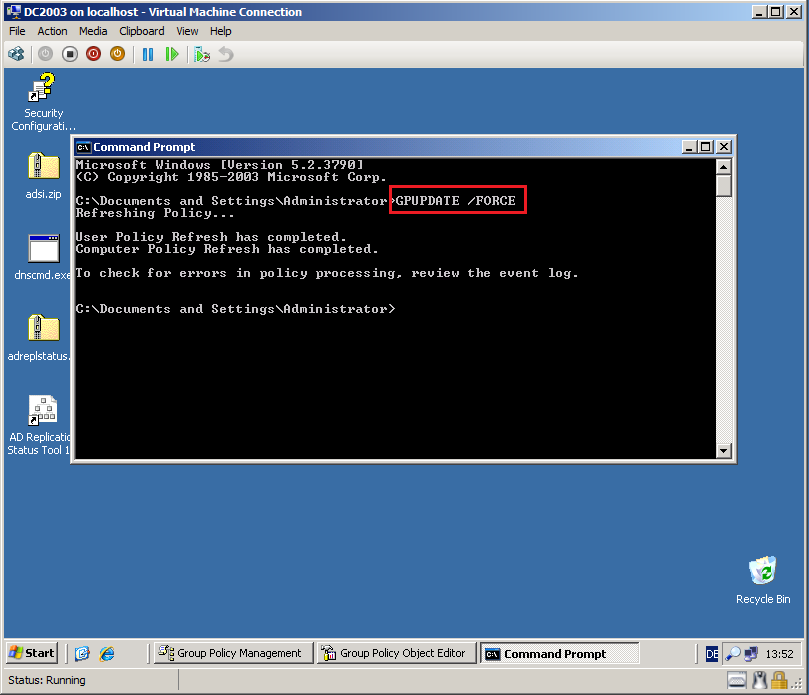
Close all, open Command prompt and run GPUPDATE /force command.
Here is firewall setting, before GPO.
Here is firewall setting, after GPO.
Recommendation
In my TestLAB, I have just a group for migration test. Because of that, I started with User account migration. But, it is recommended to perform migration in the following steps:
- Group migration
- Users account migration
- Services account migration
- Security Translation
- Computers account migration
Santhosh Sivarajan (ADDS MVP) has a great article about steps:
Active Directory Migration – High Level Steps (Santhosh Sivarajan - ADDS MVP)
User Account Migration
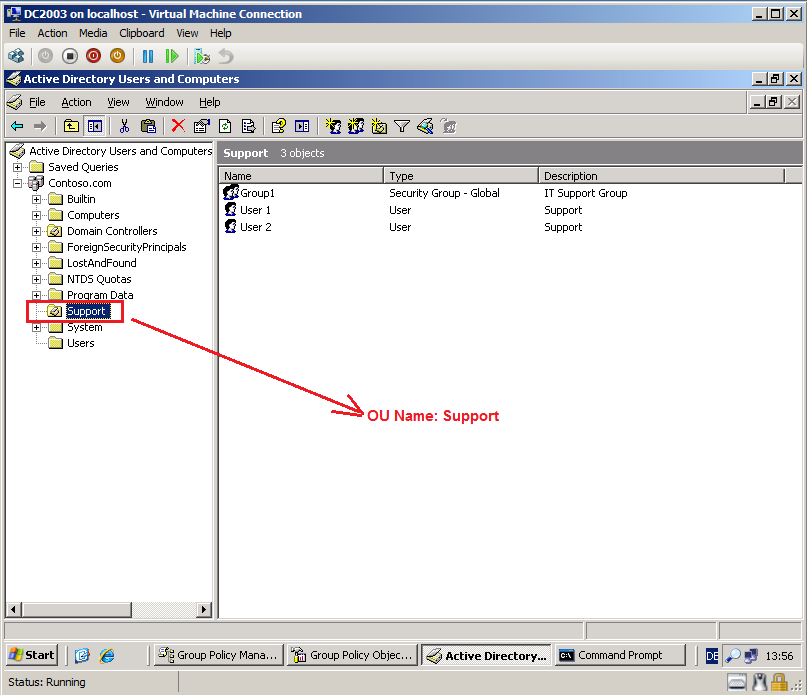
For user account migration, we use 3 way. My user accounts are in Support OU in Contoso.com.
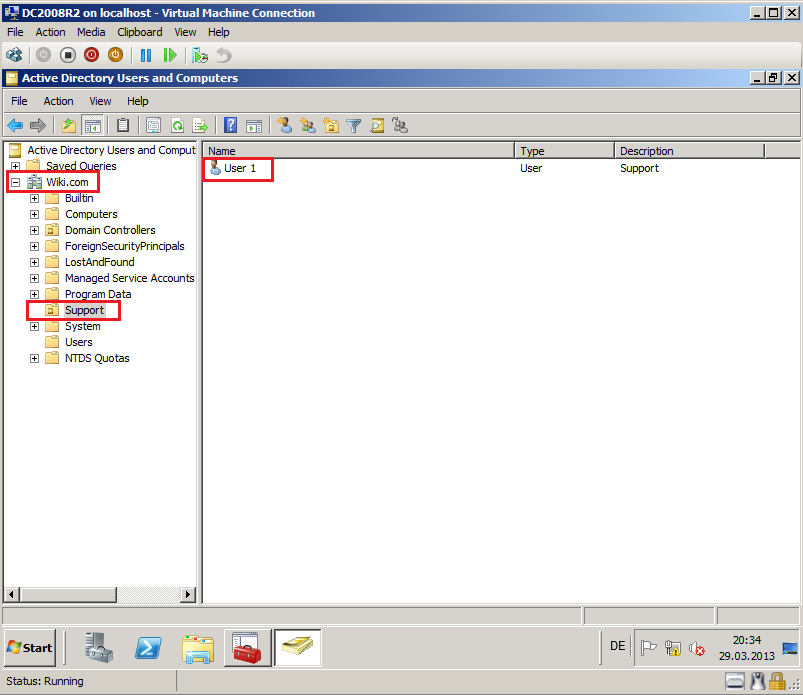
I need migrate users to same OU in Wiki.com. I create Support OU in Wiki.com.
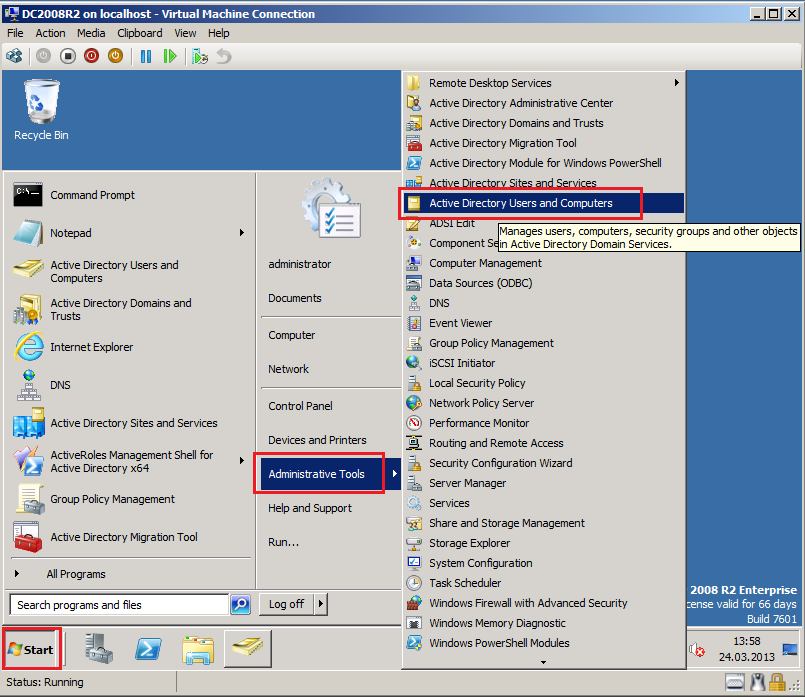
Click Strat, then Administrative Tool, open Active Directory Users and Computers.
Right click on Wiki.com, select New, then click Organizational Unit.
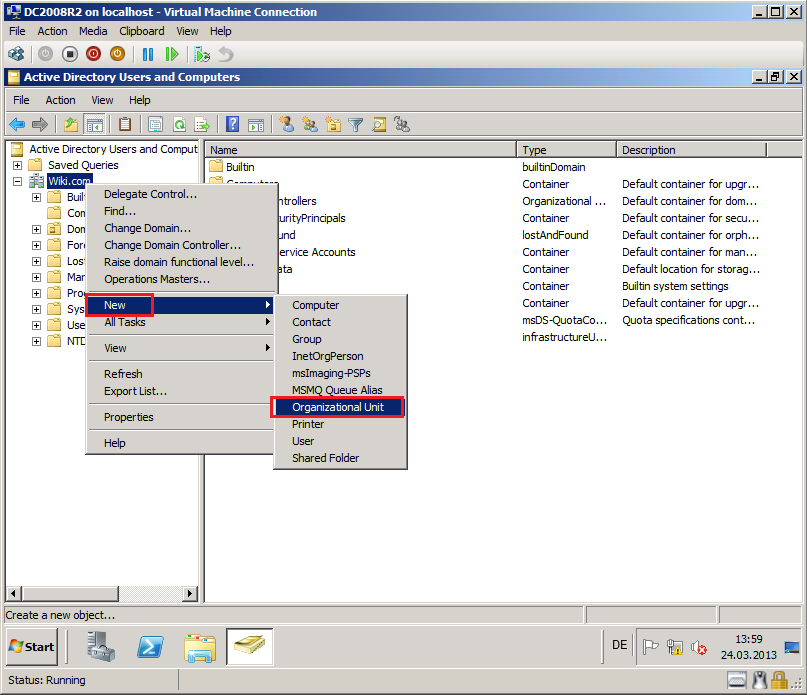
In Name, write Support, then click OK.
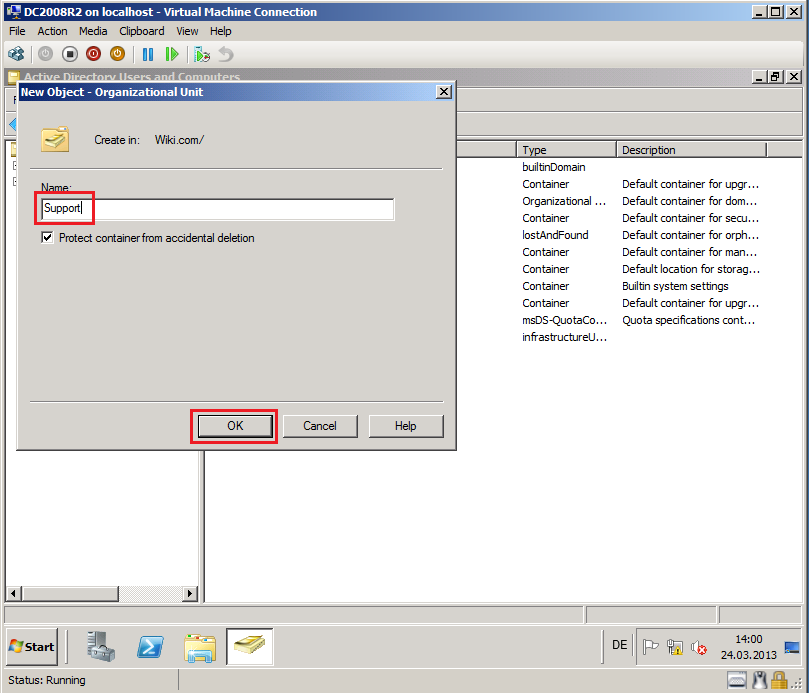
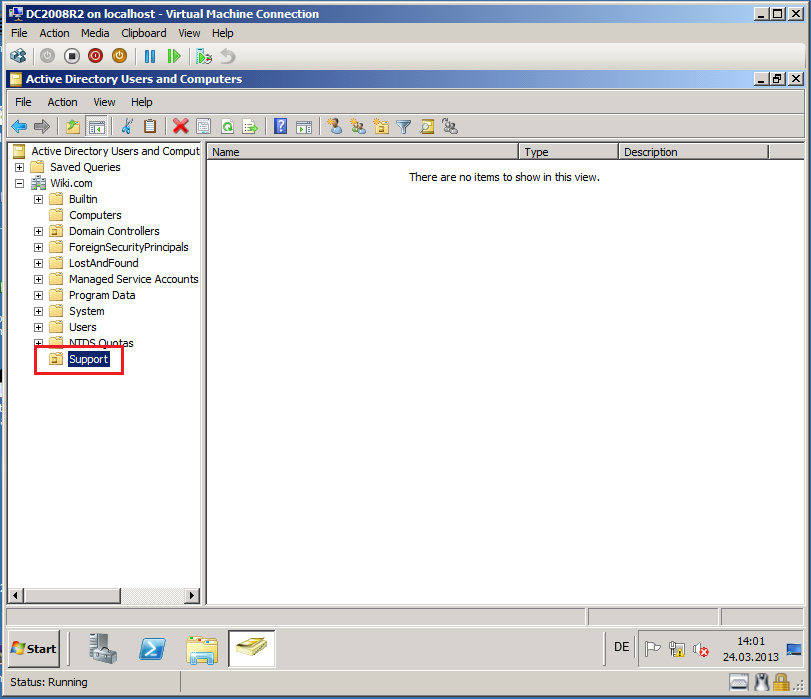
Now, we have Support OU in Wiki.com domain.
1-Normal Way
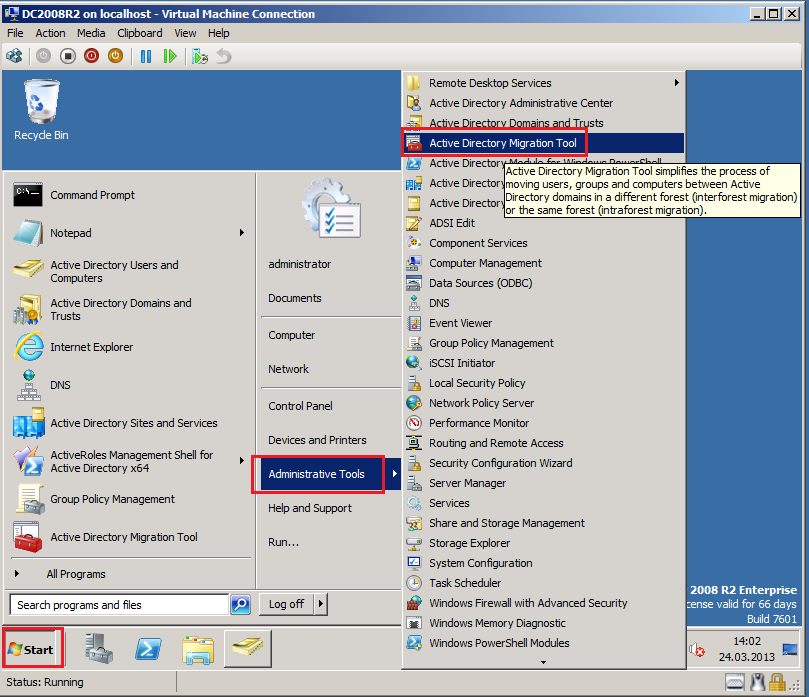
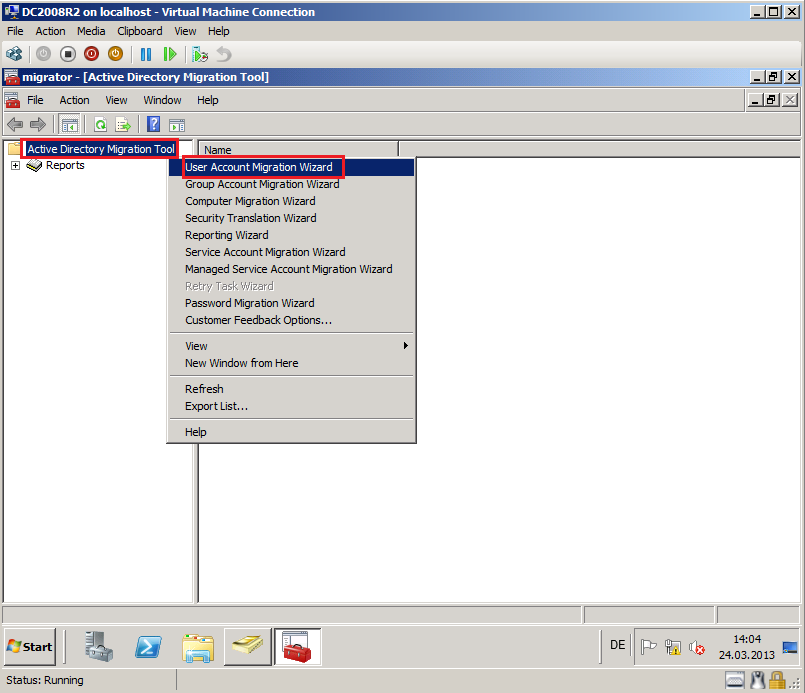
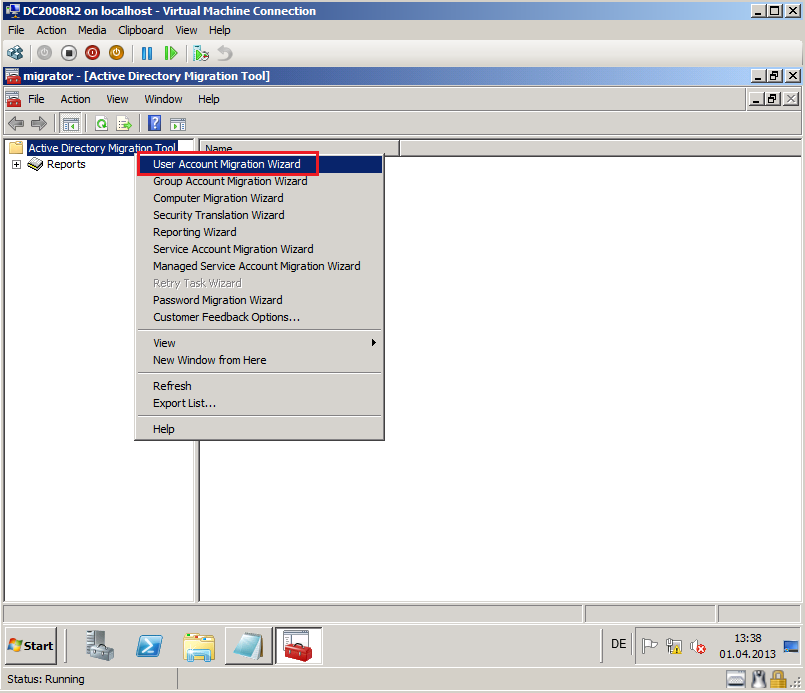
Click Strat, then Administrative Tool, open Active Directory Migration Tool.
Right click on Active Directory Migration Tool, select User Account Migration Wizard.
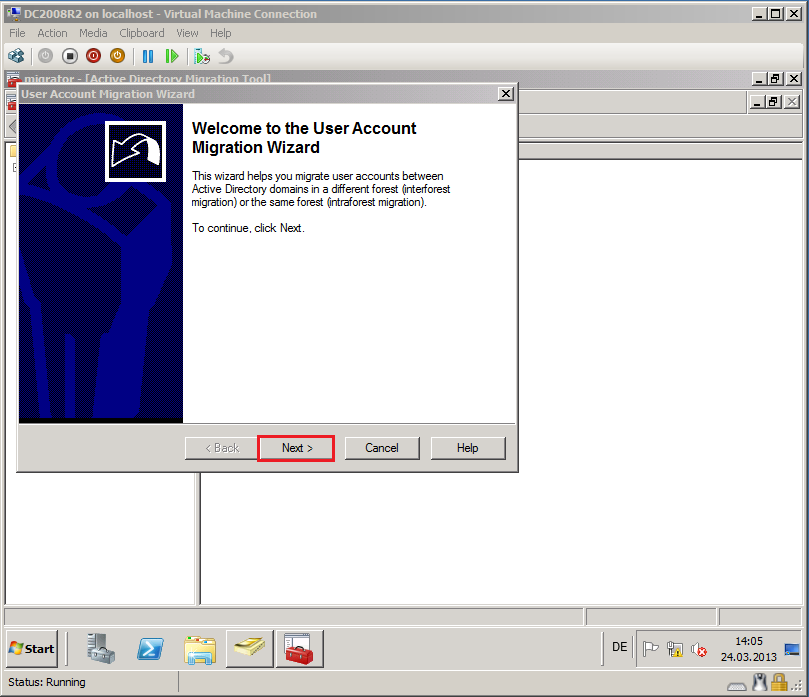
On Welcome to the User Account Migration Wizard page, click Next.
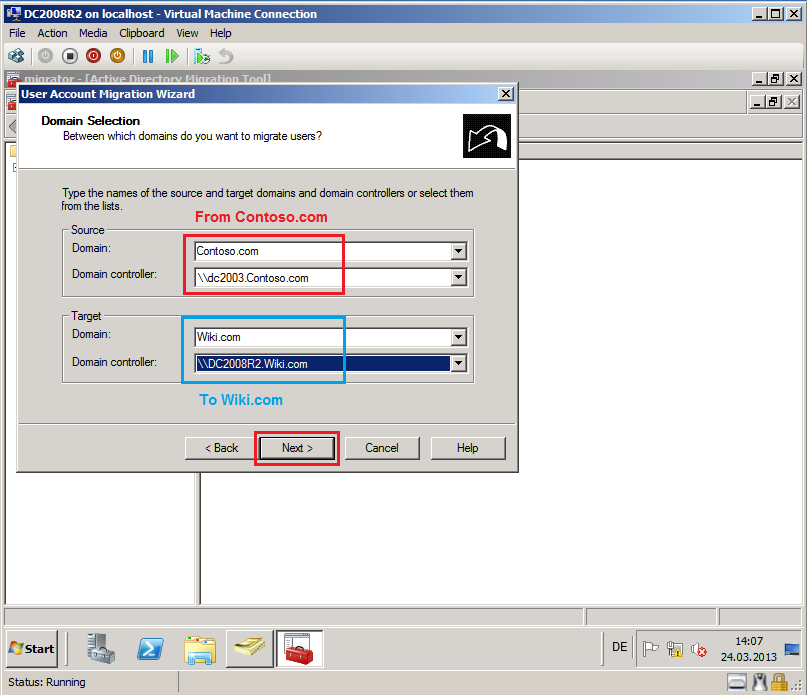
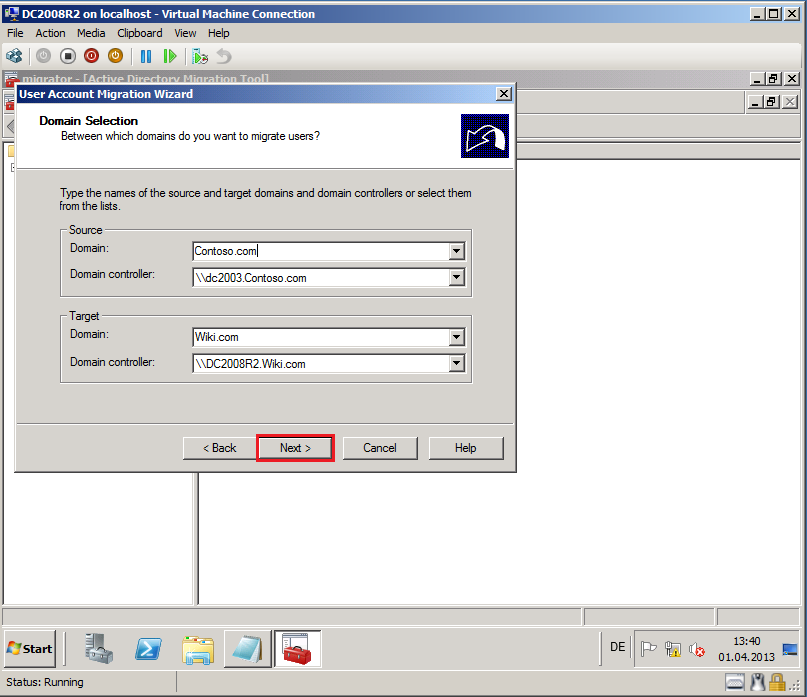
On Domain Selection page, select Source and Target domain, you can select which specific domain controller to use, if you have more domain controllers. In my TestLAB, source domain is Contoso.com and DC name is DC2003.Contoso.com, target domain is Wiki.com and DC name is DC2008R2.Wiki.com. Click Next.
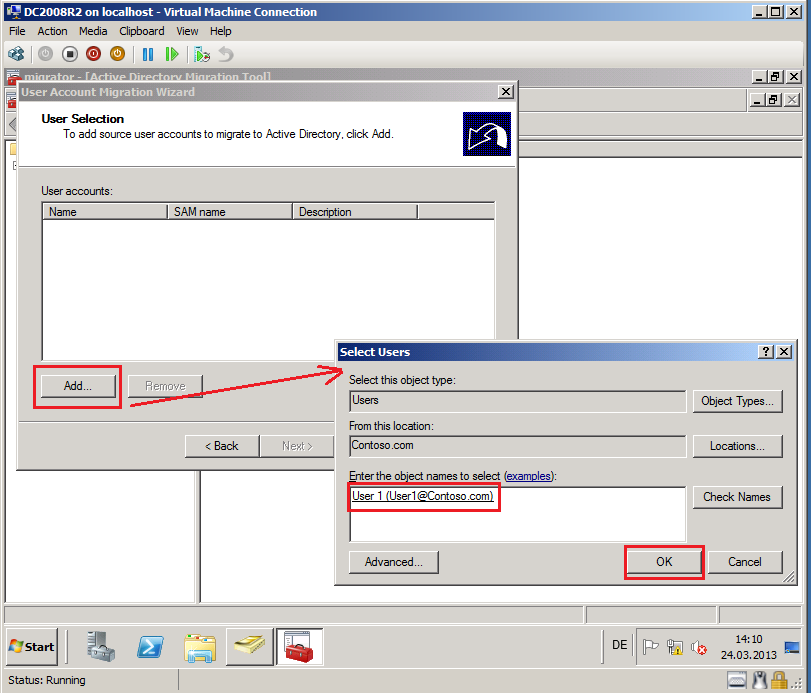
On User Selection Option page, select Select users from domain, then click Next.

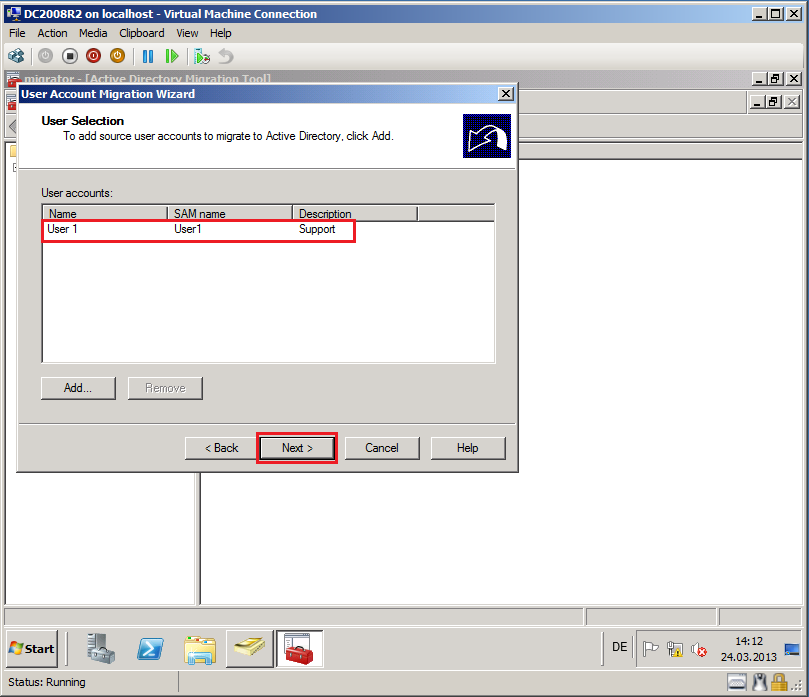
On User Selection page, click Add, find and select users and then click OK. In my case is User1@contoso.com.
On User Selection page, click Next.
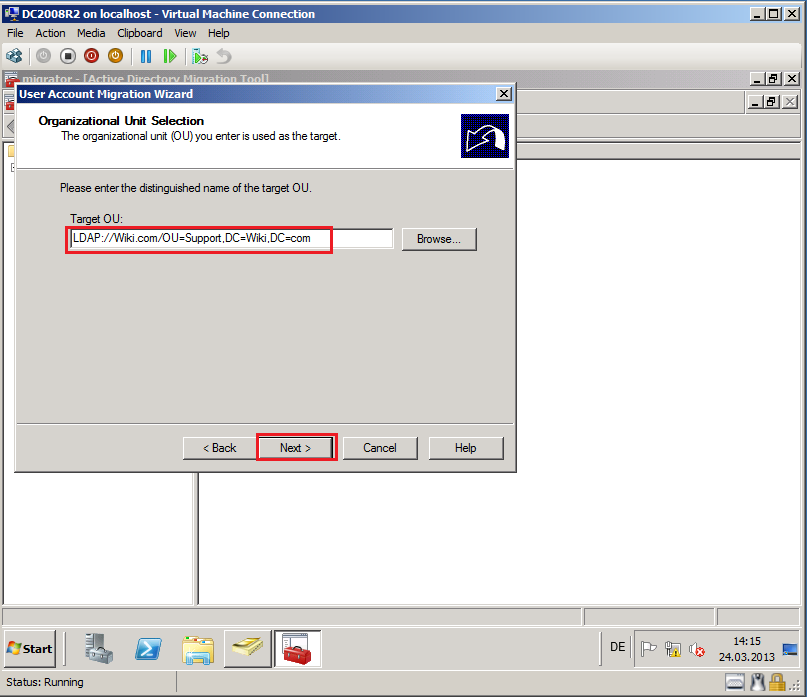
On Organizational Unit Selection page, select Browse and select target OU, then click OK. In my case, target OU is Support.
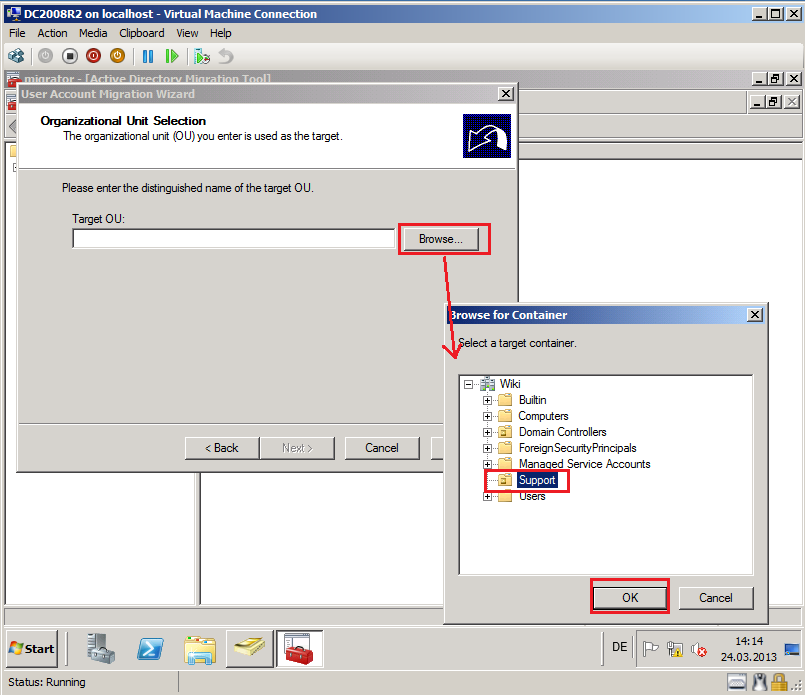
On Organizational Unit Selection page, click Next.
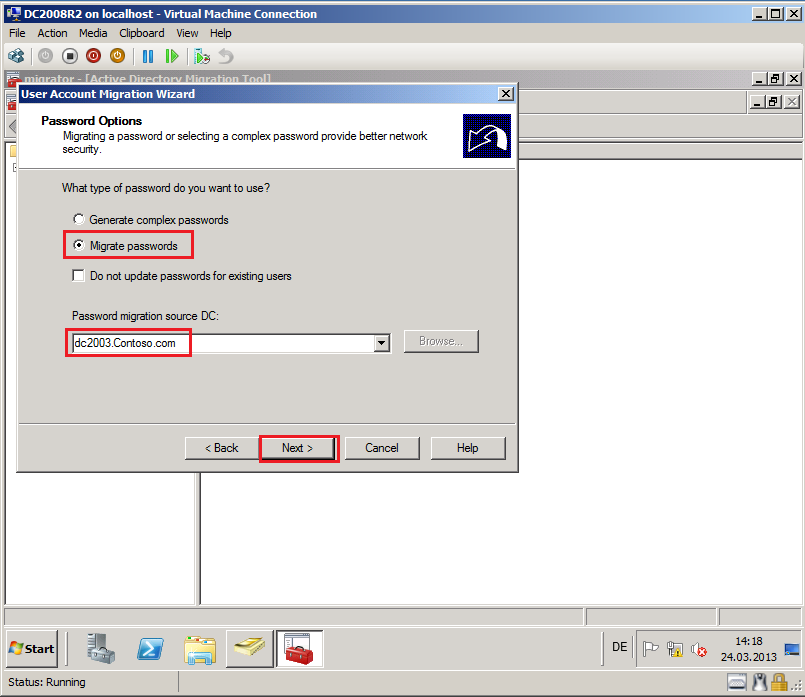
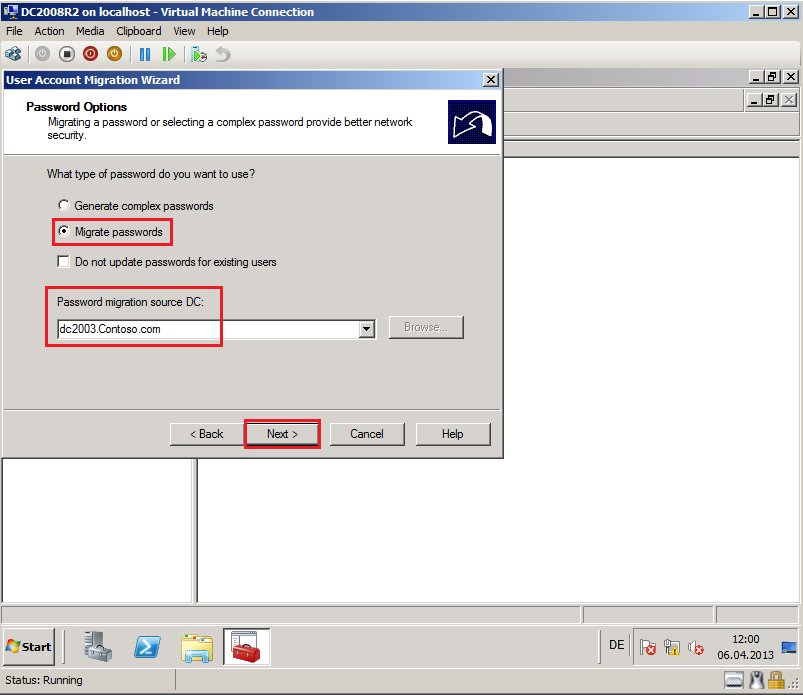
On Password Options page, select appropriate option. In my case, Migrate passwords option and Password migration source DC is DC2003.Contoso.com. Then select Next.
Quick description about options:
Generate complex passwords: Select this option to generate a complex password automatically for each user account that you migrate.
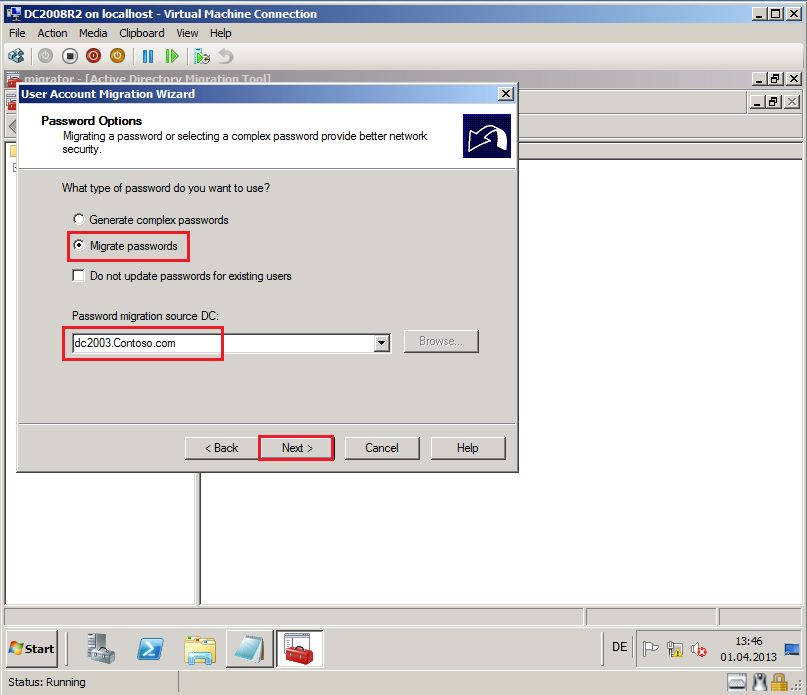
Migrate passwords: Select this option to migrate the original passwords from source domain to target domain.
Do not update passwords for existing users: Select this option if you do not need passwords update for existing user objects in target domain and for other accounts you want update passwords.
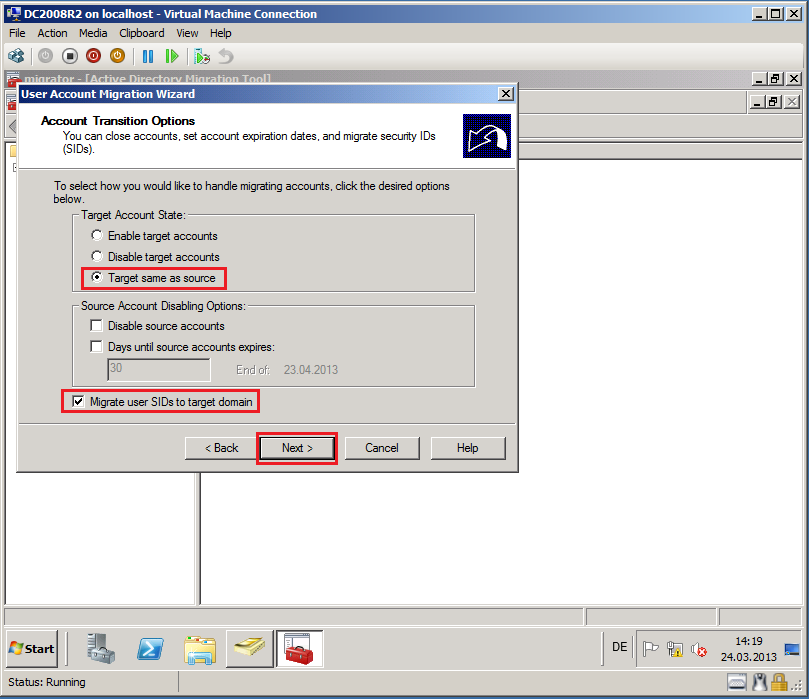
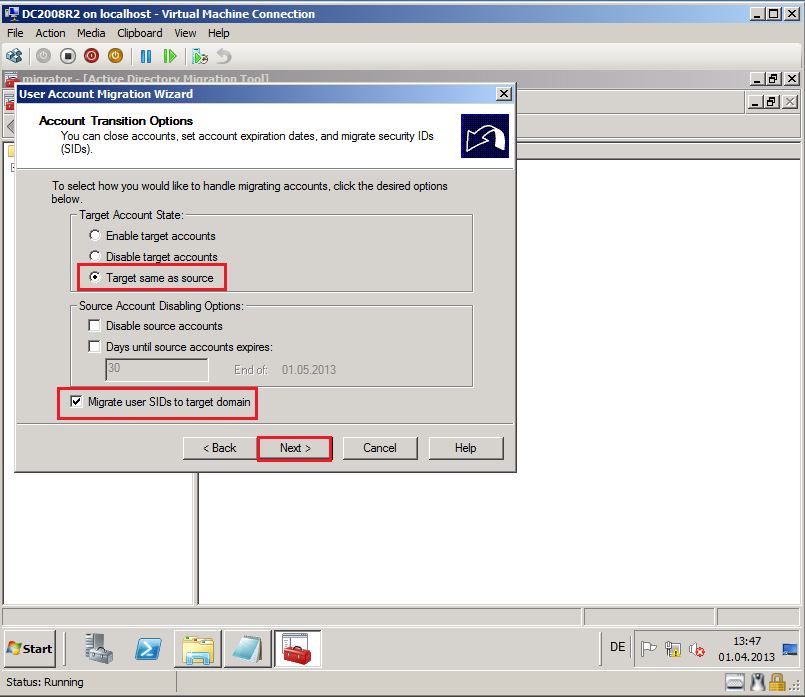
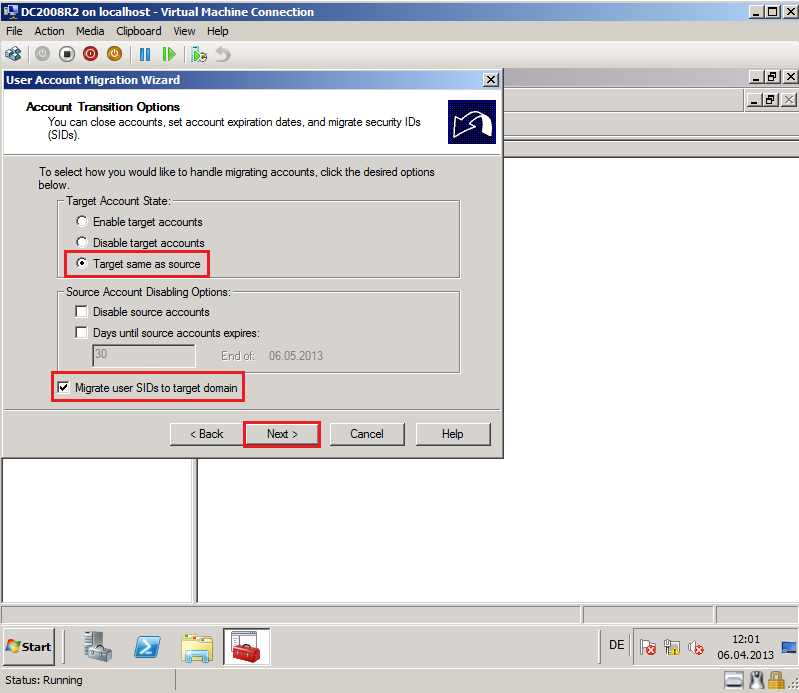
On Account Transition Options page, select appropriate options. In my case, I select Target same as source and Migrate user SIDs to target domain, then click Next.
Quick description about options:
Target Account State:
Enable target accounts: Select this option to enable the newly created user account in the target domain.
Disable target accounts: Select this option to disable the newly created user account in the target domain. Please, do not select this option to migrate accounts that for services use.
Target same as source: Select this option to set the target account to the same state as the source account.
Source Account Disabling Options:
Disable source accounts: Select this option to disable the original user account in the source domain.
Days until source accounts expires: Select this option to set the number of days after which the source account is no longer enabled.
Migrate user SIDs to target domain:
Migrate user SIDs to target domain: Select this option to add the SID of migrated account from source domain to the sIDHistory attribute of the new user account in target domain.
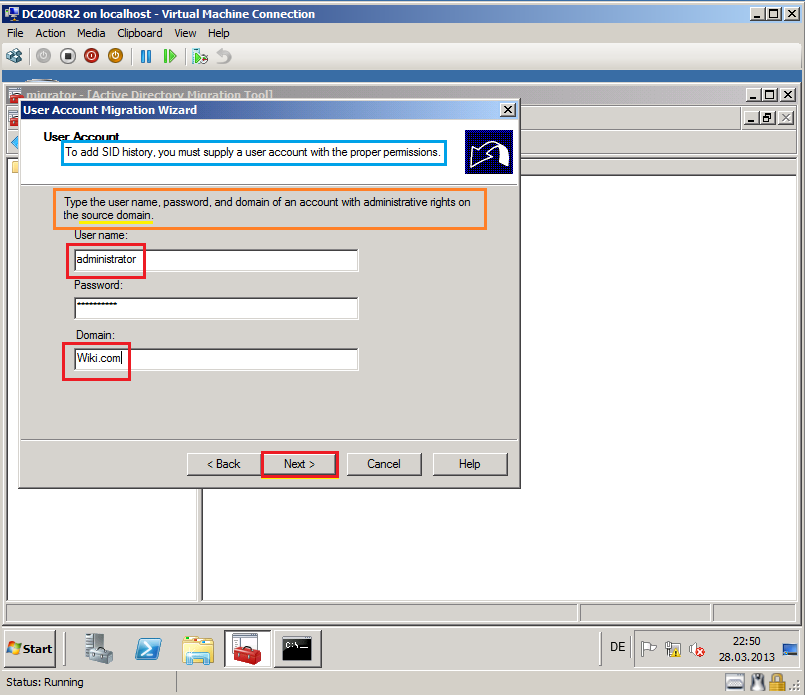
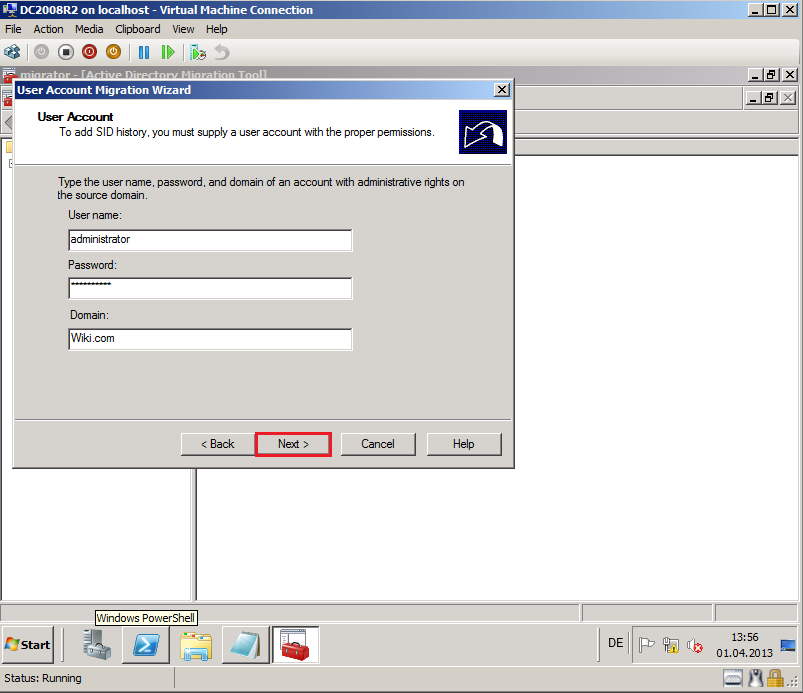
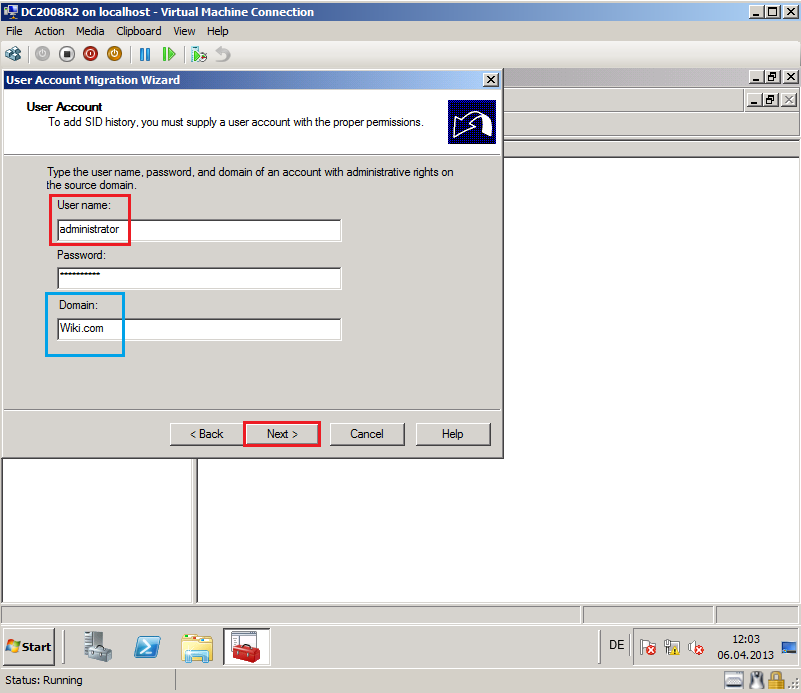
On User Account page, enter ADMT credentials to add SID history. In my case, we used Wiki\Administrator account as ADMT account. Then select Next.
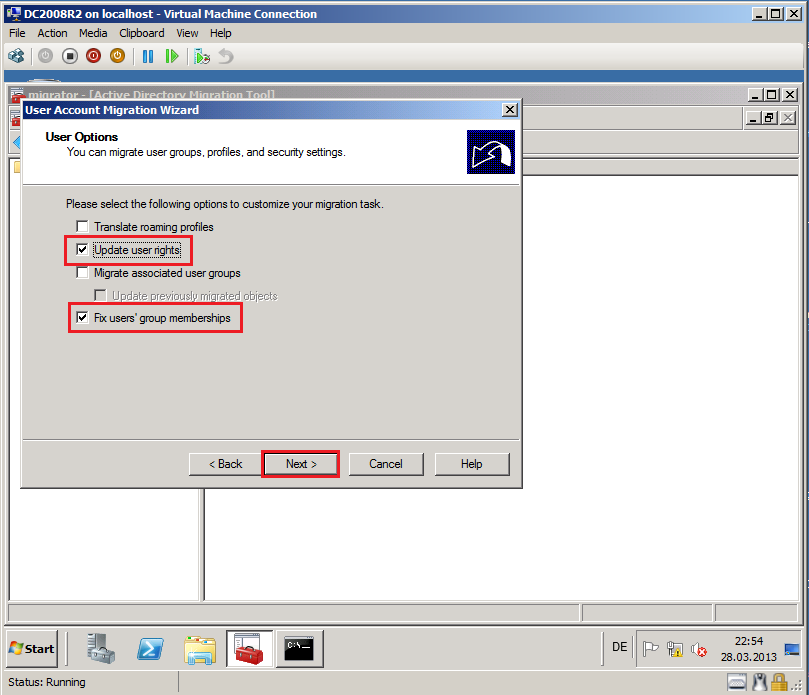
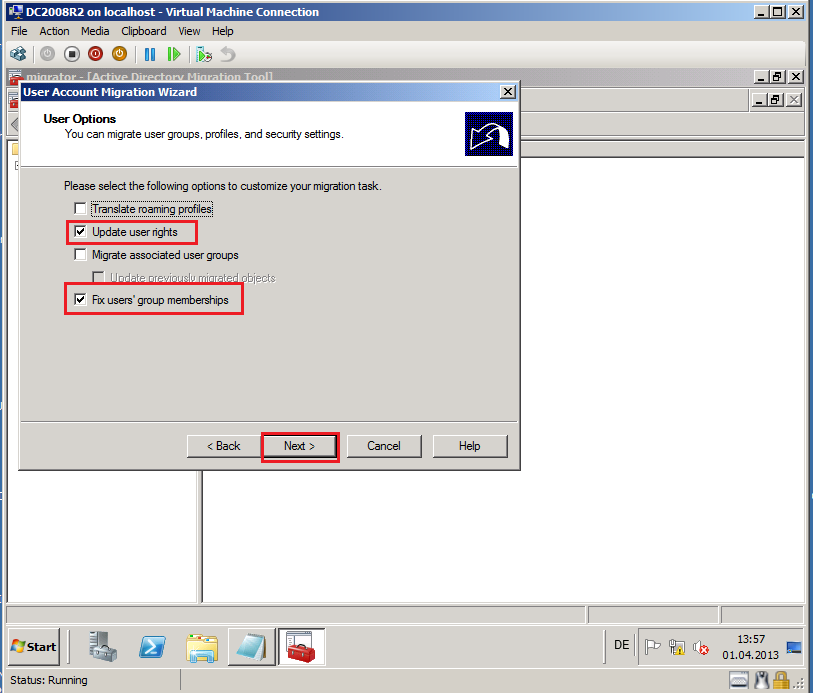
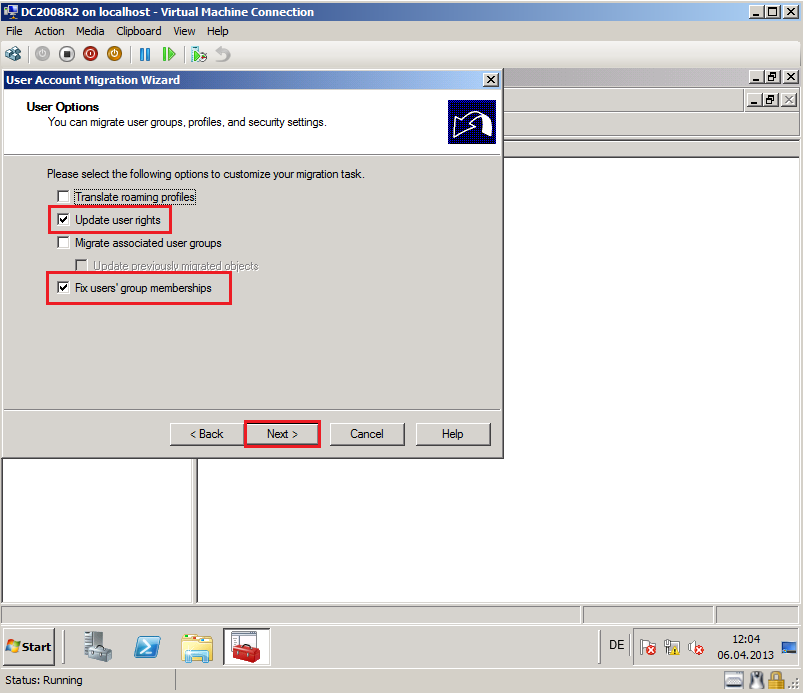
On User Options page, select appropriate options. In my case, Upgrade user rights and Fix users group memberships. Then click Next.
Quick description about options:
Translate roaming profiles: Select this option to copy roaming profiles from source domain to target domain for the selected user accounts.
Update user rights: Select this option to set user rights that are assigned to new user account in target domain to match user rights that are assigned to the user account in source domain.
Migrate associated user groups: Select this option to migrate groups of which migrated user accounts are members.
Update previously migrated objects: Select this option to update the groups of which the migrated user accounts are members, even if you migrated those groups previously.
Fix users' group memberships: Select this option to add migrated user accounts to target domain groups, if those user accounts were members of target domain group in source domain.
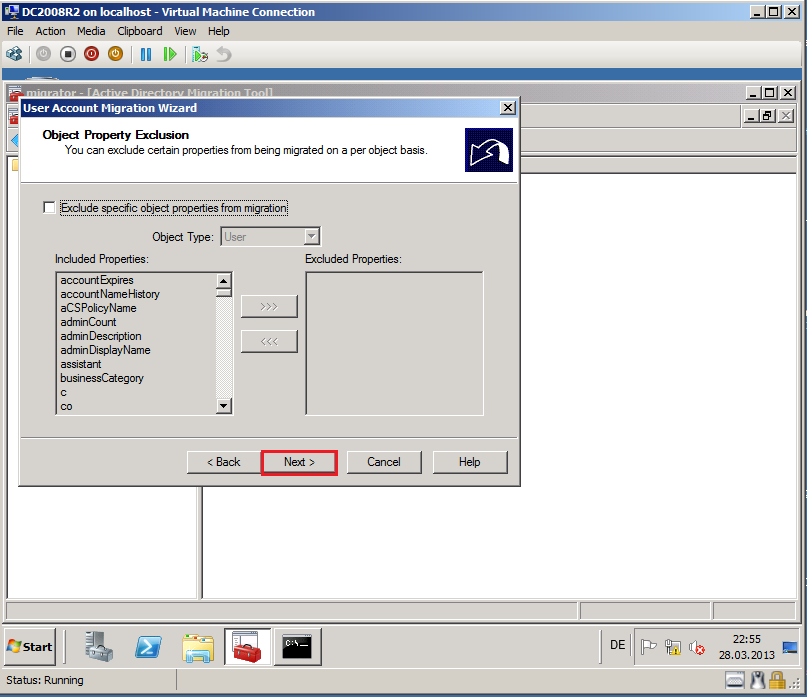
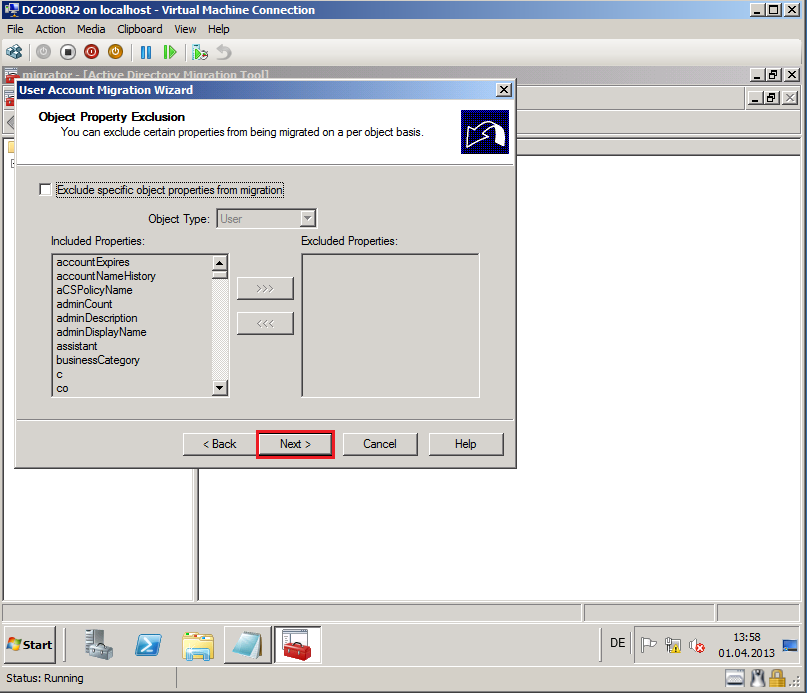
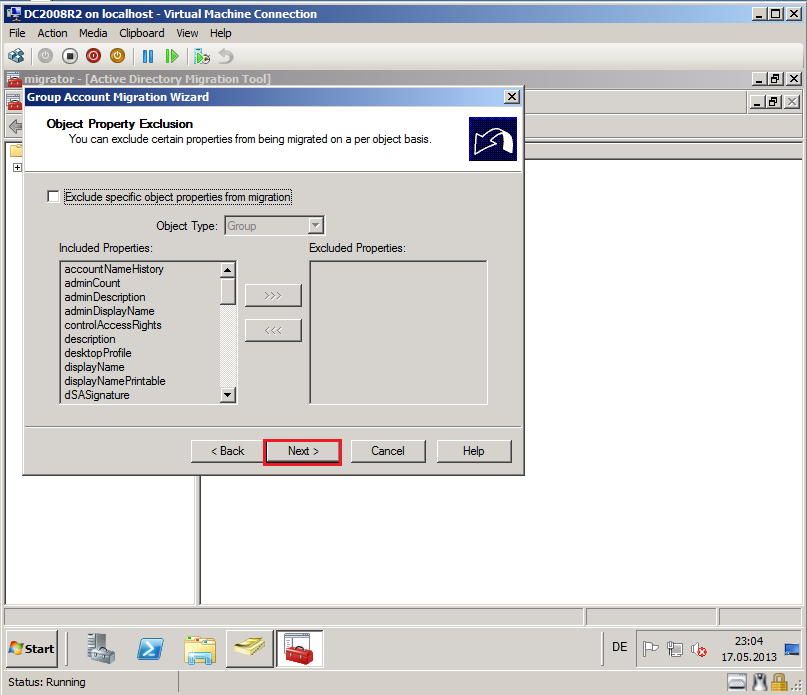
On Object Property Exclusion page, select appropriate options. In my case, I will all attributes, then select Next.
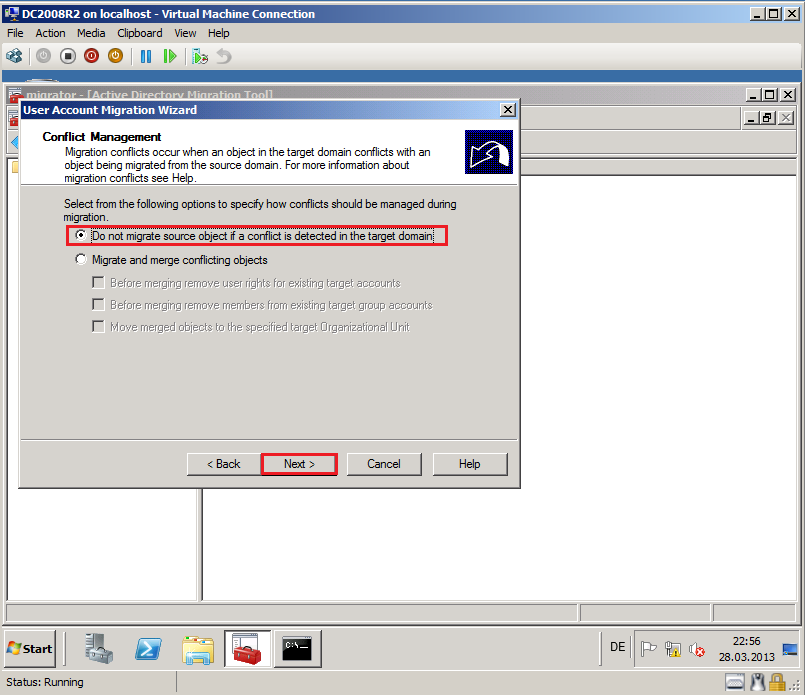
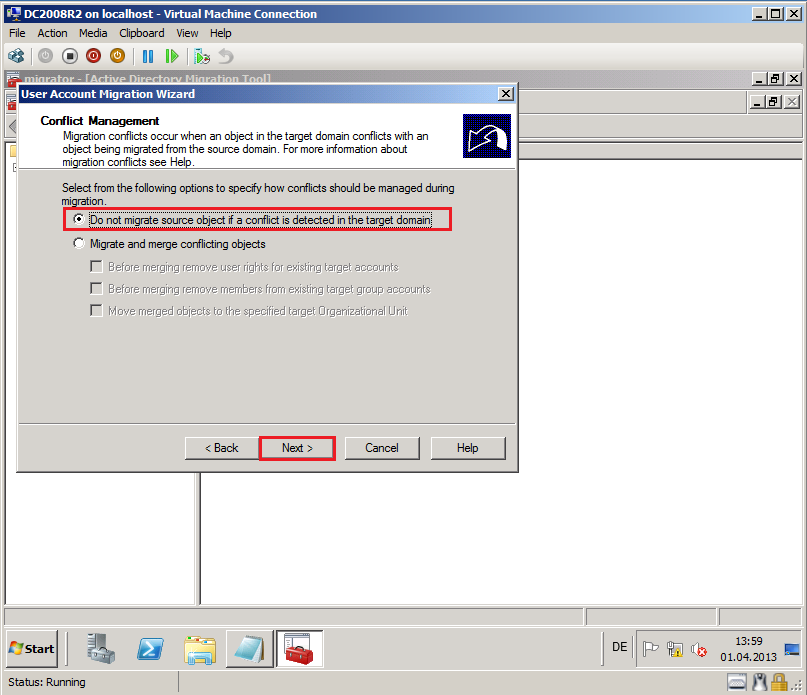
On Conflict Management page, select Do not migrate source object if a conflict is detected in the target domain, then click Next.
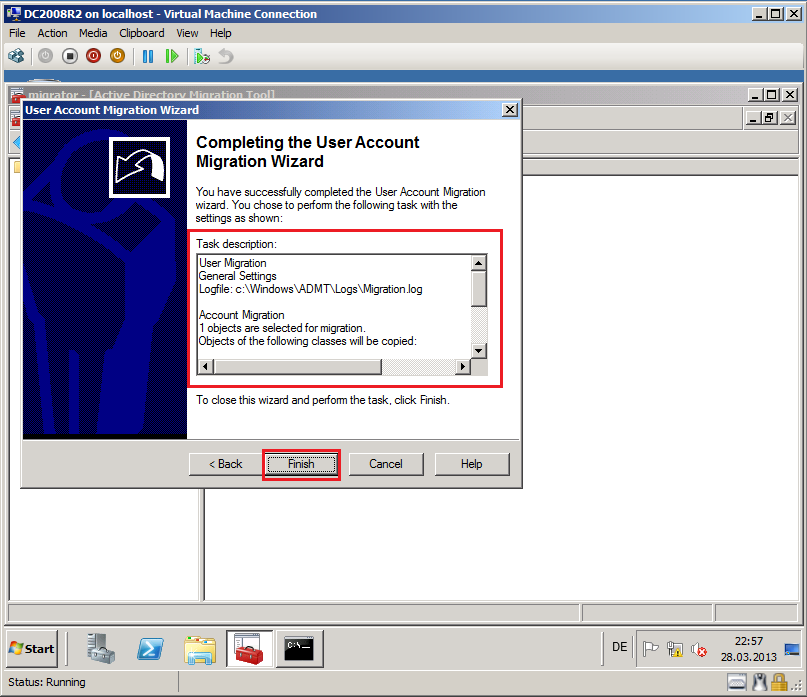
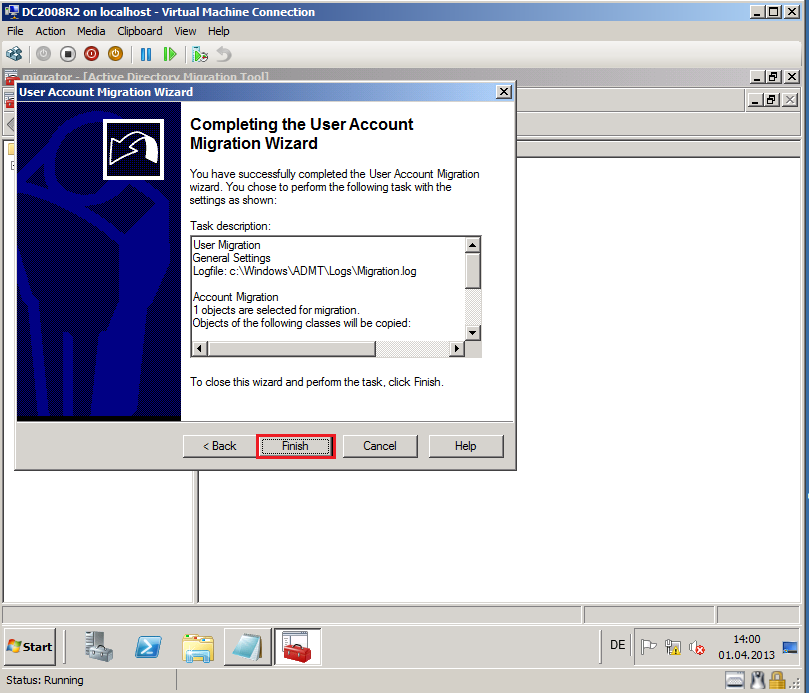
On Completting the User Account Migration Wizard page, review Task description, then select Finish.
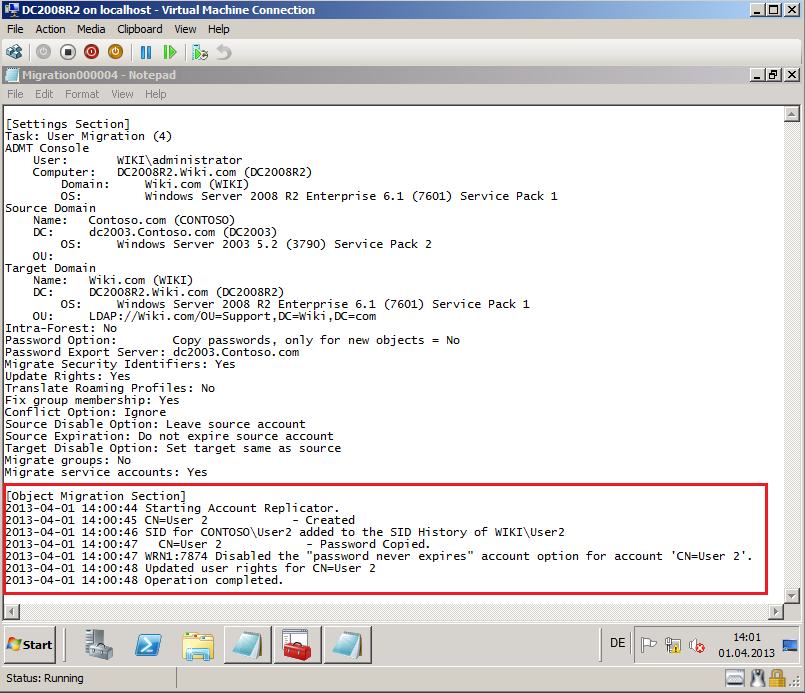
After completed, click View Log.
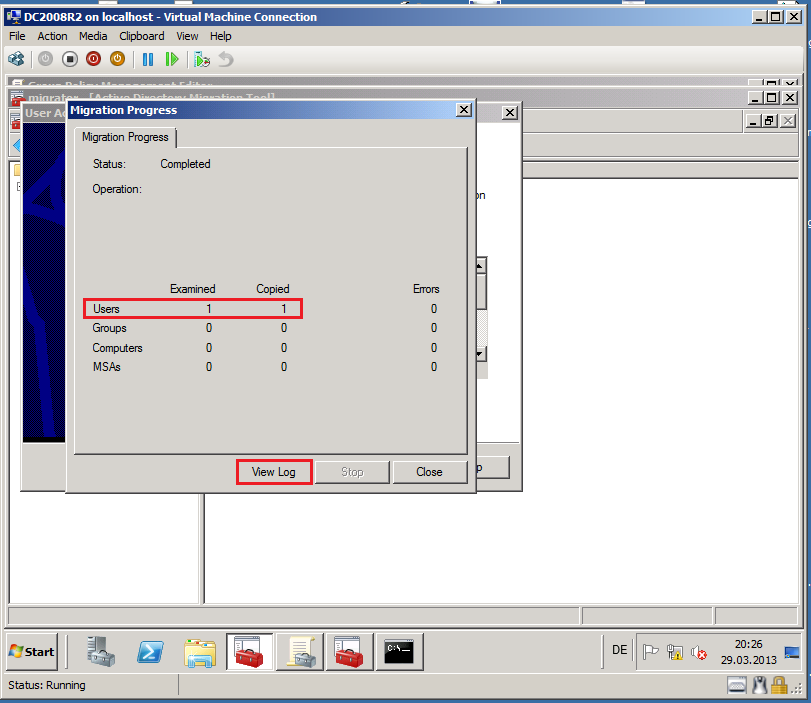
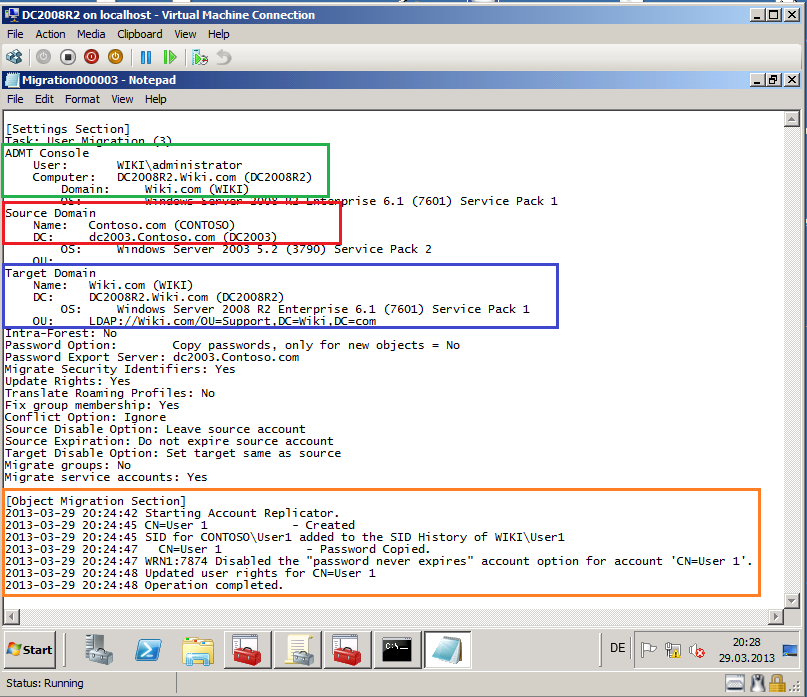
Now, you can see you Migration Log file, if your migration failed.
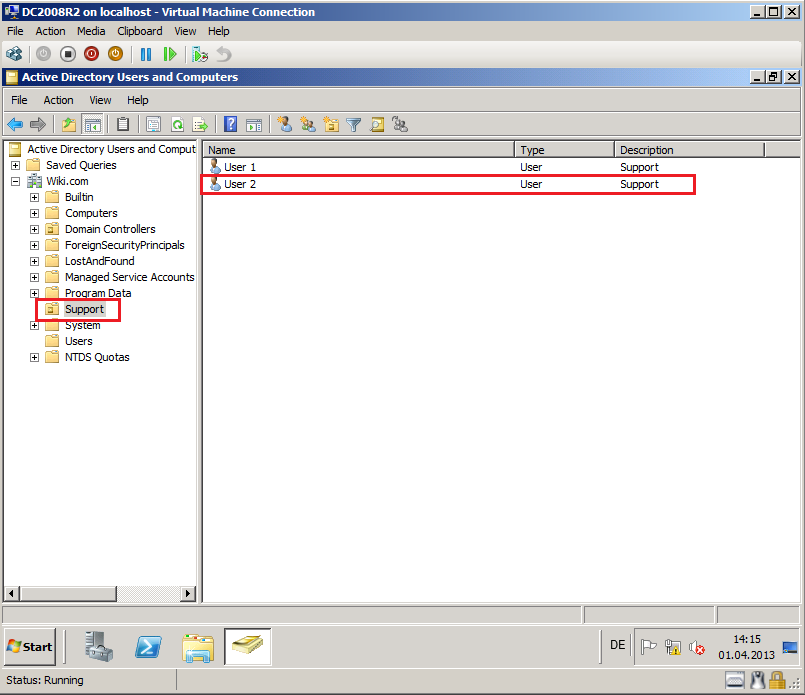
Open Active Directory Users and Computers, click Support OU and check User account.
2- Read Users from a file
For User2 account migration, I create a file and use this file for migration.
Click Strat, then Administrative Tool, open Active Directory Migration Tool. Right click on Active Directory Migration Tool, select User Account Migration Wizard.
On Welcome to the User Account Migration Wizard page, click Next.

On Domain Selection page, select Source and Target domain, you can select which specific domain controller to use, if you have more domain controllers. In my TestLAB, source domain is Contoso.com and DC name is DC2003.Contoso.com, target domain is Wiki.com and DC name is DC2008R2.Wiki.com. Click Next.
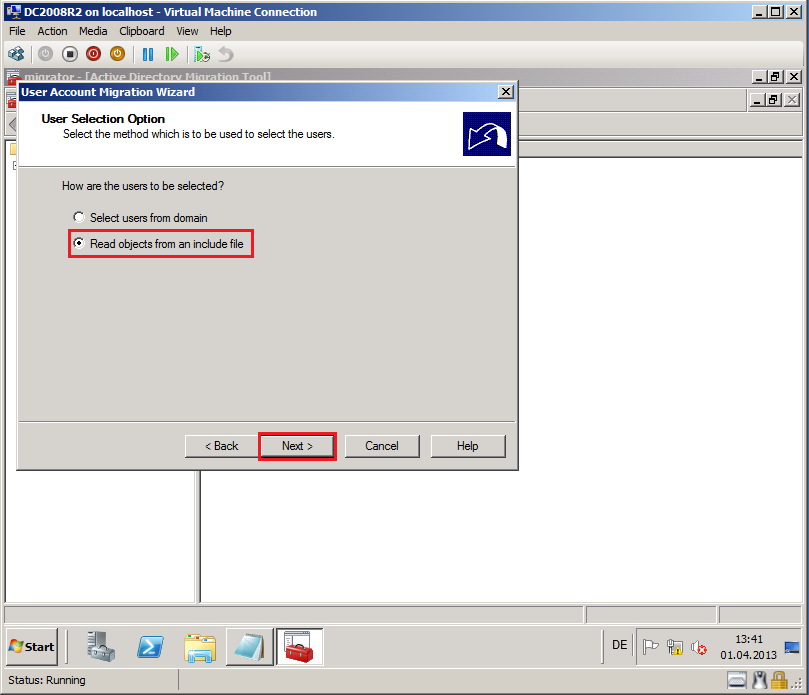
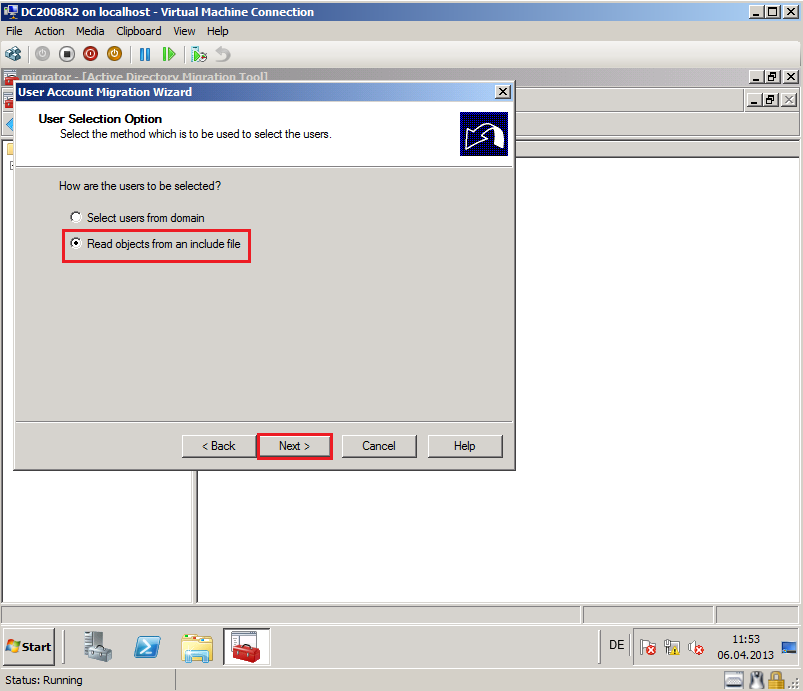
On User Selection Option page, select Read objects from a include file, then click Next.
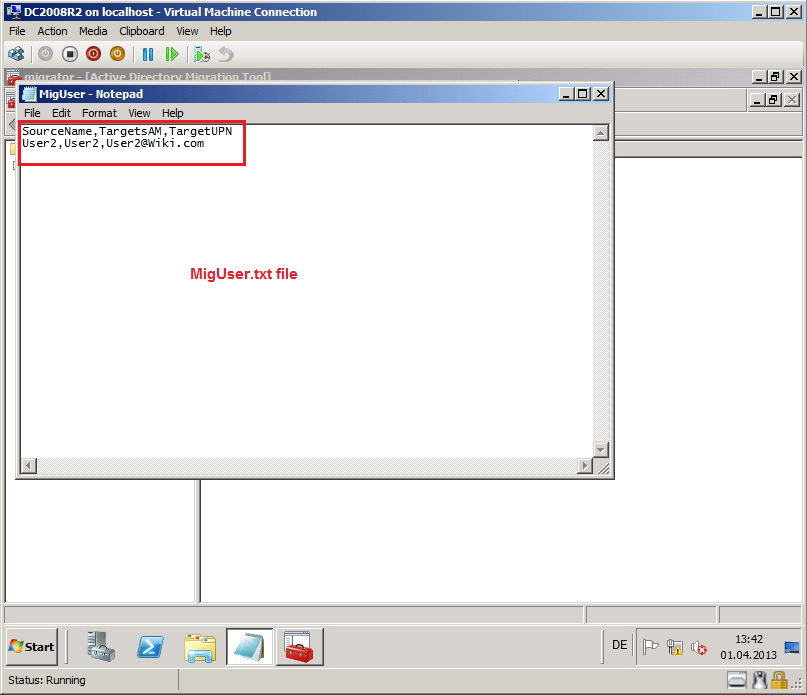
You can create a .txt or .csv file, I created MigUser.txt. Here is example file:
SourceName,TargetSAM,TargetUPN
User2,User2,User2@wiki.com
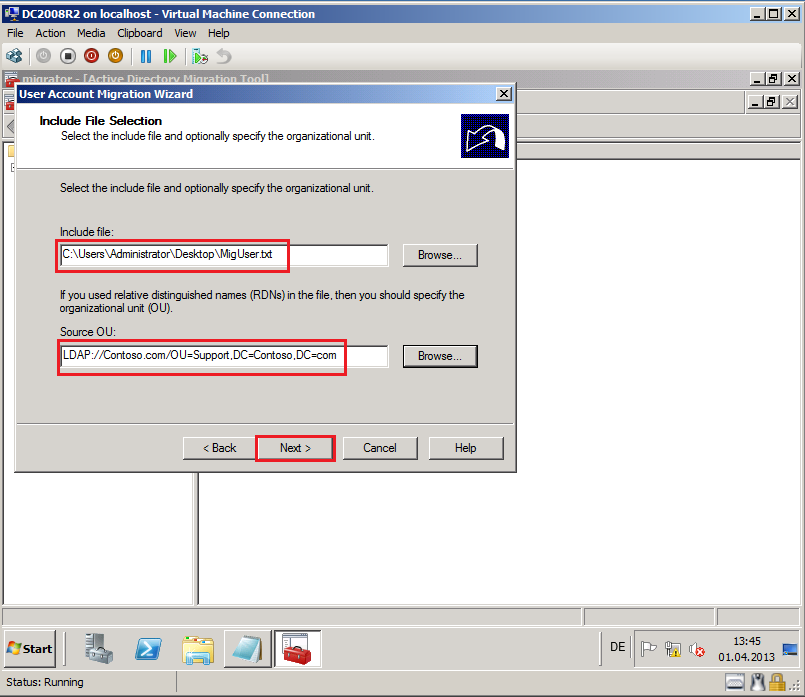
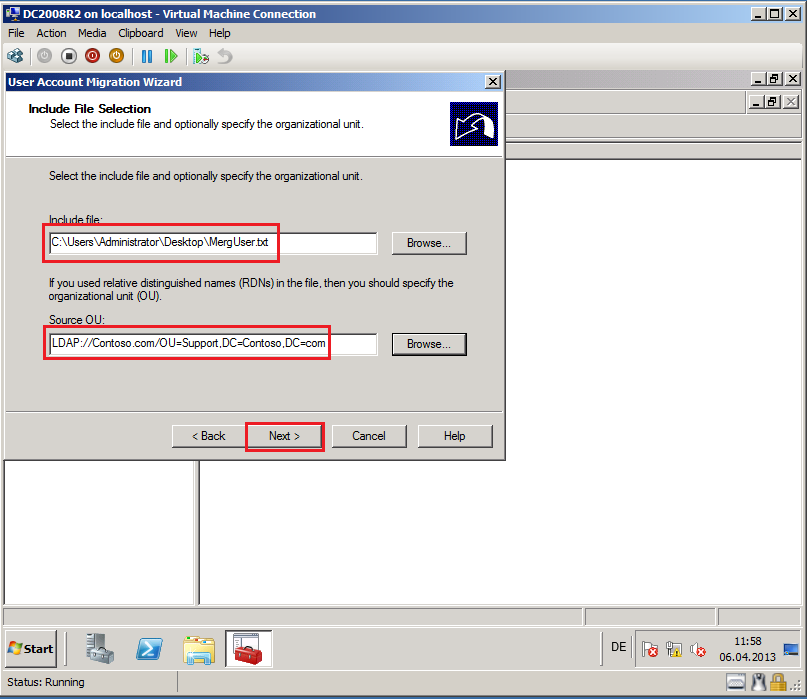
On Include File Selection page, in Include file field, select MigUser.txt file, in Source OU field, select Support OU on Contoso.com domain (source domain).
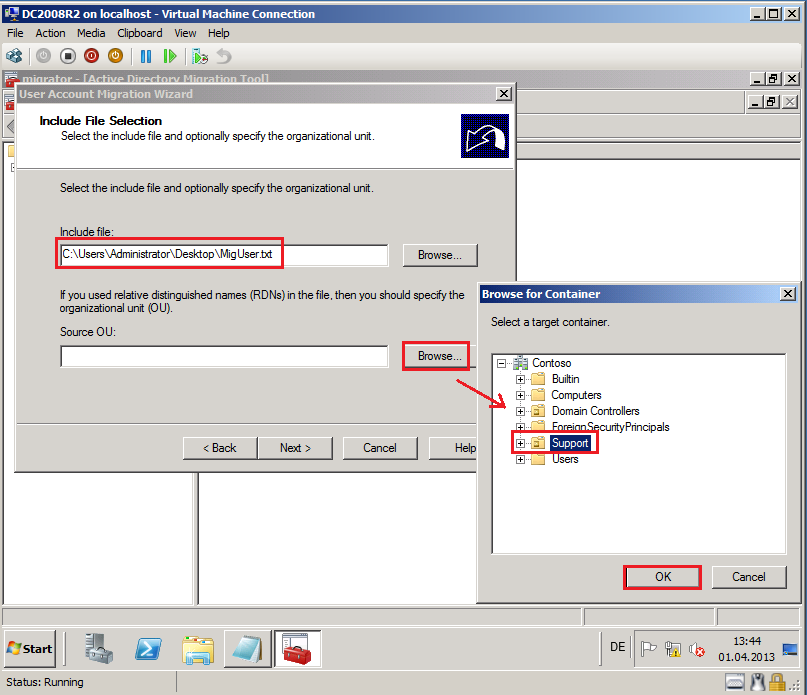
Click Next.
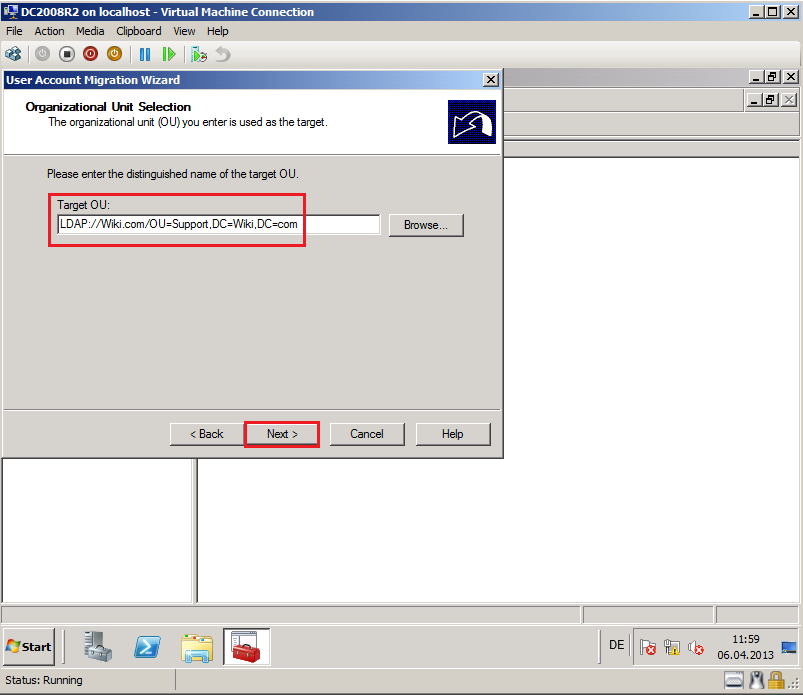
On Organizational Unit Selection page, in Target OU field, select Browse and select target OU, then click OK. In my case, target OU is Support. Click Next.

On Password Options page, select appropriate option. In my case, Migrate passwords option and Password migration source DC is DC2003.Contoso.com. Then select Next.
On Account Transition Options page, select appropriate options. In my case, I select Target same as source and Migrate user SIDs to target domain, then click Next.
On User Account page, enter ADMT credentials to add SID history. In my case, we used Wiki\Administrator account as ADMT account. Then select Next.
On User Options page, select appropriate options. In my case, Upgrade user rights and Fix users group memberships. Then click Next.
On Object Property Exclusion page, select appropriate options. In my case, I will all attributes, then select Next.
On Conflict Management page, select Do not migrate source object if a conflict is detected in the target domain, then click Next.
On Completting the User Account Migration Wizard page, review Task description, then select Finish.
After completed, click View Log.

Now, you can see you Migration Log file, if your migration failed.
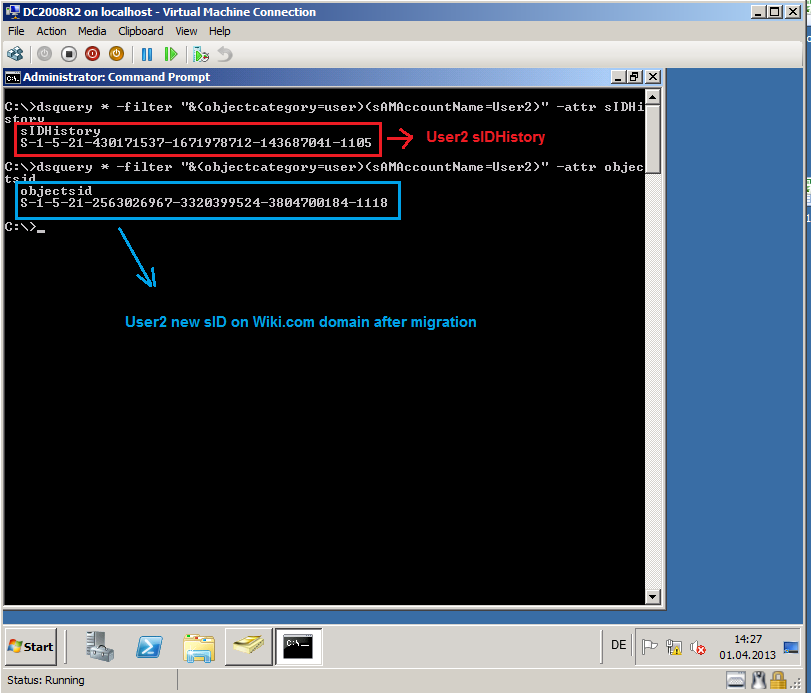
Open Active Directory Users and Computers console, click Support OU and check User2.
Now User2 has new sID in Wiki.com domain and her/his sID from Contoso.com domain saved as sIDGistory.
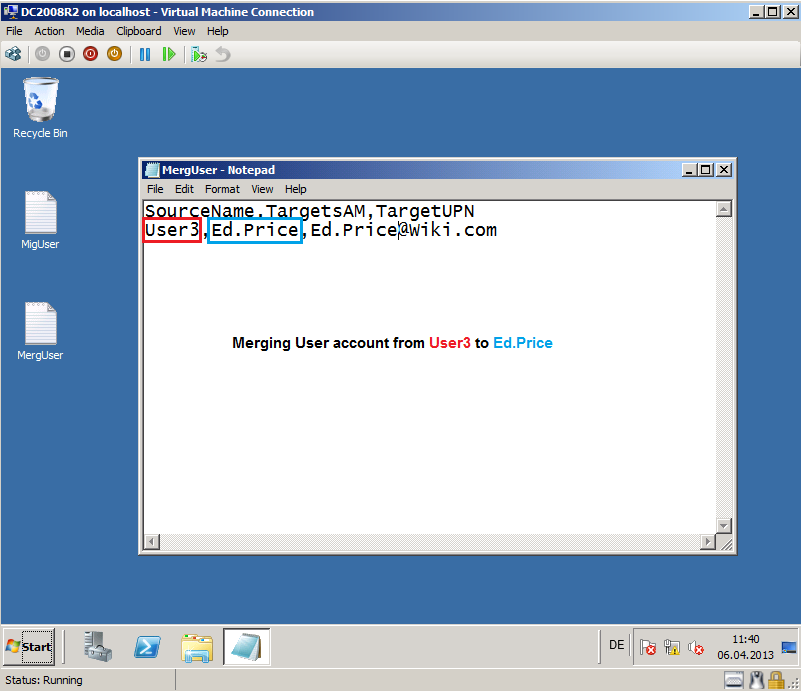
3- Merging Users
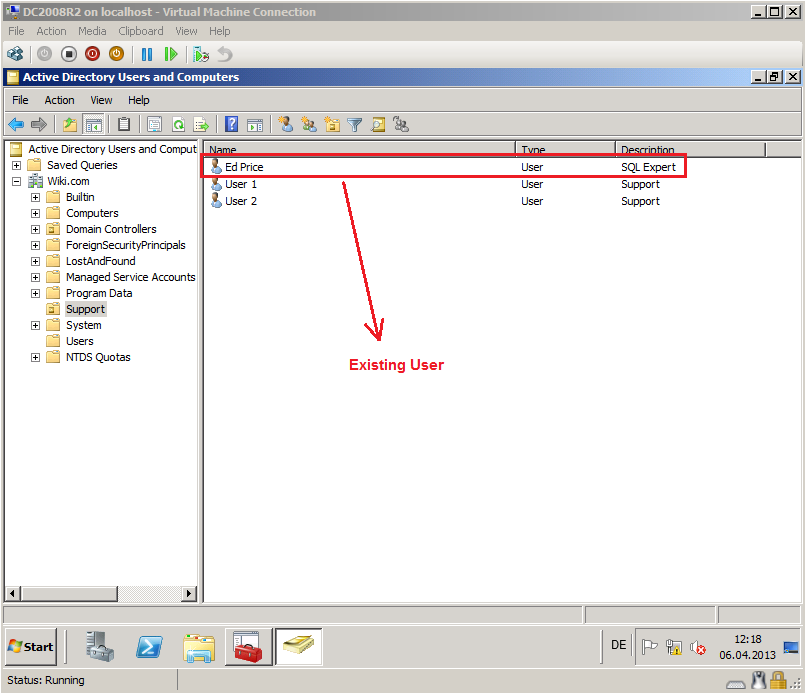
I will migrate and merg User3 account from Contoso.com domain with existing user account (Ed Price) in Wiki.com domain.
Here is Ed Price user account in Wiki.com domain.
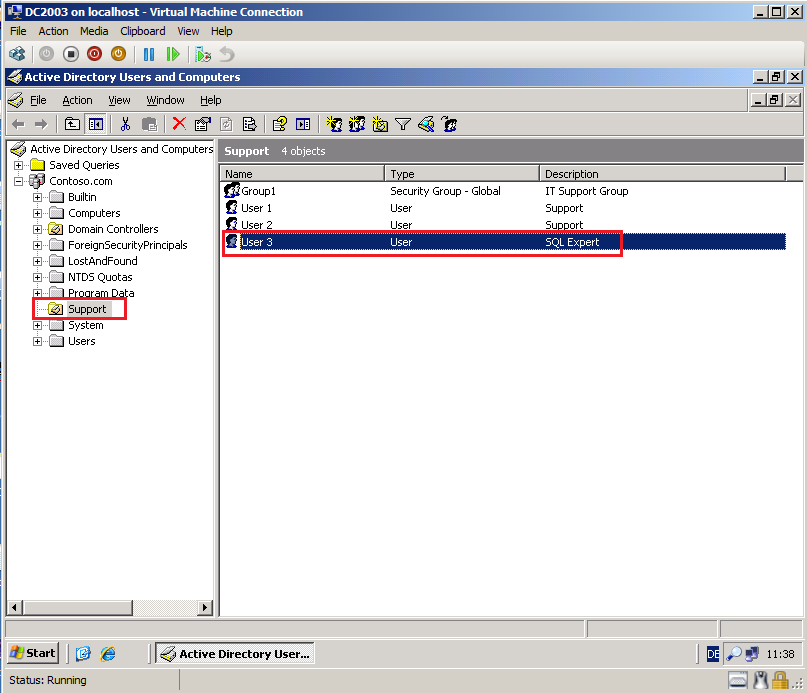
Here is User3 user account in Contoso.com domain.
Here is my example MergUser.txt file.
SourceName,TargetSAM,TargetUPN
User3,Ed.Price,Ed.Price@Wiki.com
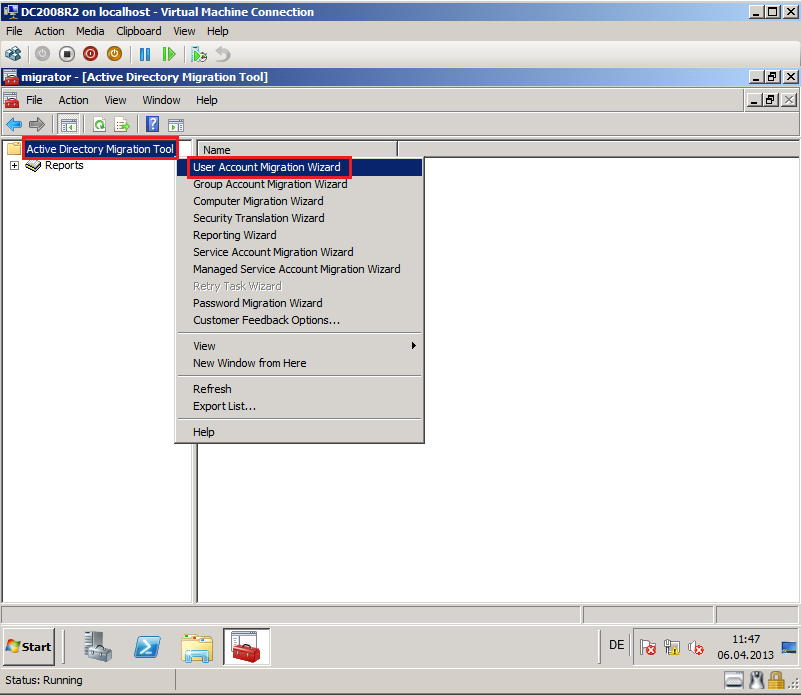
Click Strat, then Administrative Tool, open Active Directory Migration Tool. Right click on Active Directory Migration Tool, select User Account Migration Wizard.
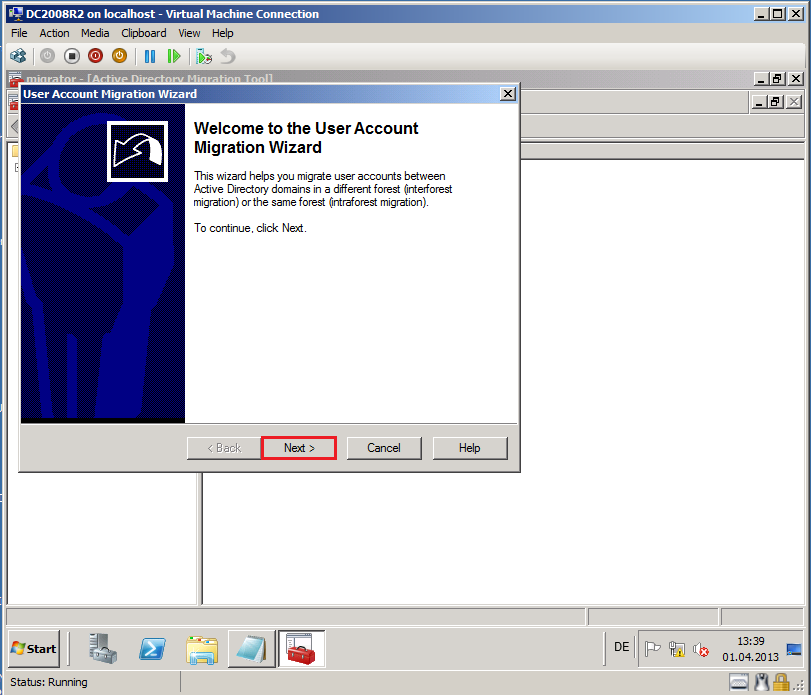
On Welcome to the User Account Migration Wizard page, click Next.
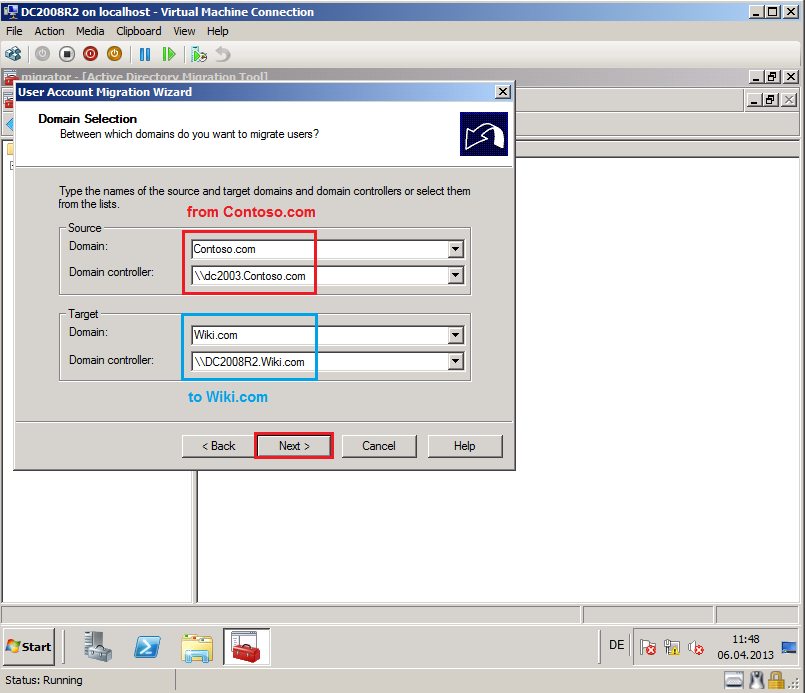
On Domain Selection page, select Source and Target domain, you can select which specific domain controller to use, if you have more domain controllers. In my TestLAB, source domain is Contoso.com and DC name is DC2003.Contoso.com, target domain is Wiki.com and DC name is DC2008R2.Wiki.com. Click Next.
On User Selection Option page, select Read objects from a include file, then click Next.
On Include File Selection page, in Include file field, select MergUser.txt file, in Source OU field, select Support OU on Contoso.com domain (source domain).
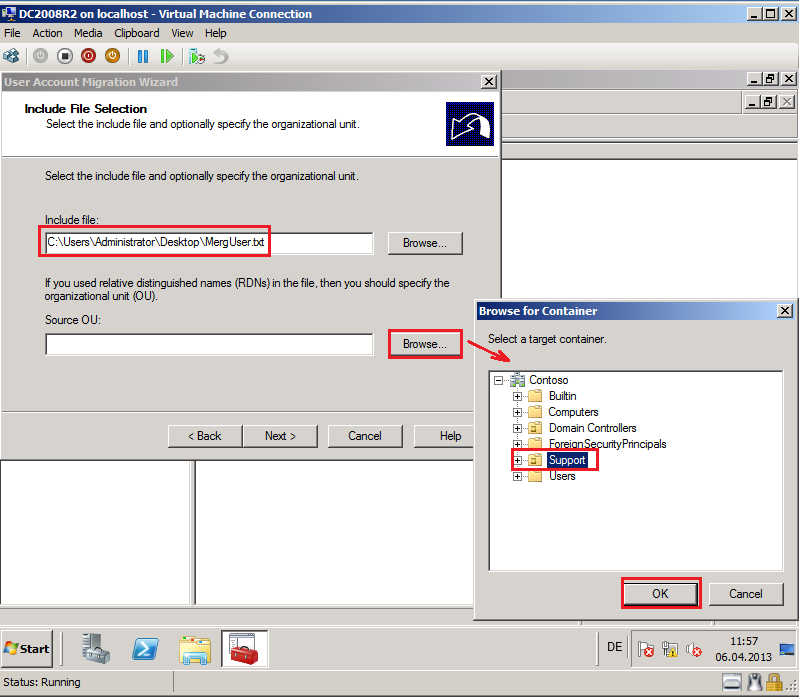
Click Next.
On Organizational Unit Selection page, select Browse and select target OU, then click OK. In my case, target OU is Support. Click Next.
On Password Options page, select appropriate option. In my case, Migrate passwords option and Password migration source DC is DC2003.Contoso.com. Then select Next.
On Account Transition Options page, select appropriate options. In my case, I select Target same as source and Migrate user SIDs to target domain, then click OK.
On User Account page, enter ADMT credentials to add SID history. In my case, we used Wiki\Administrator account as ADMT account. Then select Next.
On User Options page, select appropriate options. In my case, Upgrade user rights and Fix users group memberships. Then click Next.
On Object Property Exclusion page, select appropriate options. In my case, I will all attributes, then select Next.

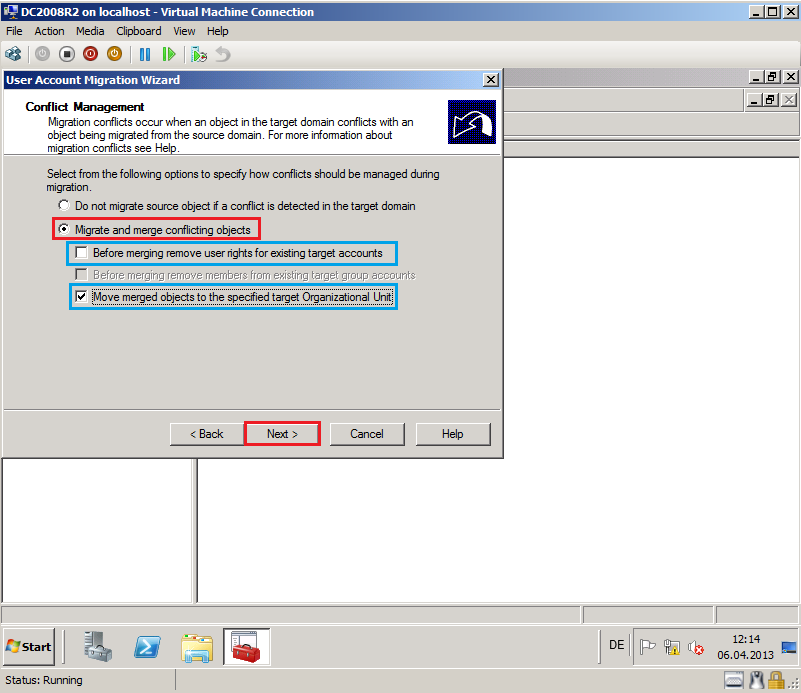
On Conflict Management page, select Migrate and merge conflicting objects, uncheck Before merging remove user rights for existing target account and select Move merged objects to the specified target Organizational Unit, then click Next.
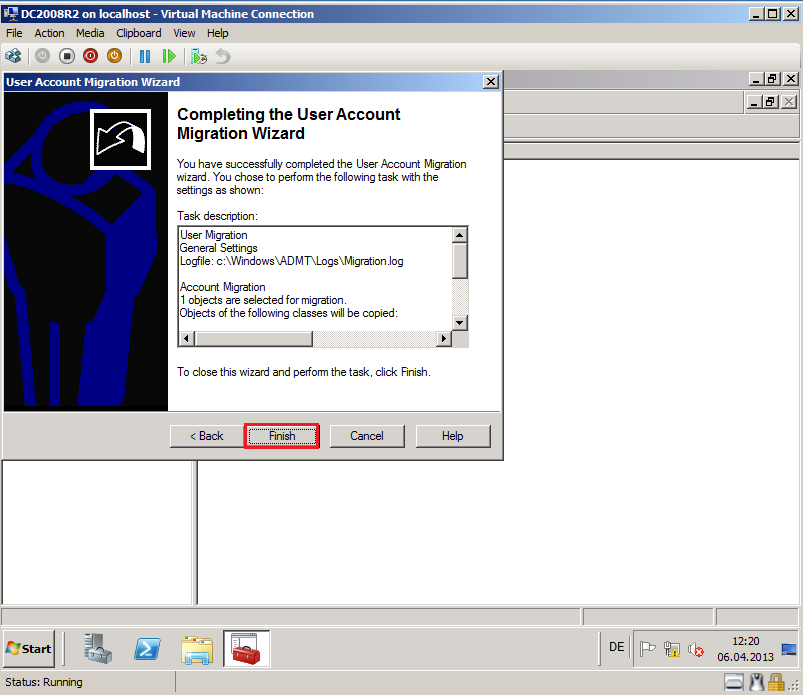
On Completting the User Account Migration Wizard page, review Task description, then select Finish.
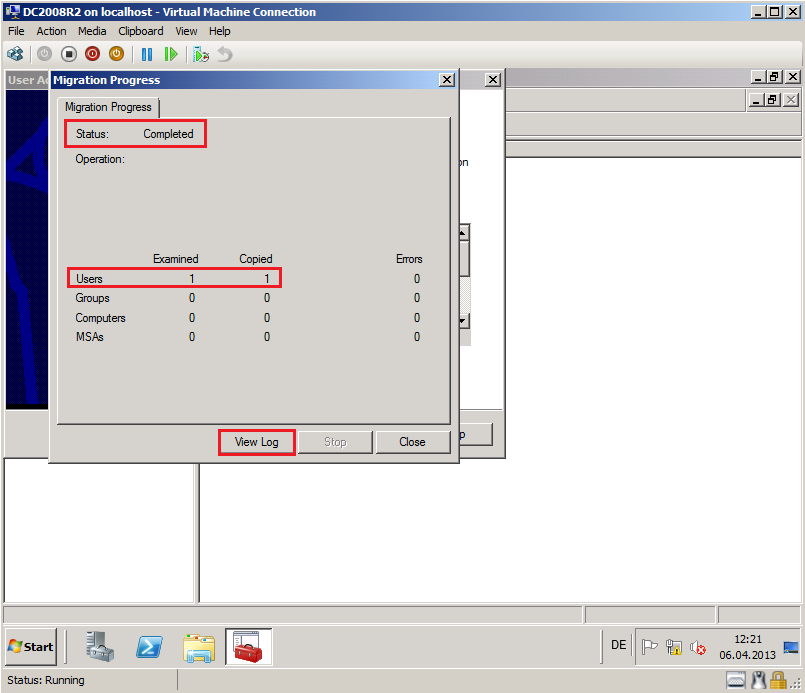
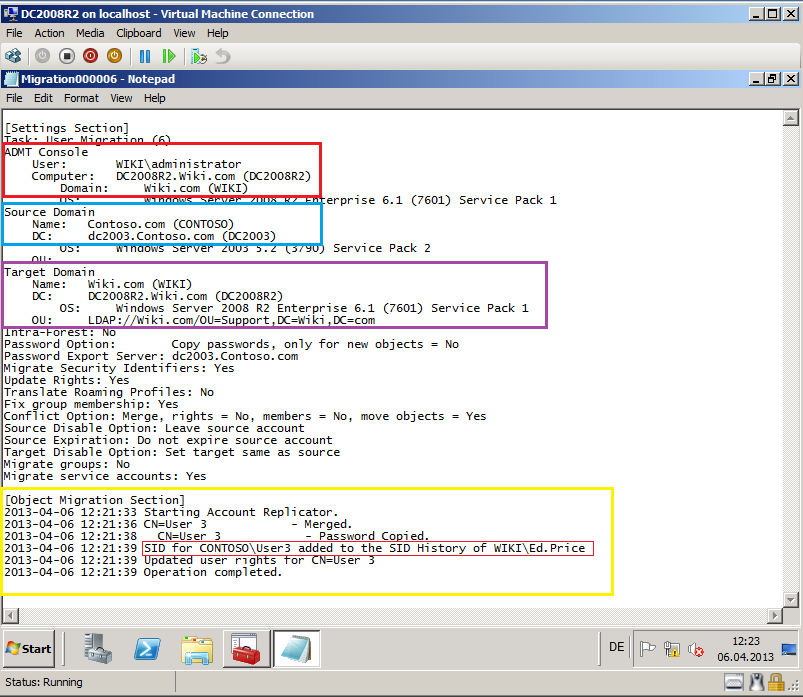
After completed, click View Log.
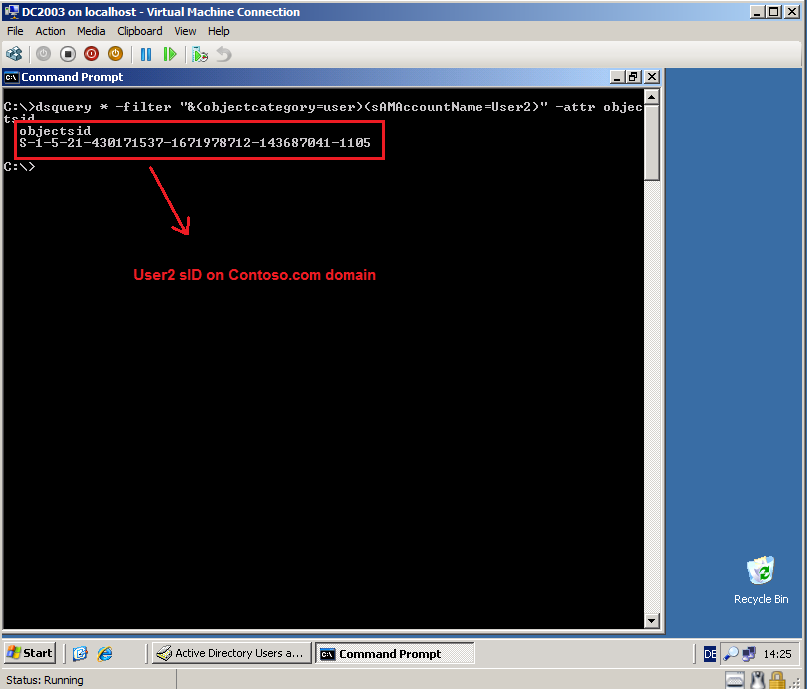
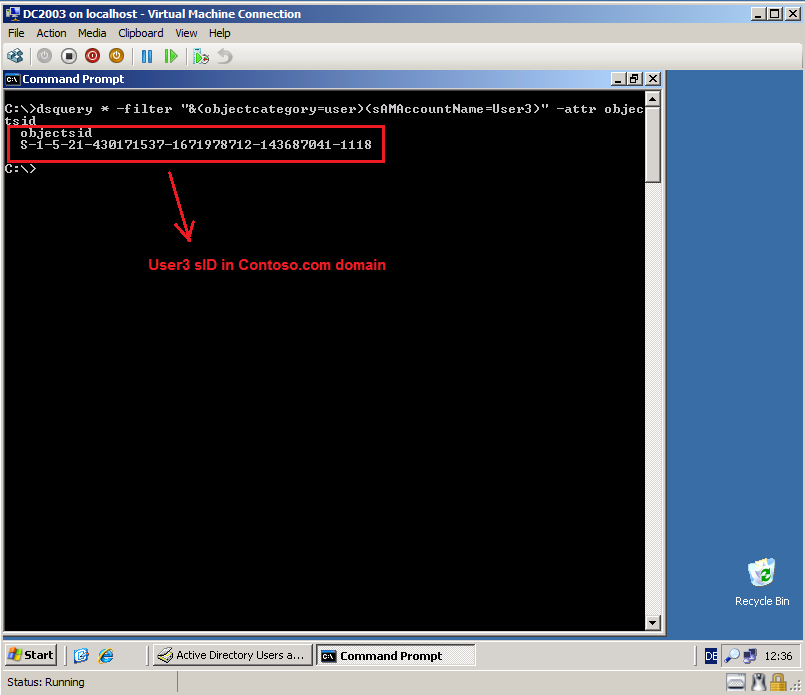
On DC2003.contoso.com, open Command Prompt and run this command:
Dsquery * -filter "&(objectcategory=user)(sAMAccountName=User3)" -attr objectsid
Now, you can see User3 sID.
After migration, on DC2008R2.wiki.com, open Command Prompt and run this command:
Dsquery * -filter "&(objectcategory=user)(sAMAccountName=User3)" -attr sIDHistory
Now, you can see Ed Price has User3 sID as sIDHistory.

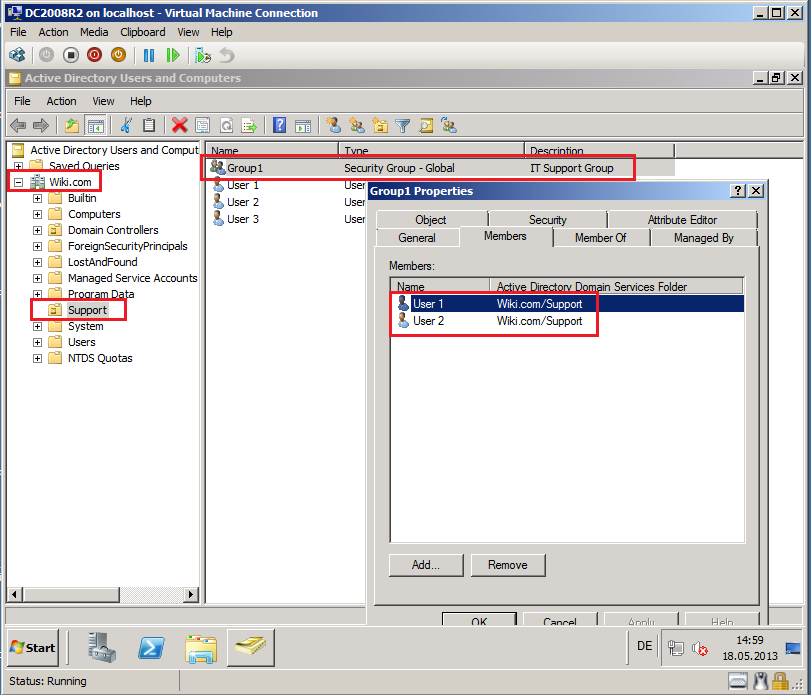
Group Account Migration
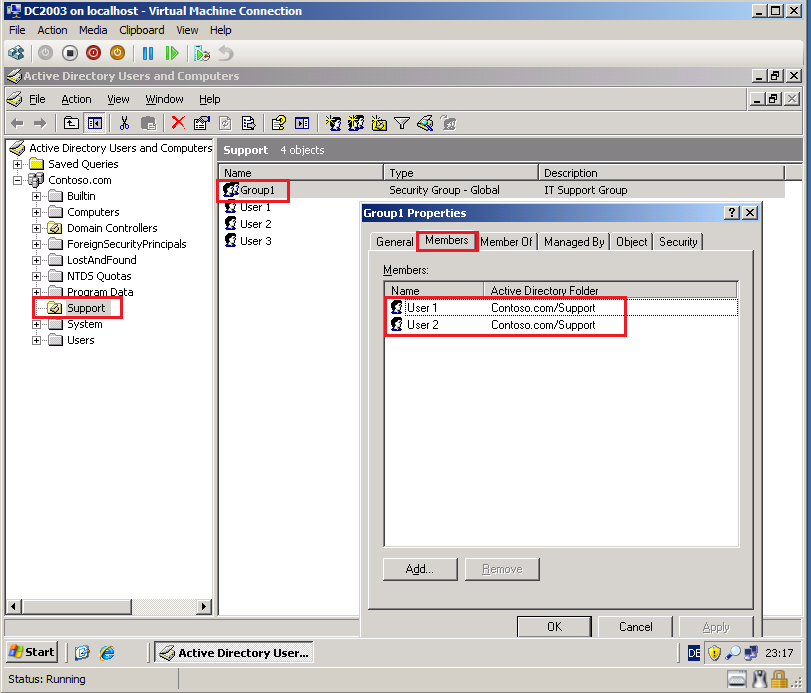
Now, we migrate a Global security group, called Group1 from Contoso.com domain to Wiki.com domain.
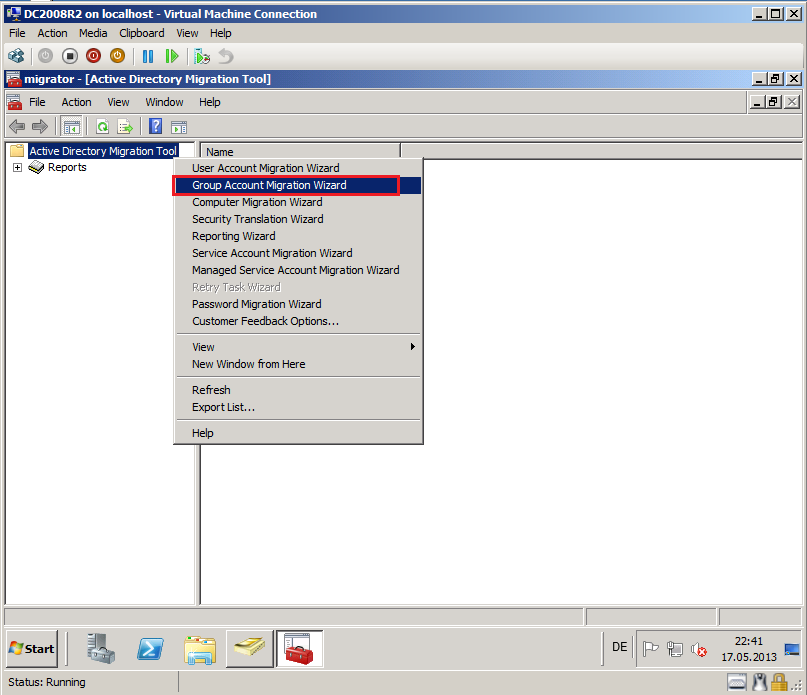
Click Strat, then Administrative Tool, open Active Directory Migration Tool. Right click on Active Directory Migration Tool, select Group Account Migration Wizard.
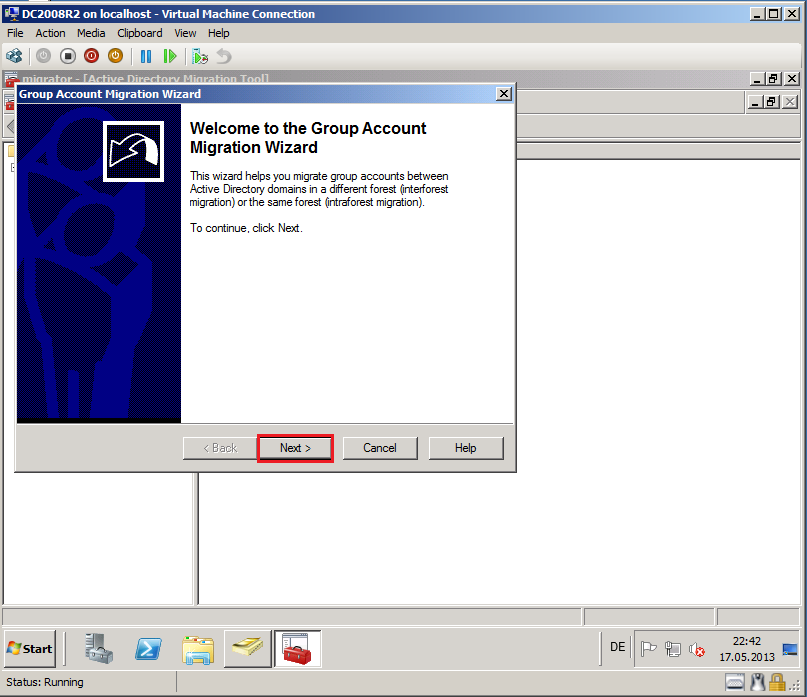
On Welcome to the Group Account Migration Wizard page, click Next.
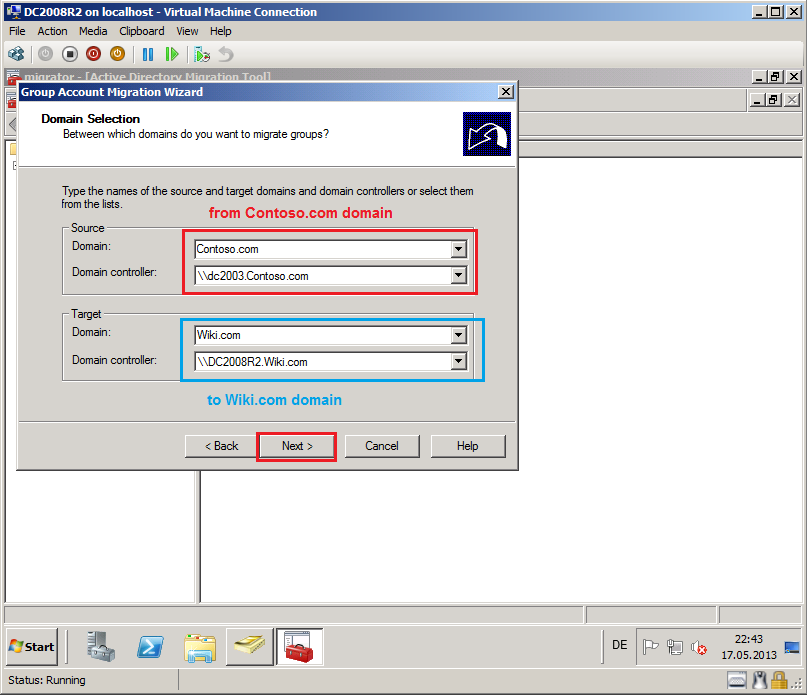
On Domain Selection page, select Source and Target domain, you can select which specific domain controller to use, if you have more domain controllers. In my TestLAB, source domain is Contoso.com and DC name is DC2003.Contoso.com, target domain is Wiki.com and DC name is DC2008R2.Wiki.com. Click Next.
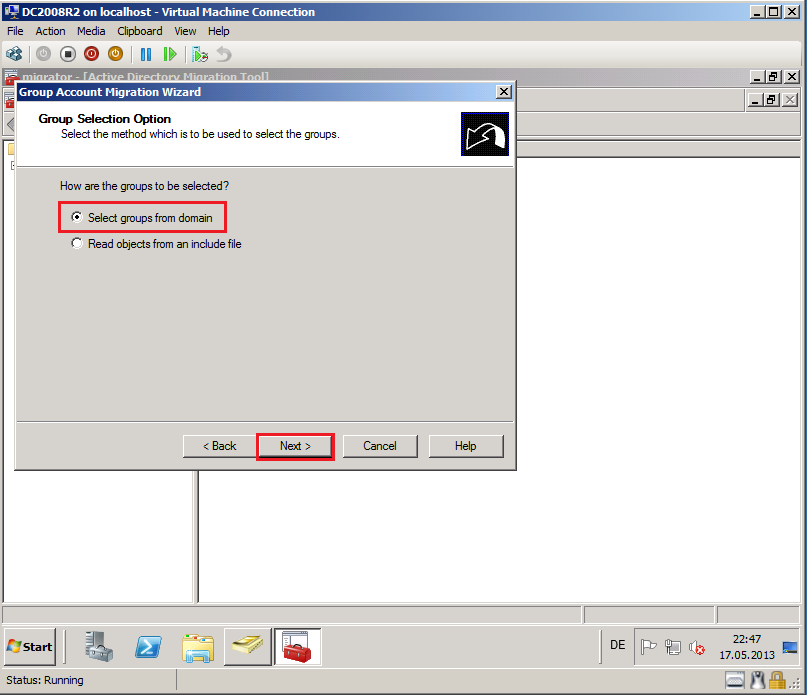
On Group Selection Option page, select Select groups from domain, then click Next.
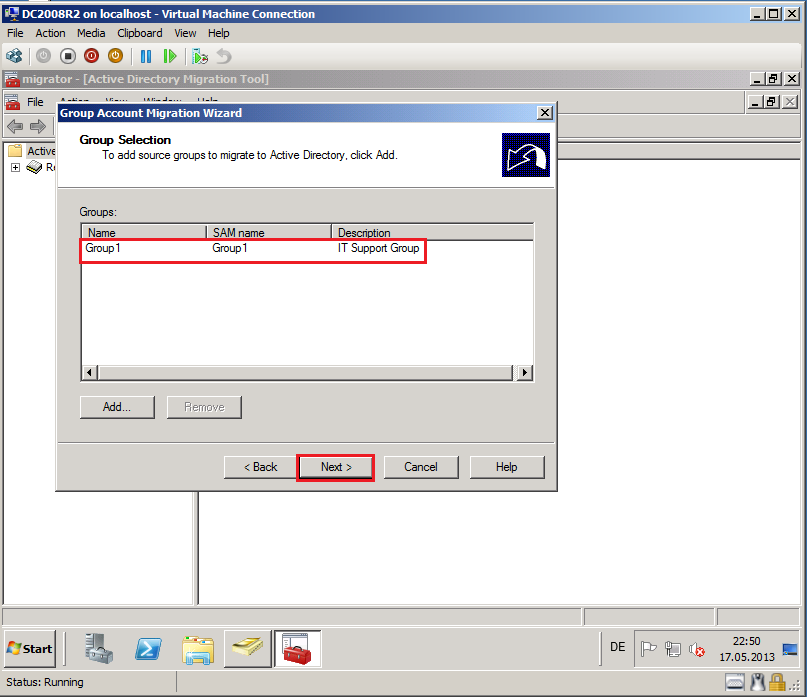
On Group Selection page, click Add, find and select groups and then click OK. In my case is Group1.
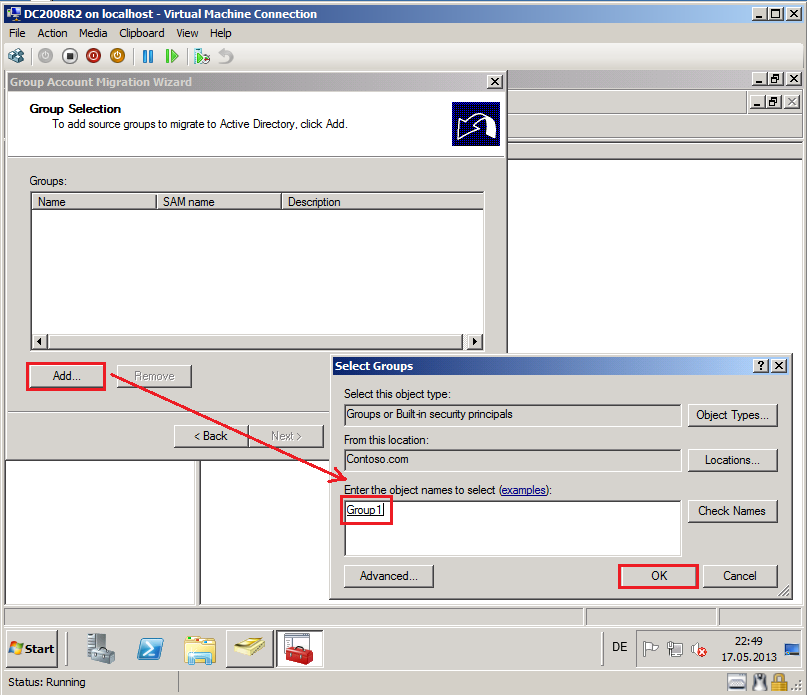
Click Next.
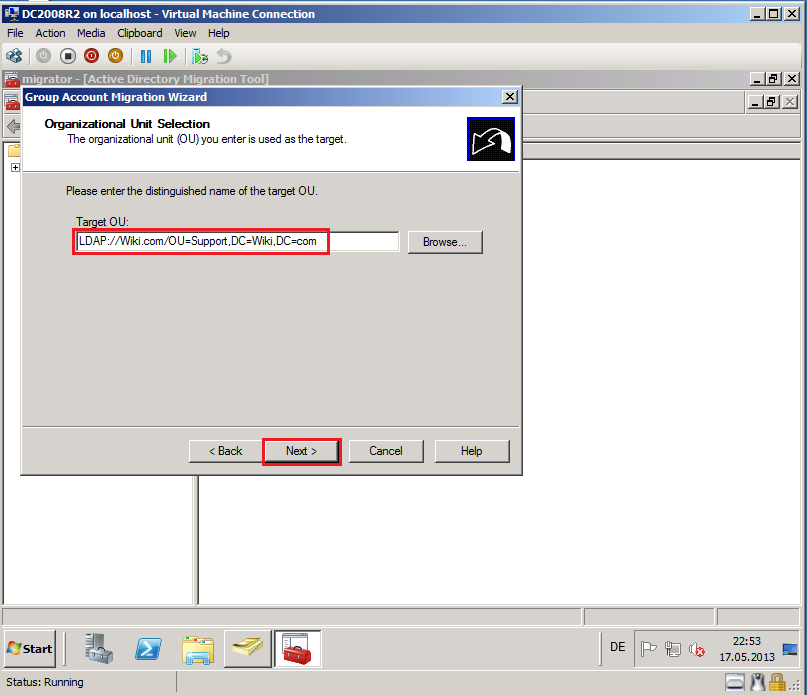
On Organizational Unit Selection page, select Browse and select target OU, then click OK. In my case, target OU is Support.
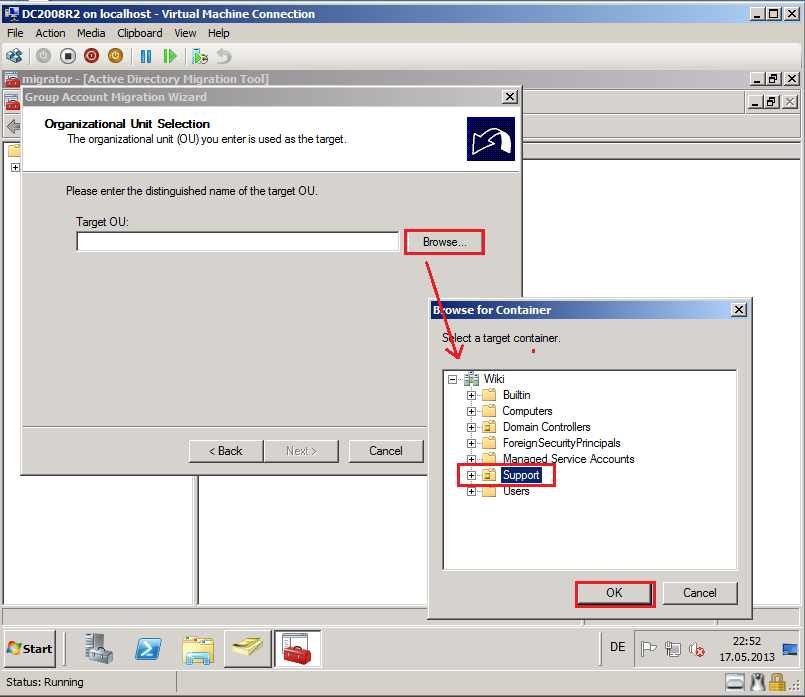
On Organizational Unit Selection page, click Next.
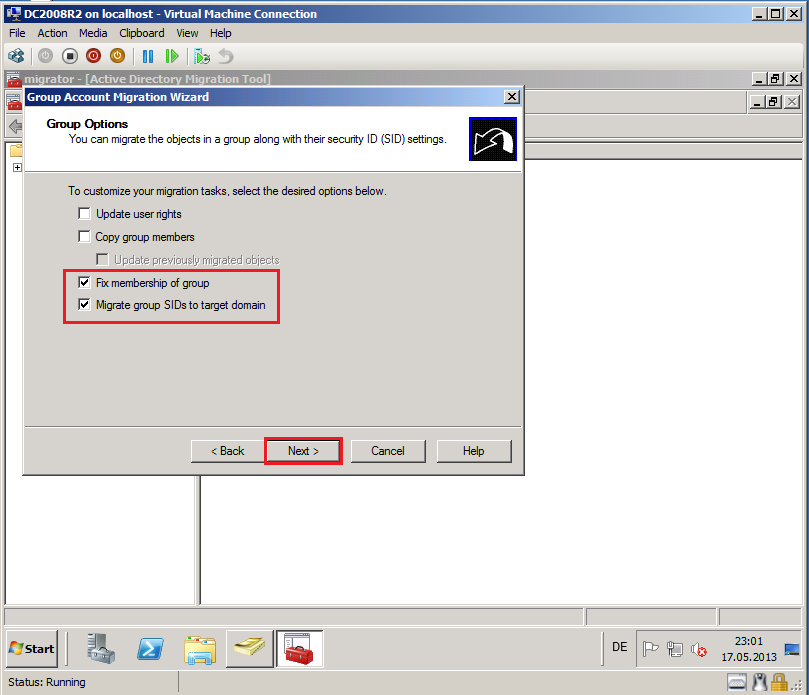
On Group Options page, select appropriate options. In my case, Fix membership of group and Migrate group SIDs to target domain. Then click Next.
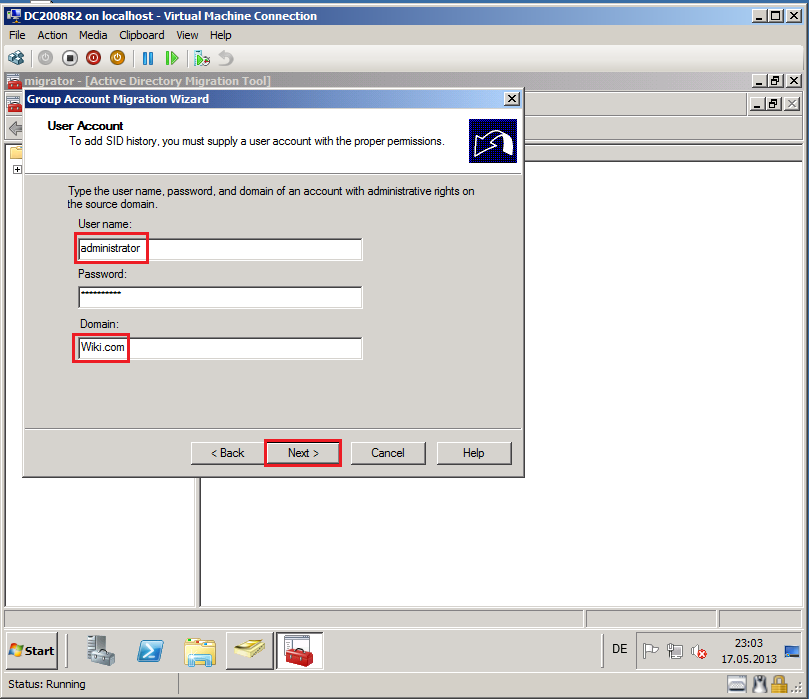
On User Account page, enter ADMT credentials to add SID history. In my case, we used Wiki\Administrator account as ADMT account. Then select Next.
On Object Property Exclusion page, select appropriate options. In my case, I will all attributes, then select Next.
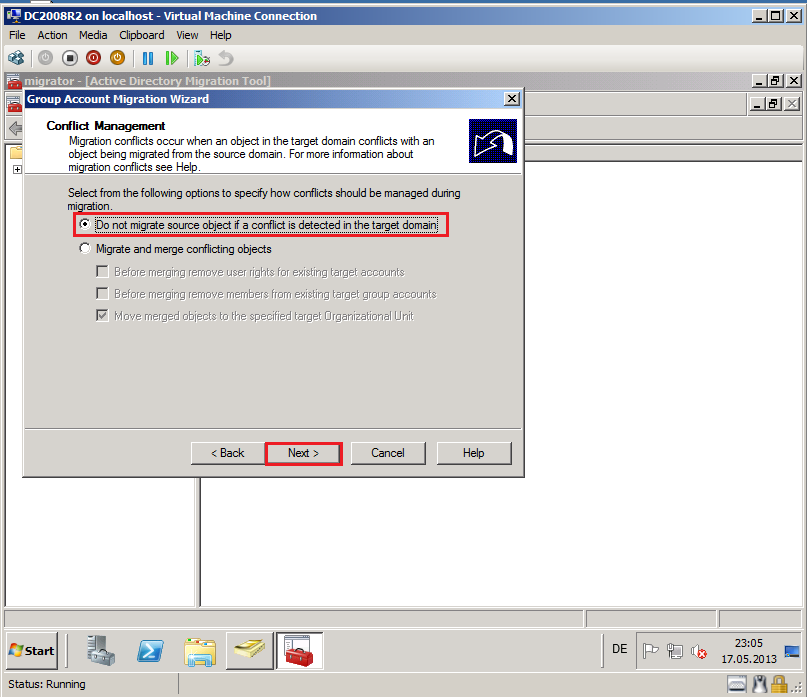
On Conflict Management page, select Do not migrate source object if a conflict is detected in the target domain, then click Next.
On Completting the Group Account Migration Wizard page, review Task description, then select Finish.

After completed, click View Log.
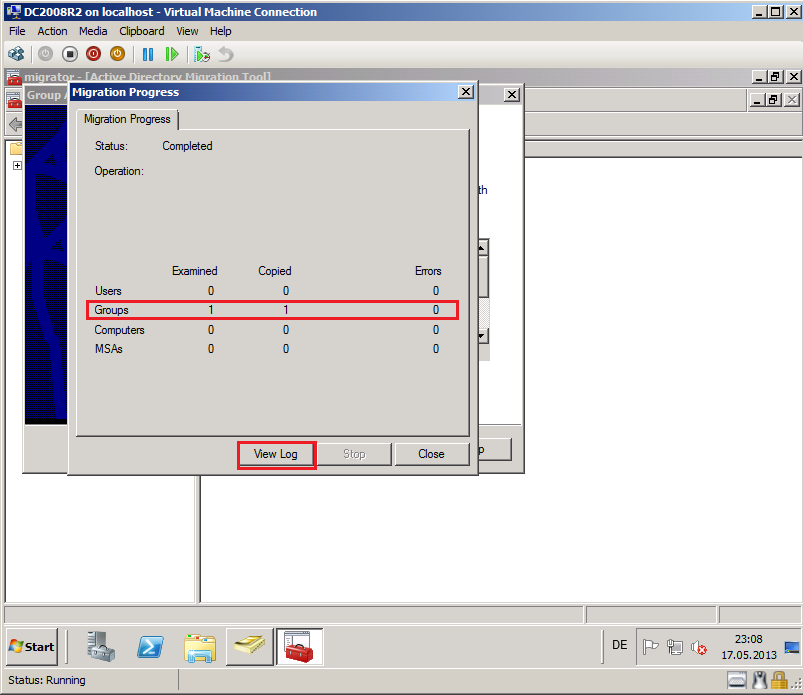
Now, you can see you Migration Log file, if your migration failed.
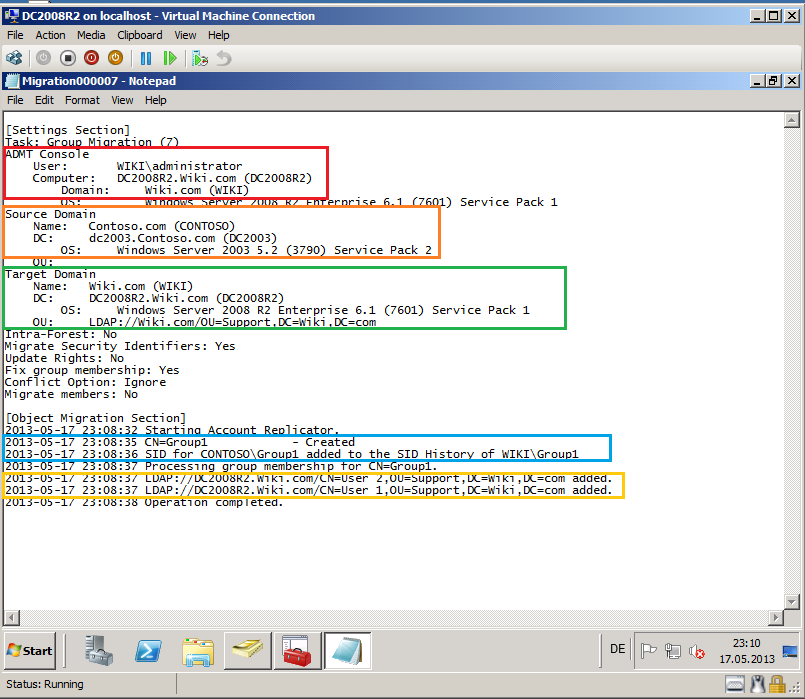
Open Active Directory Users and Computers, click Support OU and check Group account.
Security Translation - Local Profiles
1- Normal Way
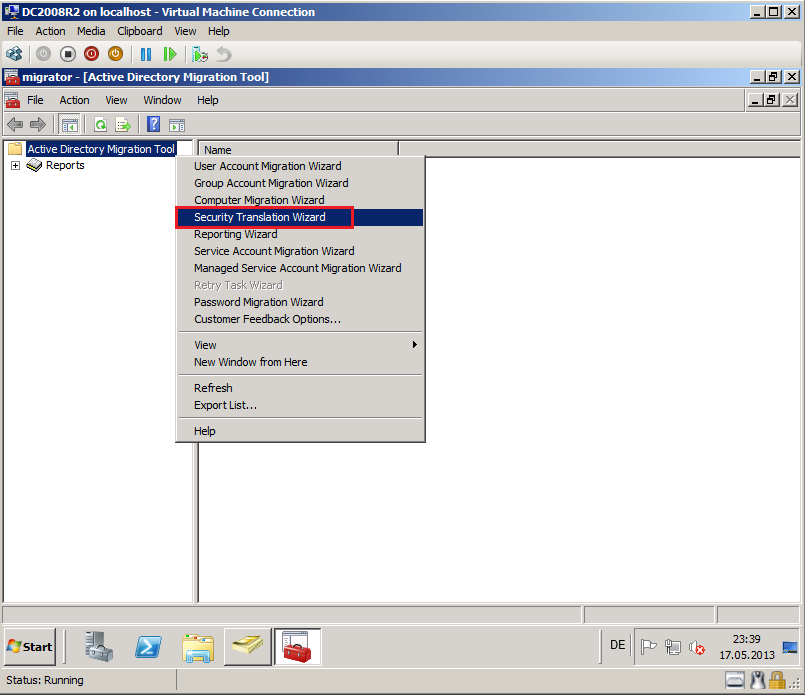
Click Strat, then Administrative Tool, open Active Directory Migration Tool. Right click on Active Directory Migration Tool, select Security Translation Wizard.
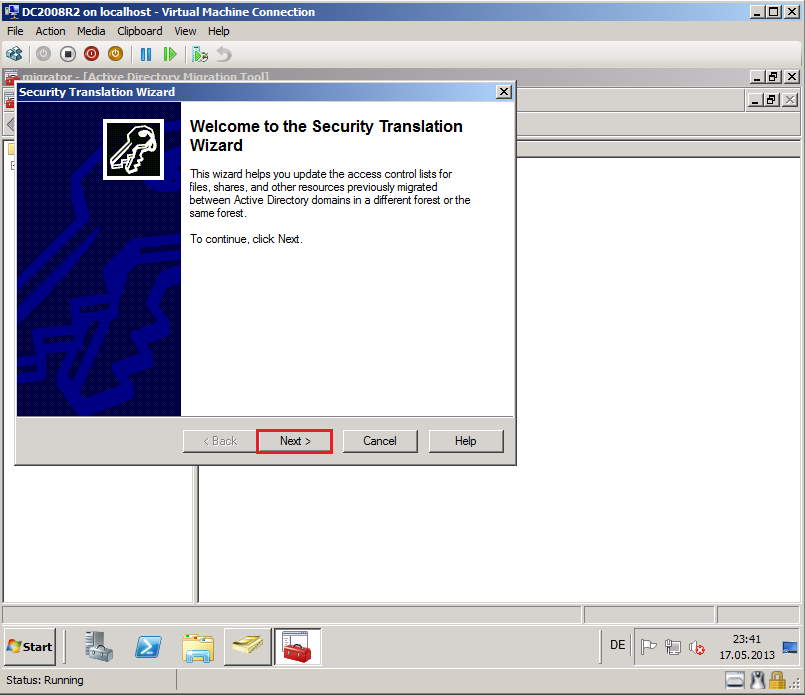
On Welcome to the Security Translation Wizard page, click Next.
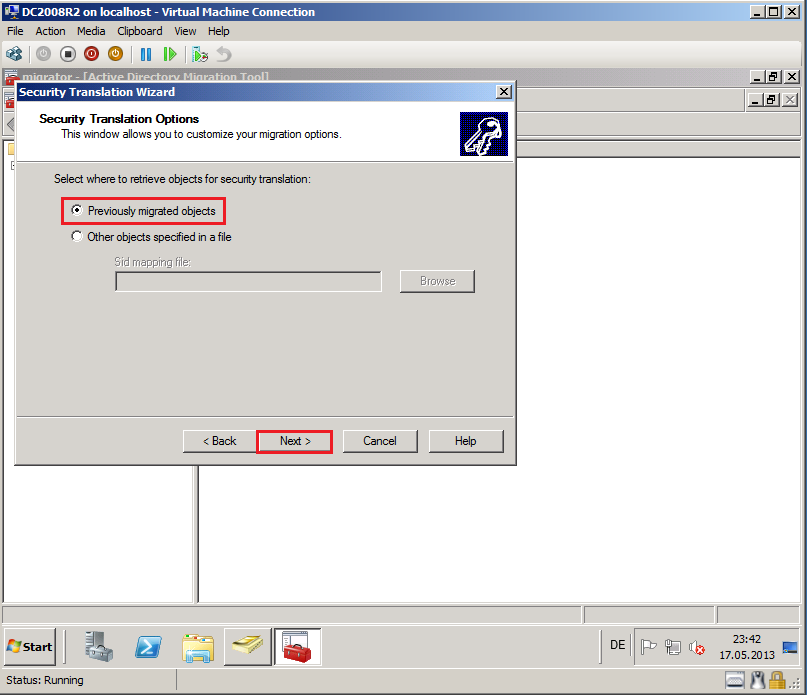
On Security Translation Option page, select Previously migrated objects, then click Next.
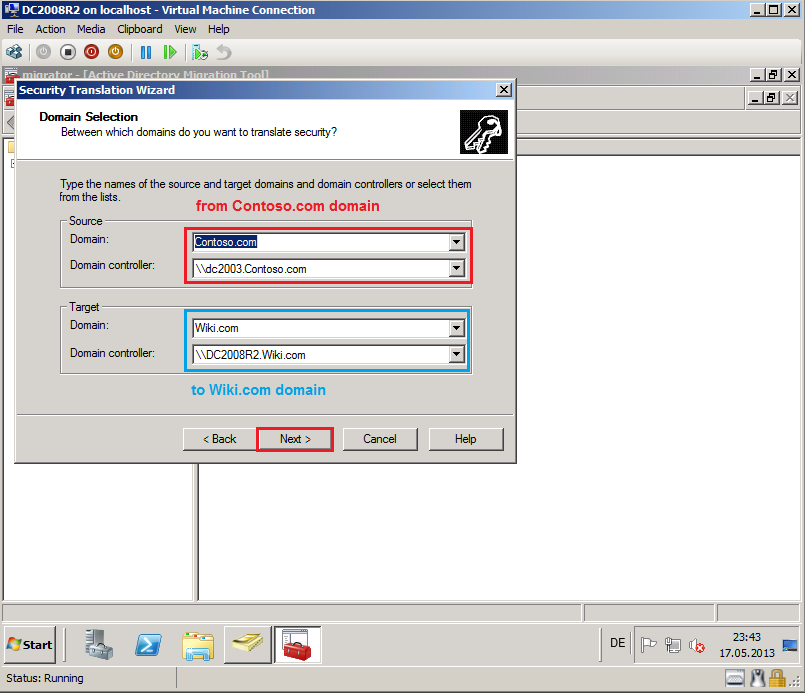
On Domain Selection page, select Source and Target domain, you can select which specific domain controller to use, if you have more domain controllers. In my TestLAB, source domain is Contoso.com and DC name is DC2003.Contoso.com, target domain is Wiki.com and DC name is DC2008R2.Wiki.com. Click Next.
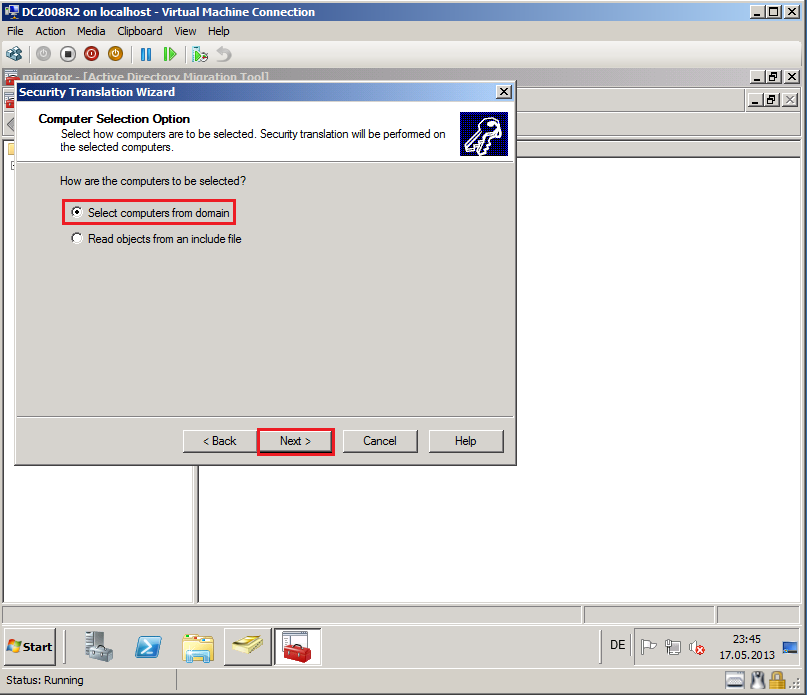
On Computer Selection Option page, select Select computers from domain, then click Next.
On Computer Selection page, click Add, find and select computers and then click OK. In my case is WINXP.
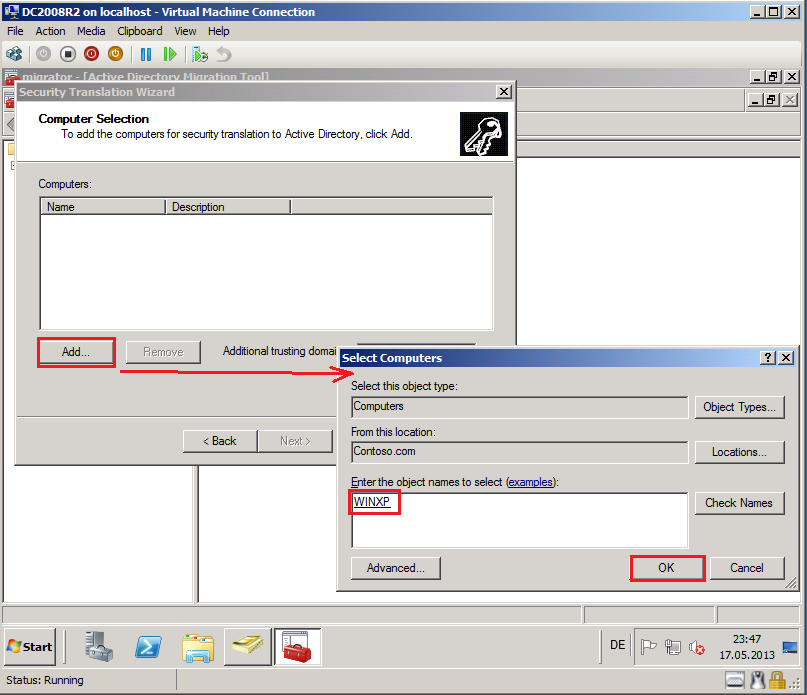
Click Next.

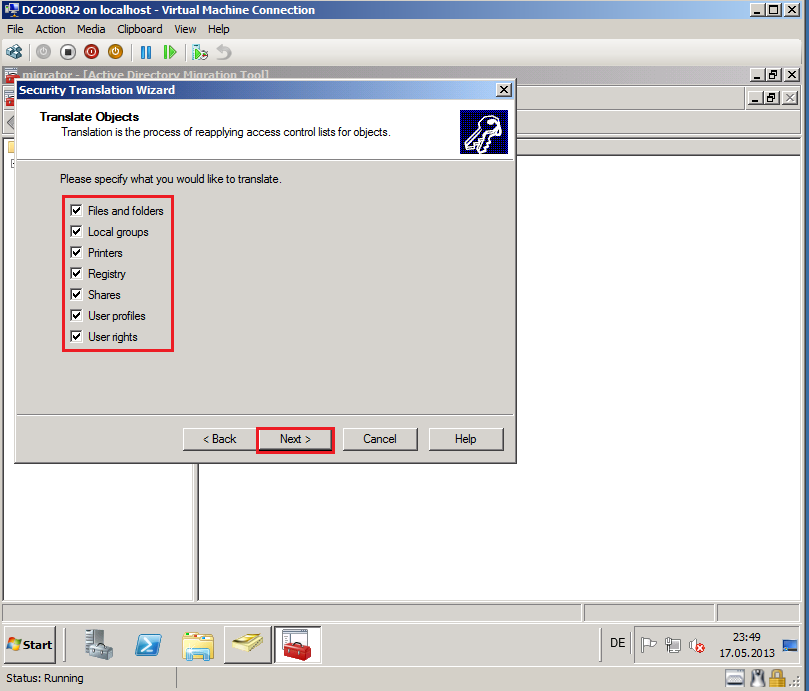
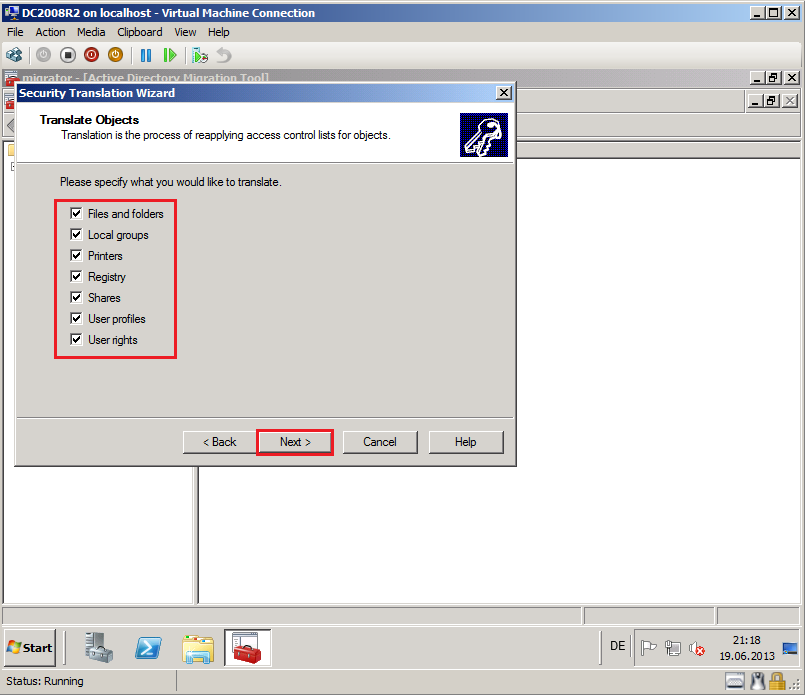
On Translate Objects page, select your options. In my case, I need all options. Click Next.
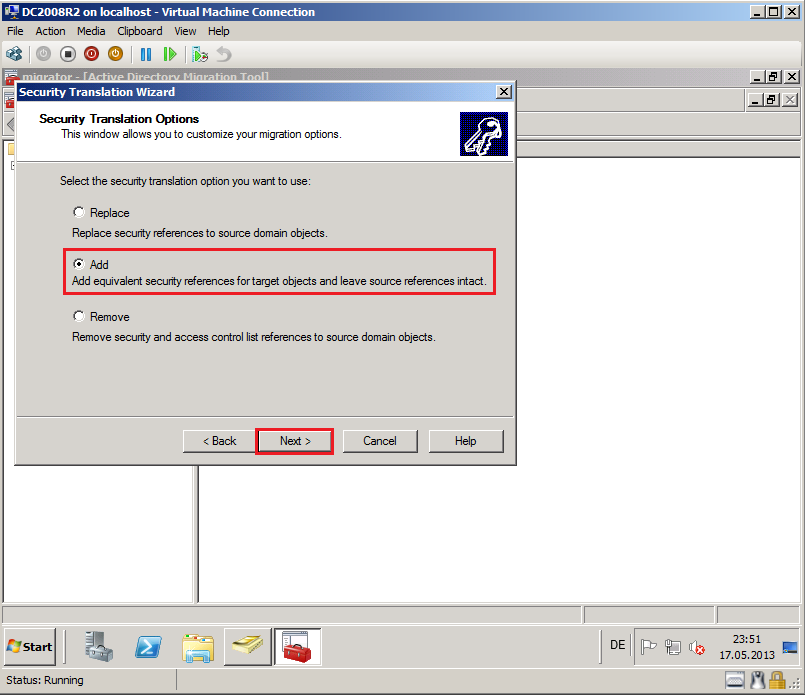
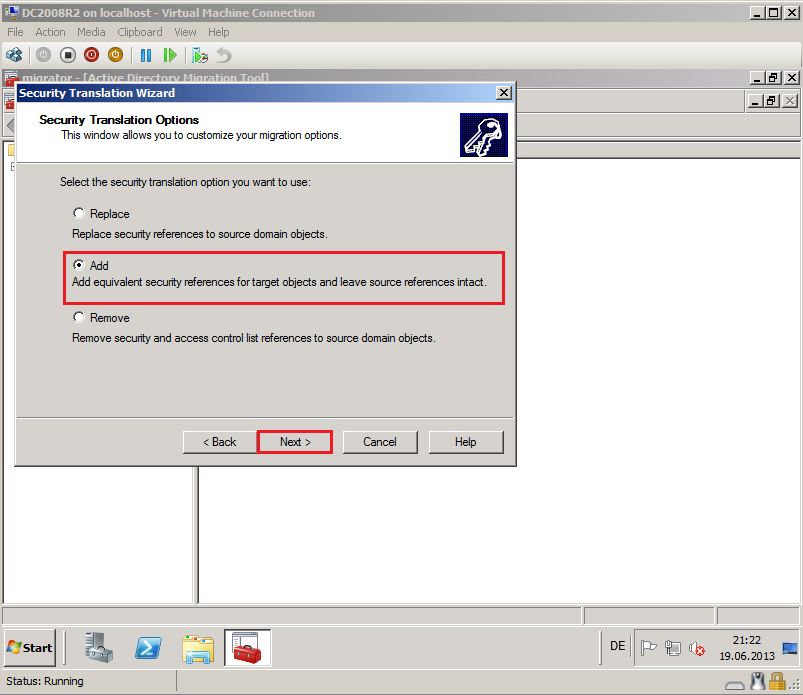
On Security Translation Option page, select Add, then click Next.
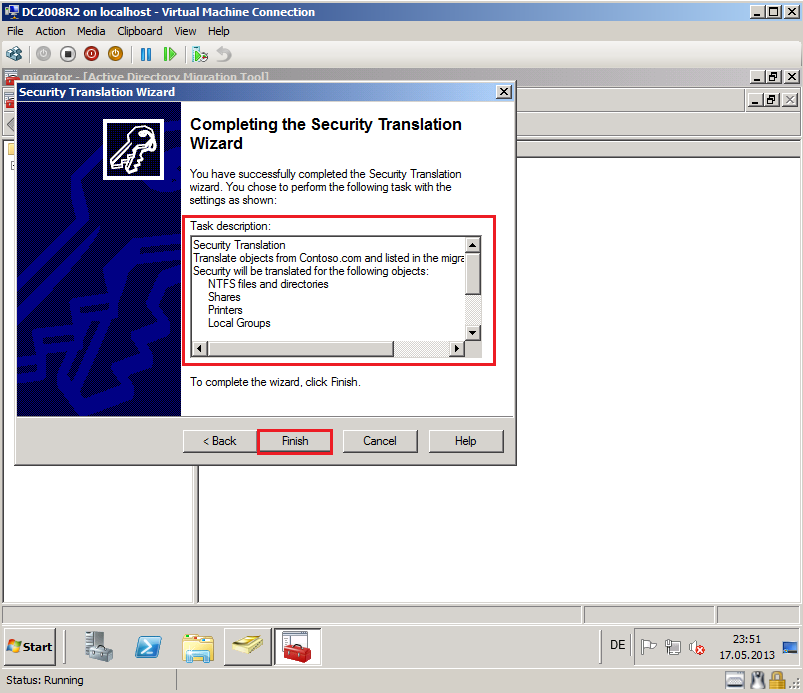
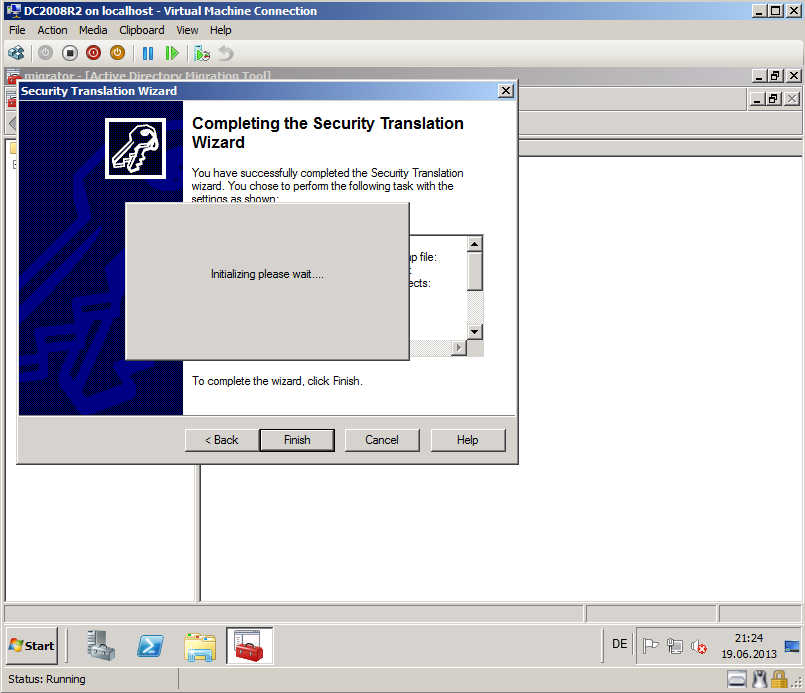
On Completting the Security Translation Wizard page, review Task description, then select Finish.
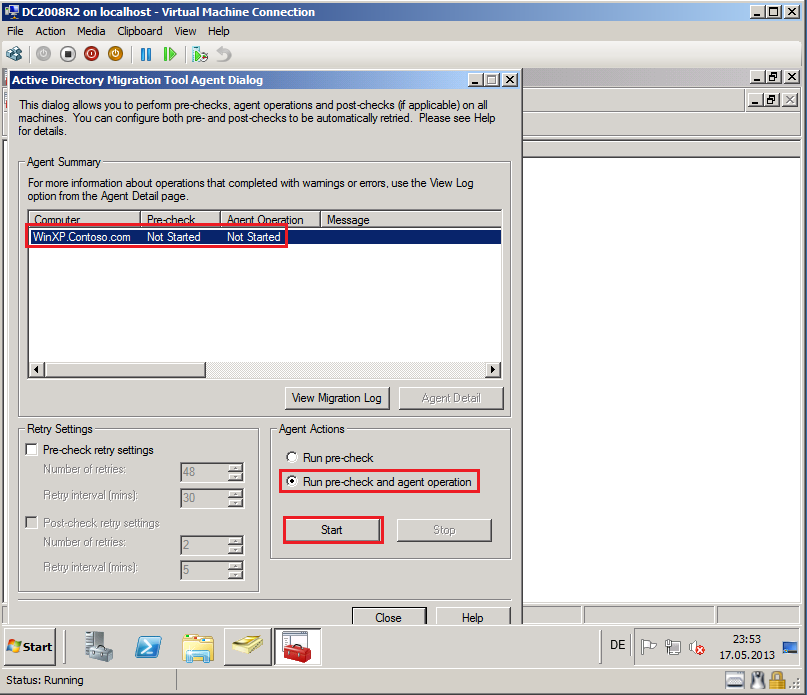
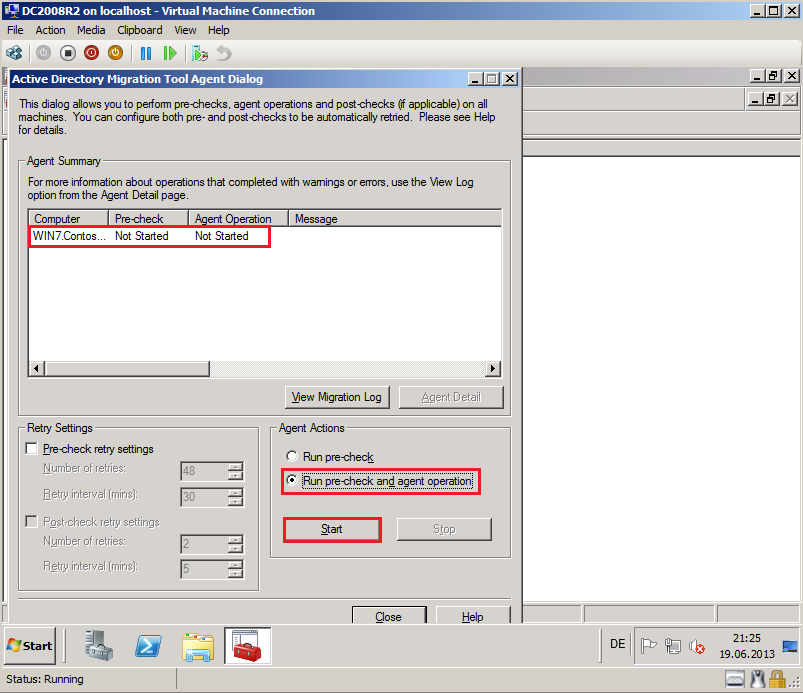
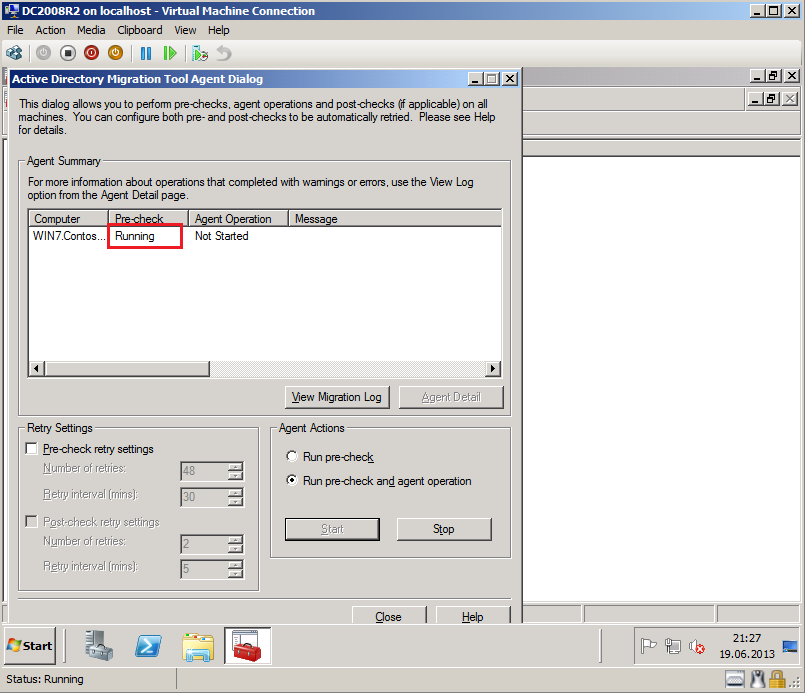
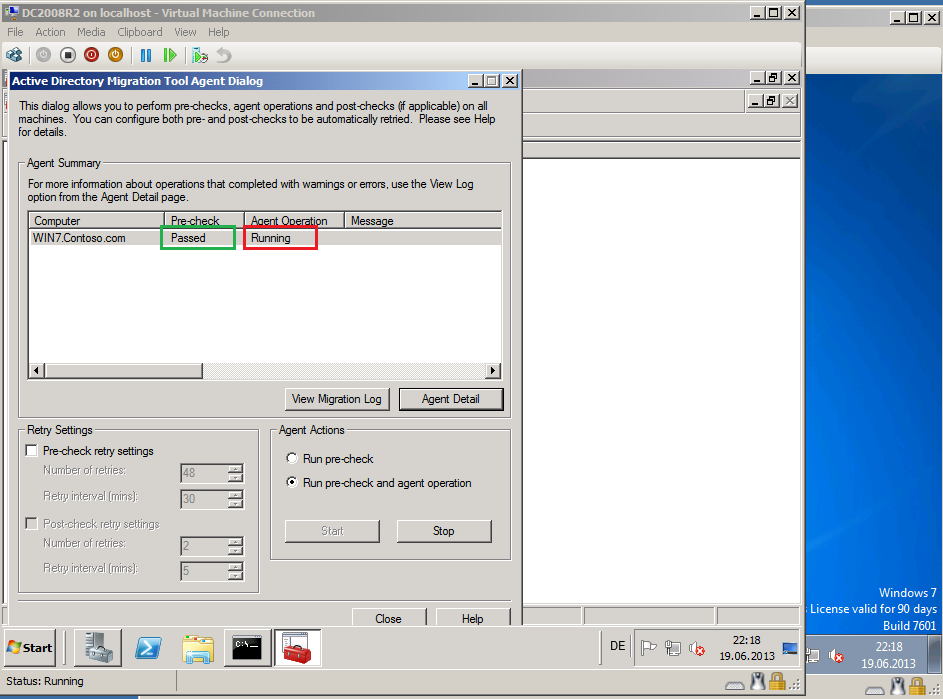
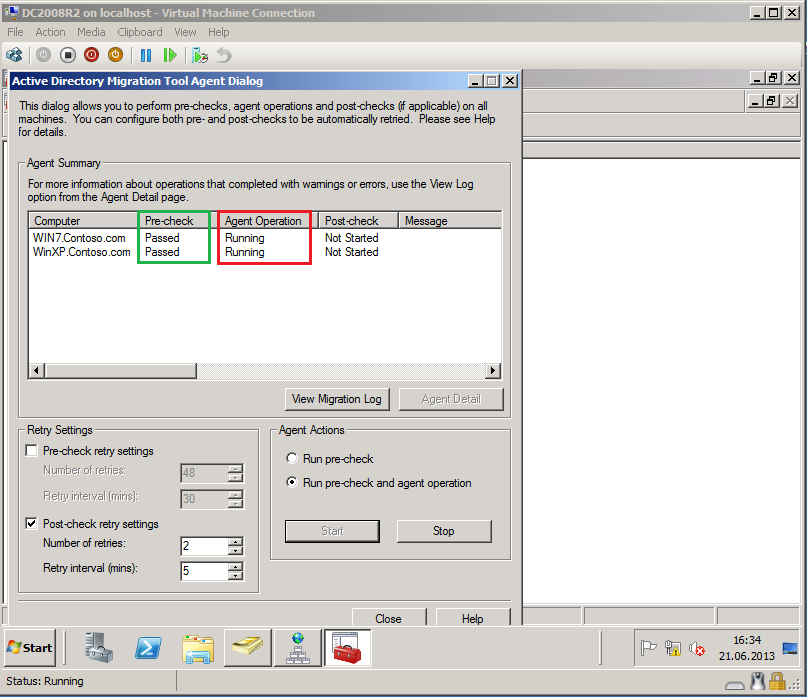
On Active Directory Migration Tool Agent Dialog page, select Run pre-check and agent opration, then click Start.
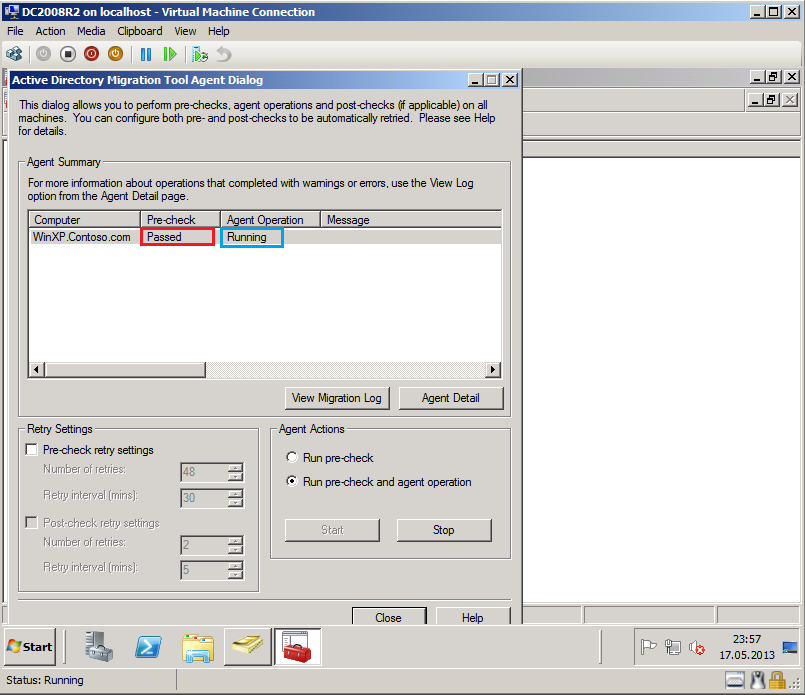
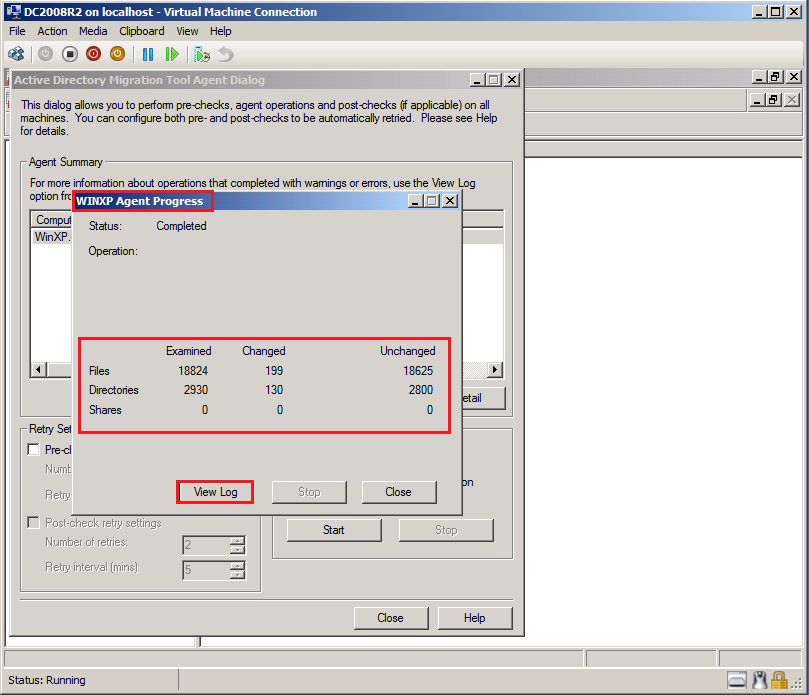
After finishing, click Agent Detail.
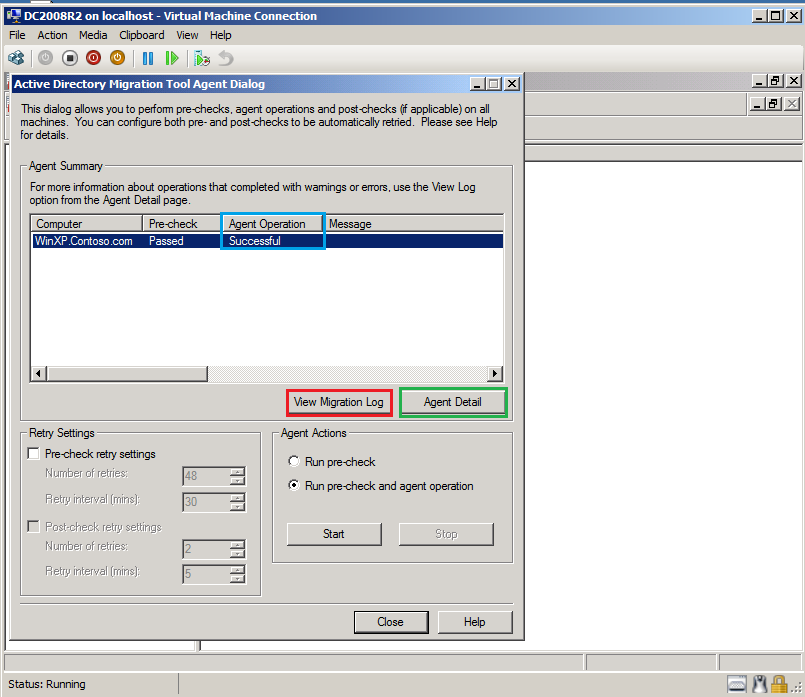
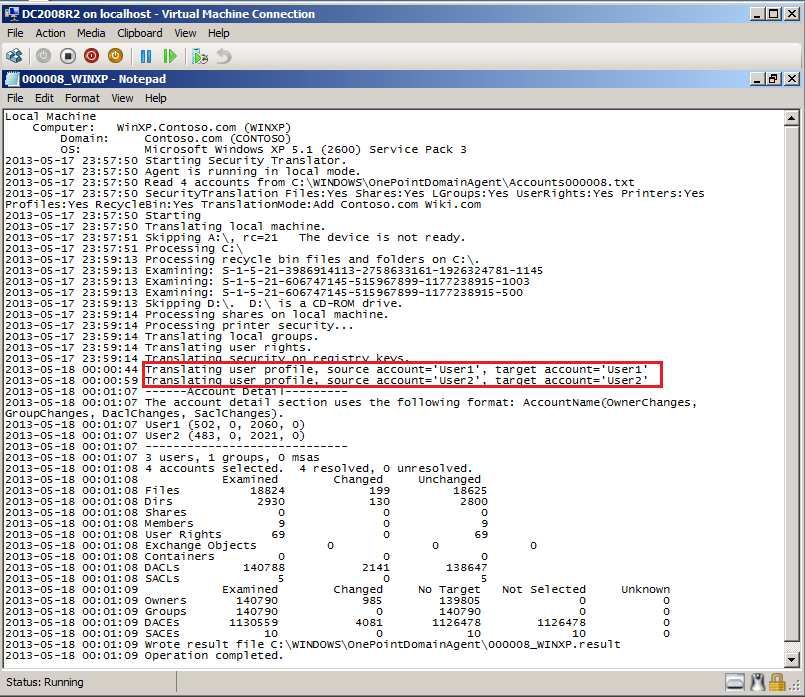
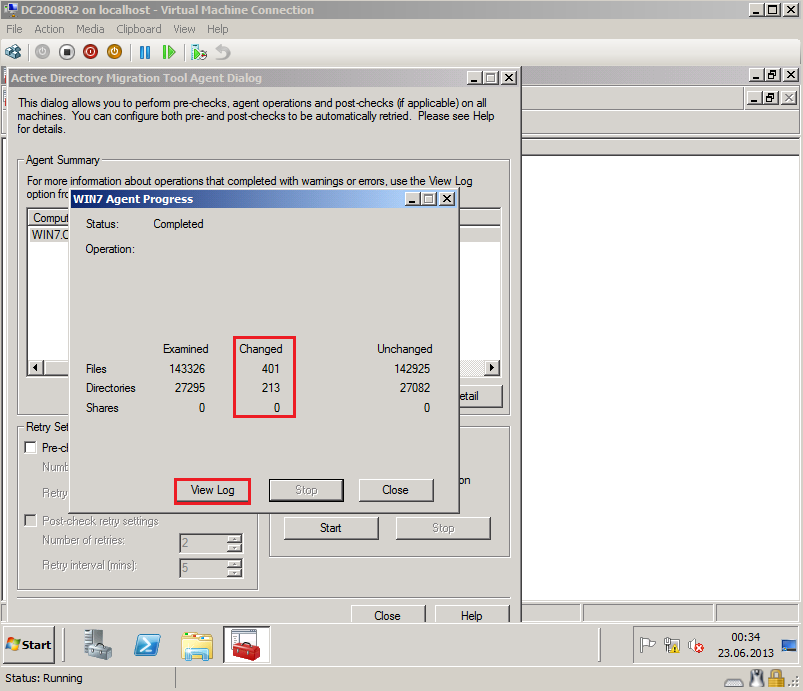
On %ComputerName% Agent Progress page, select View log and check Log file
2- Read Local Profiles from a file
Click Strat, then Administrative Tool, open Active Directory Migration Tool. Right click on Active Directory Migration Tool, select Security Translation Wizard.

On Welcome to the Security Translation Wizard page, click Next.

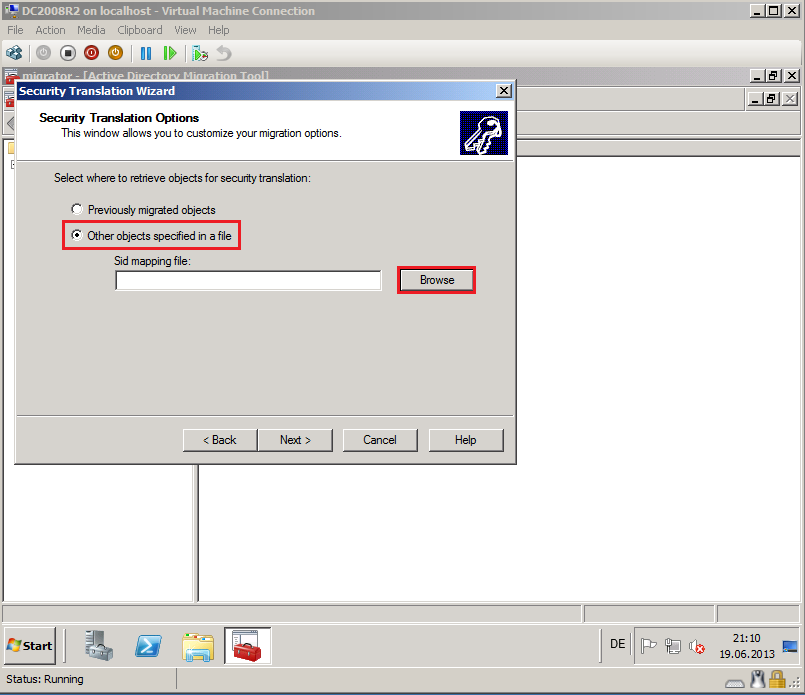
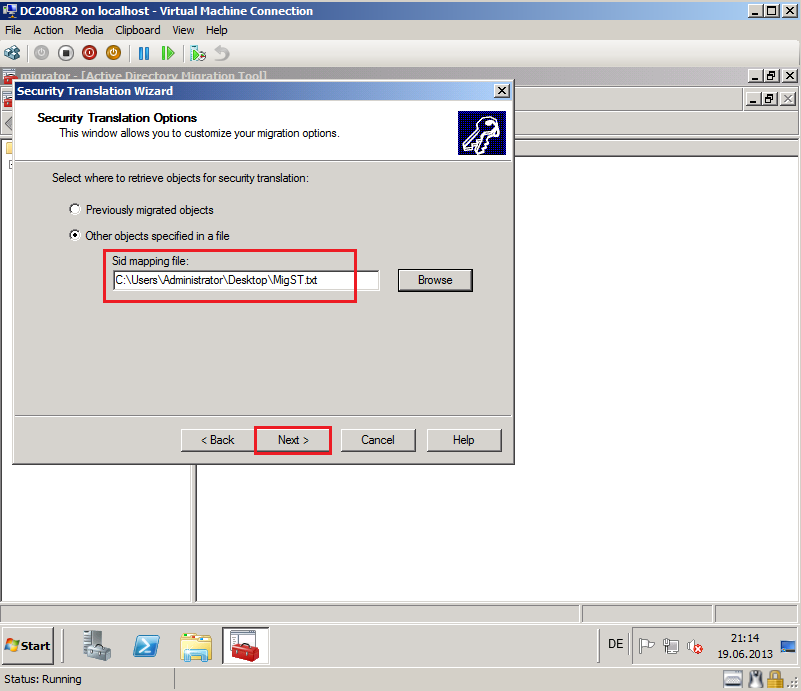
On Security Translation Option page, select Other objects specified in a file, then click Browse.
Here is my example file (MigST.txt) for User1 and User2 profiles. Here is format:
User SID in Source Domain,User SID in Target Domain
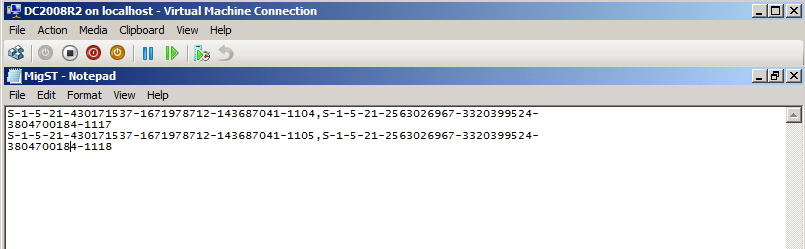
If you don't like using SID format, you can use this format in file too:
SourceDomain\UserName,TargetDomain\UserName

Select your file (in my example MigST.txt), then click Next.
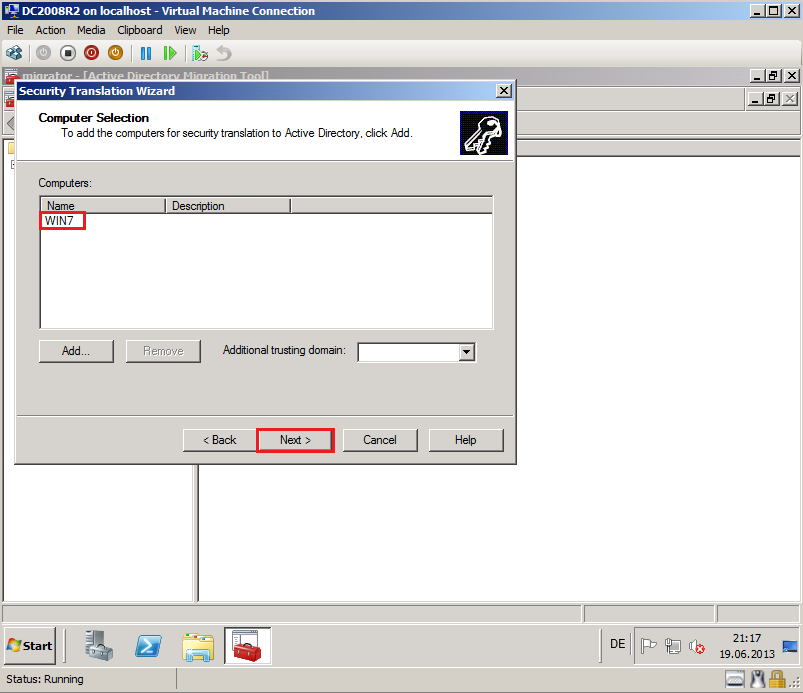
On Computer Selection page, click Add, find and select computers and then click OK. In my case is WIN7.
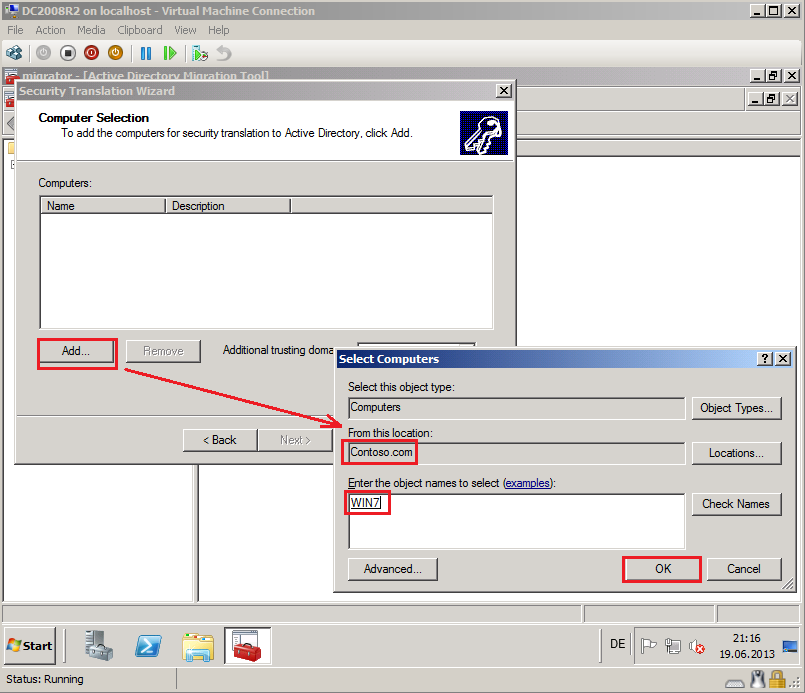
Click Next.
On Translate Objects page, select your options. In my case, I need all options. Click Next.
On Security Translation Option page, select Add, then click Next.
On Completting the Security Translation Wizard page, review Task description, then select Finish.

On Active Directory Migration Tool Agent Dialog page, select Run pre-check and agent opration, then click Start.
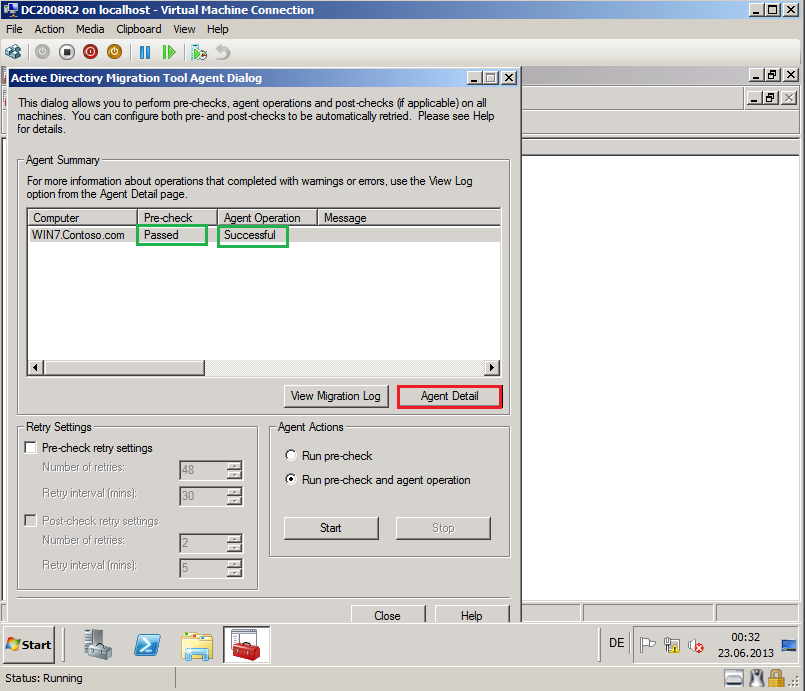
After finishing, click Agent Detail, then on %ComputerName% Agent Progress page, select View log and check Log file
Computer Account Migration
Before we migrate computer account, we check two settings.
1- Run RegEdit.exe on the Target domain controller, go to following registry key:
HKEY_LOCAL_MACHINE\SYSTEM\CurrentControlSet\Services\LanmanServer\Parameters
and make sure the LSARPC and Netlogon values exist in the NullSessionPipes registry key.
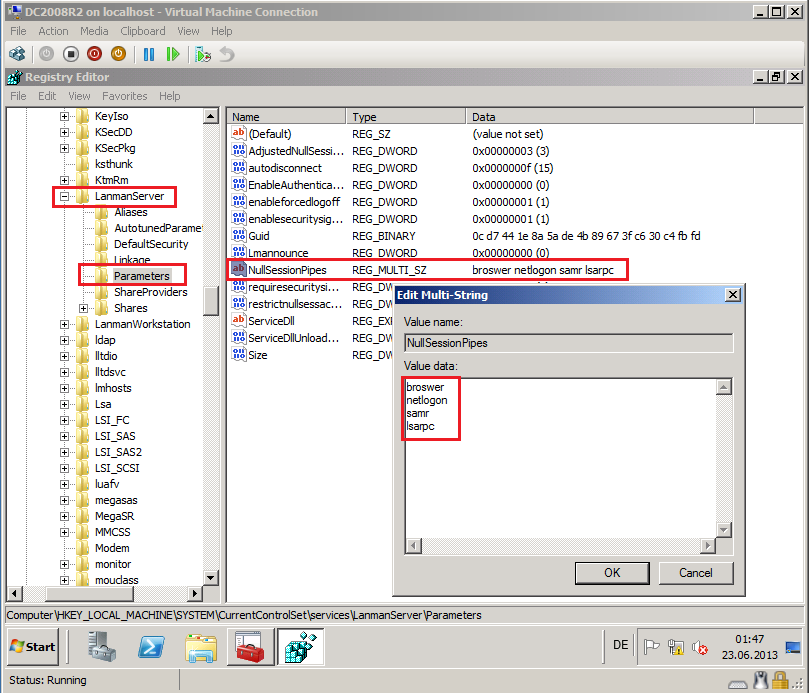
This registry key setting is for computer account migration error:
ERR3:7075 Failed to change domain affiliation, hr=800704f1 The system detected a possible attempt to compromise security. Please ensure that you can contact the server that authenticated you.
More information:
ADMT, RODC’s, and Error 800704f1 (Ask the Directory Services Team)
2- Open Group Policy Management Editor console on the Target domain controller, edit Default Domain Controllers Policy, expand Computer Configuration\Policies\Administrative Templates\System, click Net Logon, and then double-click Allow cryptography algorithms compatible with Windows NT 4.0 and set to Enabled.
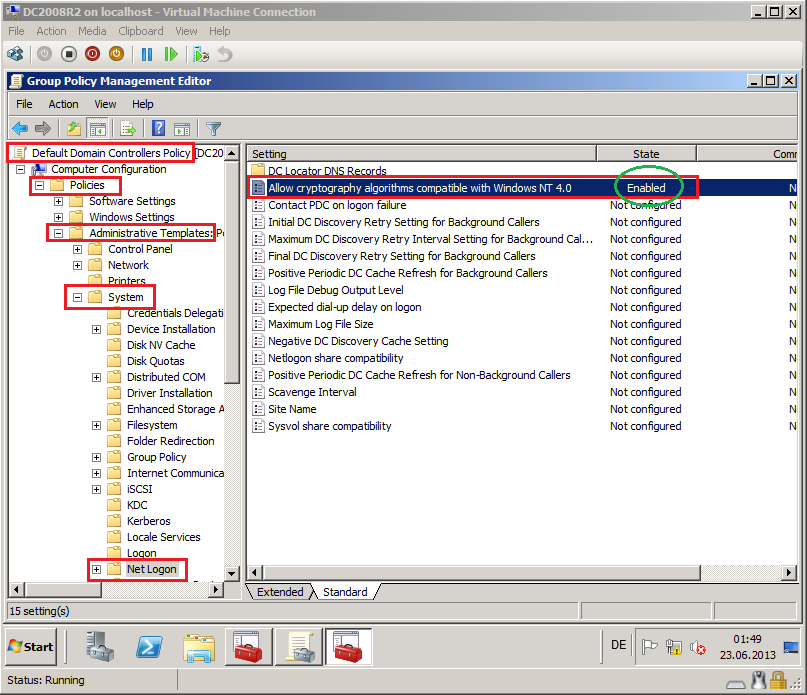
This GPO setting is for computer account migration error:
ERR3:7075 Failed to change domain affiliation, hr=800704f1 The system detected a possible attempt to compromise security. Please ensure that you can contact the server that authenticated you.
More Information:
Now, we can migrate computer accounts.
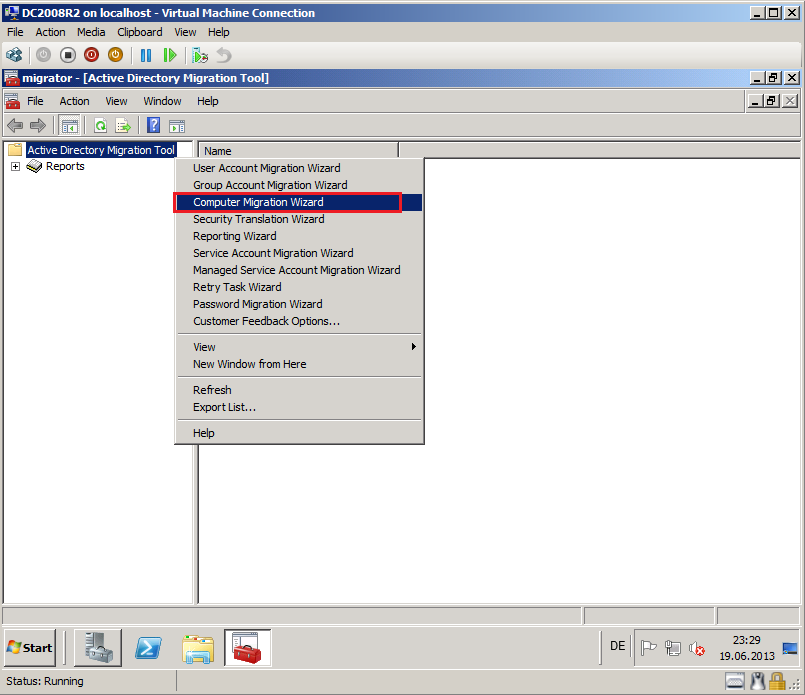
Click Strat, then Administrative Tool, open Active Directory Migration Tool.
Right click on Active Directory Migration Tool, select Computer Migration Wizard.
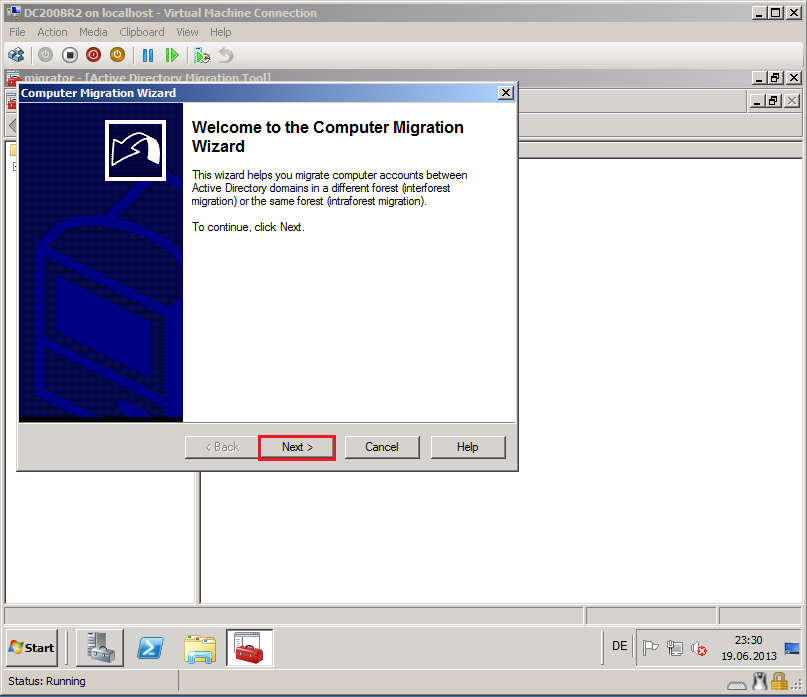
On Welcome to the Computer Migration Wizard page, click Next.
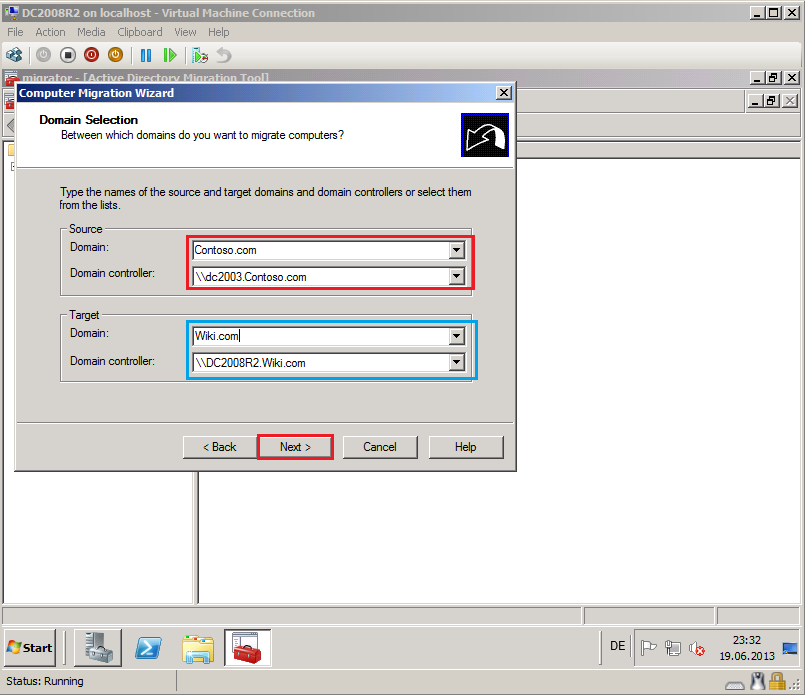
On Domain Selection page, select Source and Target domain, you can select which specific domain controller to use, if you have more domain controllers. In my TestLAB, source domain is Contoso.com and DC name is DC2003.Contoso.com, target domain is Wiki.com and DC name is DC2008R2.Wiki.com. Click Next.
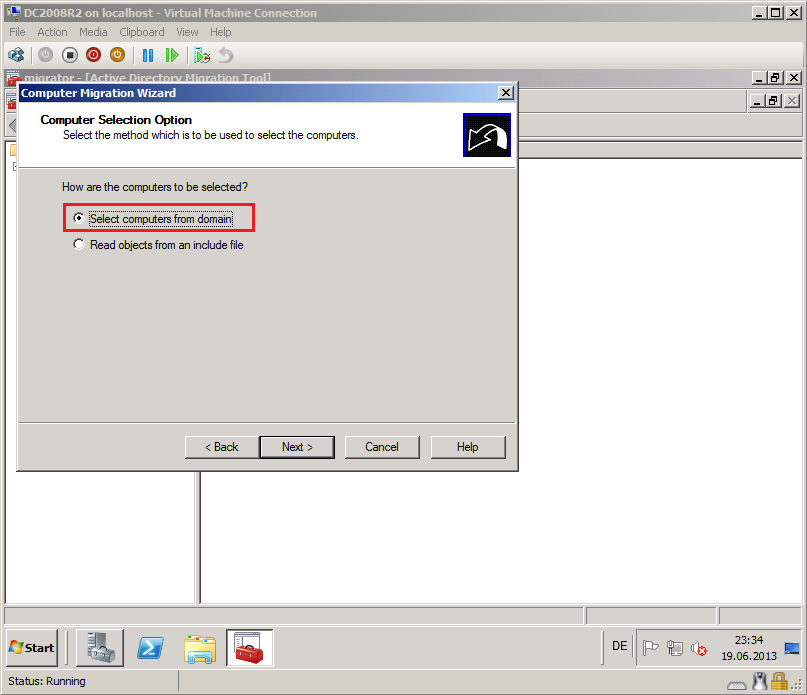
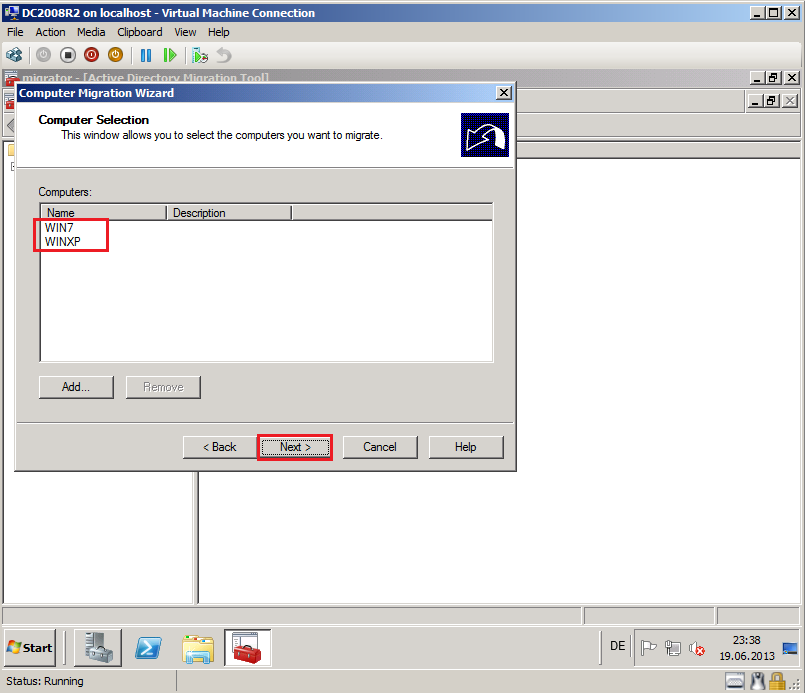
On Computer Selection Option page, select Select computers from domain, then click Next.
On Computer election page, click Add, find and select computers from source domain (In my TestLAB, source domain is Contoso.com) and then click OK. In my case are WIN7 and WINXP.
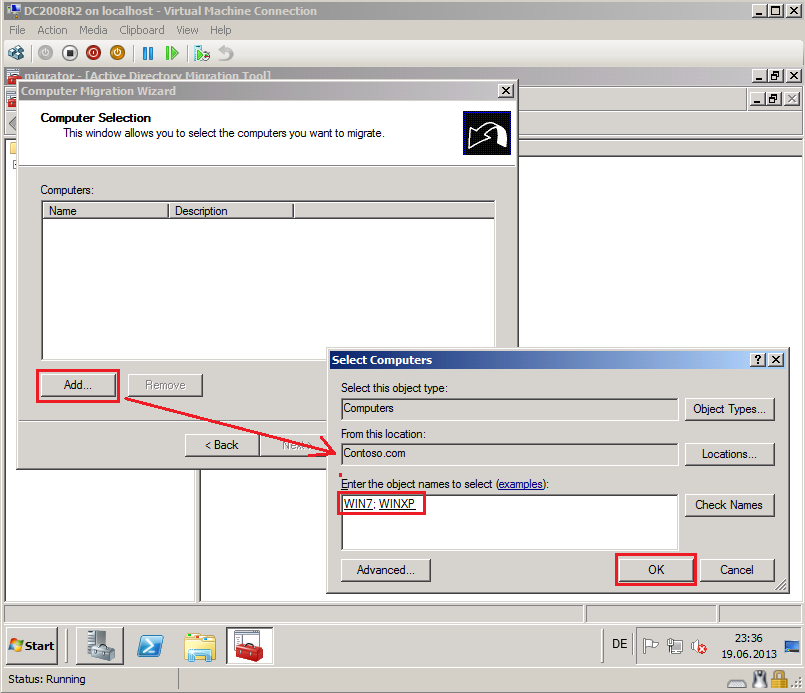
On Computer Selection page, click Next.
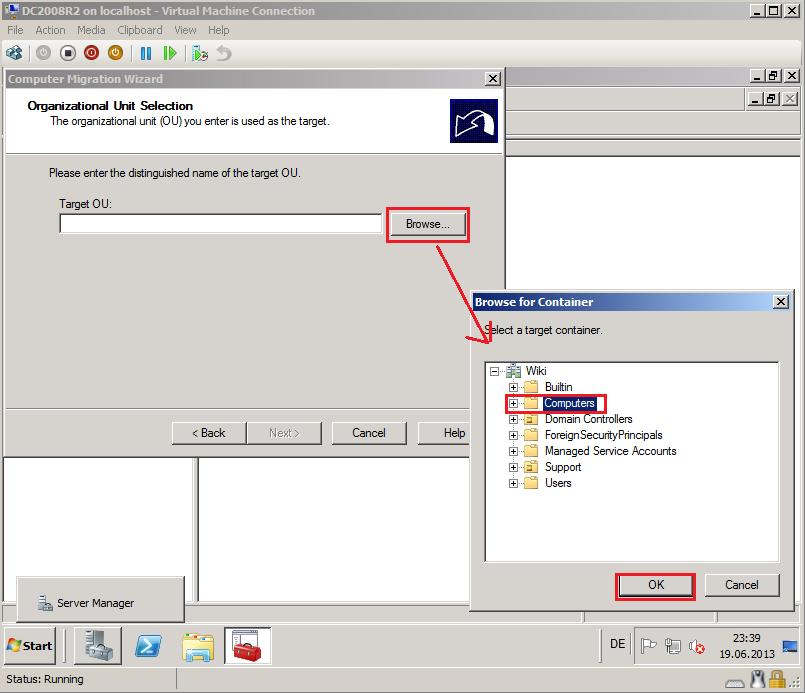
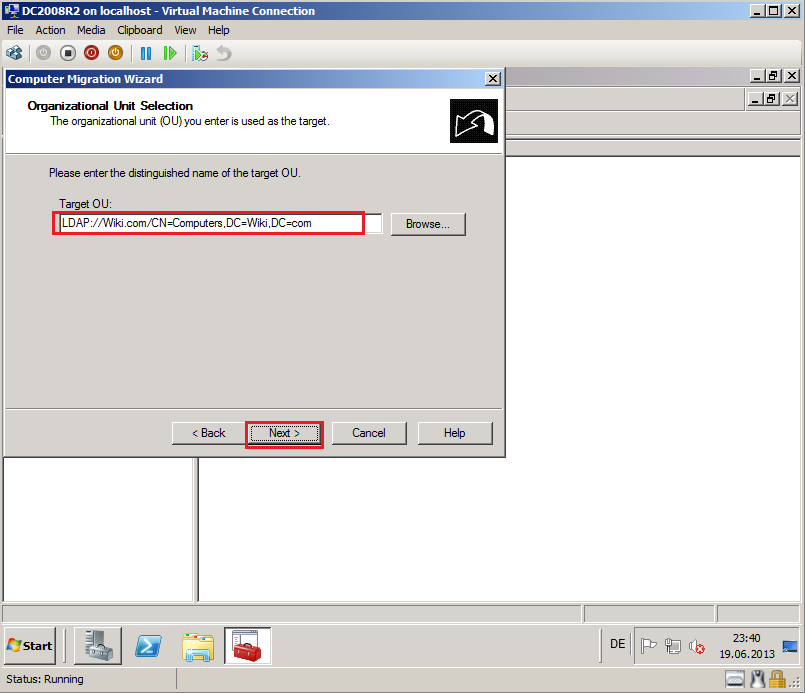
On Organizational Unit Selection page, select Browse and select target OU, then click OK. In my case, target OU is Computers container.
On Organizational Unit Selection page, click Next.
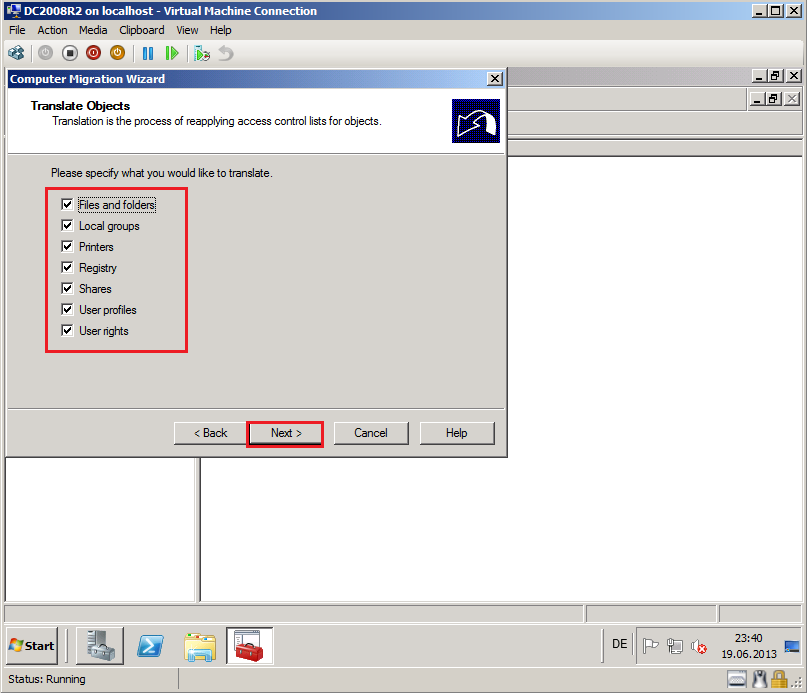
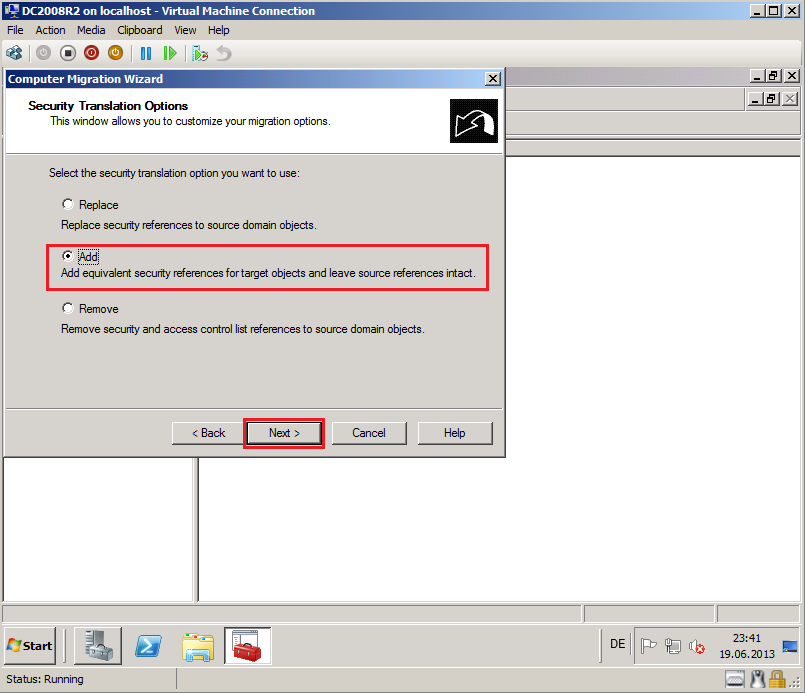
On Translate Objects page, select your options. In my case, I need all options. Click Next.
On Security Translation Option page, select Add, then click Next.
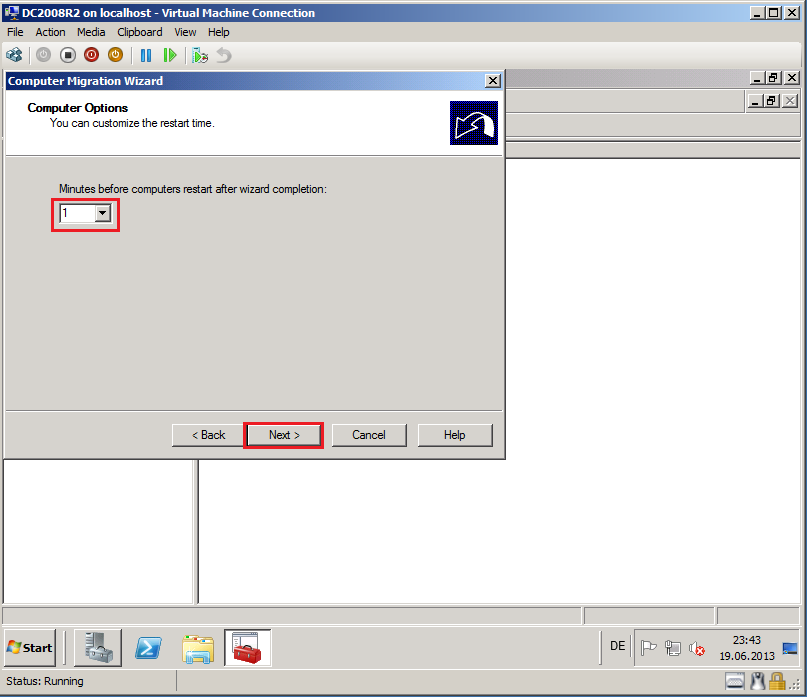
On Computer Options page, select Time, then click Next. In my case, I set 1 Minutes.
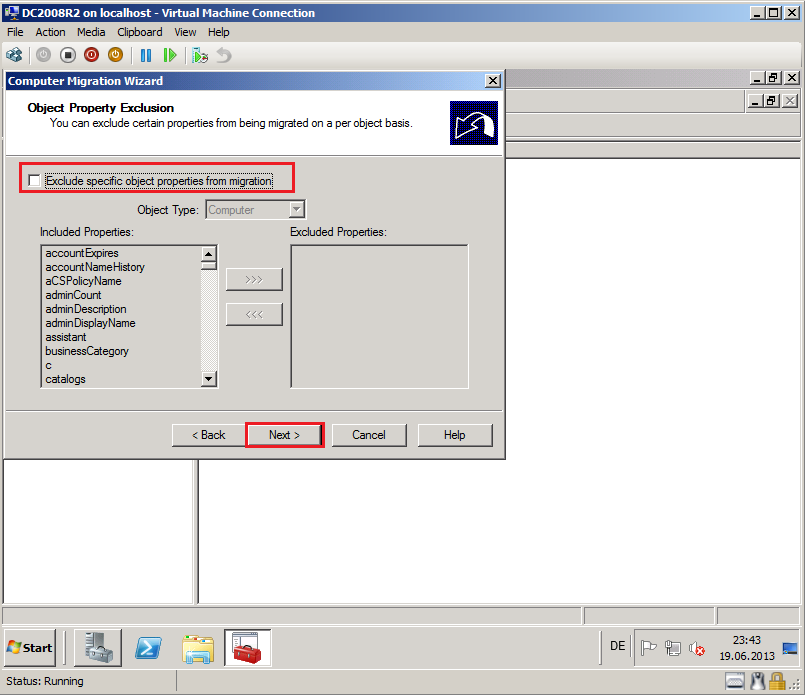
On Object Property Exclusion page, select appropriate options. In my case, I will all attributes, then select Next.
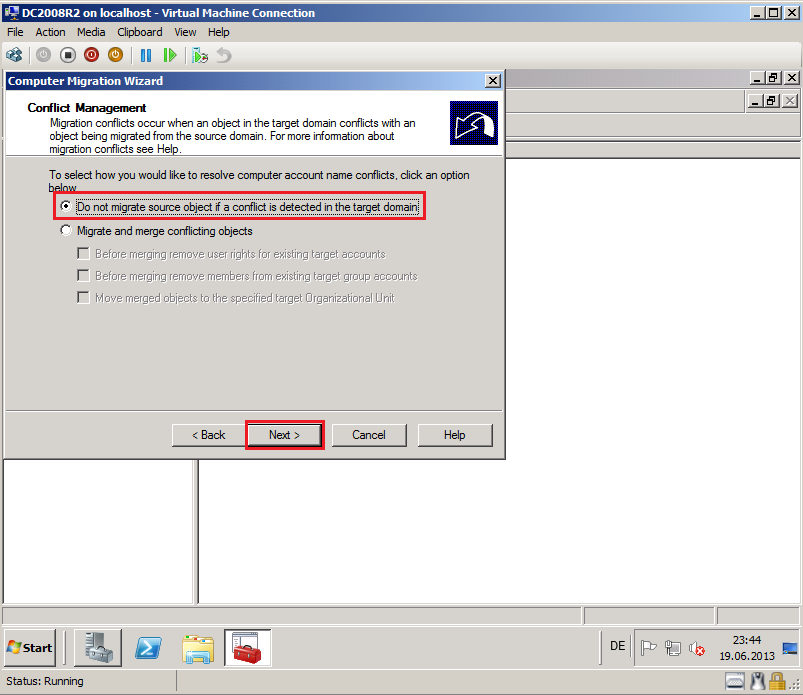
On Conflict Management page, select Do not migrate source object if a conflict is detected in the target domain, then click Next.
On Completting the Computer Migration Wizard page, review Task description, then select Finish.
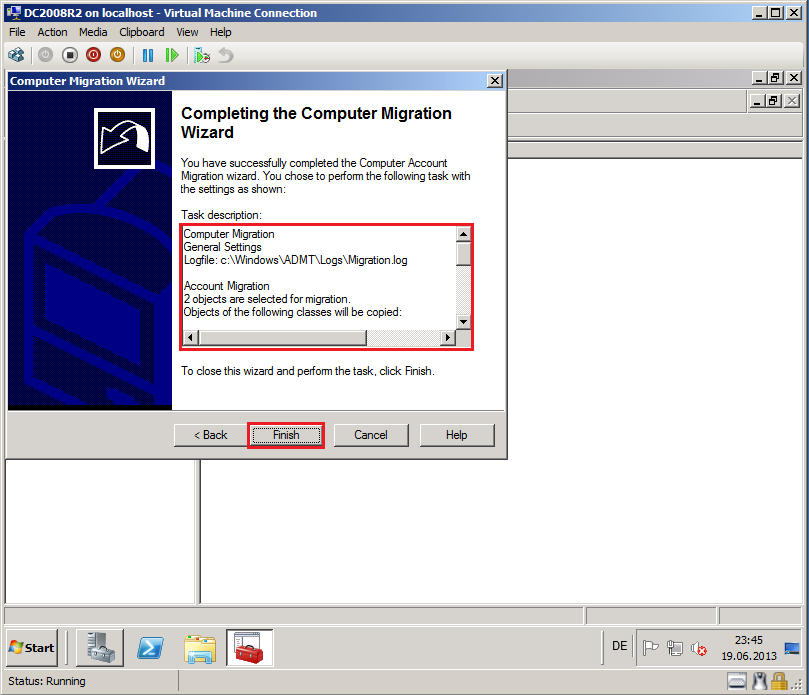
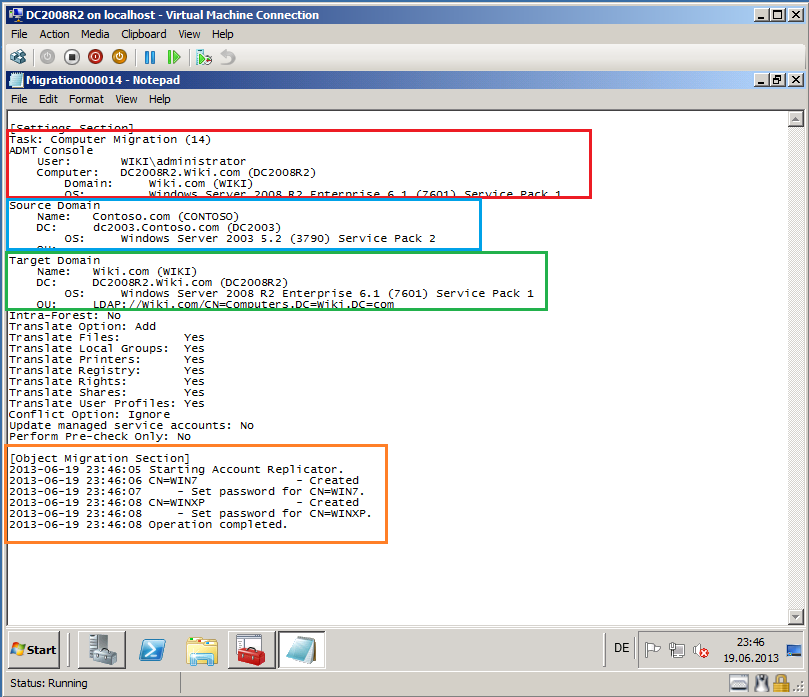
After completed, click View Log.
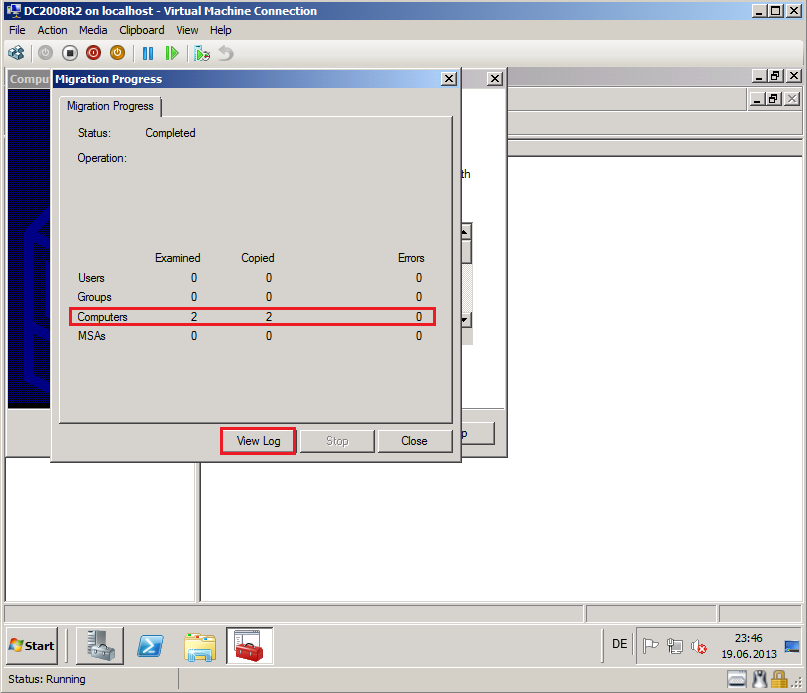
Now, you can see you Migration Log file, if your migration failed.
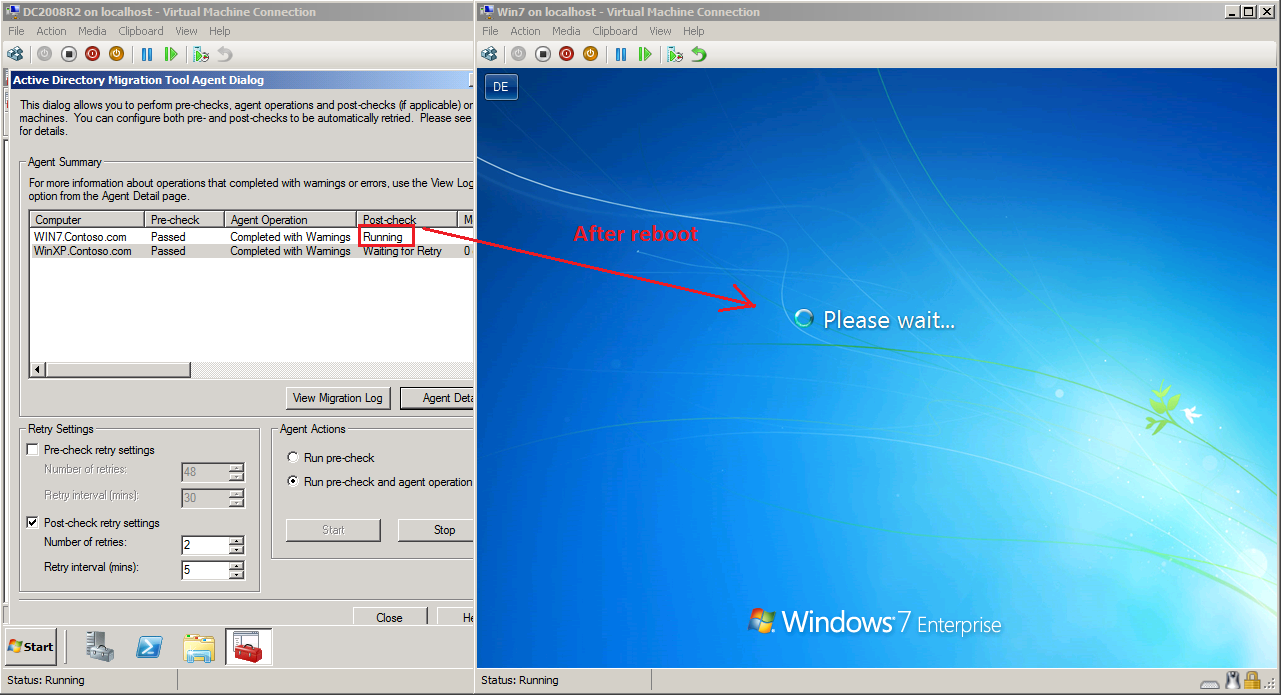
After closing log file, Active Directory Migration Agent Dialog opened automatic. On Active Directory Migration Tool Agent Dialog page, select Run pre-check and agent opration, then click Start.
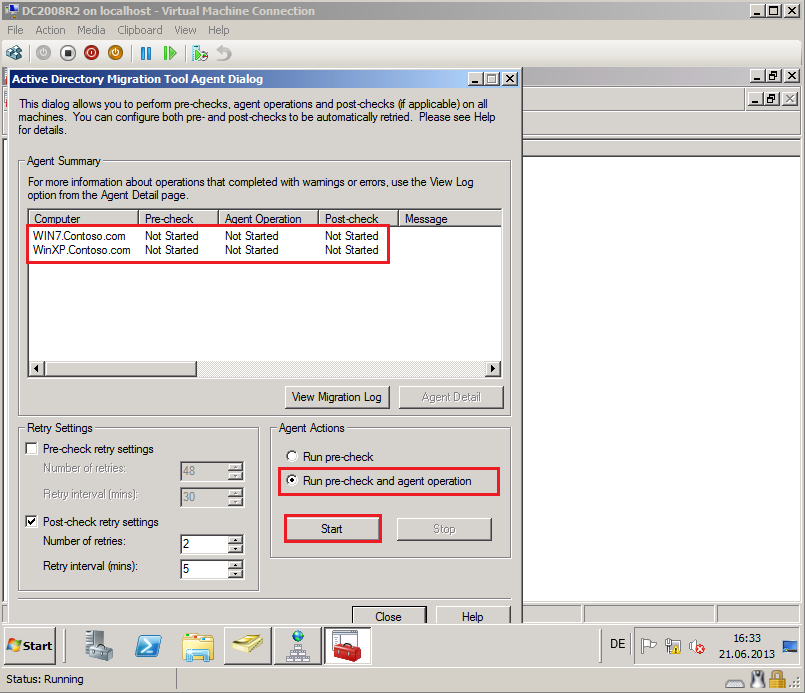
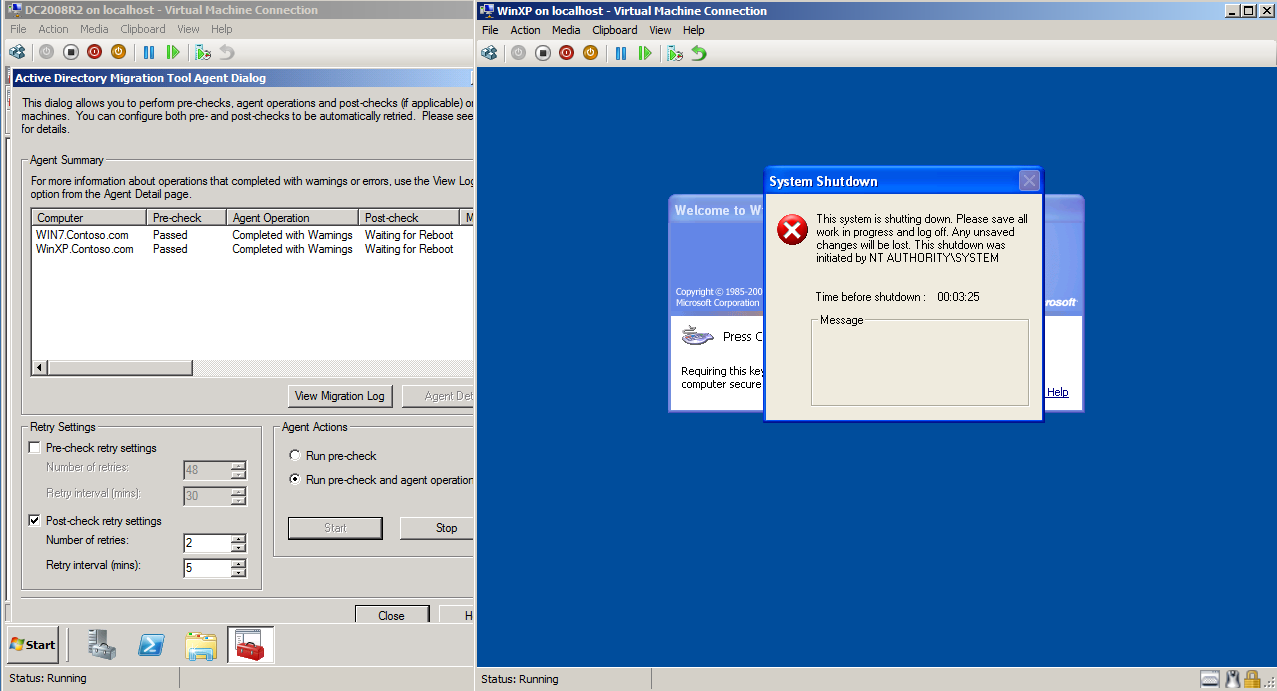
After Agent Operation is completed, wait for client automatic restart.
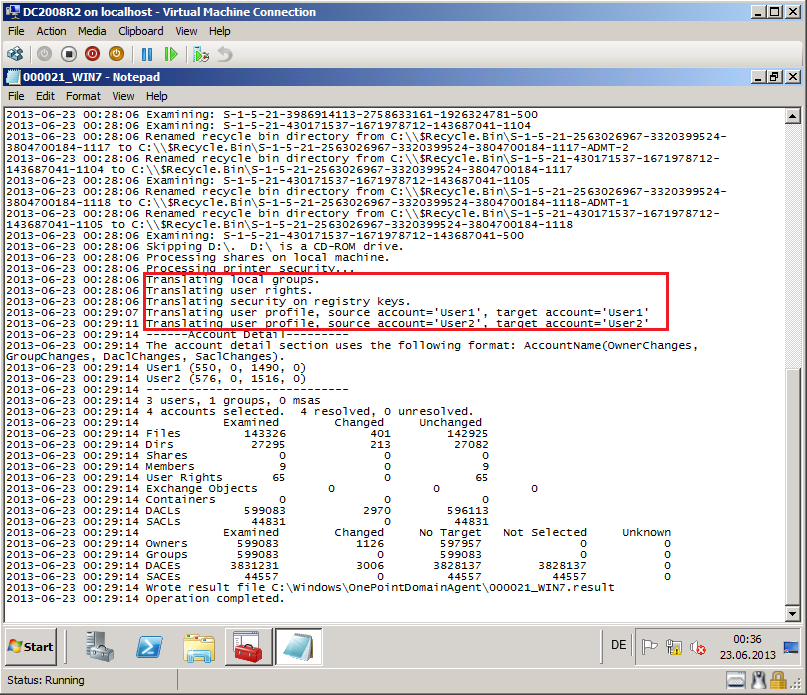
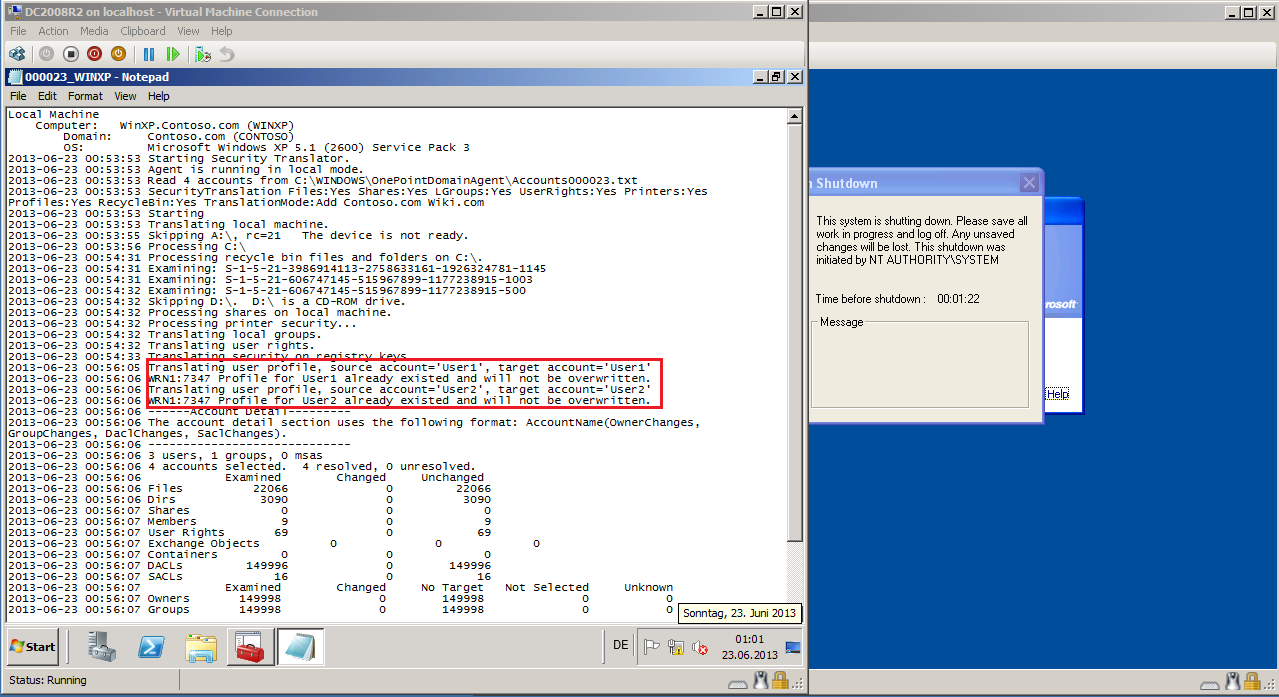
Here is Warning (WRN1:7347) and is ok, because we translated user profile.
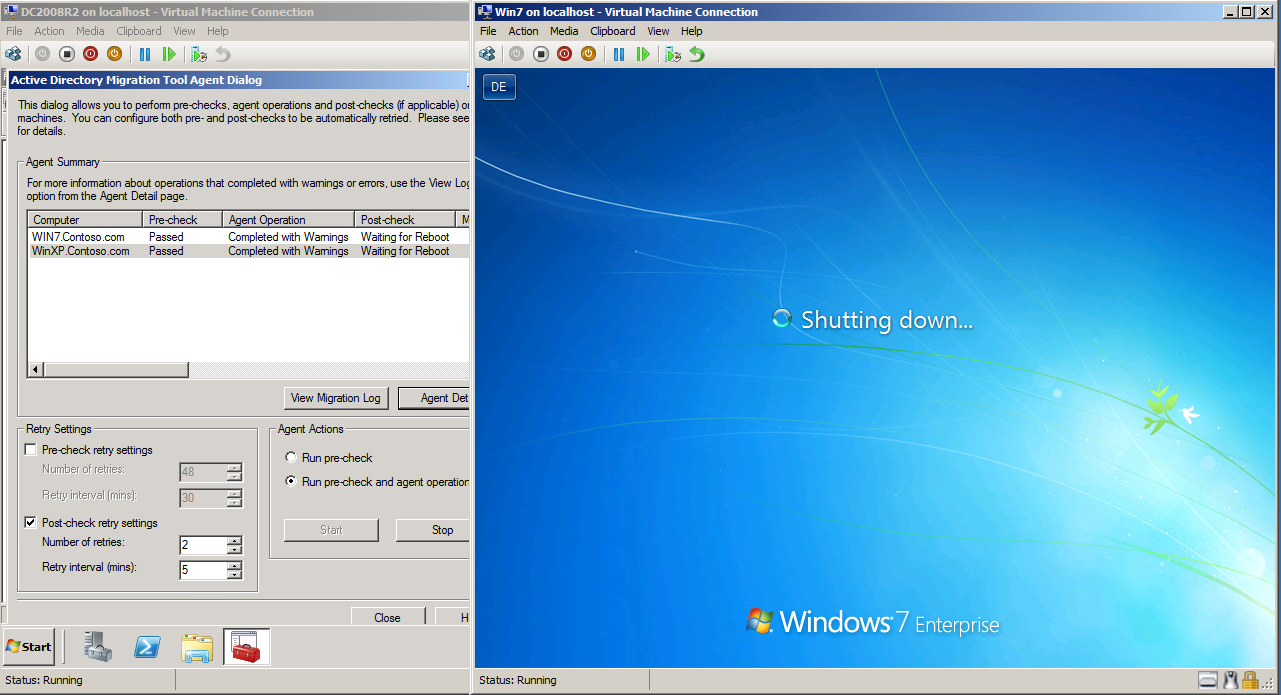
After reboot, Post-check runing automatic.
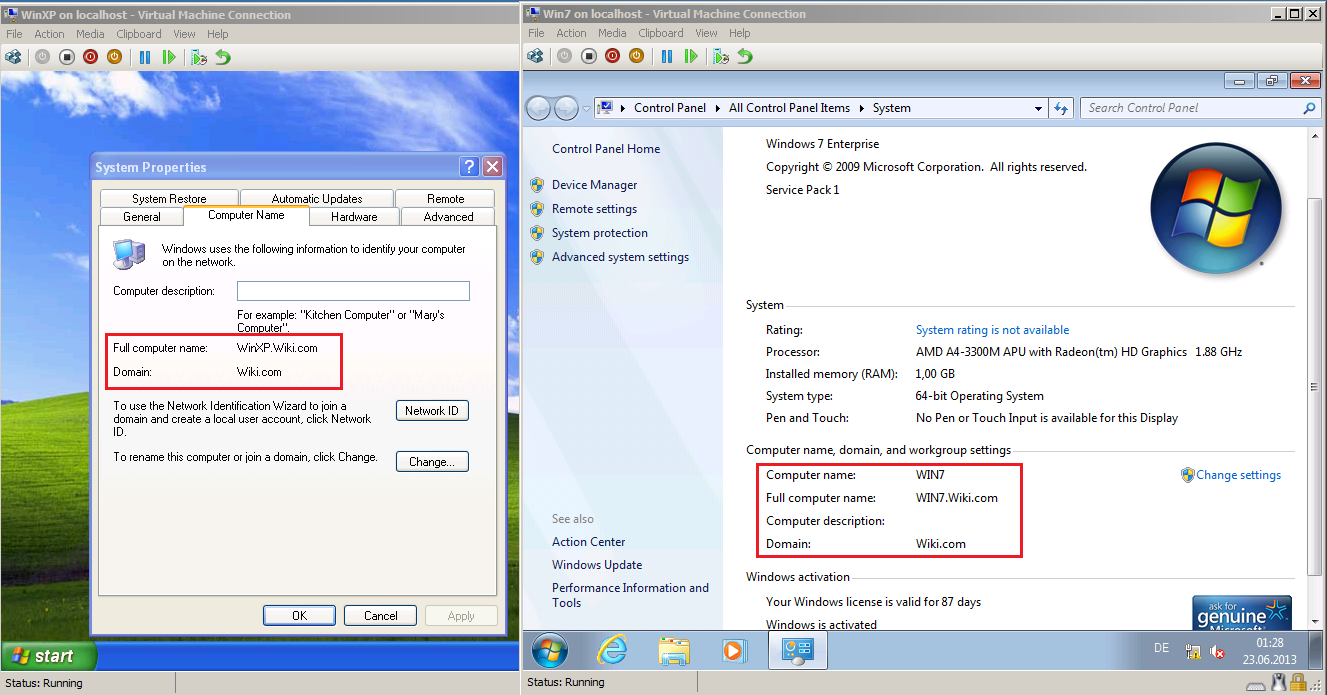
Now, computer migration is completed.
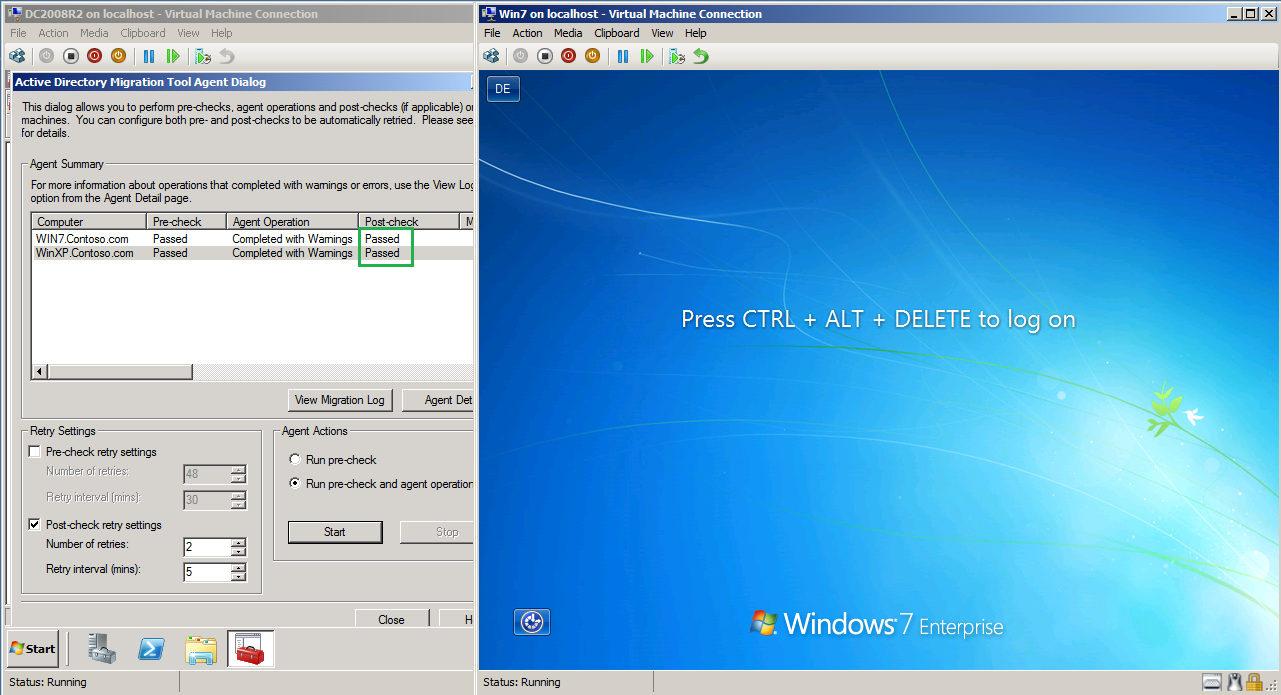
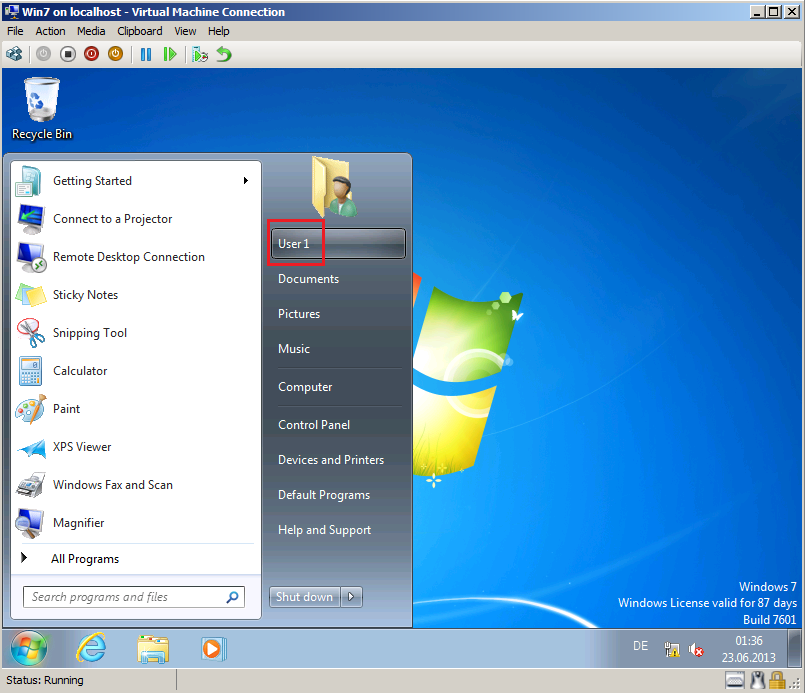
Logon to client, right click on Computer, click Properties and check Domain and Full computer name.
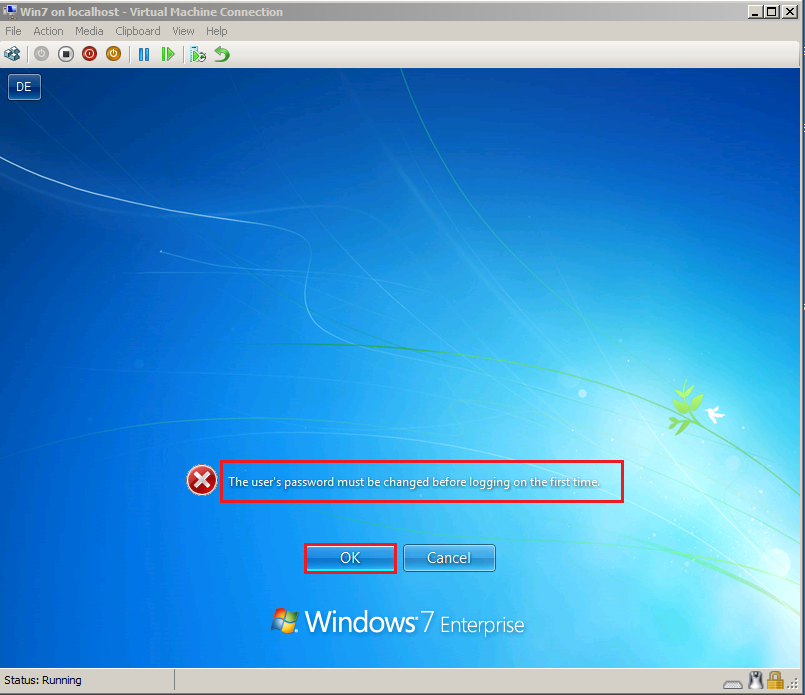
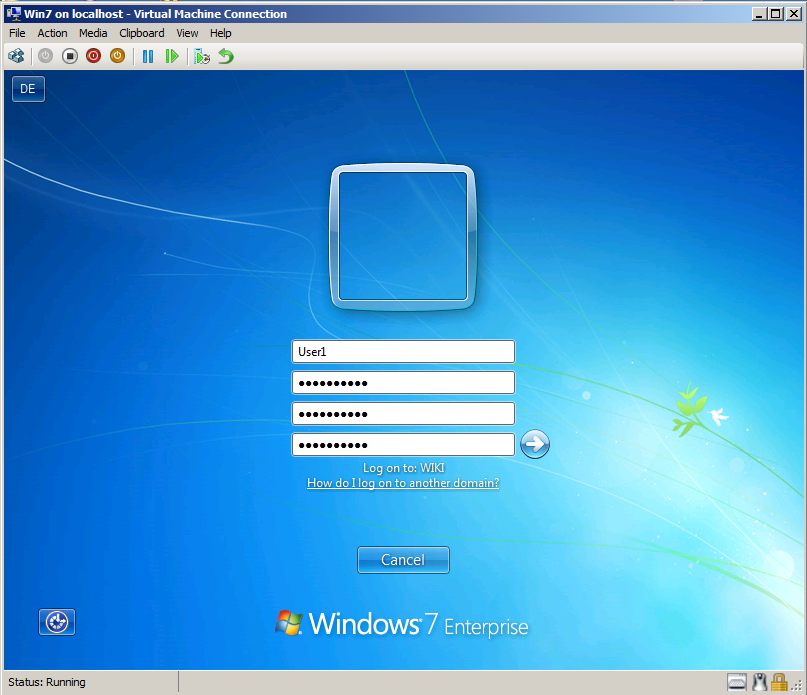
After migration, Wiki\User1 need logon to client at first time.
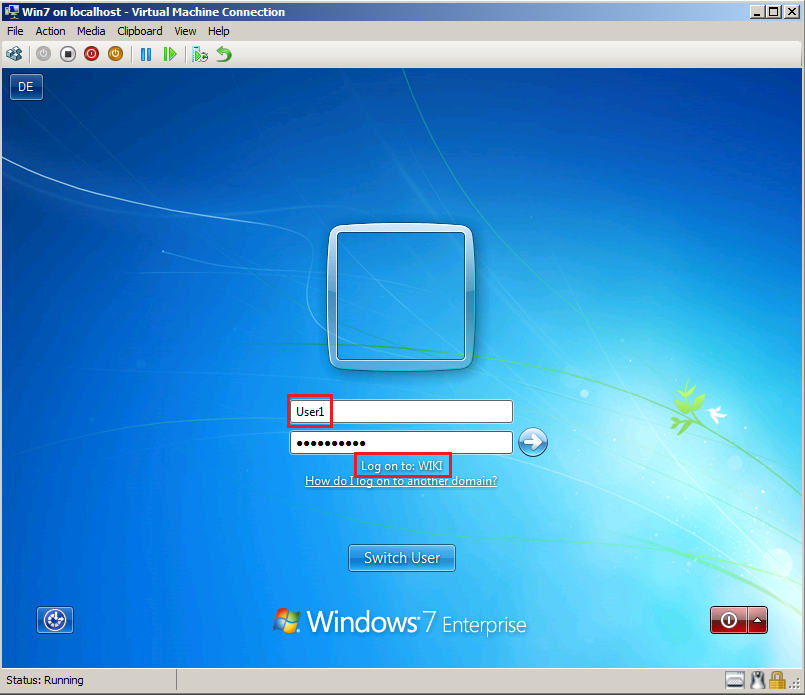
You can show, User forced to change password.

Using ADMT 3.2 for migration to Windows Server 2012 Domain
If you need Interforest migration from Domain Controller 2003 to Domain Controller 2012, at this time MS has not ADMT for Windows Server 2012.
You can downgrade your forest and Domain functional level to Windows Server 2008 R2, add a additional Domain Controller 2008 R2 and use ADMT 3.2 for migration. After migration is completed, you can demote Domain Controller 2008 R2 and raise again FFL & DFT to Windows Server 2012.
More Information:
ADMT 3.2 and PES 3.1 installation errors on Windows Server 2012 (KB2753560)
Please, if you find article useful, write your own article in TechNet Wiki to help TechNet Wiki community.