Lab Deployment Guide For Windows Azure Pack
This document covers a simple, proof-of-concept style express deployment of Windows Azure Pack (WAP) in a test environment. This is intended to complement the general TechNet document (Install an express deployment of Windows Azure Pack) with specific settings and recommended configurations. This lab presents a repeatable set of installation steps, but does not attempt to cover all possible scenarios or settings.
Lab Environment
This lab assumes the following settings (you may need to substitute settings such as server and service account names):
- An express deployment of WAP (listed in the Web Platform Installer as "Windows Azure Pack: Portal and API Express") and Service Provider Foundation (SPF) will be installed on the same server.
- A Virtual Machine Manager (VMM) infrastructure is already in place and fully configured. At a minimum, your VMM environment will need at least two VM Networks, 1 cloud, and 1 VM template configured.
- An SPF service account named Contoso\SPFSvcAcct
- A VMM server named VMMSRV
- A VM with SPF and WAP installed named WAP01
- An Active Directory domain name of Contoso.com
- A SQL Server 2008 R2 or 2012 (or later) installation
Lab Steps
Log on to WAP01 using the Contoso\spfsvcacct account.
Log out. This step is a precaution to ensure that the service account's profile is pre-created on the server to avoid any first-time launch time-outs.
Open Administrative Tools\Computer Management and expand Local Users and Groups. Create a new local user on your WAP01 server named SPFLocal. Assign the account a password and uncheck User must change password at next logon. Add the SPFLocal account to the ** SPF_Admins, SPF_Provider, SPF_Usage,** and SPF_VMM local groups. Log on to WAP01 once using this account, then log off again.
Log on to WAP01 using the Contoso\Administrator account. Open Server Manager and select Local Server.
Under IE Enhanced Security Configuration select Off for both Users and Administrators and click **OK. **
Launch \SPF\Setup.MSI from your Orchestrator in System Center 2012 R2 install media. ** **
Click Install in the SPF installation wizard.
On Getting Started page, select I have read, understood, and agreed to these license terms and click Next.
On Prerequisites page, note any missing prerequisites (these will be installed below).
Open Server Manager, click on Manage and select Add Roles and Features.
Click Next through the Before you begin, Installation Type, and Server Selection pages**.**
On the Server Roles page, select Web Server (IIS) and click Add Features then click Next.
On Features page, select Management OData (IIS) Extension, click Add Features, then click Next.
On Web Server Role (IIS) page, click Next.
On Role Services page, additionally select the following components:
- Security\Basic Authentication and Windows Authentication
- Management Tools\IIS Management Scripts and Tools
Click Next, then, on the Confirmation page, click Install.
Download and install the following components:
Run setup.exe from your VMM installation media* *and install the **VMM Admin Console. ** Do not install the VMM management server.
Return to the SPF installation wizard and click on Check Prerequisites Again to verify that all the prerequisites have been successfully installed, then click Next.
On the Configure the database server page, replace the server name with your SQL server name** **and click Next.
Leave the settings on the Specify a location for the SPF files screen at default values and click Next
On the Configure the Admin web service page, under Application Pool Credentials, select Service account and specify Contoso\spfsvcacct. Enter the appropriate password for the service account password. Click Next.
**Important: ** Specify the domain account for all application pool credentials, not the local account.
Use the same values you entered in step 22 above for the Configure the Provider web service, Configure the VMM web service, and Configure the Usage web service pages.
On the Customer experience improvement program page, select the appropriate response and click Next.
On the Installation Summary page, click Install.
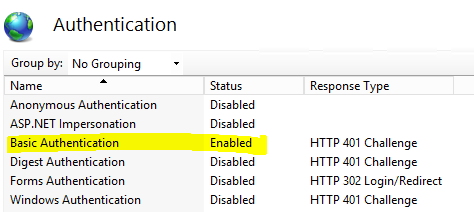
Open Internet Services Manager and navigate to <SERVERNAME>\Sites\SPF. Double-click on Authentication and verify that Basic Authentication is Enabled.
Install the .NET Framework 3.5 prerequisite for WAP. If the WAP VM has Internet connectivity, setup will automatically download the latest version. If the VM does not have an internet connection, you will need to install it from the install media. Attach your Windows 2012 R2 ISO to the WAP01 VM (change the relative path below if your virtual DVD drive is something other than D:\:
- Launch an elevated command prompt and run: dism /online /enable-feature /featurename:netfx3 /all /source:D:\sources\sxs
Install the Web Platform Installer from http://www.microsoft.com/web/downloads/platform.aspx
When Web PI installation wizard starts, select I accept the terms in the License Agreement and click Install
Once the installation is completed, click Finish.
Click on Windows/Start button and type web.
Click on **Web Platform Installer. ** Once Web PI successfully launches, install the following items in the following order:
- .NET 4.5 Extended with ASP.NET for Windows 8
- IIS recommended configuration
Type IIS recommended configuration in the search box in Web PI and press Enter
- Select IIS Recommended Configuration and click Add
- Click the Install button
- Click I Accept to begin installation.
Type Windows Azure Pack in the search box in Web PI and press Enter. Select Windows Azure Pack: Portal and API Express.
- Click Add
- Click Install
- Click **I Accept **to begin installation.
Select the appropriate choice for Windows Update and then click Continue.
The configuration page (https://localhost:30101/ ) will launch. You will see certificate errors since we are using the self-signed cert. Click Continue for this website (not recommended).
On the Database Server Setup page, specify the SQL Server where WAP will store its databases. WAP requires SQL Server Authentication to be enabled:
Connect to your SQL server in SQL Enterprise Manager, right-click on your server name and choose Properties then Security. Change the default security configuration to SQL Server and Windows Authentication Mode.

Restart the SQL server service
Return to the WAP01 server. On the Database Server Setup screen specify your SQL server settings. For Authentication Type, use SQL Server Authentication. Click the Next icon to continue.
On the Customer Experience Improvement Program page, select the appropriate response and click Next.
On Feature Setup page, click on the Check mark button in the lower right-hand corner of the page.
Connect to https://wap01:30091/. Dismiss any certificate dialogs. Complete the tour.
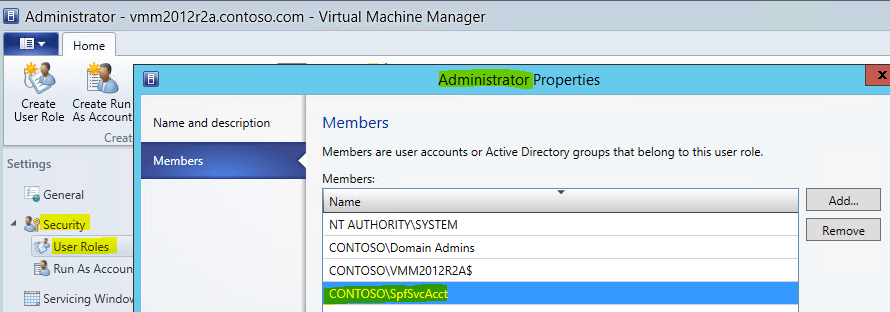
Log on to the VMM Admin Console and navigate to Settings\Security\User Roles.
Double-click the Administrator role and add Contoso\SpfSvcAcct to the role. This will allow the SPF service account to manage VM-related activities initiated by the WAP portals.
Return to the WAP Admin Portal (https://wap01:30091/) and navigate to VM Clouds on the left-hand side of the console.
Click **Register System Center Service Provider Foundation. ** In the registration dialog specify spflocal as the SPF account and type the password.
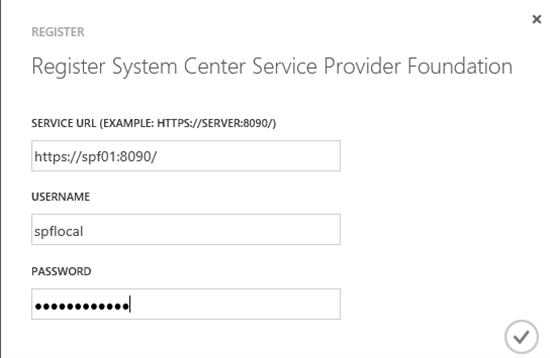
**Important: ** Do not type the name of the machine or use the domain account in this dialog. Specify only the local user account name.
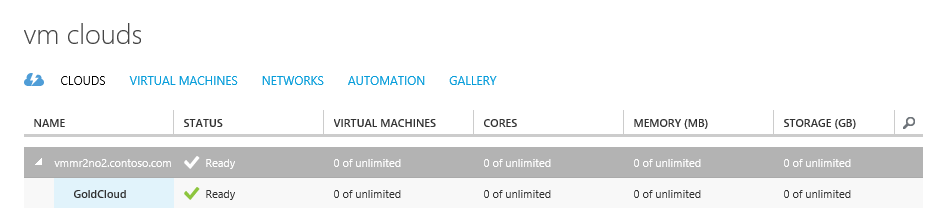
Click on VM Clouds again and choose Use an existing virtual machine cloud provider to provision virtual machines.
For the Virtual Machine Manager Server FQDN, specify the FQDN of your VMM server (e.g. VMM01.contoso.com)
Click Register. Verify that your VMM clouds populate.