Azure and SQL Database Tutorials - Tutorial 2: Using SQL Database
This tutorial demonstrates the process of creating a Windows Azure cloud service consuming Azure SQL Database and the process of deploying the application to Azure.
Last reviewed: 11/4/2011
Note
If you wish to contribute to this page, use the Edit tab at the top (sign-in required). If you wish to provide feedback for this documentation please either send e-mail to azuredocs@microsoft.com or use the Comment field at the bottom of this page (sign-in required).
In Tutorial 1: Using Windows Azure Web Role and Windows Azure Table Service (en-US), you created a simple golfer message board application. In the application, a ASP.NET Web role provides the front-end that allows golfers to view the contents of the message board and post new entries. Each entry contains a name and a message. When golfers post a new message, the Web role creates an entry that contains the information entered by the golfers using Windows Azure Table service. In this tutorial, you will modify the application so that it uses SQL Database instead of the Table service.
Here is a screenshot of the application:
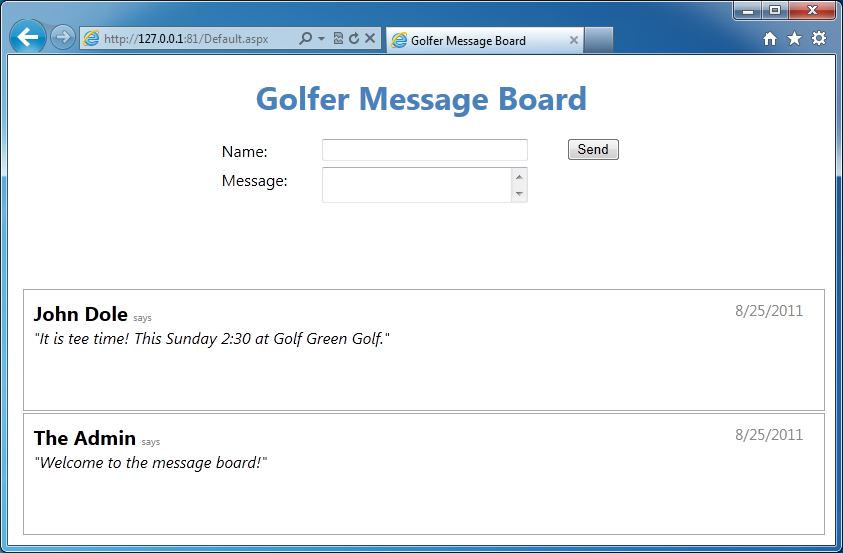
Note: This tutorial is not intended to show you how to choose between SQL Database and the Table service, but to show you how to use SQL Database. For information on SQL Database and Windows Azure Table service comparison, see Windows Azure SQL Database and Windows Azure Table Service at http://msdn.microsoft.com/en-us/magazine/gg309178.aspx, and [[Understanding Data Storage Offerings on the Windows Azure Platform]].
Note: Completing Tutorial 1 is not a pre-requisite for this tutorial, however, it helps with understanding the scenario.
Note: The tutorial code has been tested on Windows Azure SDK (October 2012).
Note: For the tutorial in PHP, see [[Using the Windows Azure Web Role and SQL Database with PHP]].
Objectives
In this tutorial, you will learn how to:
- Understanding the process of developing a SQL Database cloud service application
- Use SQL Database as a cloud-hosted database platform for your applications
Prerequisites
Note the following requirements before you begin this lesson:
- .NET development experience
- Before you begin this step you must complete the steps in [[Windows Azure and SQL Database Tutorials (en-US)]].
Understanding the Architecture
The following diagram illustrates the development components and the runtime components involved in this tutorial:
- There are two environments: the Windows Azure runtime environment and the local development environment. The runtime environment is hosted in one of the Microsoft data centers.
- There are two main services within the runtime environment: Compute and Storage. Compute is the computational part of Windows Azure. Storage consists of three main parts: Table service, Blob service and Queue service. Other than the Windows Azure Storage Service, you can also use SQL Database to store data. SQL Database is a cloud-based relational database service built on Microsoft SQL Server technologies. In this tutorial, you will use SQL Database. Tutorial 1 covers Table service; tutorial 3 covers Blob service; and tutorial 4 covers Queue service. For more information, see [[Understanding Data Storage Offerings on the Windows Azure Platform]].
- The Compute service is also referred as Cloud Service. It is the application you deploy on Windows Azure. Every Cloud Service can have Web role and Worker role. A Web role is an ASP.NET Web application accessible via an HTTP or HTTPS endpoint and is commonly the front-end for an application. A worker role is a role that is useful for generalized development, and may perform background processing for a Web role. In tutorial 1, you created a Web role project. Tutorial 2 and tutorial 3 uses the same Web role. Tutorial 4 will introduce Worker role. For more information, see Overview of a Windows Azure Application.
- You can use the portal to administrate Windows Azure platform resources, and use Database Manager to perform basic database management tasks.
- You develop the SQL Database application using Visual Studio and Windows Azure SDK.
- You deploy the application to Windows Azure Emulator for testing and to Windows Azure.
- A Windows Azure project includes two configuration files: ServiceDefinition.csdef and ServiceConfiguration.cscfg. These files are packaged with your Windows Azure application and deployed to Windows Azure.
In this Article
- Lesson 1: Prepare SQL Database account
- Lesson 2: Modify the application to use SQL Database
- Lesson 3: Test and deploy the application
Lesson 1: Prepare SQL Database Account
In this lesson, you connect to your SQL Database account and create a server and a database for the Golfer Message Board application using Windows Azure Management Portal. You can also use SQL Database Management API to create SQL Database servers, databases, and tables programmatically. For more information, see Management REST API Reference.
Procedures
In this lesson, you will go through the following procedures:
You must have a Windows Azure Platform subscription.
To create a SQL Database server and a database
Open a Web browser, and browse to http://windows.azure.com.
Log in to your Windows Live account.
On the bottom of the page, click + NEW, click DATA SERVICES, click SQL DATABASE, and then click CUSTOM CREATE.
Type or select the following values:
Name Value NAME
GolferMessageBoardDB
SERVER
New SQL Database Server
Click the right arrow on the bottom right corner of the dialog.
Type the following values:
Name Value LOGIN NAME
MyAdmin
LOGIN PASSWORD
pass@word1
LOGIN PASSWORD CONFIRMATION
pass@word1
REGION
(Select a region that you want your service to reside. For better performance, choose the one that is close to you.)
ALLOW WINDOWS AZURE SERVICES TO ACCESS THE SERVER
(selected)
Note: An administrator account is a master account used to manage the new server. You should avoid using this account in connection strings where the username and password may be exposed. To simplify the tutorial instructions, this tutorial uses the administrator account. The default administrator username is MyAdmin, and the default password is pass@word1. If you change the username and the password in this step, you must change them accordingly in the rest of the tutorial.
Note: The password policy requires that this password contain at least one number, one character, one letter, and one symbol. In addition, the password cannot be less than six characters nor contain three consecutive characters from the username.
Click the check mark on the bottom right corner of the page.
On the top of the page, click DATABASES to list the SQL databases. From the list, you can find out the SQL Database server name for the GolferMessageBoardDB database.Wait until the STATUS column shows Online.
You can use either SQL Server Management Studio or Windows Azure Management Portal to manage your SQL Database. To connect to SQL Database from SQL Server Management Studio, you must provide the fully qualified domain name of the server. In this tutorial, you will use Windows Azure Management Portal.
Note: The SQL Server Management Studio from SQL Server 2008 R2 and SQL Server 2008 R2 Express can be used to access, configure, manage and administer SQL Database. Previous versions of SQL Server Management Studio are not supported.
SQL Database has two types of access control: firewall and SQL authentication. You must configure the SQL Database firewall settings to allow connections from your computer(s). You must also allow connections from Windows Azure, because the golfer message board application is hosted in Windows Azure (This is done in the previous procedure). In addition to configuring the SQL Database server-side firewall, you must also configure your client-side environment to allow outbound TCP connections over TCP port 1433. For more information on SQL Database security, see [[Security Guidelines for Windows Azure SQL Database]].
To create a SQL Database server firewall rule
- From Windows Azure Management Portal, in the left pane, click SQL DATABASES. You shall see a list of SQL databases.
- Find the GolferMessageBoardDB database, and then click the server (on the same row) which hosts the database.
- On the top of the page, click CONFIGURE.
- Click ADD TO ALLOWED IP ADDRESSES. A new firewall rule which allows the development computer to access is added to the list. This step is required before using Management Portal for SQL Database.
- At the bottom of the page, click SAVE.
The Golfer Message Board application has one table for storing the messages.
To create a table
From Windows Azure Management Portal, click SQL DATABASES.
From the SQL database list, click GolferMessageBoardDB to select the row.
On the bottom of the page, click MANAGE. The Management Portal for SQL Database is opened in a different browser tab or new browser.
Type the following values:
Name Value SERVER
(use default value)
DATABASE GolferMessageBoardDB
USERNAME MyAdmin
PASSWORD pass@word1
Click Log on.
Click New Query.
In the Query window, type the following query, and then click Run.
CREATE TABLE [Messages](
   [MessageID] [int] IDENTITY(1,1) NOT NULL PRIMARY KEY,
   [GolferName] [nvarchar](100) NOT NULL,
   [GolferMessage] [nvarchar](1000) NOT NULL,
   [Timestamp] [datetime] NOT NULL
)
Click the Message button on the bottom of the main pane, and make sure the query is completed successfully.
What did I just do?
In this step, you created a SQL Database server, a database, and a table needed by the golfer message board application.
Next Steps:
You will modify the golfer message board application you created in tutorial 1 so that it uses SQL Database instead of the Table service for storing the messages.
Return to Top
Lesson 2: Modify the Application to use SQL Database
Currently, the application only needs to access a single table. It is easy and straightforward to access the data using LINQ.
There are two places you need to modify the application to use SQL Database. One is listing the messages, and the other is inserting new messages to the database.
Procedures
In this lesson, you will go through the following procedures:
- Open the golfer message board application
- Create messages entity class
- Modify the default.aspx page for listing the messages
- Modify the default.aspx.cs page for inserting new messages
- Compile the MessageBoard_WebRole project
To open the Golfer Message Board application
- Click Start, point to All Programs, point to Microsoft Visual Studio 2012, right-click Visual Studio 2012, and then click Run as administrator.
- If the User Account Control dialog appears, click Yes.
- Click the FILE menu, point to Open, and then click Project/Solution.
- In File name, type C:\AzureTutorials\Tutorial2\GolferMessageBoard\GolferMessageBoard.sln, and then click Open.
To create message entity class
In Solution Explorer, right-click MessageBoard_WebRole, point to Add, and then click New Item.
In the Add New Item – MessageBoard_WebRole dialog, type and select the following values:
Name Value Installed Templates
Visual C# , Data
Template
LINQ to SQL Classes
Name
MessageBoard.dbml
Click Add.
From the View menu, click Server Explorer. You can also press Ctrl+Alt+S to open Server Explorer.
In Server Explorer, right-click Data Connections, and then click Add Connection.
Type and select the following values.
Name Value Data source
Microsoft SQL Server
Data provider .NET Framework Data Provider for SQL Server Click Continue.
Type and select the following values.
Name Value Data source
Microsoft SQL Server (SqlClient
Data provider .NET Framework Data Provider for SQL Server Server name
<ServerName>.database.windows.net
User SQL Server Authentication
(Selected)
User name
MyAdmin
Password
pass@word1
Select or enter a database name
GolferMessageBoardDB
Note: SQL Database doesn’t support unencrypted connections. If you try to request a connection via SQL Server Management Studio that is unencrypted, SQL Database signals SQL Server Management Studio to establish an encrypted connection. To change the Encrypt setting, click Advanced from the Add Connection dialog. For more information, see [[articles: Overview of Security in Windows Azure SQL Database]].
Note: The <ServerName> is the SQL Database server name you wrote down when you created the server.
Note: SQL Database supports only SQL Server Authentication. For more information, see Security Guidelines and Limitations (Windows Azure SQL Database) at http://msdn.microsoft.com/en-us/library/ff394108.aspx#authentication.
Click OK.
In Server Explorer, expand the database connection you just added, expand Tables.
Drag-and-drop the Messages table onto the O/R Designer. The Object Relational Designer (O/R Designer) provides a visual design surface for creating and editing LINQ to SQL classes (entity classes) that are based on objects in a database.
In Solution Explorer, right-click MessageBoard_WebRole, and then click Rebuild.
In tutorial 1, you used a DataList control and an ObjectDataSource control to list the messages. You will replace the ObjectDataSource control with a LinqDataSource control in this tutorial.
To modify the Default.aspx page for listing the messages
In Solution Explorer, expand MessageBoard_WebRole, right-click Default.aspx, and then click View Designer.
From Toolbox, drag a LinqDataSource data control (under the Data category), and then drop it to the right or the bottom of dsMessages.
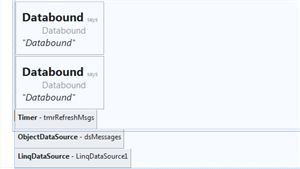
Note: Click Ctrl+Alt+X to display the Toolbox. The LinqDataSource control is listed under the Data category. The dsMessages control appears on the bottom of the page.
Hover over the LinqDataSource1 control, click the right button, and then click Configure Data Source.
In Choose your context object, select MessageBoard_WebRole.MessageBoardDataContext, and then click Next.
Note: The context object will not be listed until you compile the MessageBoard_WebRole project.
In Select, select GolferName, GolferMessage, and Timestamp, and then click Finish.
Hover over the dlMessages DataList control, click the right button, then in Choose Data Source, choose LinqDataSource1.
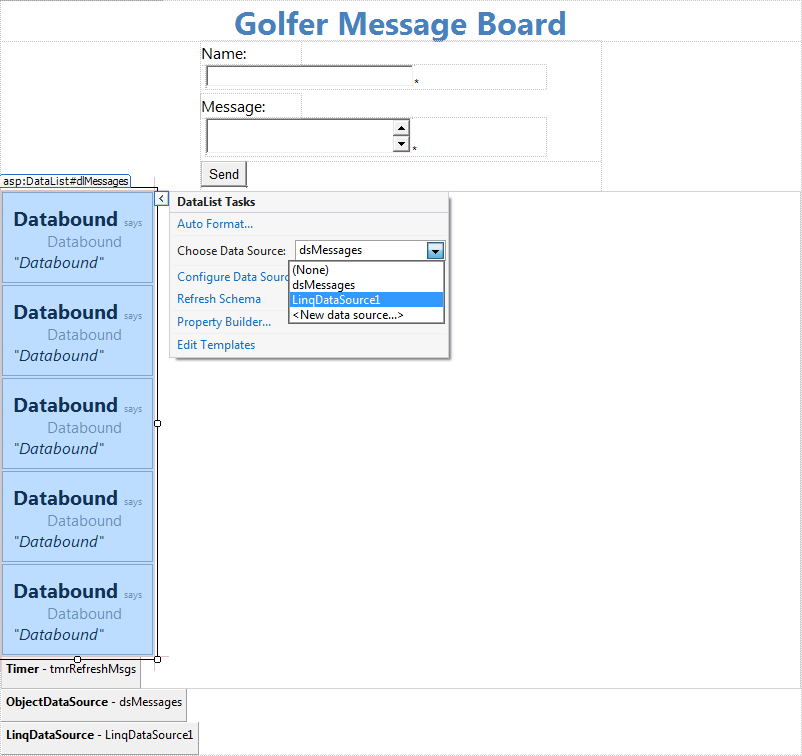
Click No to reject resetting the template.
To modify the Default.aspx.cs page for inserting new messages
In Solution Explorer, right-click Default.aspx, and then click View Code.
Delete the code inside the btnSend_Click method, and then insert the code snippet Tutorial02-Lesson02-Task04_WebRoleBtnSend_Click:
protected void btnSend_Click(object sender, EventArgs e)
{
   MessageBoardDataContext context = new MessageBoardDataContext();
   var newMessage = new Message
   GolferName = txtName.Text,
   GolferMessage = txtMessage.Text,
   Timestamp = DateTime.UtcNow
};

context.Messages.InsertOnSubmit(newMessage);
context.SubmitChanges();

txtName.Text = "";
txtMessage.Text = "";
dlMessages.DataBind();
If you don't see the code snippet, follow the instructions found in [[Windows Azure And SQL Database Tutorials (en-US)]] to copy the snippet.
Because you don't need the Table service, you can delete the MessageBoard_Data project from the solution, all of the references, and the associated using statements. However it will not impact your testing if you choose to keep the project.
To compile the MessageBoard_WebRole project
- In Solution Explorer, right-click MessageBoard_WebRole, and then click Rebuild. Make sure the project is compiled successfully.
What did I just do?
In this step, you modified the golfer message board application to connect to SQL Database via LINQ.
Next Steps:
You will test and deploy the application.
Return to Top
Lesson 3: Test and Deploy the Application
In this lesson, you test the application in Windows Azure computer emulator, package the application, and then deploy the application to Windows Azure.
Note: If you don’t have a Windows Azure Platform subscription, see the Provisioning Windows Azure section of this tutorial.
Procedures
In this lesson, you will go through the following procedures:
- Test the application in compute emulator
- Generate the service package
- Sign in to Windows Azure
- Create a cloud service
- Deploy the application to the staging environment
- Test the application in the staging environment
- Promote the application to the production environment
To test the application in compute emulator
- If MessageBoard is not the startup project: In Solution Explorer, right-click MessageBoard, and then click Set as Startup Project.
- From the Debug menu, click Start Debugging. The Golfer Message Board page is opened in a new browser window.
- Switch to the browser window to view the message board application.
- Add a few entries to the message board by entering your name and a message before clicking Send.
- Close the browser window to stop the debugger and shut down the development in the compute emulator.
After the application is tested successfully in the compute emulator environment, the next step is to create the service package and then deploy the application to Windows Azure.
To generate the service package
- In Solution Explorer, right-click the MessageBoard cloud project, and then click Package.
- In Package Windows Azure Application, select the following values:
Name Value Service configuration
Cloud Build configuration Release - Click Package. After Visual Studio builds the project and generates the service package, Windows Explorer opens with the current folder set to the location where the generated package is stored. The default directory is C:\AzureTutorials\Tutorial2\GolferMessageBoard\MessageBoard\bin\Release\app.publish. Make sure to write down the path. You will need it later in this lesson.
To sign in to Windows Azure
Open a Web browser and browse to http://windows.azure.com/. This is the Windows Azure Management Portal.
Sign in using the Windows Live ID associated with your Windows Azure account.
Note: If you haven’t had a Windows Azure Platform subscription, see the Provisioning Windows Azure section of this tutorial.
You need to create a cloud service for the Web role. If you have created a cloud service account in [[articles: Windows Azure and SQL Database Tutorials - Tutorial 1: Using Windows Azure Web Role and Windows Azure Table Service|tutorial 1]], you can skip this step.
To create a cloud service
- From the portal, in the left pane, click CLOUD SERVICES.
- On the bottom left corner of the portal page, click NEW, click COMPUTE, click CLOUD SERVICE, and then click CUSTOM CREATE.
- Type or select the following values.
Name Value URL <yourname>gmb Note: The URL prefix must be unique.
REGION/AFFINITY GROUP (For better performance, select the same region as the one you chose for the storage service, or use an affinity group.) Deployment a cloud service package now (not selected) - Click the check sign on the bottom right corner. Wait until the status changes to Created. This process could take several minutes.
To deploy the application to the staging environment
- From the portal, in the left pane, click CLOUD SERVICES.
- In the middle pane, click the cloud service you just created. The default name is <yourname>gmb..
- From the top of the page, click STAGING.
- Click UPLOAD A NEW STAGING DEPLOYMENT.
- From Upload a package, type or select the following value.
Name Value Deployment name v1.1.0.0 Package location C:\AzureTutorials\Tutorial2\GolferMessageBoard\MessageBoard\bin\Release
\app.publish\MessageBoard.cspkgConfiguration file C:\AzureTutorials\Tutorial2\GolferMessageBoard\MessageBoard\bin\Release
\app.publish\ServiceConfiguration.Cloud.cscfgDeploy even if one or more roles contain a single instance (Selected). You can always increase the number of instances from the portal. Start deployment (Selected) - Click the check sign on the bottom right corner of the page.
- Wait until the upload process is completed. The process can take several minutes to complete.
To test the application in the staging environment
- From the portal, in the left pane, click CLOUD SERVICES.
- In the middle pane, click the cloud service you created.
- From the top of the page, click STAGING.
- On the right side of the page, click the site URL.
- Test the application by entering one or more entries.
After the application is working correctly in the staging environment, you are ready to promote it to the production environment.
To promote the application to production
From the portal, in the left pane, click CLOUD SERVICES.
In the middle pane, click the cloud service you created.
From the top of the page, click STAGING.
On the bottom of the page, click SWAP.
On the right, click YES.
On the top of the page, click PRODUCTION. It takes several minutes to complete the operation.
On the right, click the SITE URL.
In the Properties pane, click the URL in the DNS name box. The application is opened in a new browser tab or a new browser window depending on your browser configuration.
Note: Some DNS services take longer to replicate the records. If you get a page not found error, you might need to try browsing to the URL again in a few minutes.
Test the application in the production environment by entering one or more entries.
What did I just do?
In this step, you tested and deployed the golfer message board to Windows Azure.
Next Steps:
Congratulations! You have completed the tutorial 2. tutorial 3 shows you another Windows Azure storage called Blob. tutorial 2.1, which is optional, shows you how to add a data service that implements the Open Data Protocol (OData) to the project.
Return to Top
See Also
- [[Windows Azure and SQL Database Tutorials (en-US)]]
- Windows Azure and SQL Database Tutorials - Tutorial 1: Using Windows Azure Web Role and Windows Azure Table Service (en-US)
- Windows Azure and SQL Database Tutorials - Tutorial 2.1 Create an OData Service
- Windows Azure and SQL Database Tutorials - Tutorial 3 Using Windows Azure Blob Service
- Windows Azure and SQL Database Tutorials - Tutorial 4 Using Windows Azure Worker Role and Windows Azure Queue Service
- [[Using the Windows Azure Web Role and Windows Azure Table Service with PHP]]
- [[Using the Windows Azure Web Role and SQL Database with PHP]]
Return to Top