Installing and Using the RemoteApp Applications in Windows 2008 R2
Introduction
After publishing the applications you need to offer them to users in the simplest possible way, reducing complexity and providing an easy method and without problems to all users.
The RemoteApp’s benefits begins at the installation. Considering that the programs are already installed and configured on the server, you only need to display them on workstations. In the following procedure you will see the two most effective and easy options to use RemoteApp.
Procedure
The first method is to create a package with the default access settings. This package has a msi extension and can be installed via group policies (GPO), System Center Operations Manager or other software distribution system.
Because the software is already installed on the server, the created package will install the icons and create associations with the file extensions. For example, installing Microsoft Office the icons will be created and when the user uses a file with a. Doc the connection to Microsoft Word will start automatically.
To create the package, open the RemoteApp Manager on Start> Administrative Tools> Remote Desktop Services. Right click on the software in the list available and then Create Windows Installer Package, as is shown in Figure 1.
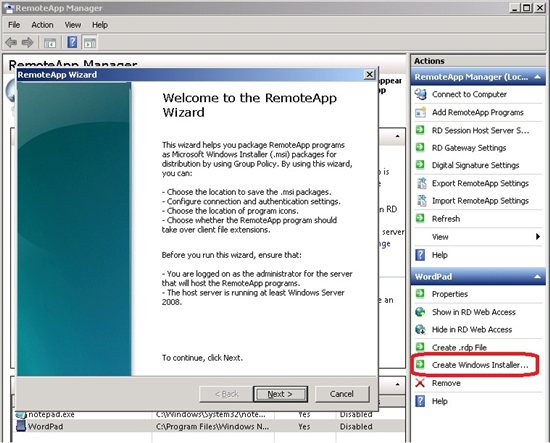
Figure 1 - Wizard to create the msi file
On the home page of the wizard click Next and specify the path where the file will be created. It is advisable to make them available through a shared folder for ease installation, but the package can also be installed in some offline method, using a Pen Drive, for example.
You can also choose the server, the connection port, RD Gateway settings and certificates.
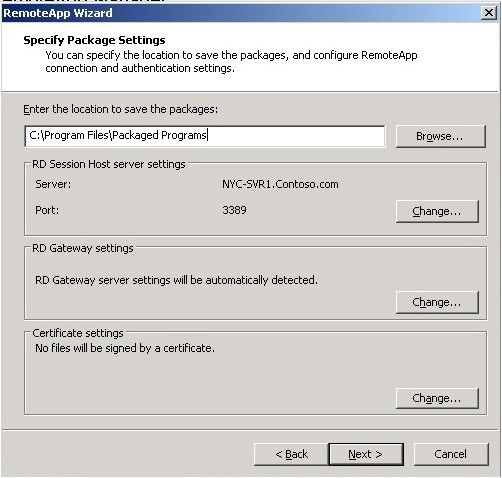
Figure 2 - The path of the package
On the next screen you can specify the location of shortcuts creation for the software. Start menu folder is interesting to use as standard nomenclature for all packages, this facilitate the search and access by users.
The option Associate client extensions for this program with RemoteApp program will make the automatic association of the extensions, creating the connection so that an extension is requested related to the software.

Figure 3 - Shortcuts and extensions
When you click Next and Finish the file with the name <Software Name>. msi is created in the specified folder.
The next step will be installation on client machines. To do that, access the shared folder containing the file and start the installation. There is no advanced option. Simply click Next and Finish.
Figure 4 shows the file in the right window and the two icons created during installation in the start menu and desktop.
As previously mentioned, this type of installation is easily done through GPOs or SCCM, with no interaction by the user.
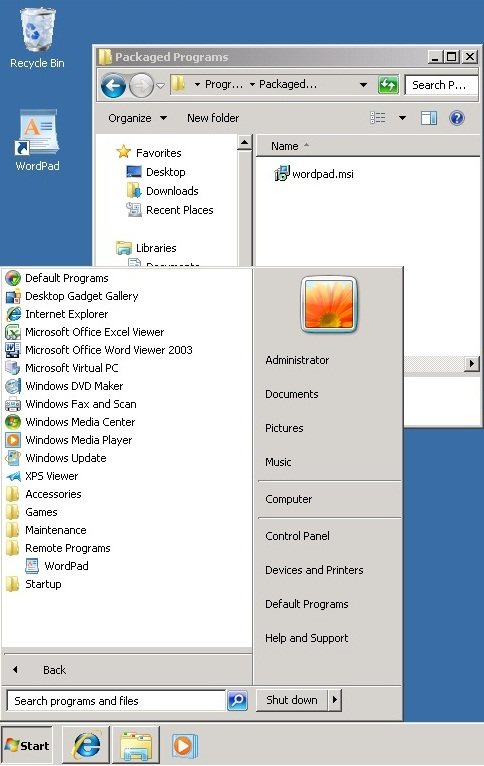
Figure 4 – MSI package and Icons
There is another way of providing applications to the user using the RemoteApp Connections. It creates icons in the Start Menu folder RemoteApp and Desktop Connections. To use it, type “Remote” in the Start Menu. The RemoteApp and Desktop Connections appears on the list, as Figure 5.
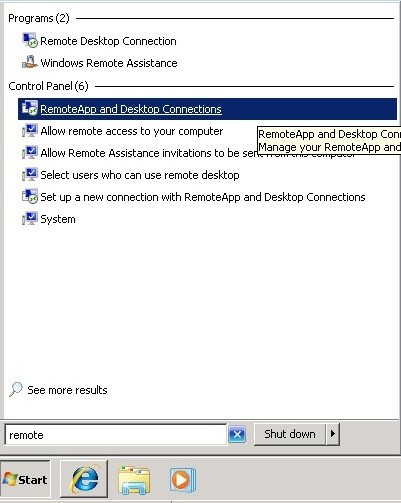
Figure 5 - Connections RemoteApp
In the window of RemoteApp and Desktop Connections, click on the left side Set up a new connection with RemoteApp and Desktop Connections.
Put the path https://remoteappserver/RDWeb/Feed/WebFeed.aspx. In Figure 6 you can see the example used. Click Next and Finish.

Figure 6 - The connection path
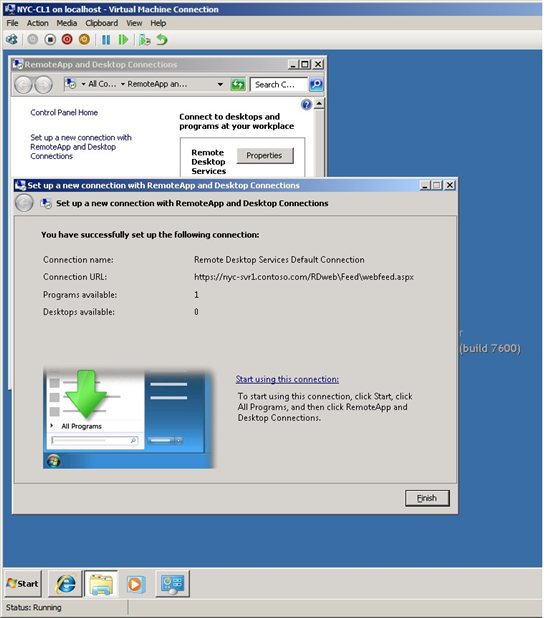
Figure 7 - Programs Available
Figure 8 shows another example with the list of programs available after the process above. Clicking on any of the icons create the server connection and the software is presented to the user.
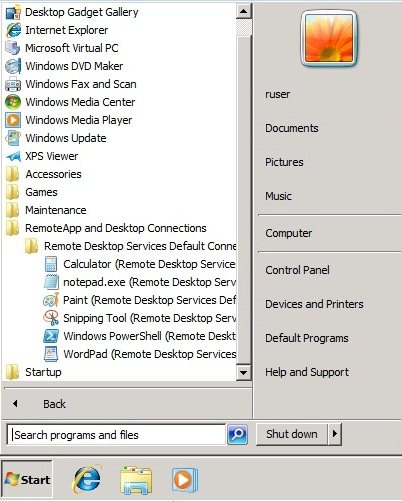
Figure 8 - Start menu folder
Leandro Carvalho
MCSA+S+M | MCSE+S | MCTS | MCITP | MCBMSS | MCT | MVP Virtual Machine
MSVirtualization | Wordpress | Winsec.org | LinhadeCodigo | MVP Profile
Twitter: LeandroEduardo