Azure: Using an Office 365 Tenant in the Management Portal
Credits
By Walter Myers, Principal Consultant, Microsoft
Disclaimer
This document is provided “as-is”.
Information and views expressed in this document, including URL and other Internet Web site references, may change without notice. Some examples depicted herein are provided for illustration only and are fictitious. No real association or connection is intended or should be inferred. This document does not provide you with any legal rights to any intellectual property in any Microsoft product. You may copy and use this document for your internal, reference purposes. © 2014 Microsoft. All rights reserved.
Introduction
To begin, when you create a directory tenant in Office 365, then you have also created a directory tenant in Windows Azure as well since Office 365 simply leverages the Windows Azure Active Directory. So you can simply use the organizational account for Office 365 to sign up for a new Azure subscription and the Office 365 directory tenant will be available to that account. For example, I signed up on Office 365 and created the account walterm@canisnetworks.onmicrosoft.com. That established my Office 365 account where I could then add users and assign licenses so users can take advantage of Exchange, Lync, and SharePoint. I then setup a directory synchronization relationship between my on-premises Active Directory with Office 365 so I could authenticate directly against my on-premises Active Directory account in both Office 365 and the Windows Azure management portal.
In my case, the on-premises domain name is canisnetworks.com, so after setting up directory synchronization, I made the walterm@canisnetworks.com account a global administrator in Office 365, and subsequently created a Windows Azure subscription using that organizational account as the service administrator. I then had access to the directory from my organizational account in Windows Azure. But what if my subscription has already been created with a Microsoft account not associated with new Office 365 directory, or has an organizational account associated with another Office 365 directory that I want to associate with this Office 365 directory?
In this walkthrough, we will:
- Show how to associate a user in an existing Windows Azure subscription with Office 365 so you can access the Office 365 directory from that account,
- Setup the global administrative mapping between Office 365 and Windows Azure, which is not exactly the same (for now),
- Look at how to create a sandbox tenant in order to test out various directory scenarios (such setting up single sign-on with popular SaaS applications from Azure Active Directory) without bothering the primary (i.e., production) directory tenant in Office 365, and
- See how to setup single sign-on with popular SaaS applications from Azure Active Directory.
Associate a User in an Existing Windows Azure Subscription with an Office 365 Directory
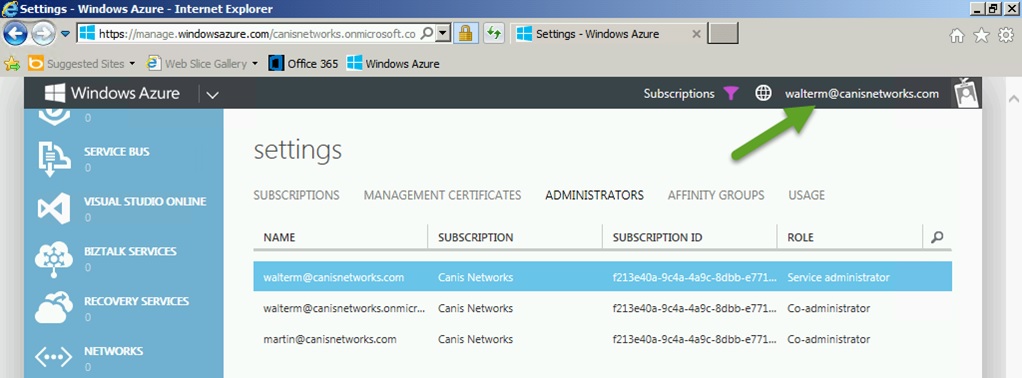
In this walkthrough, we have an existing Windows Azure subscription that was already created by a Microsoft account not associated with Office 365 but now has an organizational account we want to use to administer another directory. What we want to do is to associate the organizational account in that subscription with the desired Office 365 directory tenant. For this walkthrough, I’m going to associate the account walterm@canisnetworks.com in the canisnetworks.com domain with an Office 365 directory tenant in the scientiamedia.com domain. The trick is that we need to create the association by way of a Microsoft account (formerly called a Live ID). The first thing is to make the Microsoft account a co-admin in the subscription that has the account we want to associate with the Office 365 directory. As we see below, we are logged in as walterm@canisnetworks.com in the Azure management portal.
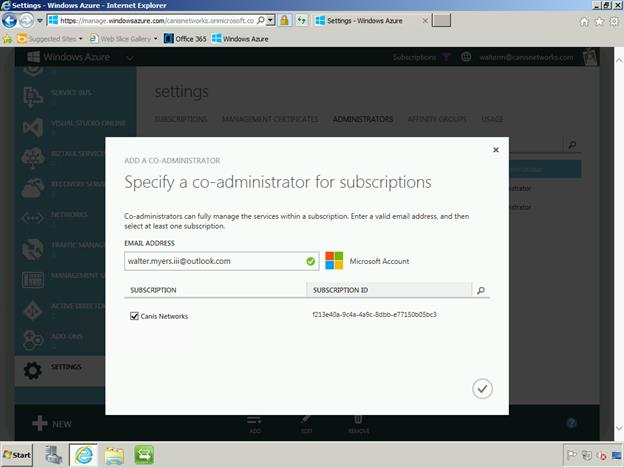
We will now add the walter.myers.iii@outlook.com Microsoft account as a co-admin, as seen below, by selecting the Add button at the bottom of the page.
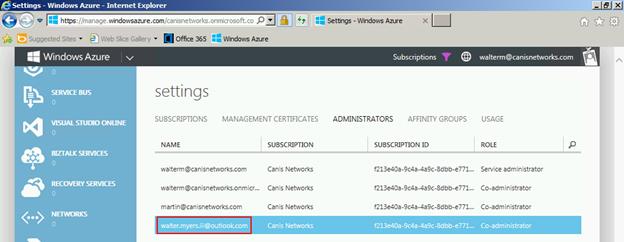
So we should look similar to below.
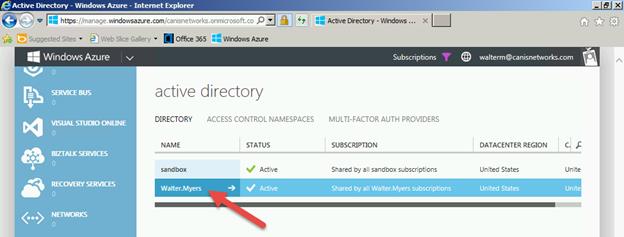
Next, I choose the Active Directory tab on the left-hand side, and see my list of directories.I then choose the home directory for the walterm@canisnetworks.com account, as seen below. Note that you should not choose a directory other than the one that account calls home or this won’t work later.
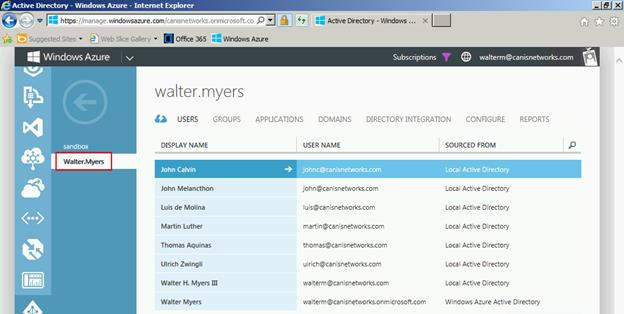
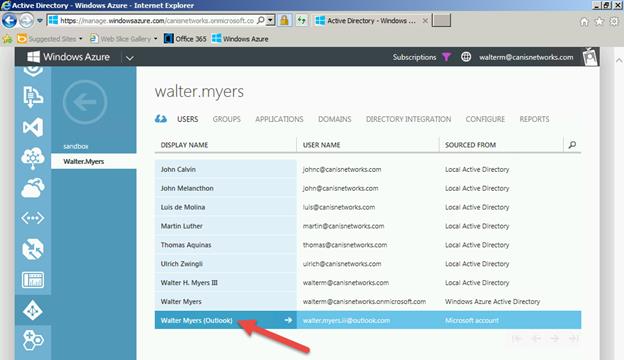
Below we see the list of users in the canisnetworks.com directory, and we’re going to now add an @outlook.com Microsoft account to the directory.
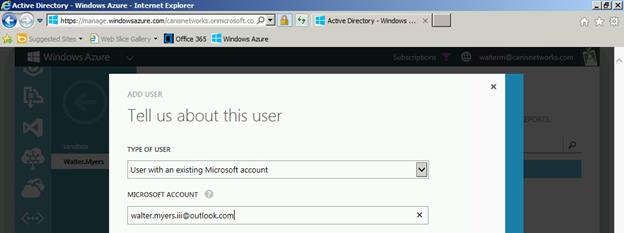
We click the Add User button and in the resulting dialog we select User with an existing Microsoft account from the dropdown as well as enter the Microsoft account.
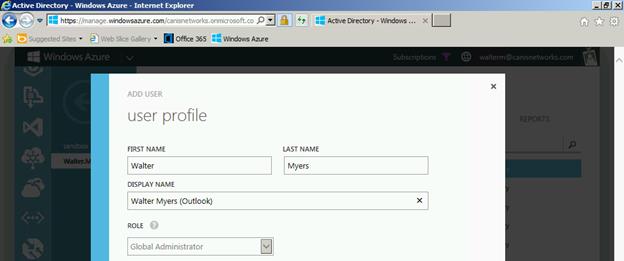
On the next page we enter the user profile information and accept the dialog.
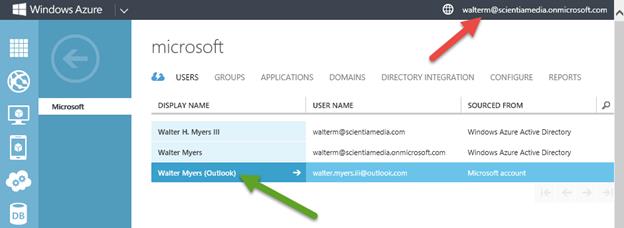
Now we see our Microsoft account added below added to the directory.
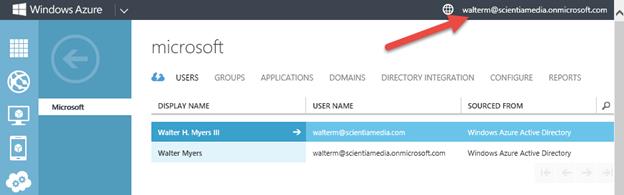
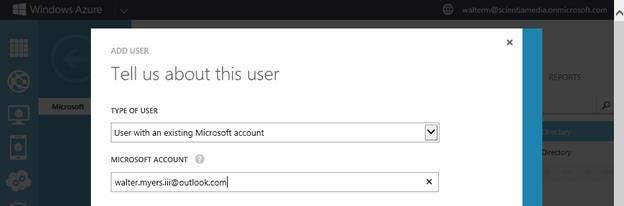
We’re done here for now. It gets a bit tricky though. We want to now associate the @outlook.com Microsoft account with the Office 365 directory tenant. We can’t add a Microsoft account to an Office 365 directory tenant in the Office 365 portal, but we can add a Microsoft account to the corresponding Windows Azure directory tenant which will also be visible in Office 365. So instead of logging on to Office 365, we will login onto the Windows Azure portal using the administrative account for Office 365. You can see this below, where I am logged in as walterm@scientiamedia.onmicrosoft.com and navigated to the directory tenant users. We’re now going to add the @outlook.com account to the Office 365 directory so we can access the directory from the Azure portal for the walterm@canisnetworks.com account.
As we did before, we add the existing Microsoft account, as seen below.
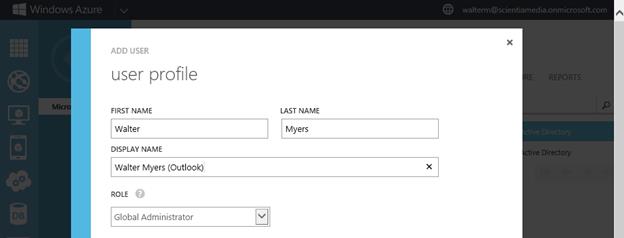
We enter the user profile information and accept the dialog.
Below, we see that the Microsoft account has been added to the directory for our desired Office 365.
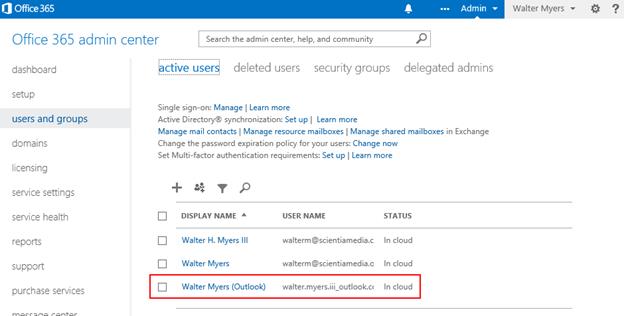
If you now login to the corresponding Office 365 portal, you will also see the Microsoft account added there just as seen above in the Azure management portal. Note that if you resize the browser to make it wider, the construction of the user name for the Microsoft account we added looks as follows:
walter.myers.iii_outlook.com#EXT#@scientiamedia.onmicrosoft.com. Interesting.
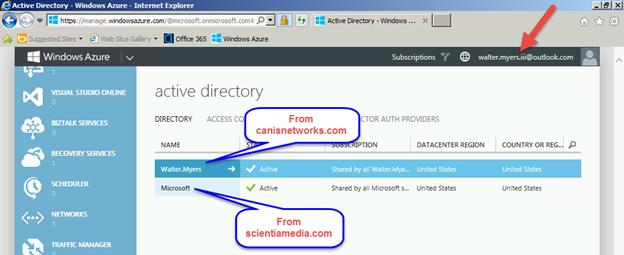
Let’s now logon to the Azure management portal with the @outlook.com Microsoft account, and navigate to the Active Directory tab. We now see the directories from our canisnetworks.com directory tenant and our Office 365 tenant in scientiamedia.com.
Next we choose the scientiamedia.com directory tenant, as seen below. It is from here that we take advantage of the Microsoft account association to give our canisnetworks.com account access to the scientiamedia.com directory. The next step, then, is to select the
Add User button.
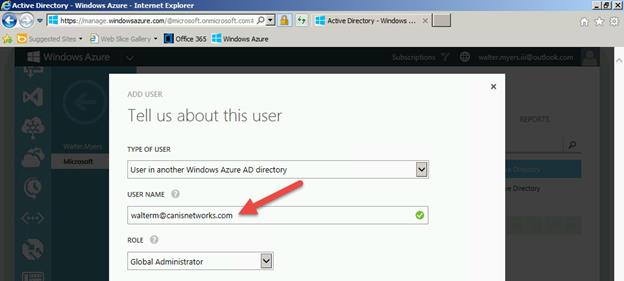
When the Add User dialog is presented, we select User in another Windows Azure AD directory from the Type of User dropdown. We add the desired walterm@canisnetworks.com organizational account from the subscription and in this case make it a Global Administrator, as seen below.
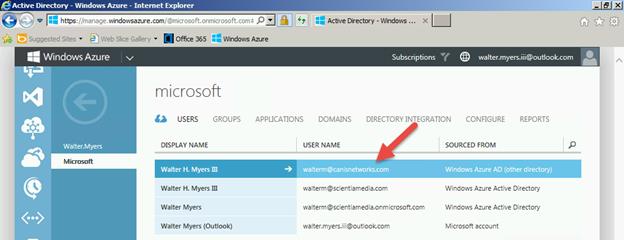
As seen below, our account is added and in my case it is notated as an account in another directory.
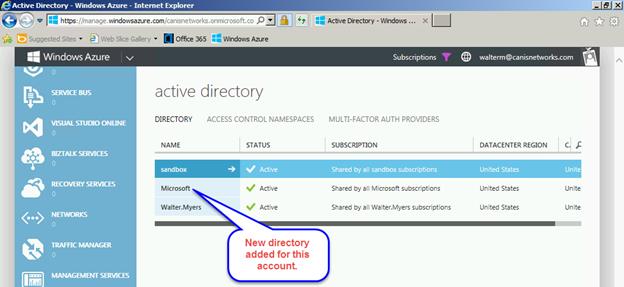
Let’s now login to the Azure management portal as walterm@canisnetworks.com and navigate to the Active Directory tab. We see below that the desired new Office 365 directory shows up in the directory list, and now this account has been successfully associated with it.
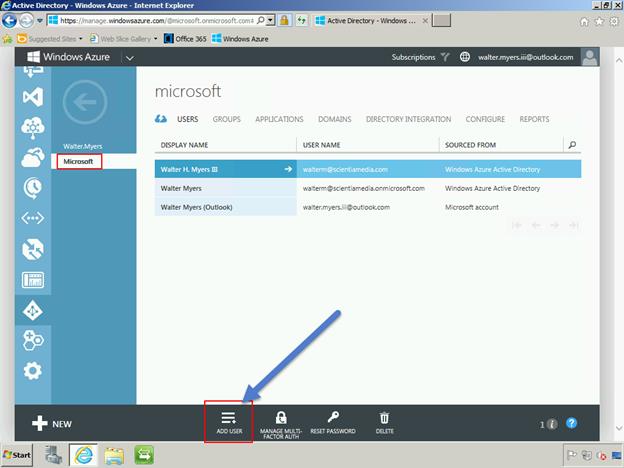
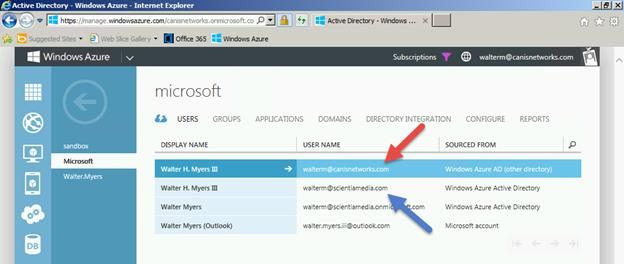
If we select the directory, we now see the users in the desired directory.
Make a User a Global Administrator in Both Office 365 and Windows
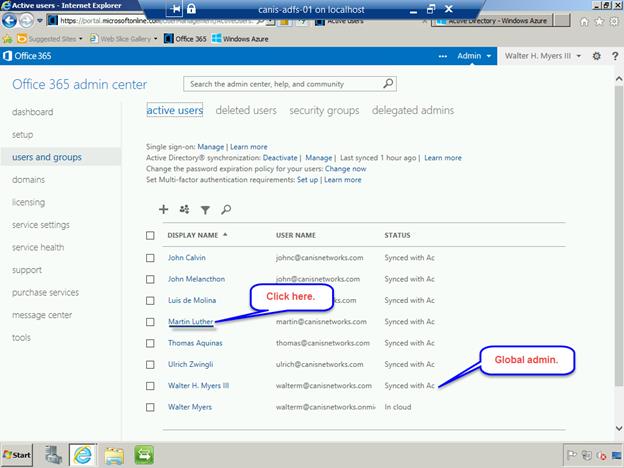
Below I have logged into the portal with an account that is a global administrator in Office 365, and I want to make another user a global administrator of the directory in the Azure management portal. I click on that user’s hyperlink in the users and groups page in the Office 365 admin center, as seen below.
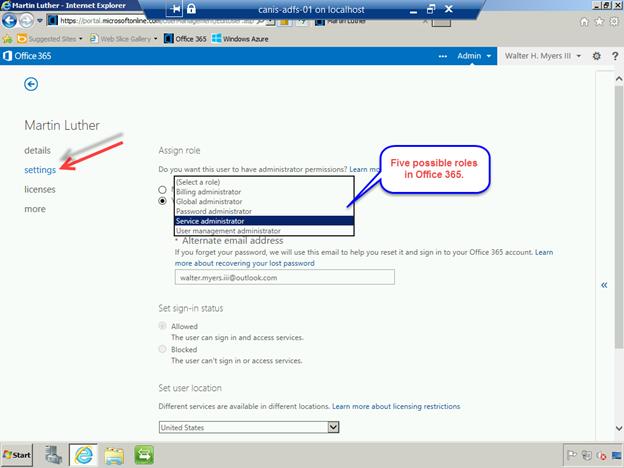
I’m now on the page for that user. I choose the settings page for the user, where I will assign the user the desired administrative role. Office 365 has five levels of administrative roles, as seen below. Windows Azure has only two, which are User and Global administrator. Eventually, these will be unified, but for now the Global administrator role in Office 365 maps to the Global administrator role in Windows Azure. For now let’s see what happens if I select the Service administrator role for a user.
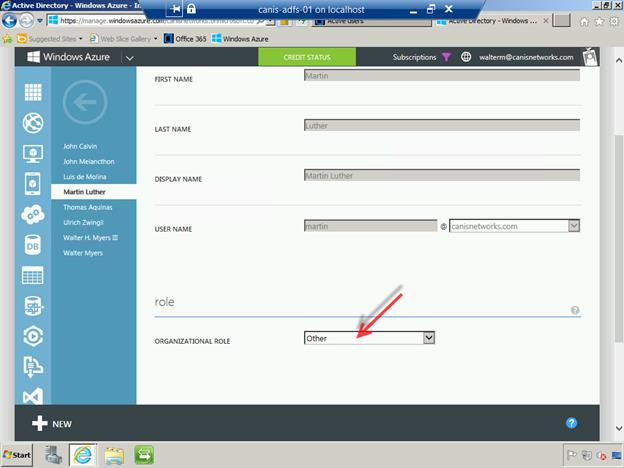
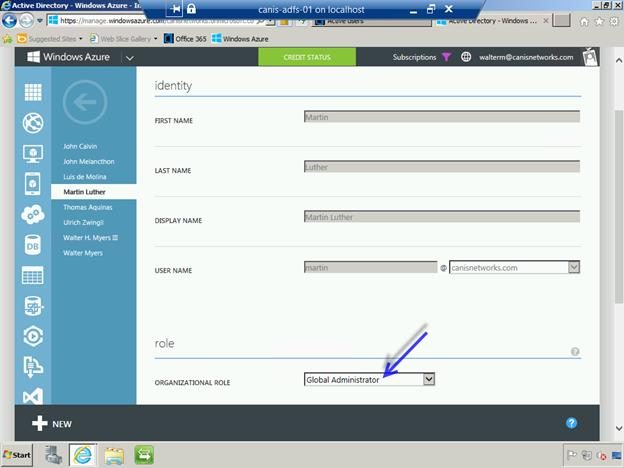
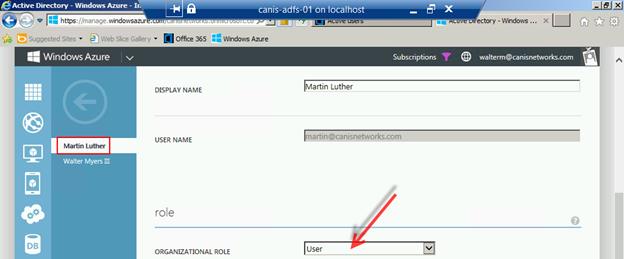
So we have put the user Martin Luther into the Service administrator role, yet when we navigate to users in our Azure Active Directory tenant (from the Windows Azure management portal) and select that user, we see the organizational role is “Other”, which we don’t want.
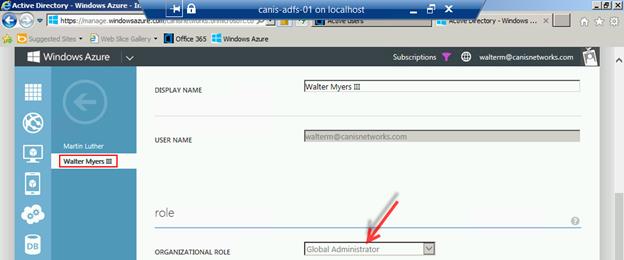
So now we go back to the user settings page in the Office 365 portal for Martin Luther and change to Global administrator.
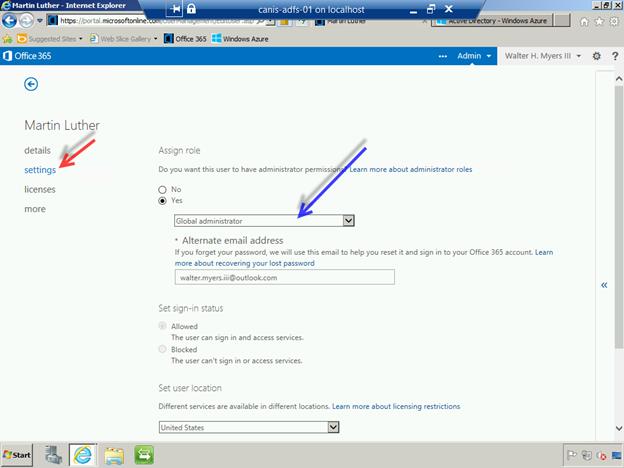
When we navigate back to the Azure management portal and refresh the page, we see that Martin Luther is now a Global administrator, as seen below.
So we’re done setting up a Global administrator for both Office 365 and Windows Azure.
Adding a Sandbox Directory Tenant
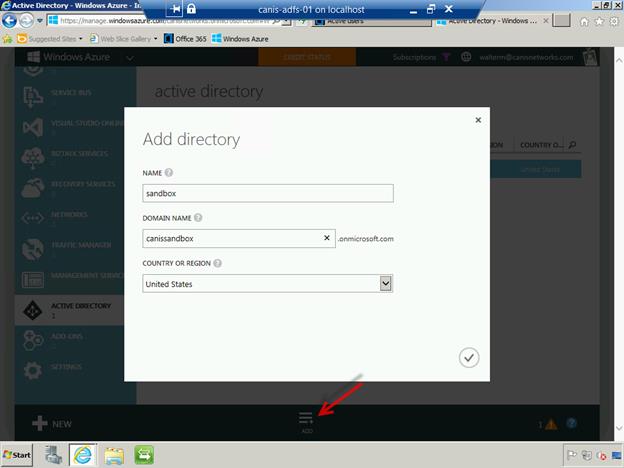
Let’s now go back to the Active Directory tenant list and select the Add button at the bottom of the page, where you will be presented with the dialog as seen below. Provide a name for your new “sandbox” directory tenant, and also give it a domain name, which will be of the final form <domain_name>.onmicrosoft.com. When finished select the check button to accept the dialog.
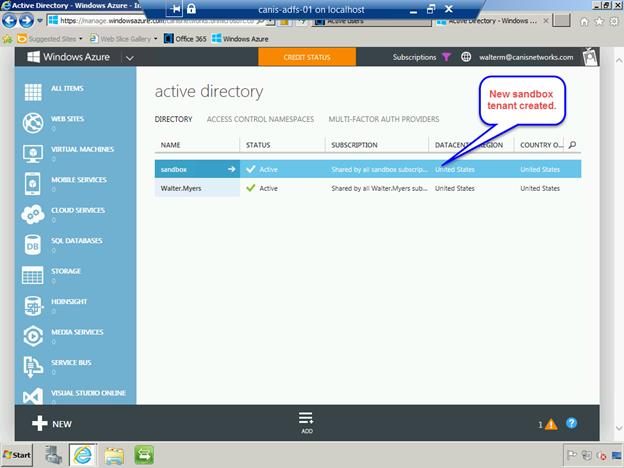
You will now see the new sandbox Azure Active Directory tenant that you just created. Now we will add users to it from your primary/production Azure Active Directory tenant.
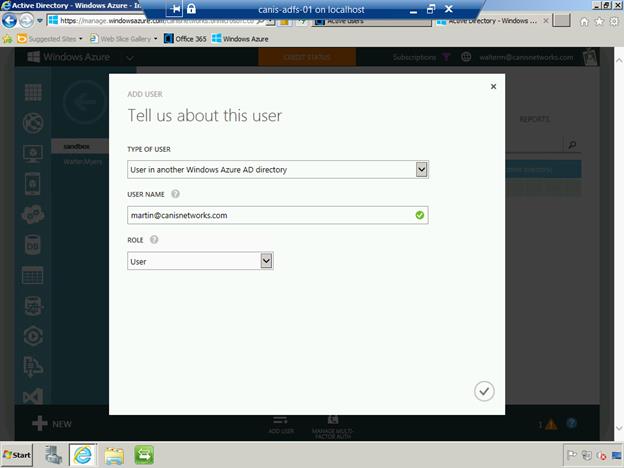
Select the sandbox tenant, and from that tenant page, select the Add User button as seen below. From the Type of user dropdown, select the User in another Windows Azure AD directory item.
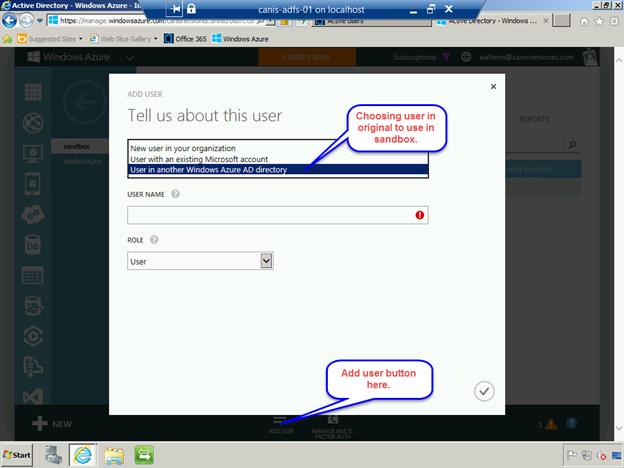
Next, in the User Name field, type in the username from your primary directory tenant. In this case, I want to place the user, Martin Luther, in the user role with respect to the directory instead of in the administrator role for this sandbox directory tenant. When finished select the check button to accept the dialog.
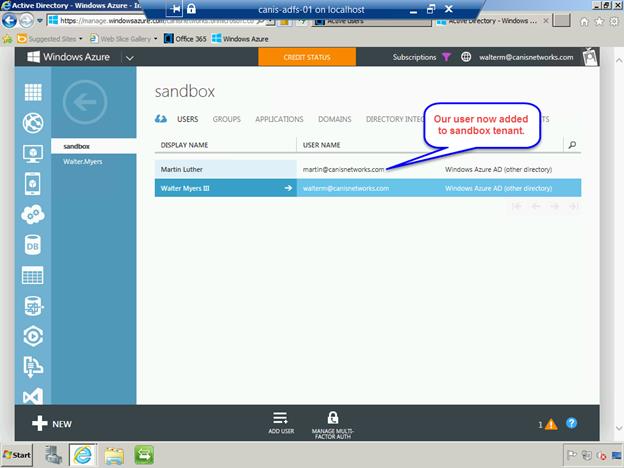
Now our user is added, as seen below, but we’re not done as we want to give the user access to the current subscription.
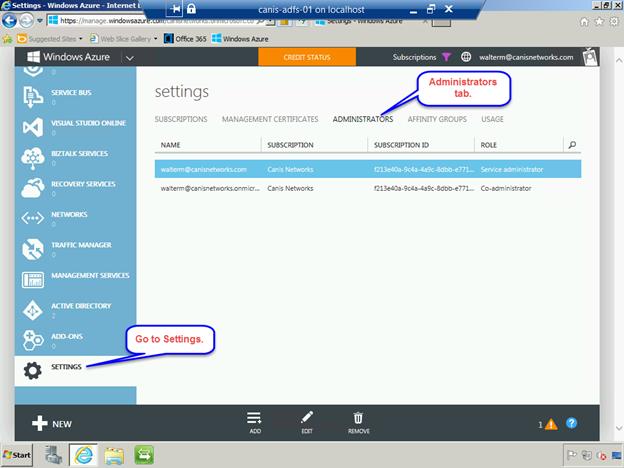
From the top-level Settings page, select the Administrators tab, as seen below.
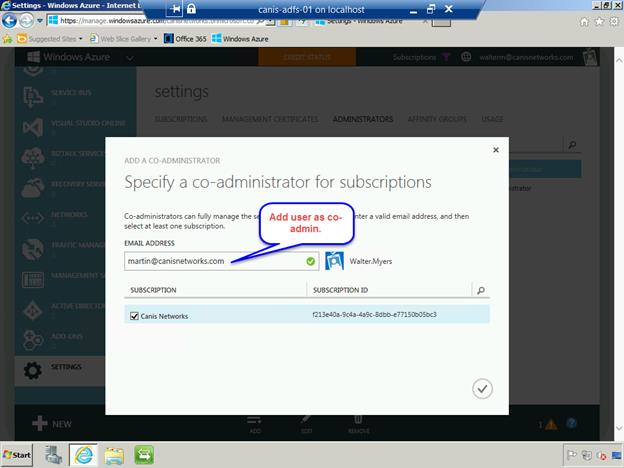
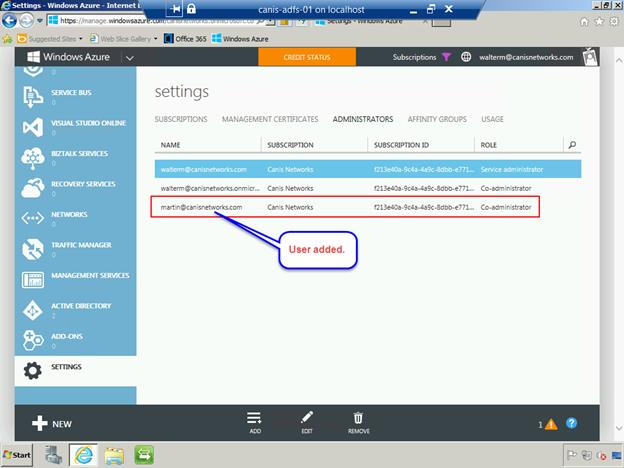
Select the Add button below in order to add a co-administrator for this subscription. As seen below, type in the email address of the desired user, select the subscription, and then choose the check button to dismiss the dialog.
Now we see the user is added.
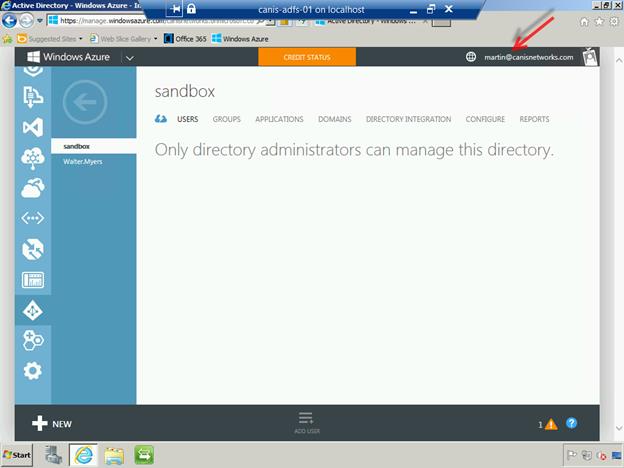
Logout as the current user and login again as the user just added.
Select the sandbox directory tenant and notice that since our newly added user is in the User role, the user has no administrative access to the tenant, as seen below.
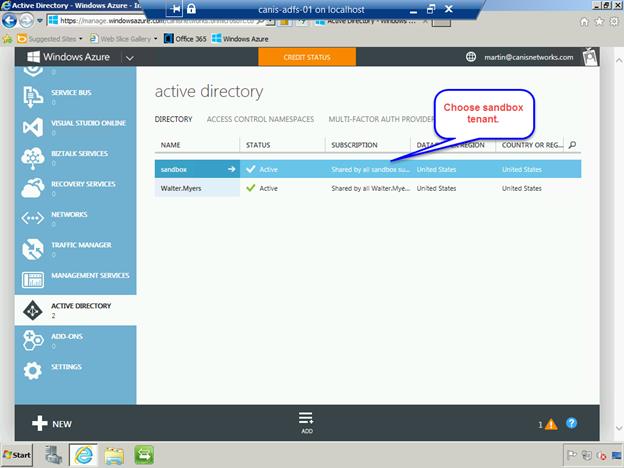
Logout as the user we just added and login again under the original Global administrator account. Navigate to the top-level Active Directory page and select the sandbox page, as seen below. Select the user just added.
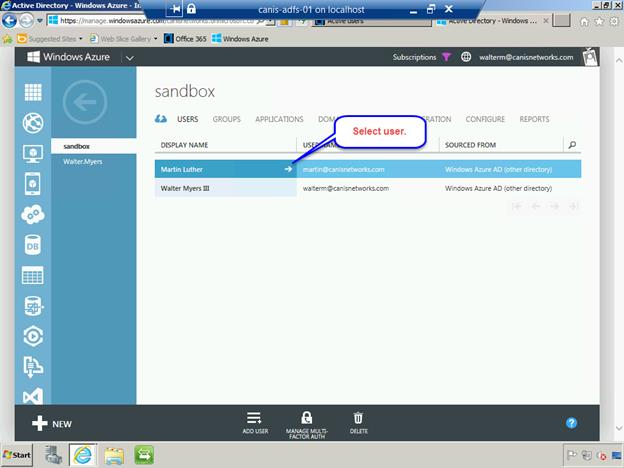
Verify that the user we just added has the User role in this directory tenant.
Then verify that the original Global administrator has the same role for the sandbox directory tenant as for the primary directory tenant.
Inspect Single Sign-on with Popular SaaS Applications
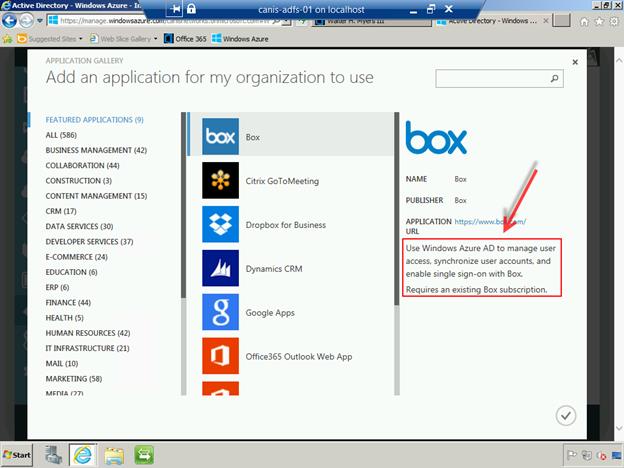
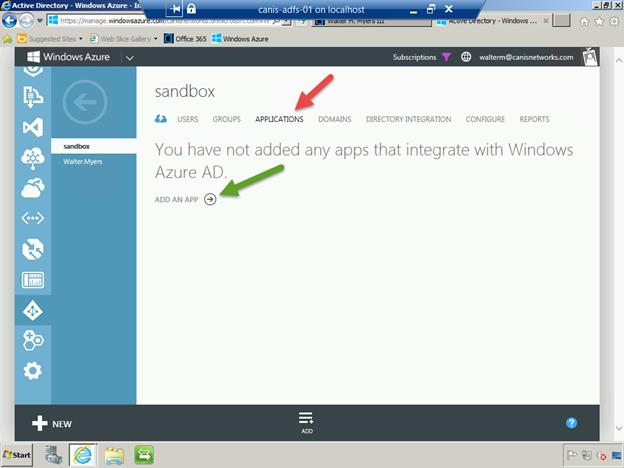
Navigate again to the sandbox directory tenant. Choose the Applications heading as seen below, then select the Add an App button. Next, select the Add an application for my organization to use button on the dialog page.
Now you will be in the Application Gallery where you can select SaaS providers that provide single sign-on capabilities with Azure Active Directory, as seen below.