Authenticate your App with Facebook using Microsoft Azure Mobile Service
Brief Introduction
In this article, you'll learn how to Authenticate Users with Facebook using Microsoft Azure Mobile Service. The IDENTITY Tab in Microsoft Azure Mobile Services provides the facility to restrict access of operations such as Insert, Modify, Read and Delete. In this way users can be Authenticated using Microsoft Azure Mobile Services.
So let's get started.
Explanation
Authentication can be done using Microsoft Account, Facebook, Twitter, Google Account, and Azure Active Directory. In this article we are doing it with Facebook. First of all, go to Azure Management Portal, and create Mobile Service. Click on New --> Compute --> Mobile Service --> Create. The pop-up window appears. Put the credentials/info in it. See the image below.
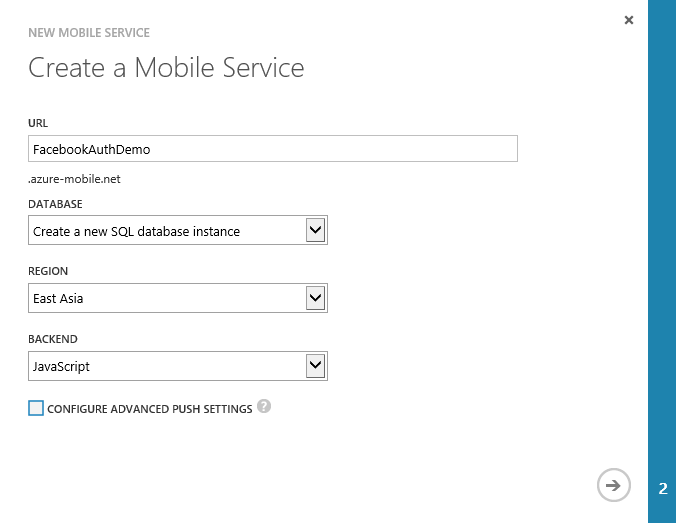
Click the Next Icon at the bottom right of the pop-up window. It will take you to the next page. See image below.

Provide the required Credentials and click the Tick button on the bottom right.
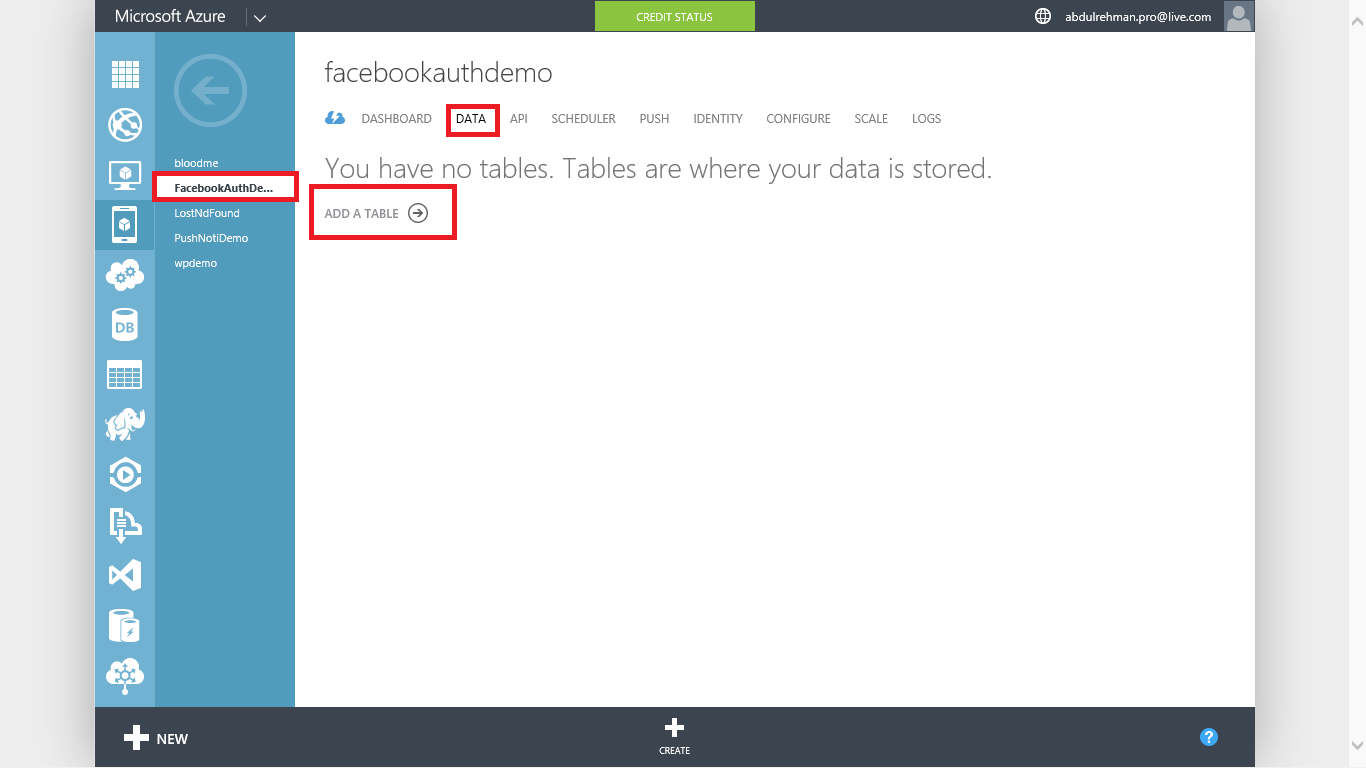
Now the Mobile Service is created. the first thing we have to do is step in to the FacebookAuthDemo Mobile Service and Click on DATA tab to create a new table. Actually this table is going to store the data for the Mobile Service. Click on ADD A TABLE to create it. See image below.
Now, when the client tries to perform any of the operations such as Insert, Read, Edit or Delete, we can set permissions here per individual per action. By default, it is "Anybody with the Application Key". Change it to "Only Authenticated Users" option so that only the authenticated users have access to these operations. Please see the image below.
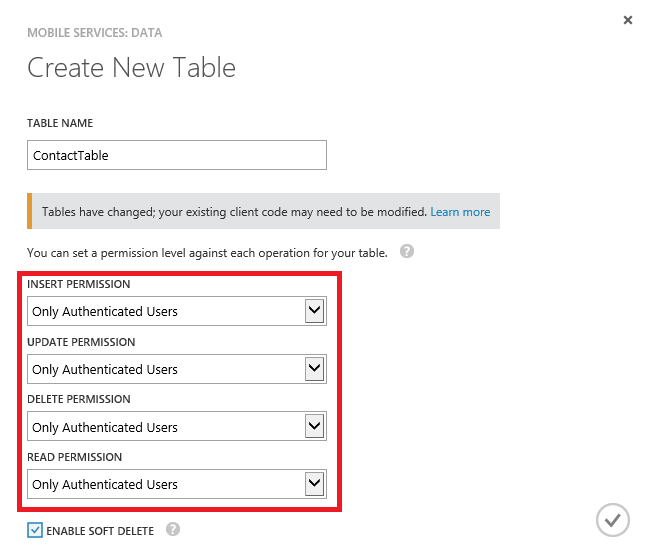
So the permissions are set, hit save button. And the table is now created.
Now, to configure which Authentication option that you want the client application to be able to use, use the IDENTITY tab. You'll see Facebook settings here. You can see, it is asking for the APP ID/APP KEY, and App Secret of our application. To find this, first of register your application on Facebook to be able to Authenticate. To do this, go to the Facebook Developers website and sign-in with your credentials.
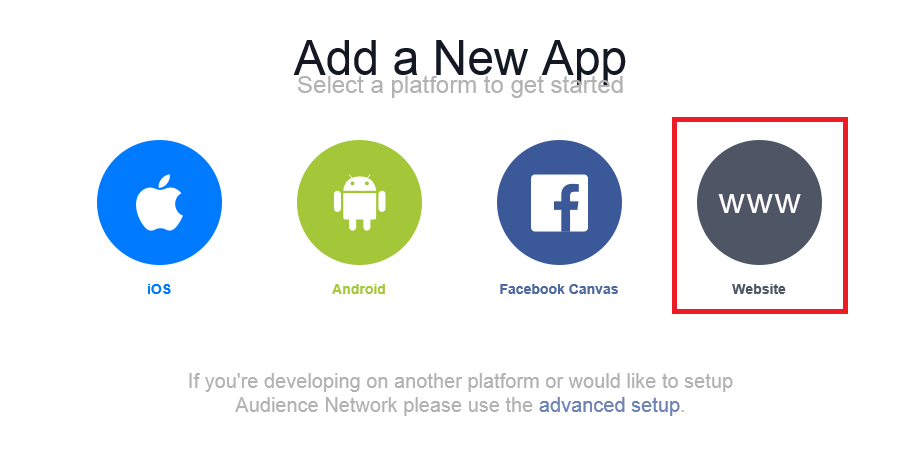
If your are not registered as a developer on Facebook, click on App and click Register as a developer. The very next step is to create an app. To do this, Click on Apps, and then click Add a New App. A pop-up will appear. Click on "Website".
Give App Name, and create. I'm creating with the name AuthDemo.
Now in Categories, select App for Pages.
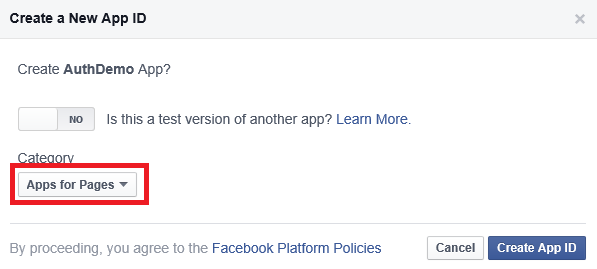
Now click on Create App ID. This registers the app with Facebook.
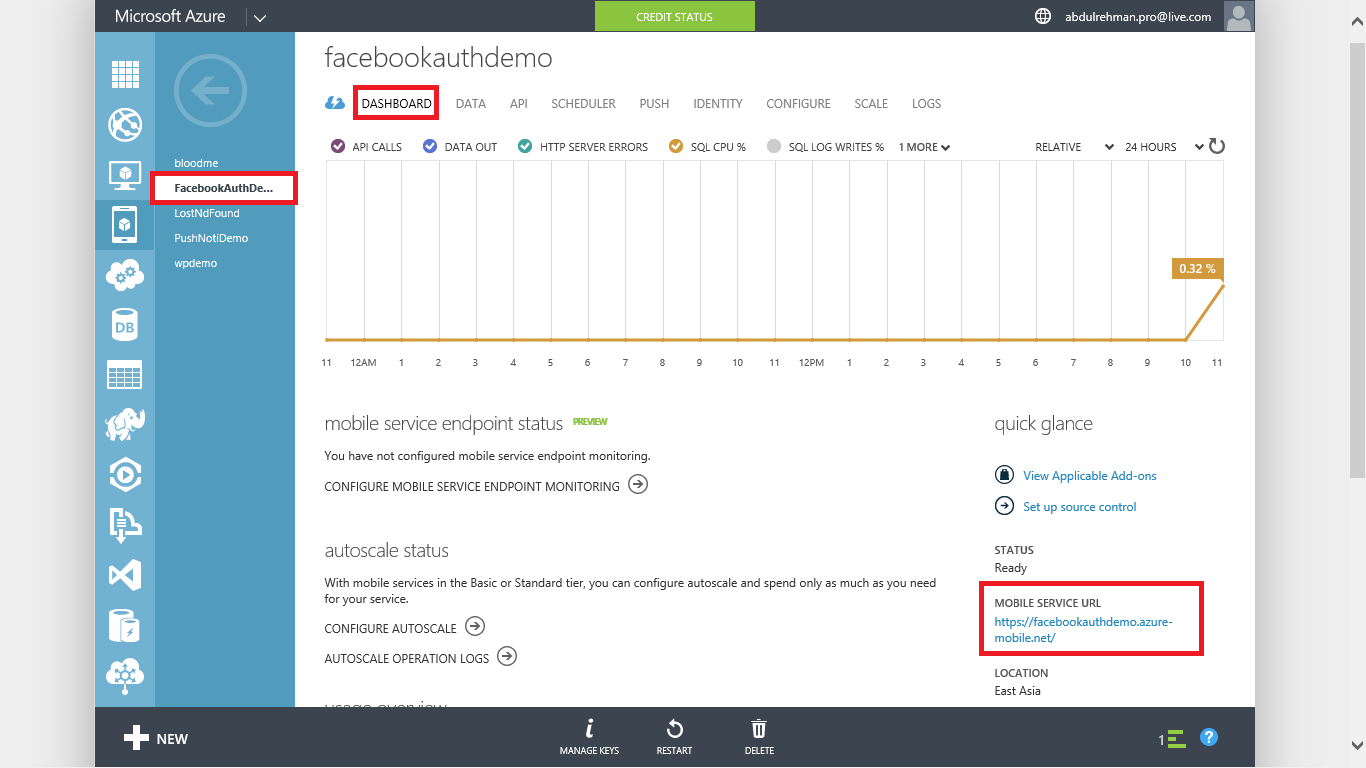
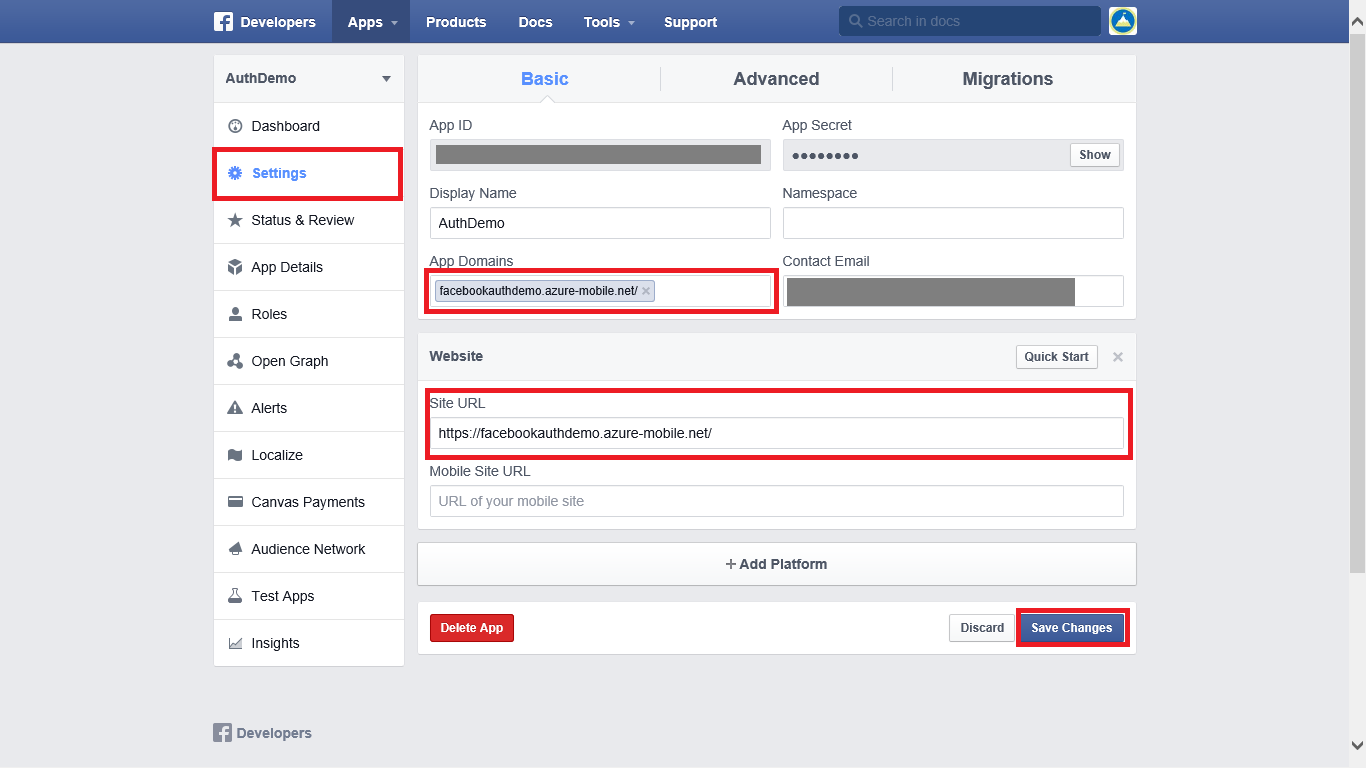
Now go to Settings, and provide the domain of your Mobile Service in App Domains. Now where to get this domain? Coming back to the our Mobile Service in Azure Portal, go to Dashboard and select Mobile Service URL.
Copy this URL and paste it on Facebook Developers Settings page. Also provide the Contact Email. Now click on Add Platform and Select Website and paste the Mobile Service URL in Site URL field. Than hit Save Changes to save these changes.
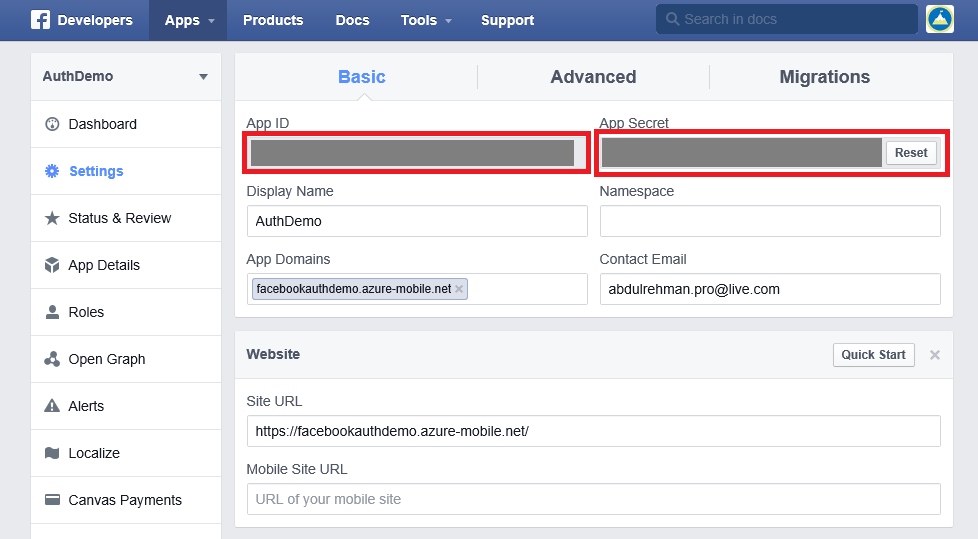
Once this is done, click on Show under App Secret, provide the password and make a note of App ID and App Secret. Please note, this App Secret is super confidential info of your app. So keep it safe.
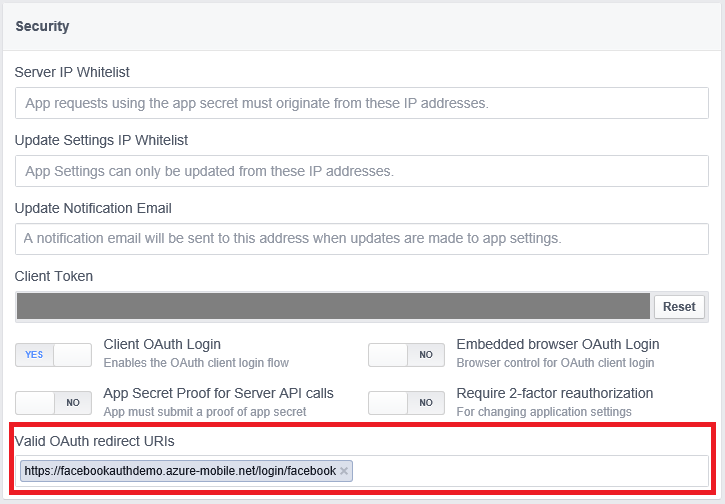
These were the basic settings of the app. Now our task is to provide the Auth URL of our Mobile Service to Facebook App. To do this, go to Advance Tab, and paste the Mobile Service URL and append with the path /login/facebook in Valid OAuth Redirect URIs.
You're almost done. :)
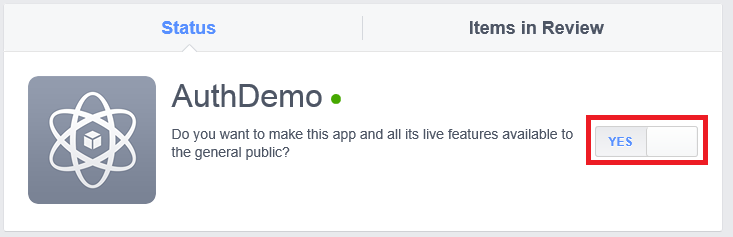
Now the Facebook Account from which you create this app is an Administrator Account. To authenticate other accounts, they need the access, so that app can authenticate their accounts as well. To do this, go to Status and Review from left pane and click Yes to enable this app for public access.
Finally you are ready to use a Facebook login for authentication in your app by providing the App ID and App Secret values to Mobile Services. As you've noted the App ID and App Secret values prior, put those values in the Mobile Service IDENTITY tab, in facebook settings.
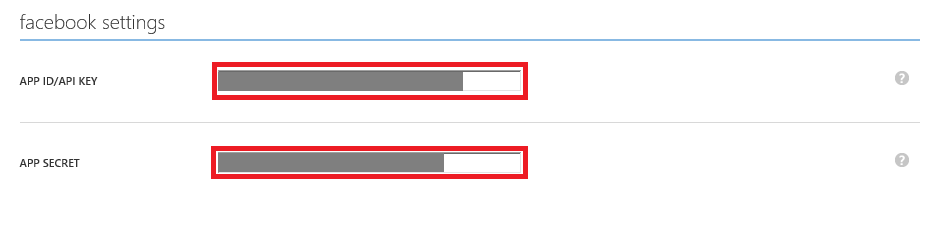
Hit save to save these changes. Now the Mobile Service is configured to work with Facebook Authentication. :)
Now let's create an app and put some code in it to Authenticate with Facebook. Open Visual Studio and create a Windows Store C# project.

Now go to the Mobile Service in Azure Management Portal. Under Quick Start tab, choose Windows platform and click on CONNECT AN EXISTING WINDOWS STORE OR PHONE APP.
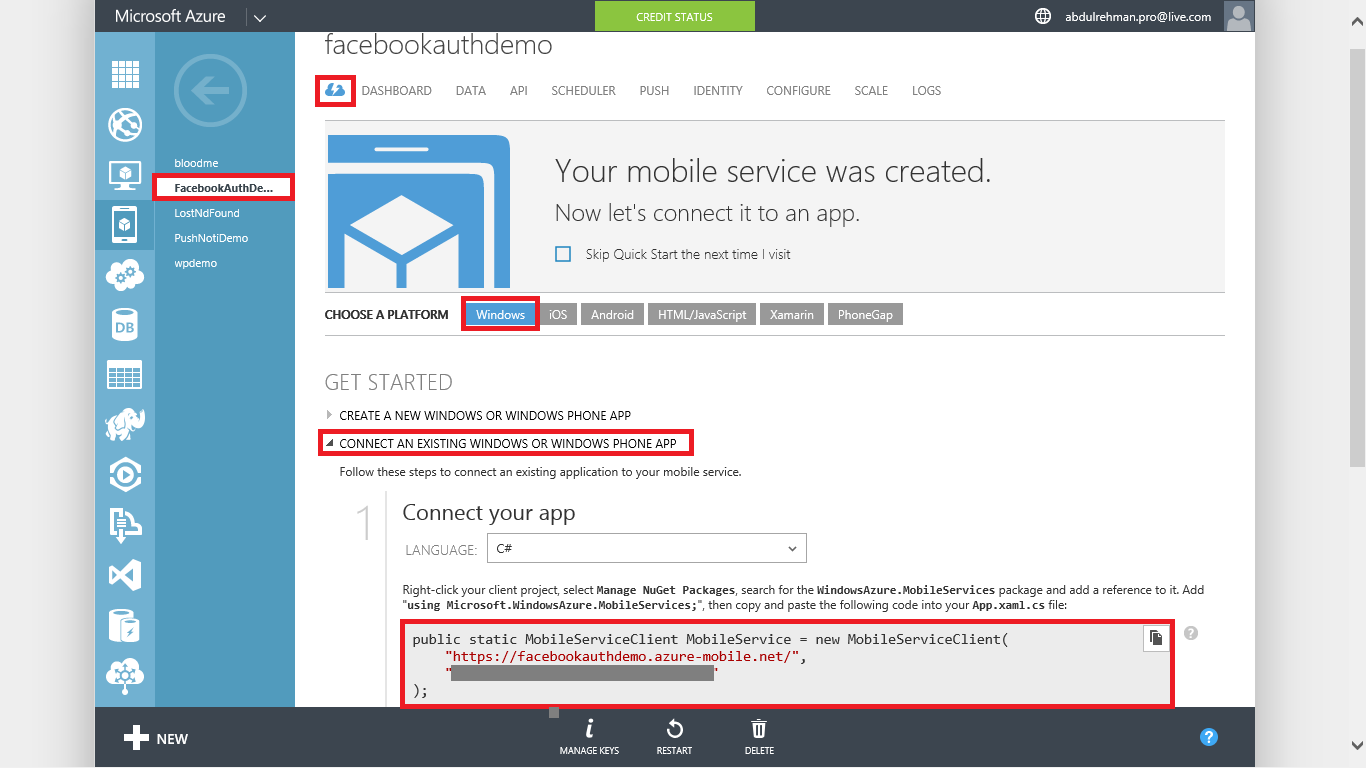
Copy the code given in Step 1 and paste it in App.xaml.cs in the project you just created.
The next step is to Authenticate the user. Paste the code in MainPage.xaml.cs file in the project.
private async System.Threading.Tasks.Task AuthenticateAsync()
{
     while (user == null)
     {
          string message;
          try
          {
               user = await App.MobileService
                    .LoginAsync(MobileServiceAuthenticationProvider.Facebook);
               message =
                    string.Format("You are now signed in - {0}", user.UserId);
          }
          catch (InvalidOperationException)
          {
               message = "You must log in. Login Required";
          }

          var dialog = new  MessageDialog(message);
          dialog.Commands.Add(new UICommand("OK"));
          await dialog.ShowAsync();
     }
}
Notice here we are using giving the Provider name as Facebook because we have to Authenticate Users with it.
Now run the app, and you'll see the Authentication part in it. It'll ask for your Facebook credentials.
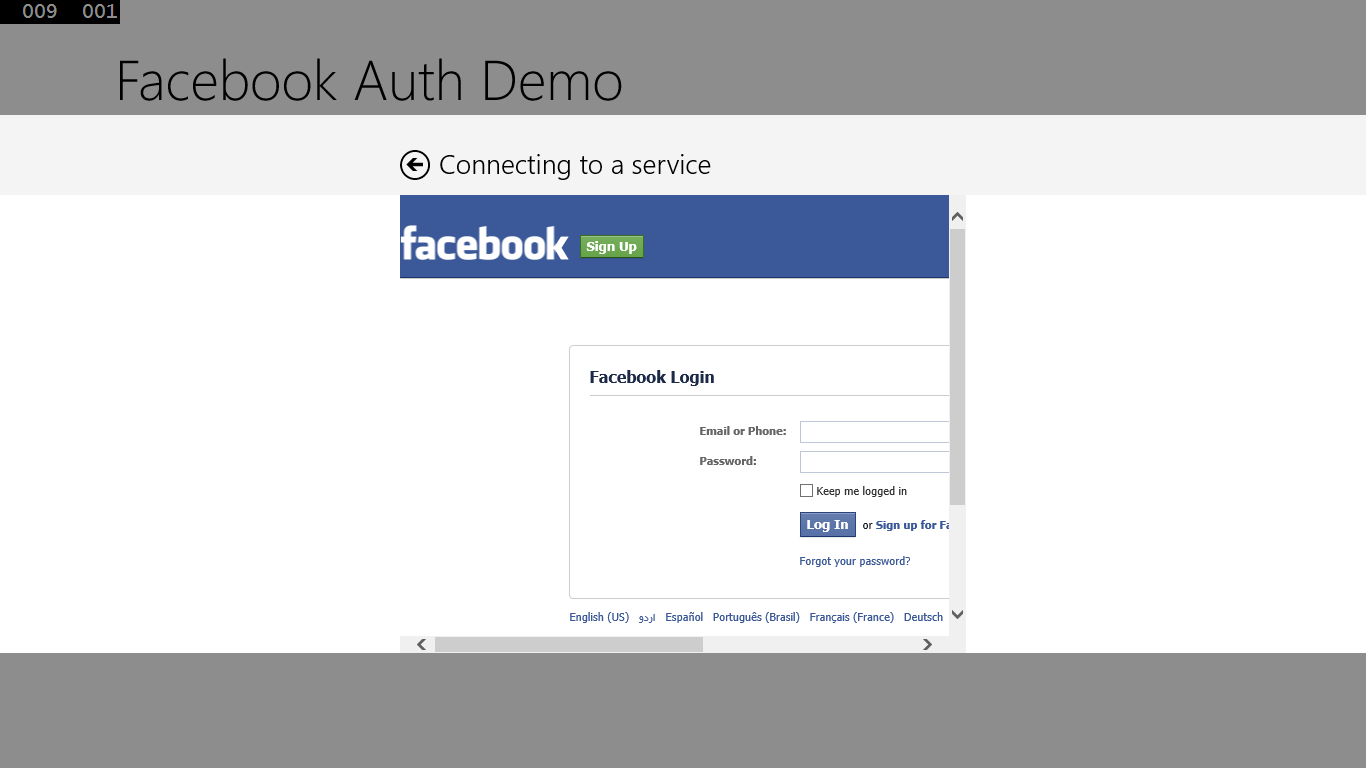
Put the credentials, hit Sign in and than it'll ask you to allow this app to access user's data. Hit yes and here you go!
So this is how you can Authenticate your app using Facebook.
Hope it will be helpful for all. :)