Autocomplete TextBox in WPF (Without third-party libraries)
Introduction
In this post I would show you how to add the autocomplete functionality to your WPF application's (TextBox control) using your own model data, .NET assemblies and WPF assemblies. There is no need to add any third-party NuGet package or any other .dll file. You can create your own after reading this post and by using the sample attached.
Description
How to create the functionality of autocomplete in WPF. Autocomplete function is based on the following,
- Query provided by the user
It is the input that user has typed into the control. - List or collection of data that we have at the moment.
This is the model of our application. You can surely use the SQL Server or other data sources for your list or collection of the items. - A conditional statement to check whether the object or item in our list has the content or not.
Using this, we can create our own autocomplete feature for any textbox.First define the model that we are going to use, you can extract the model from an SQL Server database, from Microsoft Azure data sources or from any other custom file also. I used the following,
using System;
using System.Collections.Generic;
using System.Linq;
using System.Text;
using System.Threading.Tasks;

namespace AutocompleteWpfSample
{
    class Model
    {
        static public  List<string> GetData()
        {
            List<string> data = new  List<string>();

            data.Add("Afzaal");
            data.Add("Ahmad");
            data.Add("Zeeshan");
            data.Add("Daniyal");
            data.Add("Rizwan");
            data.Add("John");
            data.Add("Doe");
            data.Add("Johanna Doe");
            data.Add("Pakistan");
            data.Add("Microsoft");
            data.Add("Programming");
            data.Add("Visual Studio");
            data.Add("Sofiya");
            data.Add("Rihanna");
            data.Add("Eminem");

            return data;
        }
    }
}
The above code would provide us the data required to complete the functionality. Now, adding the XAML controls would be like this. All we need is,
- A TextBox
for user inpute - A StackPanel
for managing the TextBlocks being added - A Border
to separate the stuff from underground controls. Fancy stuff only.
<TextBox Width="300" Padding="5, 3, 5, 3" KeyUp="TextBox_KeyUp" Name="textBox" />
<Border Width="298" Height="150" BorderBrush="Black" BorderThickness="1">
    <ScrollViewer VerticalScrollBarVisibility="Auto">
        <StackPanel Name="resultStack"></StackPanel>
    </ScrollViewer>
</Border>
Great, that completes the UI. You would see that I have also attached an event handler to handle the user input. That is to run when the user inputs a character, I would search for the match in my Model. Have a look at the following C# code for the WPF application's Autocomplete feature.
private void  TextBox_KeyUp(object  sender, KeyEventArgs e)
{
 bool found = false;
 var border = (resultStack.Parent as  ScrollViewer).Parent as Border;
 var data = Model.GetData();

 string query = (sender as TextBox).Text;

 if (query.Length == 0)
 {
   // Clear
   resultStack.Children.Clear();
   border.Visibility = System.Windows.Visibility.Collapsed;
 }
 else
 {
   border.Visibility = System.Windows.Visibility.Visible;
    }

 // Clear the list
 resultStack.Children.Clear();

  // Add the result
 foreach (var obj in data)
 {
    if (obj.ToLower().StartsWith(query.ToLower()))
    {
       // The word starts with this... Autocomplete must work
       addItem(obj);
       found = true;
          }
  }

  if (!found)
  {
     resultStack.Children.Add(new TextBlock() { Text = "No results found." });
  }
}
I also had the function to add the item to the StackPanel, showing that would be injustice. So here it is,
private void  addItem(string  text)
{
   TextBlock block = new  TextBlock();

   // Add the text
   block.Text = text;

   // A little style...
   block.Margin = new  Thickness(2, 3, 2, 3);
   block.Cursor = Cursors.Hand;

   // Mouse events
   block.MouseLeftButtonUp += (sender, e) =>
   {
      textBox.Text = (sender as  TextBlock).Text;
   };

   block.MouseEnter += (sender, e) =>
   {
      TextBlock b = sender as  TextBlock;
      b.Background = Brushes.PeachPuff;
   };

   block.MouseLeave += (sender, e) =>
   {
      TextBlock b = sender as  TextBlock;
      b.Background = Brushes.Transparent;
   };

   // Add to the panel
   resultStack.Children.Add(block);
}
The above code would now be able to add the new items to the list and would let the user chose which item to add to the TextBox.
Note
There are a lot of other UI changes that I have made. So, you can surely ignore them. Such as mouse enter and mouse leave event handling to change the background color.
Common Example
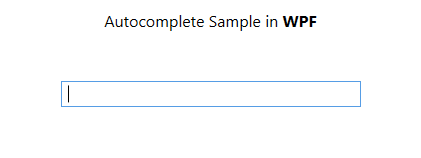
A very common example to this task is when you want to show the users a little of previously filled or found data. Such as names, the following example depicts. The following example is just based on a single TextBox control (as it looks)
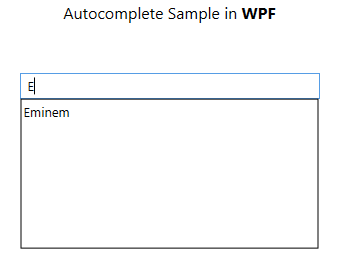
Now, perhaps the user enters the text query. And the application (using the autocomplete feature) would show him the following UI,
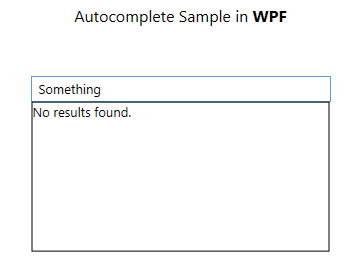
Good going until this step. There are quite other UI changes that application undergoes when the user interacts with the list generated, or when the user enters the query that does not have any match found. See the following two images,

So, this was the article focusing on creating a WPF application which allows the users to use the functionality of autocomplete in any TextBox. Apart from this article, you can download the source code for this from MSDN Galleries. I hope, it helps you out. :-)